Transform Your Master Bathroom on a Budget: A Stunning, Affordable Remodel Reveal
Are you dreaming of a luxurious master bathroom but held back by a tight budget? Many homeowners believe a complete transformation requires a full gut renovation, but we’re here to challenge that notion! This comprehensive guide reveals how we completely revitalized our master bathroom, achieving a truly dramatic transformation without altering any of the major, costly elements. If you thought a truly impactful bathroom remodel on a budget was impossible, prepare to be inspired!
For nearly eight years, our master bathroom remained untouched—a relic from when we first moved into our home. While a complete overhaul was always in our long-term plans, a recent decision to move meant a full-scale renovation no longer made financial sense. However, we weren’t content to leave it as it was. Our goal became to significantly spruce up the space, making it more appealing to potential buyers and a more beautiful, welcoming retreat for its next owners, even if their ultimate plan was a more extensive renovation down the line.
This project proves that with smart design choices, strategic DIY efforts, and a clear vision, you can achieve remarkable results without breaking the bank. Join us as we unveil the step-by-step process, the design philosophy, and the stunning reveal of our budget-friendly master bathroom makeover.
The Master Bathroom Remodel Plan: Designing with Existing Elements
Our approach to this master bathroom makeover involved a somewhat unconventional, yet highly effective, design challenge: to work in harmony with the existing brown tile, almond-colored tub, and cultured marble countertop. This decision might seem controversial, especially considering our past successes with painting countertops to mimic marble, or painting linoleum floors in our laundry rooms, and even stenciling kitchen floors. We’ve also had great results painting tile backsplashes. So, yes, painting all these elements was an option.
However, we wanted to demonstrate a powerful design principle: you can create truly beautiful, cohesive spaces even when faced with elements you dislike or can’t afford to change. This applies whether it’s an outdated tile, an unappealing flooring choice, or any other fixed feature in your room. The key lies not in ignoring these elements or decorating *around* them, but in consciously decorating *with* them. This means making intelligent design decisions that serve two main purposes: first, making the disliked element appear to be an intentional design choice, and second, ensuring it blends seamlessly into your overall aesthetic. This strategy transforms perceived limitations into unique opportunities for creativity and a truly personalized look.
The Before: A Glimpse into its Outdated Past
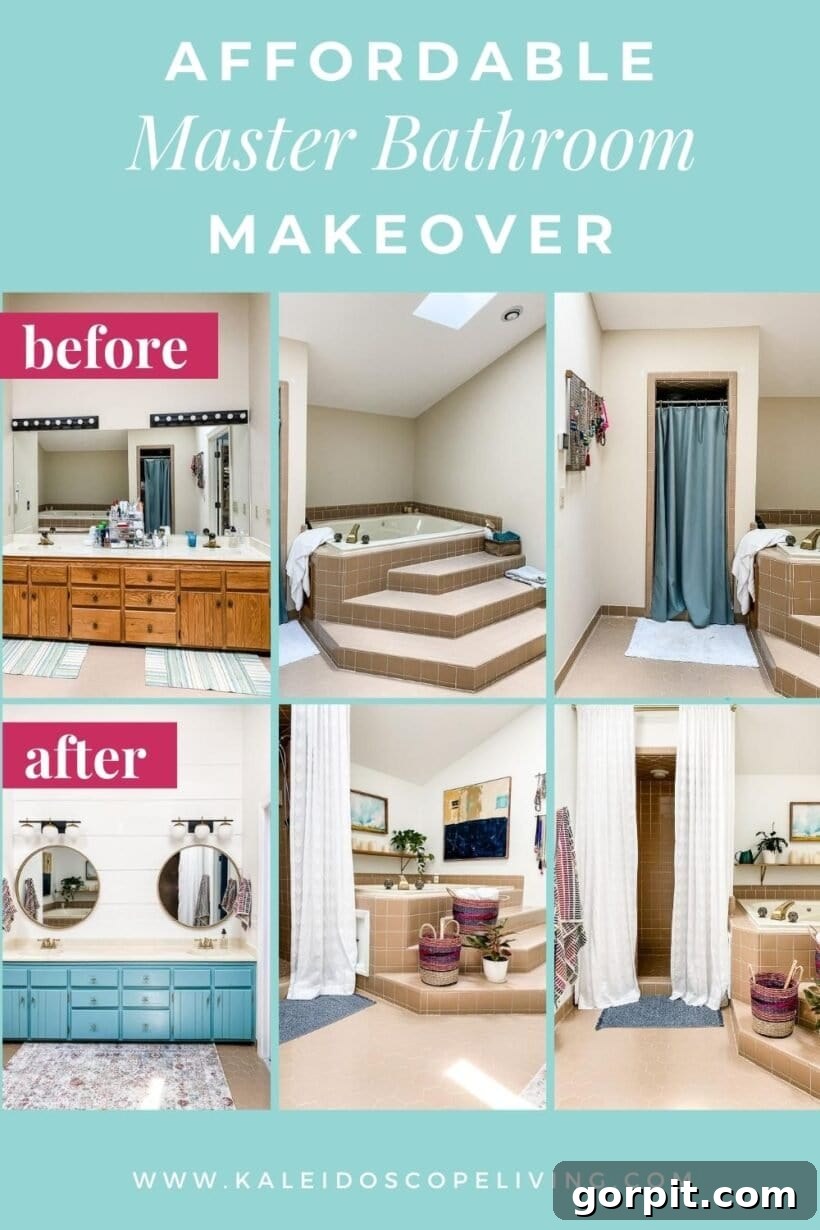
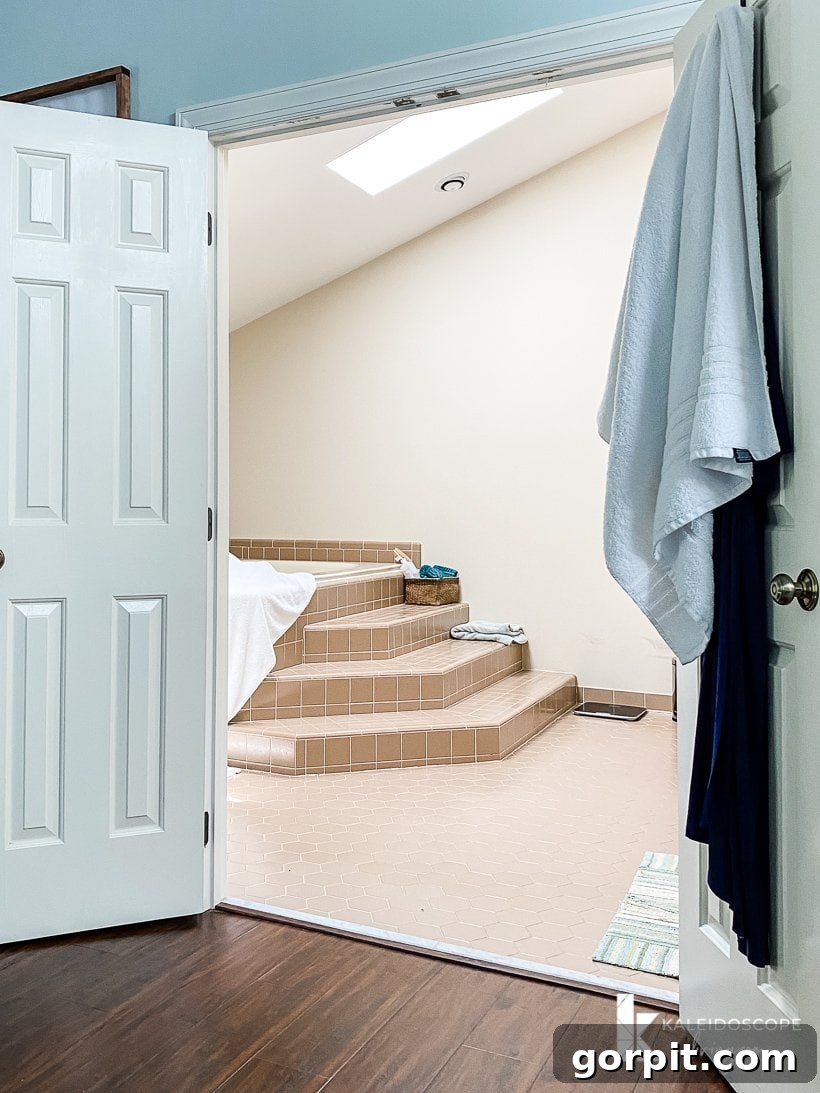
To truly appreciate the transformation, let’s take a look at how our master bathroom appeared for over seven years. It was a space that spoke volumes about the late 90s and early 2000s, characterized by heavy brown tones and fixtures that had seen better days. We hadn’t even painted the very brown walls, leaving the space feeling dark, heavy, and utterly uninspired. The vanity, lighting, and general decor were all trapped in a bygone era, emphasizing the need for a fresh, modern perspective.
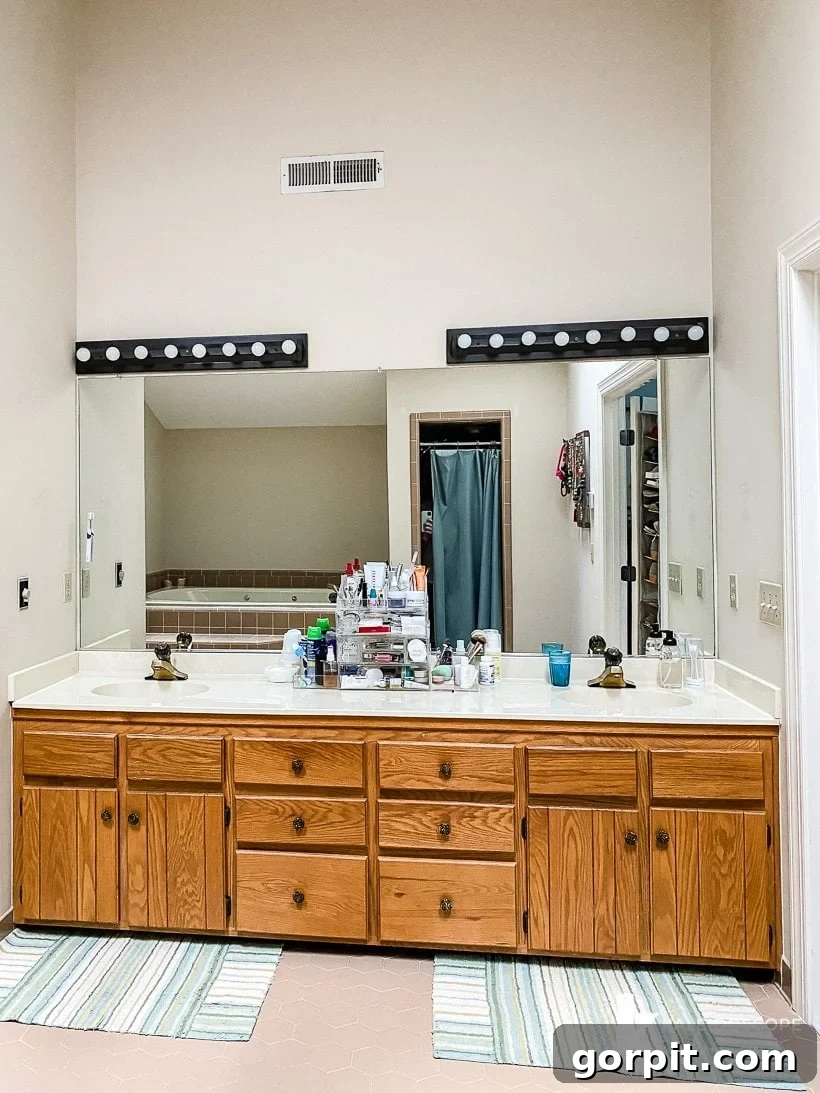
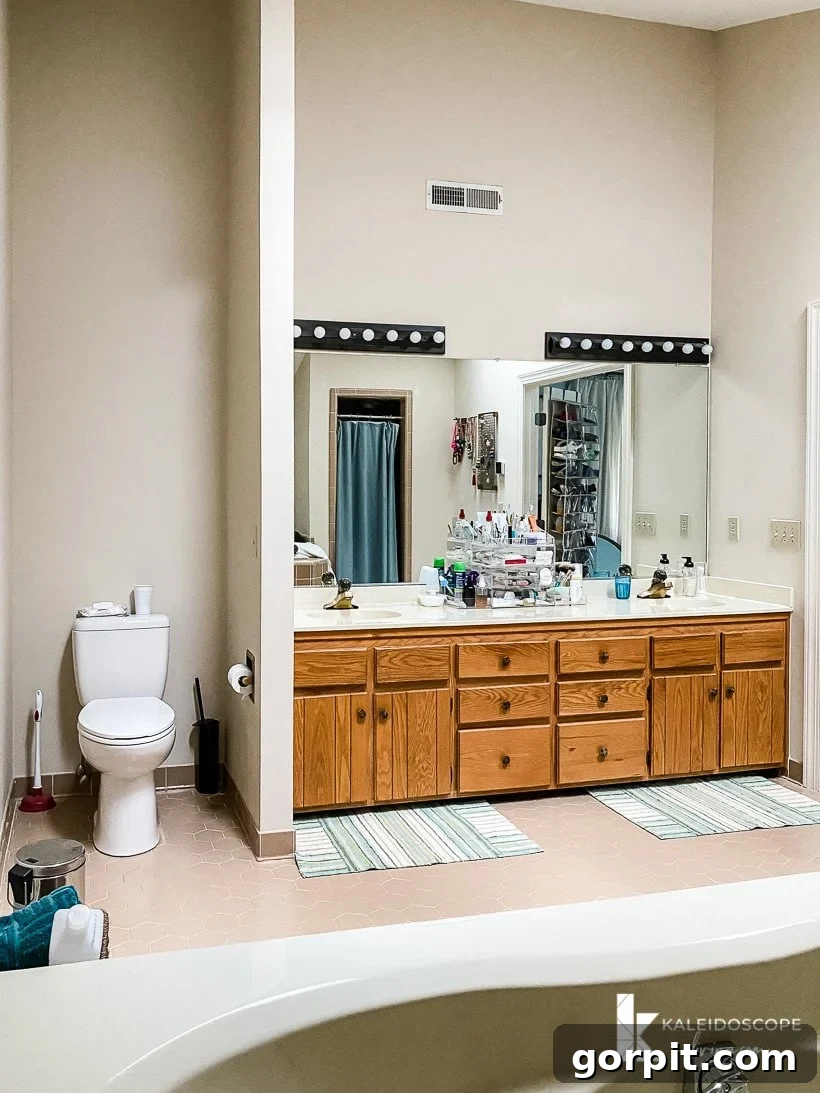
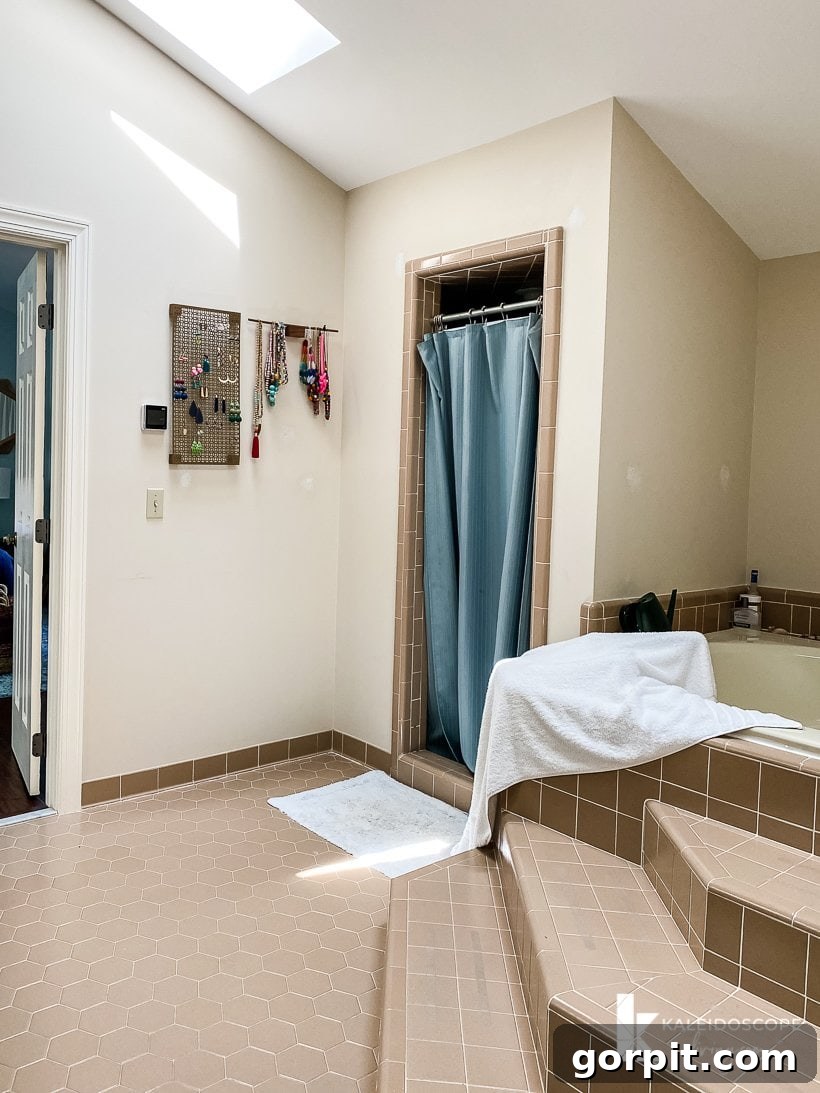
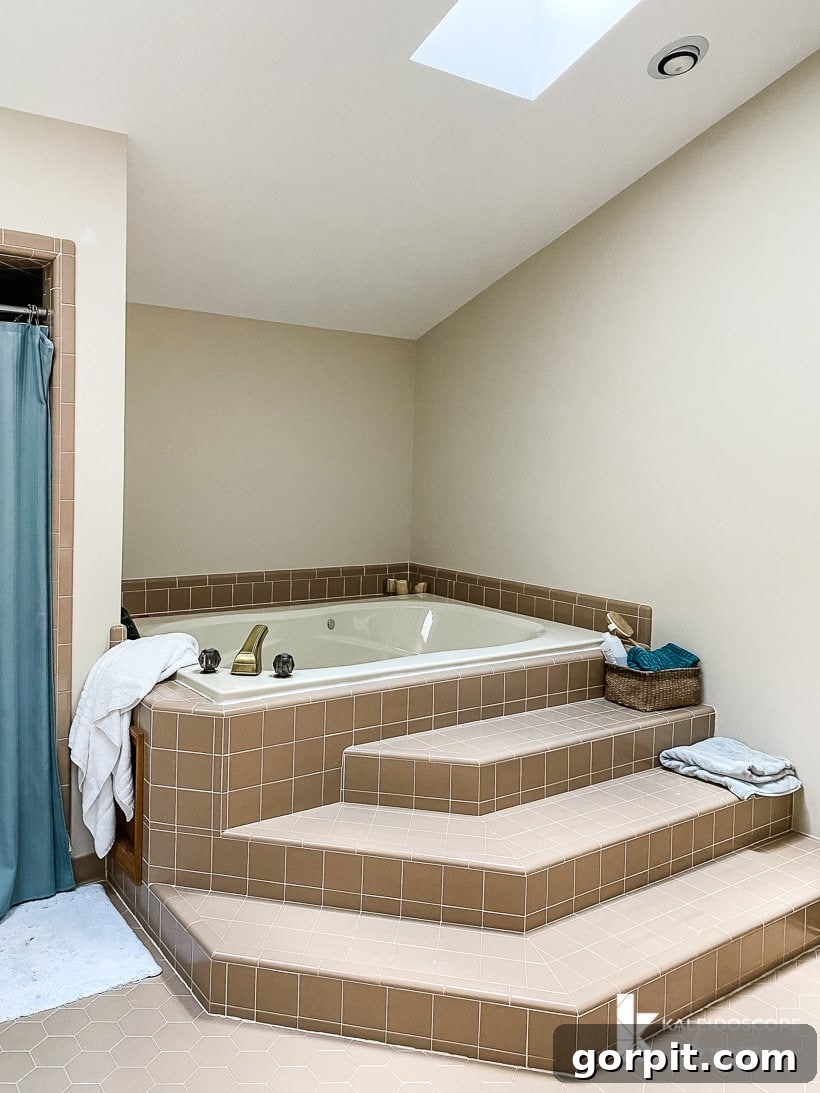
This post contains affiliate links for your convenience. Click here for my full disclosure policy.
The Design Plan: Strategic Choices for Harmony
Our design plan was meticulously crafted to integrate the existing brown and almond tones while injecting a fresh, modern vibrancy into the space. The visual mood board below illustrates the carefully selected elements that would bring this vision to life.
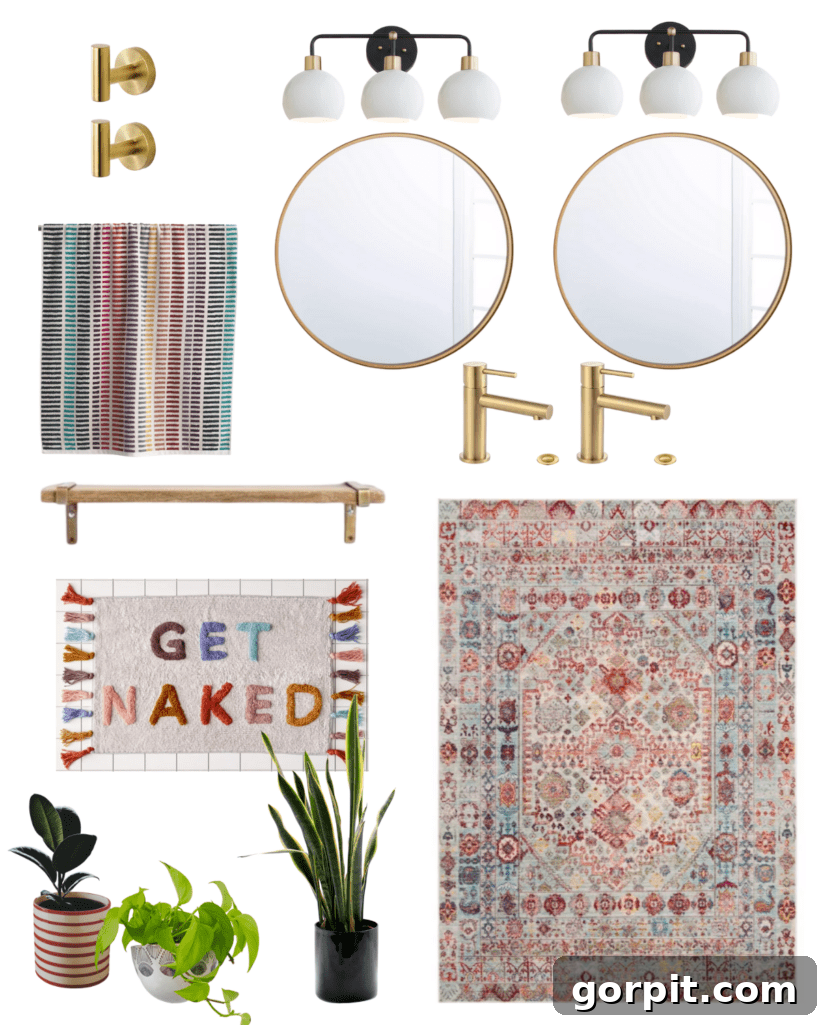
Shop the items from our design plan by clicking on the links below:
The very first decision, and arguably the most crucial, revolved around selecting the rug. This piece served as our “crucial element,” a foundational concept we emphasize in Designer in a Binder. Identifying this core piece simplifies every subsequent design choice, creating a domino effect of harmonious selections. We knew a strategically placed rug could visually break up the expansive brown tile, acting as a soft, inviting anchor. Critically, the chosen rug featured subtle brown tones, ensuring it complemented—rather than clashed with—the existing tile. This was essential for making the older elements feel integrated and intentional.
Equally important was the selection of the towels. These weren’t merely functional; they were chosen for their beige background and included brown hues within their color palette, further bridging the gap between the new and old. Their design also delightfully echoed the rug used in the seating area of our master bedroom, creating a seamless visual flow and connection between the two private spaces within our home. This thoughtful coordination ensures a consistent aesthetic that enhances the overall appeal and perceived value of the entire suite.
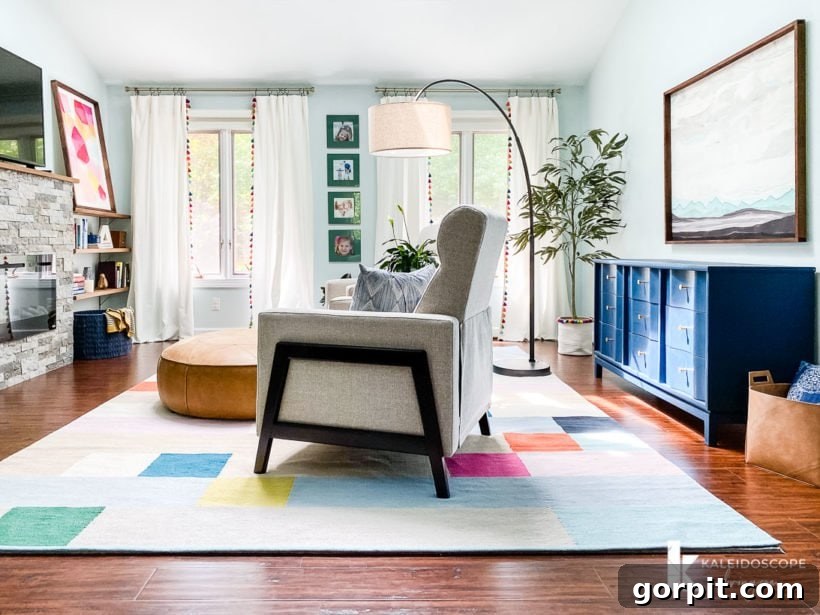
The entire design hinged on balancing existing fixed elements with fresh, modern touches. By carefully selecting items that picked up on the existing color palette while introducing complementary hues and textures, we aimed to elevate the entire space without the need for expensive structural changes.
The D.I.Y. Projects: Our Hands-On Transformation
The most significant aspect of this affordable master bathroom remodel was our commitment to a do-it-yourself approach. Every single component of this transformation was completed by us, allowing for substantial cost savings and a deep sense of accomplishment. We tackled a comprehensive list of projects, all completed in a whirlwind five days!
Here’s a detailed breakdown of the D.I.Y. projects that brought our vision to life:
- Painted the Walls: We opted for “Falling Snow” by Behr, a crisp, light color that instantly brightened the entire room, offering a stark and refreshing contrast to the previous dark brown.
- Painted the Doors: To add a touch of modern drama and sophisticated contrast, the doors were painted in “Midnight in the Tropics” by Behr.
- Painted the Cabinets: This was a game-changer! The outdated wood cabinets were revitalized with a custom mix of equal parts Heirloom and Renfrew Blue. This vibrant yet sophisticated hue completely transformed the vanity area. You can find our detailed cabinet painting tutorial here.
- Installed New Cabinet Hardware: Simple yet impactful, replacing the old hardware with modern pulls instantly updated the vanity’s look.
- Installed a Modern Plank Wall Treatment: On the prominent vanity wall, we added a stylish plank wall treatment. This created architectural interest and a custom feel that beautifully complemented the new cabinet color. Click here for the full tutorial.
- Installed New Vanity Lights: Upgrading the light fixtures brought contemporary style and improved illumination to the vanity area.
- Installed New Sink Faucets: Replacing the old faucets with sleek, modern designs contributed significantly to the updated aesthetic.
- Installed Shelves: We added a functional shelf above the tub for decor and essentials, and two practical shelves above the toilet for storage and styling.
- Installed a New Double Curtain Rod: Over the shower, a double curtain rod allowed us to hang decorative outer curtains and a functional inner shower curtain, which is only closed during use. This creates a much softer, more elegant look than a single shower curtain.
- Added Pretty Plants and Decor: By strategically placing plants and decor items sourced from around our home, we injected life, texture, and personality into the newly refreshed space.
- Hung a Large DIY Art Canvas: A custom piece of artwork above the tub added a unique, personal touch and a focal point.
Completing all these projects in just five days was exhausting, but the effort was undoubtedly worth it. The transformation exceeded our expectations, creating a space that feels entirely new and inviting.
The Reveal: A Stunning Master Bathroom Makeover
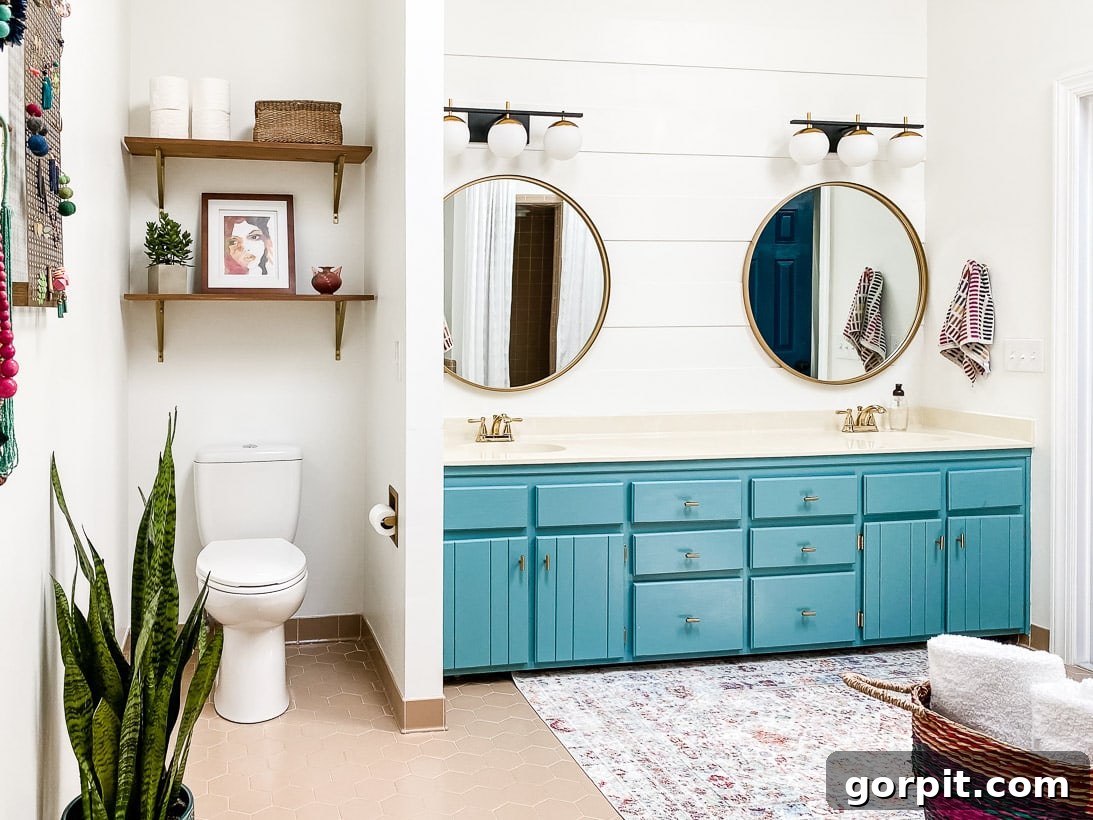
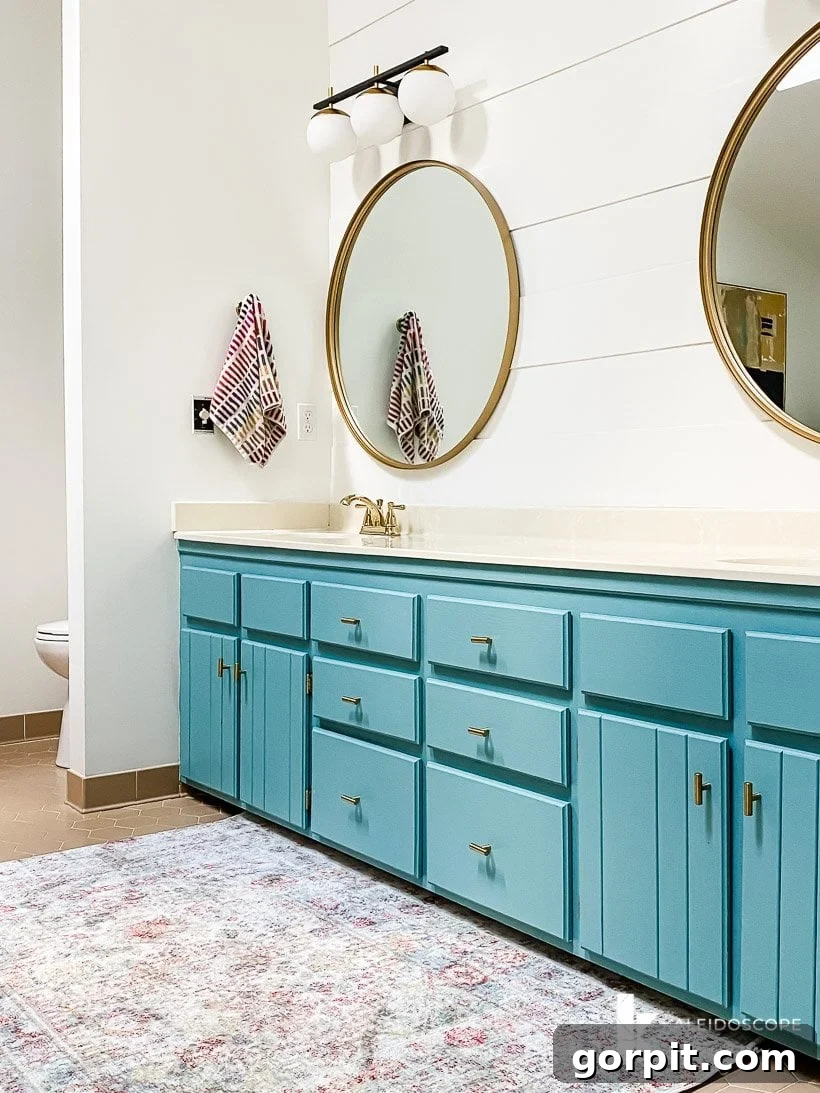
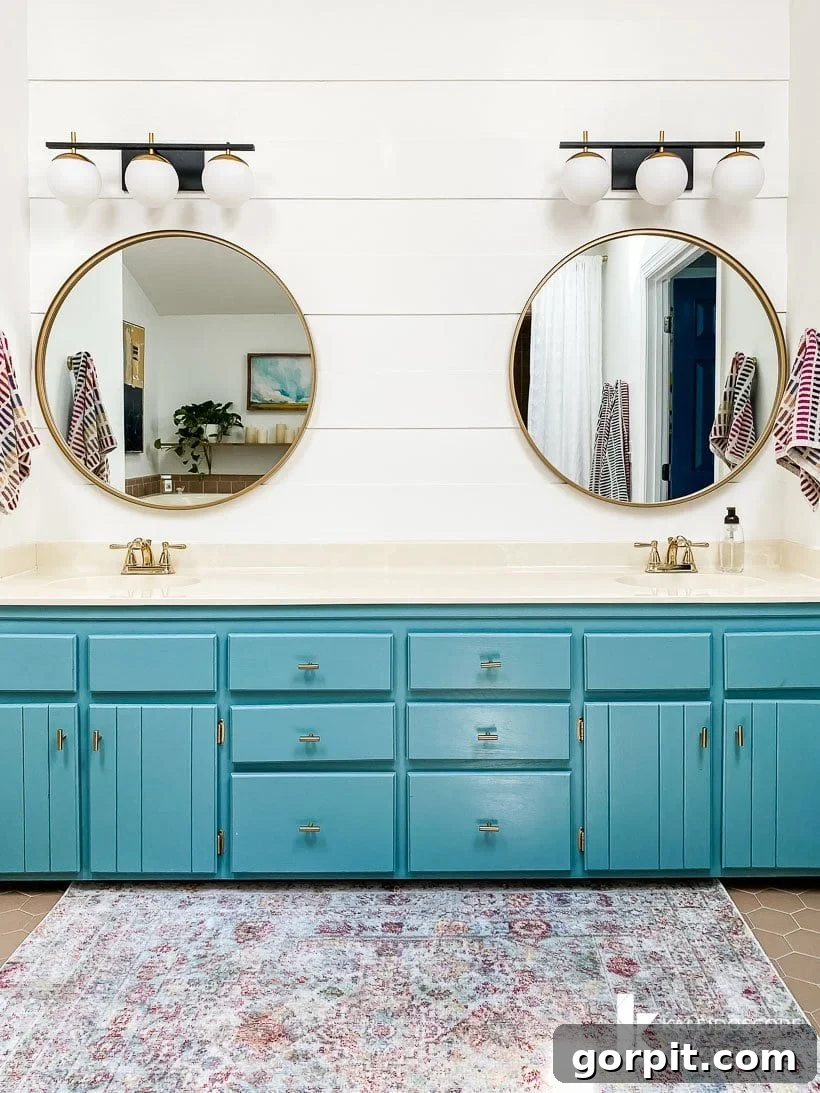
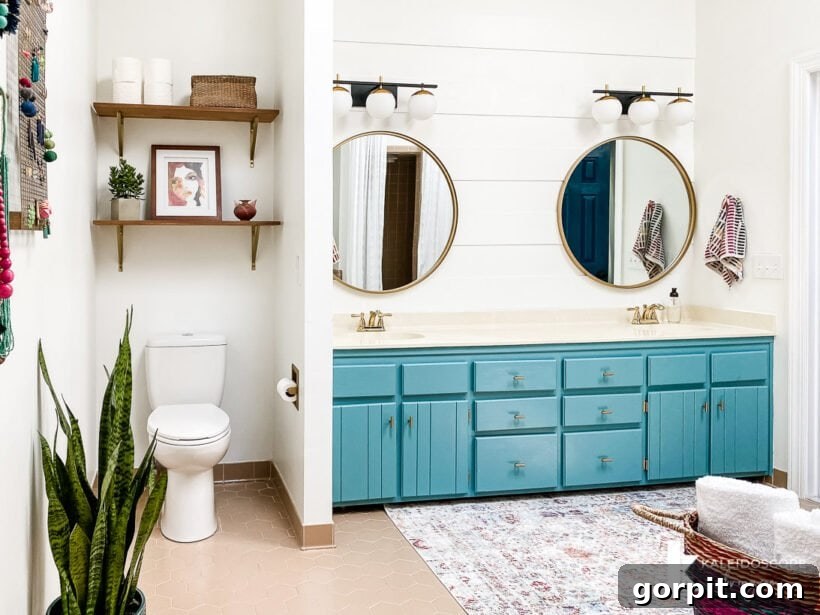
The moment of truth is here! The most impactful changes, without question, took place on the vanity wall. By removing the enormous, outdated mirror and replacing the old light fixtures and sink faucets, we immediately infused the space with a contemporary feel. The combination of painting the cabinets in our custom turquoise blend and upgrading the hardware was a complete game-changer, breathing new life into the entire area. Furthermore, the modern DIY plank wall we installed adds incredible texture, depth, and visual interest to this expansive wall, especially accentuated by the impressive 14-foot vaulted ceiling. It draws the eye upward, making the room feel even grander and more thoughtfully designed.
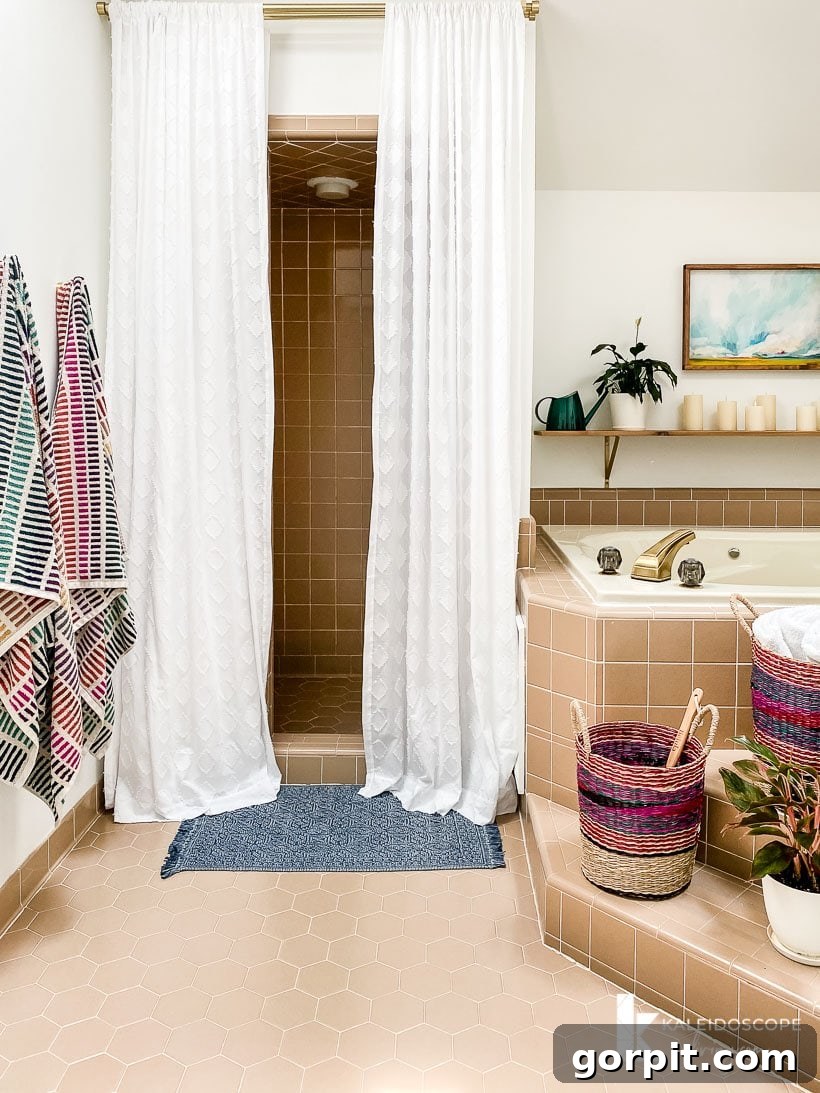
On the wall opposite the vanity, the addition of curtains around the shower area, hung on a clever double-rod system, truly elevated the look. This setup allows us to keep the main shower curtain tucked away on the inner rod, only sliding it out when needed for showering. This design choice prevents the visual clutter of a constantly visible shower curtain, instead presenting elegant fabric panels that dramatically soften the space and conceal the almond tub, making it feel more like a luxurious bathing niche. You can just barely glimpse the white shower curtain peeking out from behind the front left curtain in the photo below, showcasing how discreet it can be.
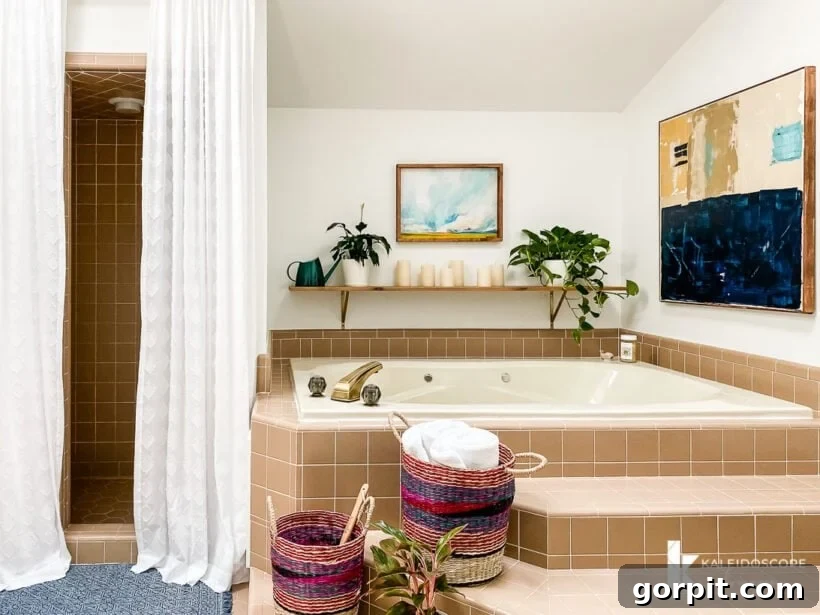
The large, tiled stairs leading up to the tub were an inherent challenge, never destined to be ideal. However, we did our best to minimize their visual impact and integrate them into the new design. By adding charming woven baskets for practical storage and a selection of lush plants, these stairs now contribute to the room’s aesthetic rather than detracting from it. Above the tub, the introduction of a stylish shelf, adorned with thoughtful artwork and ambient candles, instantly transformed this corner. It now feels much more updated, intentional, and inviting—a perfect spot for relaxation. The large canvas above the tub was a piece I painted myself, and I’m incredibly pleased with how its colors and abstract form complement the rejuvenated space.
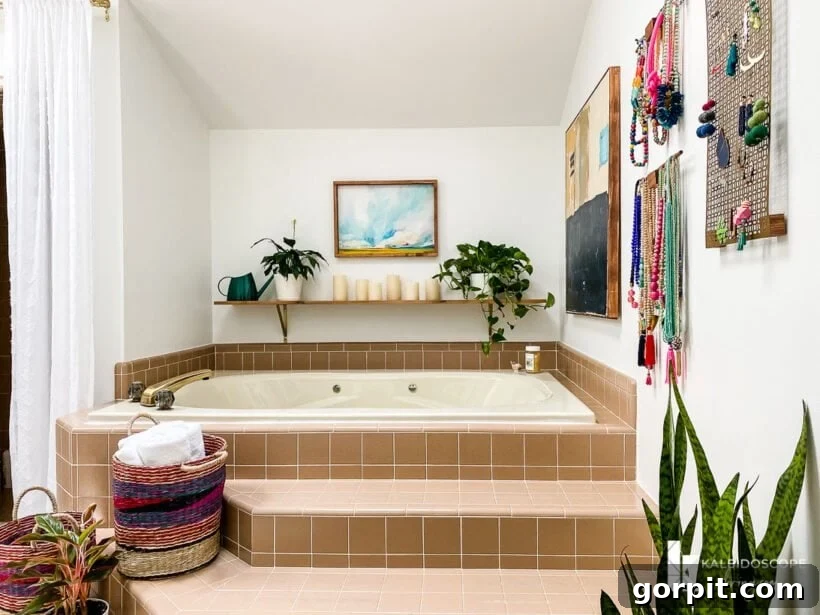
Functionality met aesthetics with the hanging of my DIY jewelry organization display on the wall to the right of the tub. This practical solution not only keeps jewelry neatly organized but also adds a wonderful pop of color and interesting texture to an otherwise plain wall, further enhancing the room’s personalized charm.
Finally, to complete the room’s functionality and visual balance, we installed a set of simple yet elegant shelves above the toilet. These shelves provide essential storage for toiletries and offer a perfect opportunity to display decorative elements. By utilizing existing decor pieces from around our house, we maintained our budget while adding personality and warmth to this often-overlooked area.
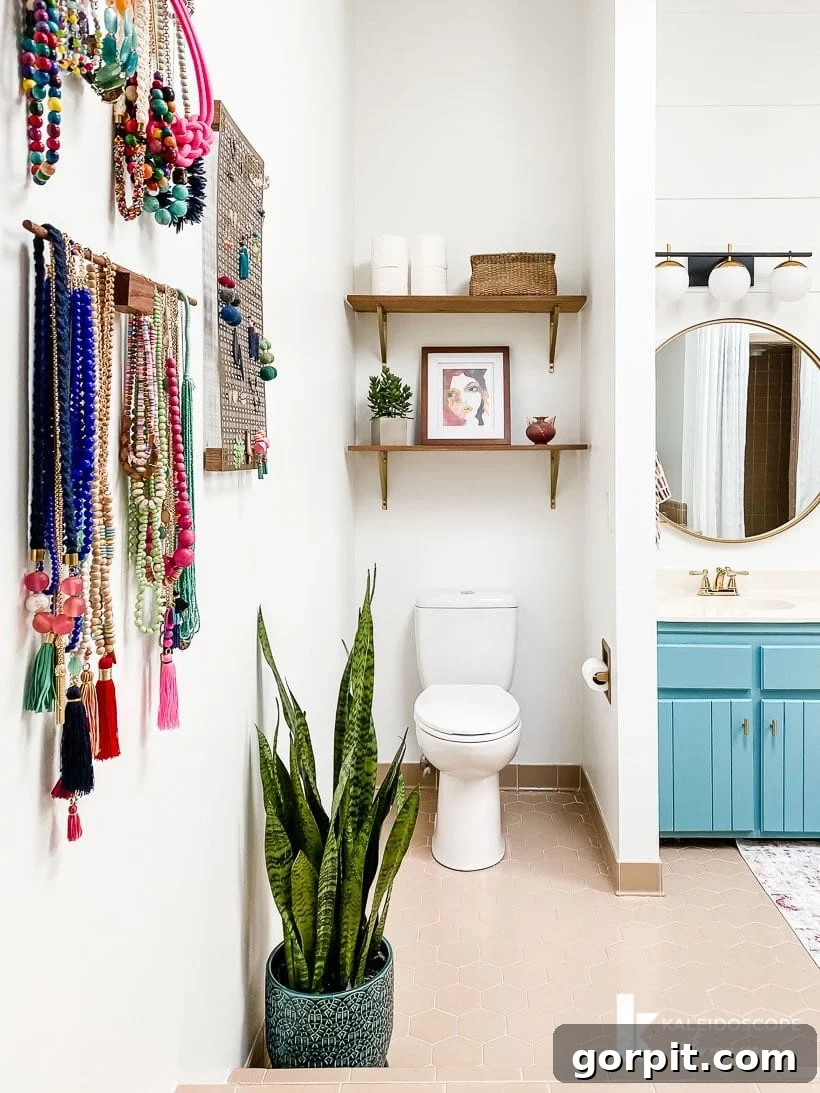
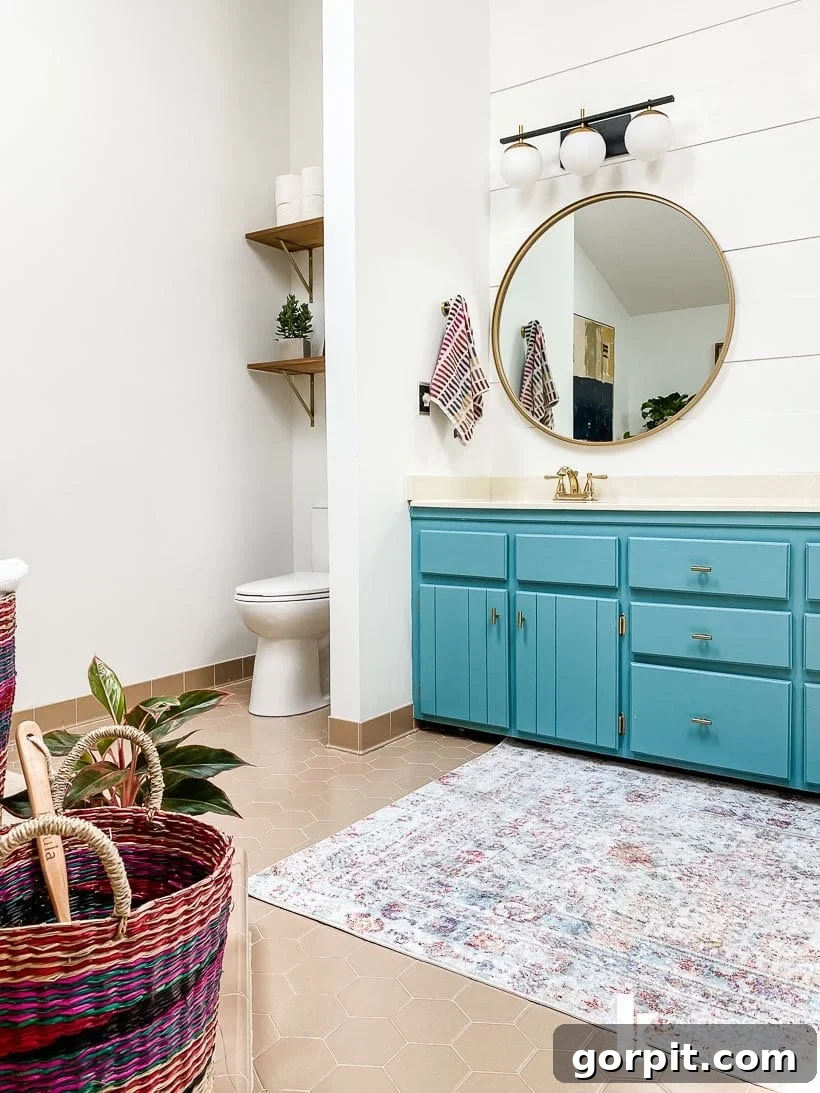
The transformation is truly remarkable. From a dated, uninspired space to a bright, modern, and inviting master bathroom, all achieved without major structural changes or a hefty price tag. We only wish we had undertaken this project years ago to have enjoyed its beauty for longer! This remodel stands as a testament to the power of thoughtful design and DIY effort.
Source List and Design Resources
For those inspired to undertake their own affordable master bathroom remodel, here is a comprehensive list of the paint colors and key sources used in our project. Simply click on the links for full details and to explore these products:
- Wall Color: Falling Snow by Behr
- Door Color: Midnight in the Tropics by Behr
- Cabinet Color: A custom mixture of equal parts Renfrew Blue and Heirloom
- Rug: [Link to Rug product – please insert specific product link here if available]
- Towels: [Link to Towels product – please insert specific product link here if available]
- Vanity Lights: [Link to Light Fixtures product – please insert specific product link here if available]
- Sink Faucets: [Link to Faucet product – please insert specific product link here if available]
- Cabinet Hardware: [Link to Cabinet Hardware product – please insert specific product link here if available]
- Double Curtain Rod: [Link to Double Curtain Rod product – please insert specific product link here if available]
- Decorative Baskets: [Link to Baskets product – please insert specific product link here if available]
- Shelving: [Link to Shelves product – please insert specific product link here if available]
If you’re eager to learn more about my systematic approach to transforming rooms and spaces throughout a home, be sure to explore Designer in a Binder®. This resource distills years of design experience into an easy-to-follow method for creating cohesive and beautiful interiors, regardless of your budget.
Don’t miss out on exclusive content, behind-the-scenes sneak peeks, and fresh design inspiration! Subscribe to our newsletter before you go, and let’s keep transforming spaces together!