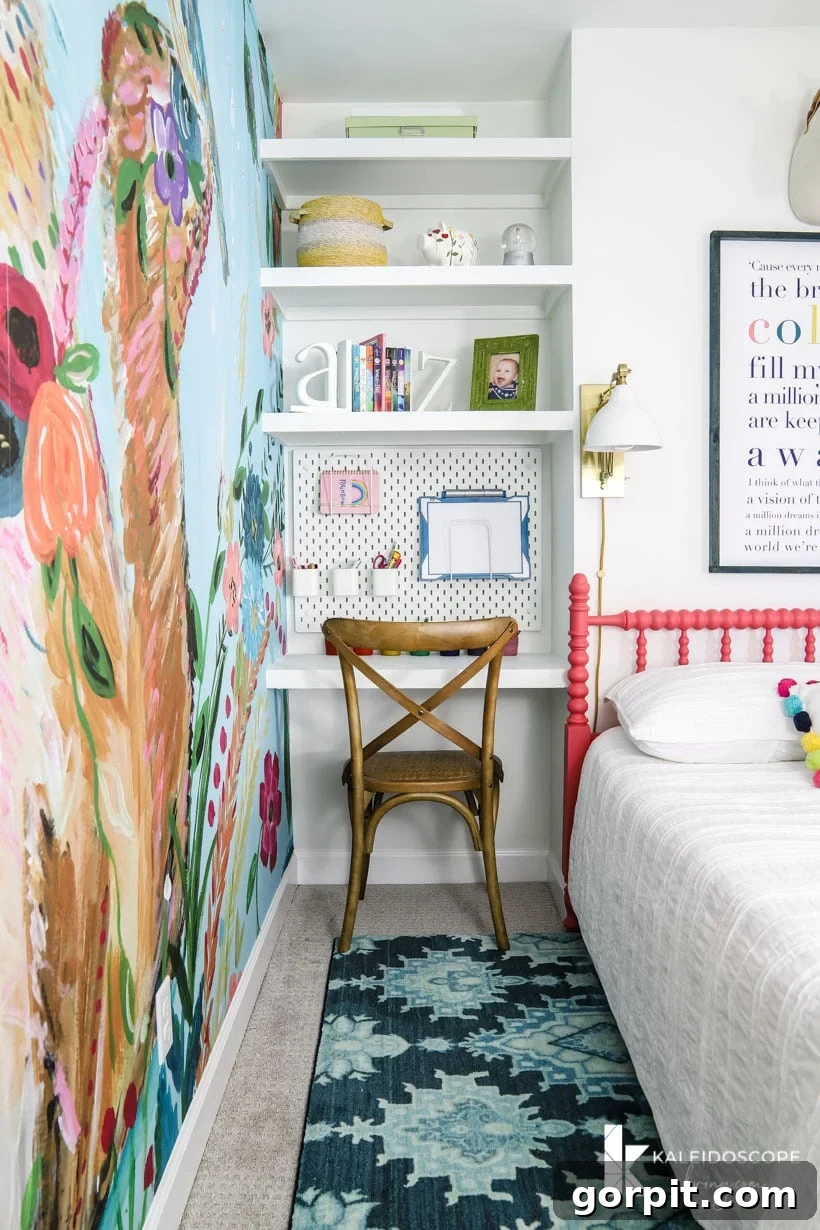
Transforming awkward nooks and wasted corners in your home into functional and stylish spaces doesn’t have to be a daunting task. In fact, building your own DIY floating shelves is one of the most rewarding and accessible home improvement projects you can undertake, even if your DIY experience is limited. This comprehensive guide will walk you through the process, empowering you to create beautiful, practical storage solutions that elevate any room.
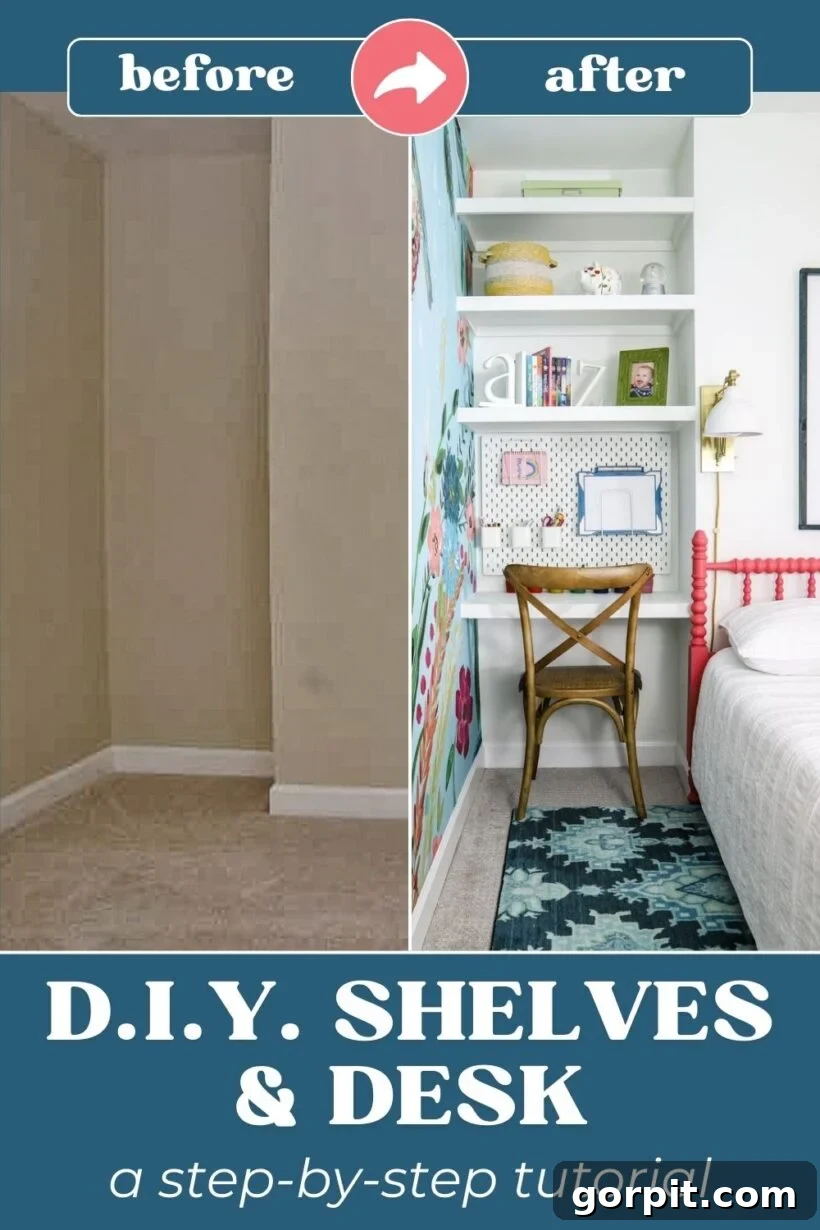
Many homes feature those quirky, unconventional spaces—be it an odd corner, a chimney breast, or a peculiar alcove—that often remain underutilized or become catch-alls for clutter. We faced a similar challenge in our daughter’s room, where an awkward nook created by a chimney stack seemed destined to be wasted space. Instead of letting it remain an eyesore, we saw an opportunity to transform it. Our solution? A combination of custom DIY floating shelves and a sleek floating desk, turning what was once a design dilemma into a stunning focal point and a hub of practicality.
This project is a testament to the power of thoughtful DIY. Not only do floating shelves maximize vertical space and offer incredible storage, but their clean, minimalist aesthetic also adds a modern touch to any decor. They are incredibly versatile, fitting seamlessly into living rooms, bedrooms, bathrooms, kitchens, or even home offices. Best of all, they’re surprisingly easy to construct and install, making them a big win for both functionality and style.
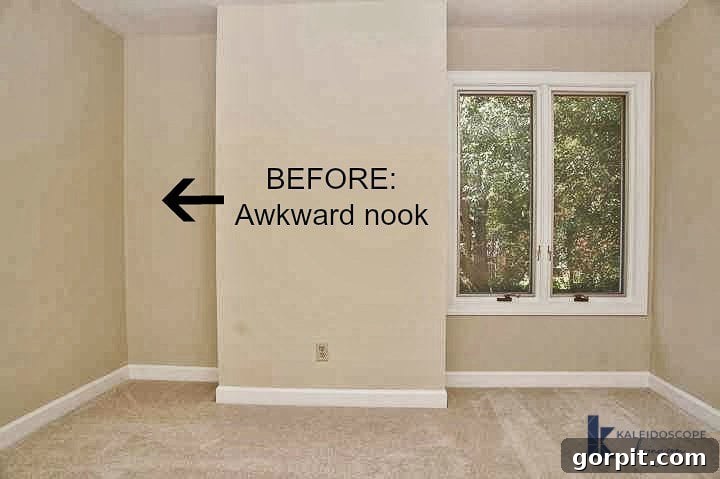
For those new to our journey, let’s take a quick look back at the “before” to truly appreciate the transformation. Our daughter Attley’s room, when we first moved in, featured this very awkward recess, a direct result of the chimney running through it. It was a blank canvas begging for a creative solution.
After much brainstorming, we decided to embrace the challenge and create a custom solution that not only filled the space but enhanced it. The result—floating shelves paired with a floating desk—has become one of the room’s absolute highlights. This project beautifully illustrates how a perceived problem can, with a little creativity and DIY spirit, evolve into an outstanding design feature.
This post contains affiliate links for your convenience. Click here for my full disclosure policy.
How to Build and Install Floating Shelves: A Step-by-Step DIY Guide
Ready to tackle your own floating shelf project? This detailed tutorial will guide you through every step, ensuring you achieve professional-looking results. Whether you’re aiming to create a cozy reading nook, a streamlined workspace, or simply add extra storage, these DIY floating shelves are the perfect solution.
Materials and Tools Needed
Before you begin, gather all your materials and tools. Having everything on hand will make the process much smoother and more efficient.
- Plywood: For the top, bottom, and optionally side panels of your shelves. The thickness will depend on the intended load and length of your shelves (e.g., 3/8″ for light-duty, 3/4″ for heavier items or longer spans).
- 1 x 2 Pine Boards: These will form the essential internal support frame for your floating shelves. Opt for straight, knot-free boards.
- Stud Finder: Absolutely crucial for locating wall studs, which provide secure anchor points for your shelves. This particular model is a favorite for its reliability and affordability.
- Table Saw or Circular Saw: Essential for making precise, straight cuts in plywood and ripping down larger boards. Our go-to circular saw is versatile and powerful.
- Circular Saw Guides (Optional but Highly Recommended): These tools significantly improve the accuracy and ease of making straight cuts with a circular saw.
- Kreg Rip Cut Guide: Ideal for cutting sheet goods to a consistent width.
- Kreg Accu-Cut Guide: Perfect for making long, accurate crosscuts.
- Straight Edge or Level: For marking cut lines and ensuring your shelves are perfectly horizontal. A long level can serve both purposes.
- Brad Nailer: Speeds up the assembly process and creates small, easily concealable nail holes.
- 2″ Brad Nails: For securing the support pieces to the wall studs.
- 1″ Brad Nails: For attaching the plywood panels to the support frame.
- Wood Glue: For extra strength in shelf assembly (optional but recommended).
- Spackle or Wood Filler: To fill nail holes and imperfections.
- Sandpaper (various grits): For smoothing surfaces.
- Caulk: To seal gaps between the shelves and the wall for a seamless, built-in look.
- Paint or Wood Stain and Sealer: To finish your shelves and match your decor.
Understanding the Anatomy of Floating Shelves
Before diving into construction, let’s visualize the core components of a floating shelf. This diagram illustrates how the hidden support frame works in conjunction with the outer plywood shell to create the illusion of a shelf “floating” on the wall.
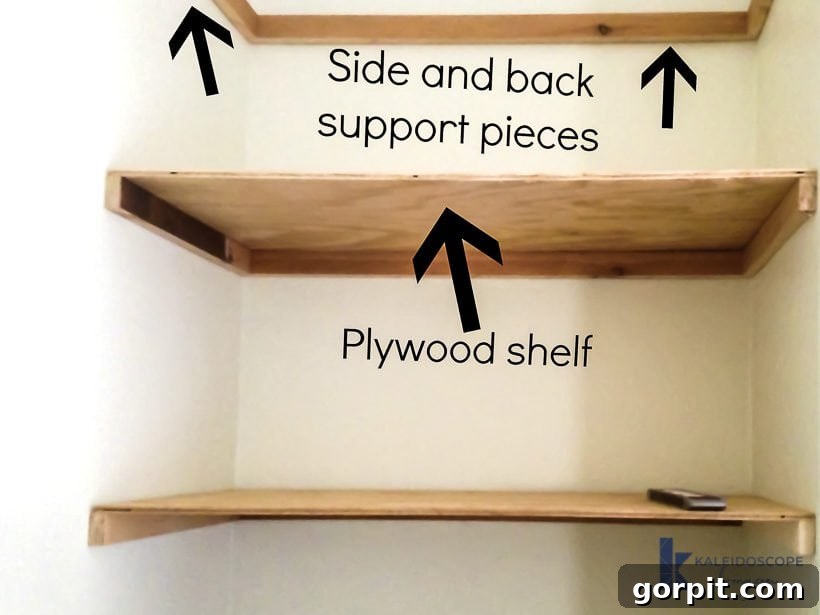
A floating shelf consists of three main parts:
- The Wall-Mounted Support Frame: This is the internal skeleton, typically made of 1×2 lumber, that is securely fastened to wall studs. It forms a sturdy bracket upon which the shelf rests.
- The Plywood Shell: This comprises the top and bottom panels of the shelf, cut from plywood. These pieces are attached to the support frame, forming the main body of the shelf.
- The Front Fascia (or Face Frame): This is a wider piece of wood attached to the front edge of the shelf. Its purpose is twofold: to conceal the internal support frame and the raw edges of the plywood, and to give the shelf a more substantial, finished appearance.
Understanding these components is key to a successful build.
Steps to Build Your Own DIY Floating Shelves
Step 1: Measure and Plan Your Space Accurately
The foundation of any successful DIY project is meticulous measurement. Begin by thoroughly measuring the area where your floating shelves will be installed. Pay close attention to dimensions, especially in awkward nooks. Our nook, for example, measured approximately 33 inches wide by 15 inches deep. Due to potential wall irregularities, which are common in older homes (and even new ones!), it’s crucial to measure for each individual shelf and not assume all dimensions will be identical. Measure the width at several points along the wall (top, middle, bottom) and the depth from the wall to the desired shelf edge.
Consider the purpose of your shelves. How much weight will they hold? What items will be displayed? This will help you determine the ideal depth and number of shelves. Sketch out your design, noting the placement and spacing of each shelf, and the height of any integrated desk surface.
Step 2: Prepare and Cut the Support Pieces
Next, you’ll cut the lumber for your internal support frame. While we repurposed old 1×6 pine boards by ripping them down to 1 1/2-inch width using our table saw, we highly recommend simply purchasing new 1×2 pine boards (which are actually 3/4″ x 1 1/2″ nominal size) as listed in the materials. This will save you significant time and effort.
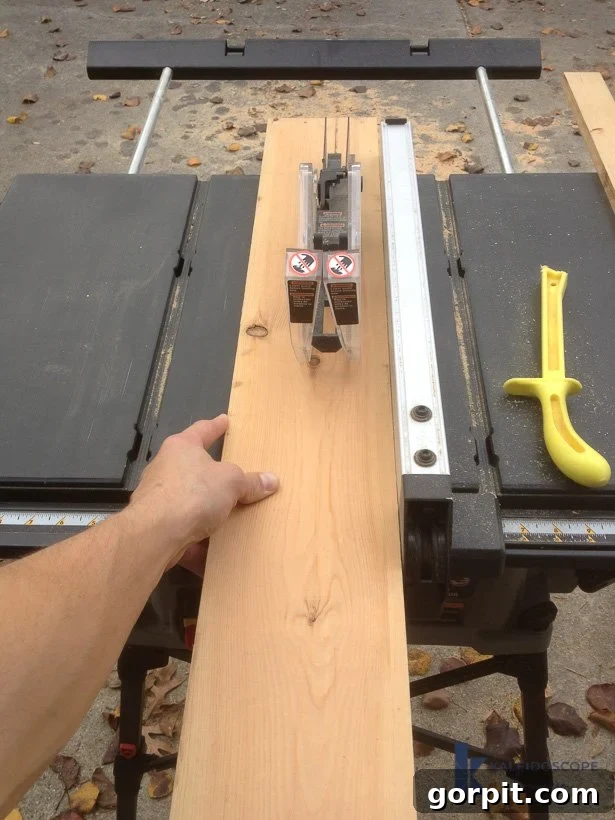
Carefully measure and cut your 1×2 support pieces to the correct lengths using a circular saw or miter saw. Remember those wall irregularities? They dictated that each back support piece varied slightly (e.g., between 32 1/2” and 33 1/4”) and each side support also had unique measurements (e.g., 13 3/4” to 14 1/4”). To prevent confusion, use painter’s tape to mark the exact position of each shelf on the wall, and then label each corresponding support piece clearly. Our unwavering mantra: measure twice, cut once. This labeling strategy allows you to batch-cut all your pieces efficiently.
Pro Tip for Staining: If you plan to stain your shelves, we strongly recommend staining the support pieces at this stage, before installation. It’s much easier to stain them while they are flat and accessible, ensuring a consistent finish.
Step 3: Install the Wall-Mounted Support Frame
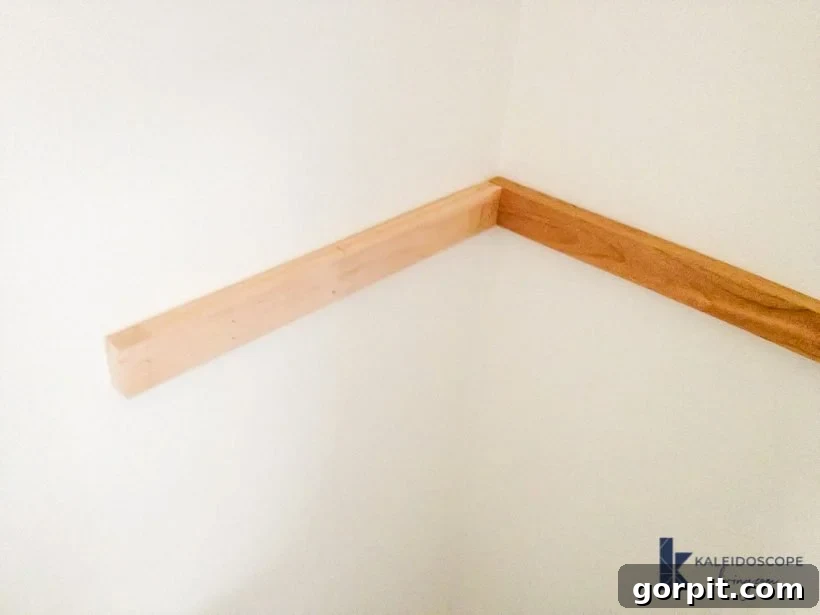
Now it’s time to install the structural backbone of your floating shelves. Grab your trusty stud finder and a level. Using the stud finder, meticulously locate and mark the positions of the wall studs where your shelves will be installed. Studs provide the most secure anchoring points for your supports.
Once studs are identified, position each back and side support piece on the wall. Crucially, use your level to ensure each piece is perfectly horizontal before securing it. For light-duty shelves, a brad nailer with 2-inch brad nails driven into the studs provides sufficient support. However, if your shelves are longer, deeper, or intended to hold heavier items (like books or dishware), we highly recommend using wood screws (e.g., 2.5-inch construction screws) or heavier gauge nails to fasten the supports more robustly into the studs. Always err on the side of caution for safety and durability.
For multiple shelves, determine your desired spacing. We installed the desk supports at standard desk height and spaced the upper shelves approximately 14 inches apart, offering ample room for decor and books.
Step 4: Cut the Plywood Panels for the Shelves
With your support frames securely in place, it’s time to cut the plywood panels that will form the top and bottom surfaces of your shelves. This is another step where precise measurements are paramount, especially if your walls are irregular. Measure each shelf individually to ensure a snug fit.
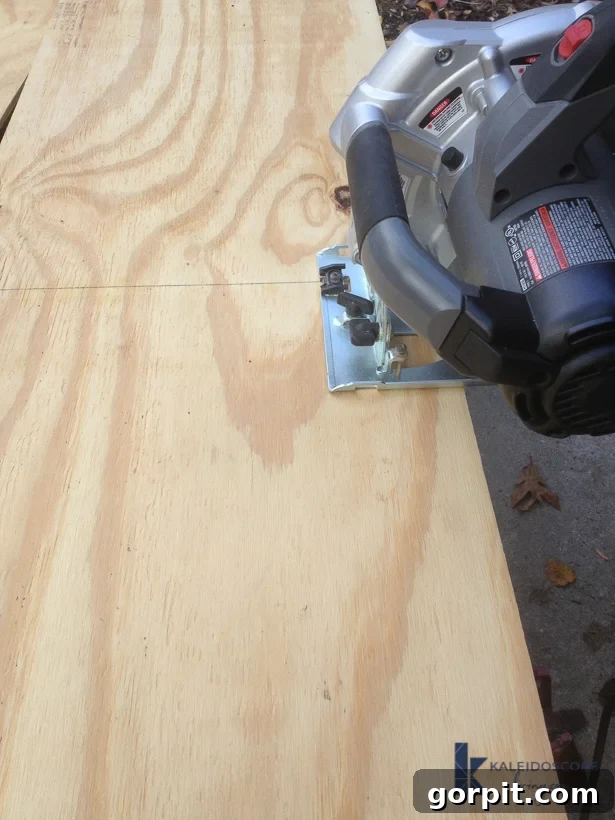
We used our circular saw with a straight edge for cutting, but if you have a Kreg Rip Cut Guide or Accu-Cut Guide, they will provide even more accurate and cleaner cuts, especially for longer pieces. For our small nook, 3/8-inch thick plywood worked perfectly, as the shelves weren’t designed for heavy loads. However, for longer spans or heavier items, we strongly recommend using thicker plywood (e.g., 1/2-inch or 3/4-inch) to prevent bowing and ensure durability.
Pro Tip for Staining: Just like the support pieces, if you’re staining, it’s a good idea to stain these plywood panels now, before attaching them. This ensures full coverage and a cleaner finish on all visible surfaces.
Step 5: Attach the Plywood Shelves to the Support Pieces
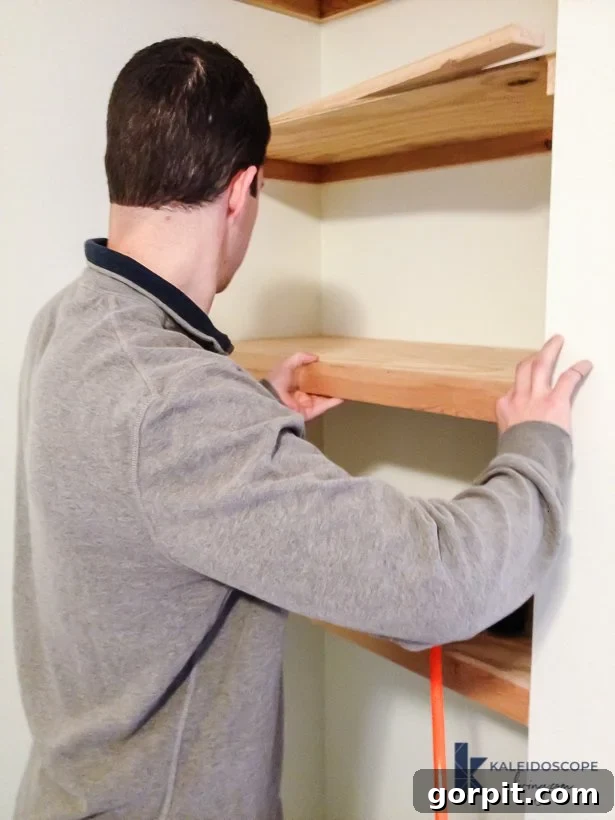
Now, bring your floating shelves to life by attaching the cut plywood panels to the installed support frames. Carefully position the top plywood piece onto the upper edge of your support frame. Use your brad nailer with 1-inch brad nails to secure the plywood to the support pieces. Drive nails every 6-8 inches along the perimeter. Repeat this process for the bottom plywood panel, attaching it to the lower edge of the support frame. For added strength, you can apply a thin bead of wood glue along the top and bottom edges of the support frame before nailing the plywood into place.
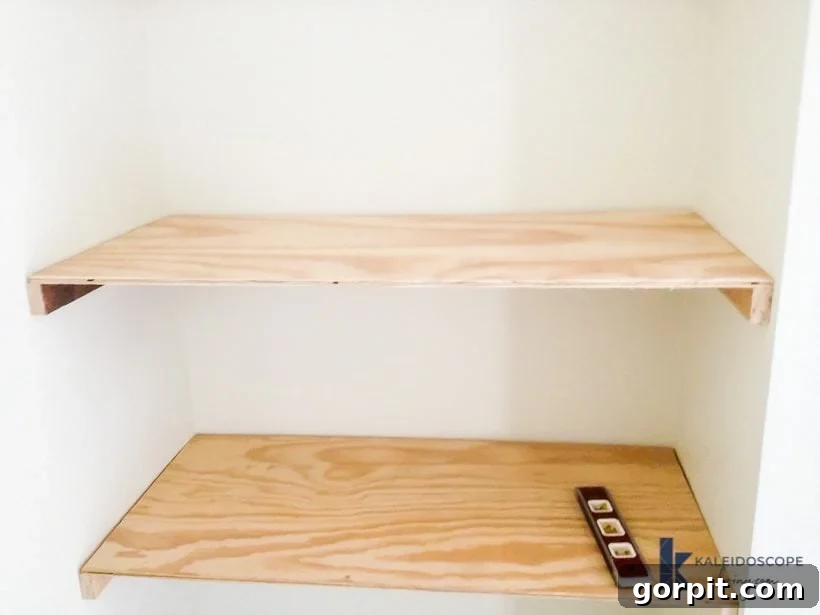
Pro Tip for Staining: If you plan to stain your shelves, consider staining the front support pieces now, before installation. This pre-finishing ensures that all surfaces, even those that will be slightly concealed, have a consistent and beautiful stain.
Step 6: Install the Front Fascia (The Finishing Touch)
The front fascia is what truly gives your shelves their “floating” appearance and a substantial, custom look. You’ll need to cut a piece of wood that is slightly wider than the combined thickness of your plywood and the support piece. The goal is to fully cover and hide the raw edges of your plywood and the internal support structure.
We ripped our pine boards to a width of 1 7/8 inches for the front fascia. If you used 1x2s for your supports (which are 1.5 inches deep) and 3/8-inch plywood, a 1×3 board (which is typically 2.5 inches wide) might be a good option for the front, or you could rip a wider board to your exact desired width. Measure the length precisely to fit snugly between the walls. Attach the front fascia using wood glue and brad nails, ensuring it is flush with the top and bottom plywood panels.
Step 7: Finishing and Painting Your Floating Shelves
Once all the structural components are installed, it’s time for the final touches that will make your DIY floating shelves look truly professional and built-in.
- Fill Nail Holes: Use spackle or wood filler to fill all visible nail holes. Allow it to dry completely.
- Sand Smooth: Lightly sand all surfaces, especially where you’ve applied filler. Start with a medium-grit sandpaper (e.g., 120-grit) to smooth out any rough spots or excess filler, then follow with a fine-grit sandpaper (e.g., 220-grit) for a silky smooth finish. Wipe away all sanding dust with a damp cloth or tack cloth.
- Caulk Gaps: Apply a bead of paintable caulk to any seams or gaps where the shelves meet the wall. This crucial step creates a seamless, built-in appearance that truly elevates the finished product. Smooth the caulk with a wet finger or a caulking tool, then allow it to dry according to the manufacturer’s instructions.
- Paint or Stain: Finally, you’re ready to paint or stain your shelves. If you’re painting, use a high-quality primer first, especially on new wood, for optimal paint adhesion and durability. We chose to paint our shelves the same color as the walls in Attley’s room, which helps them visually blend in and creates a cohesive, custom look. If you don’t have leftover paint, learn how to match a paint color that is already on your walls. If staining, apply your chosen stain according to product instructions, followed by a protective topcoat for durability.
This entire project, from start to finish, took us only an afternoon to complete, and we couldn’t be happier with the results. What was once an overlooked, awkward nook is now one of our favorite features in Attley’s beautifully transformed room. It provides invaluable additional storage, a dedicated workspace with the floating desk, and a true sense of bespoke design.
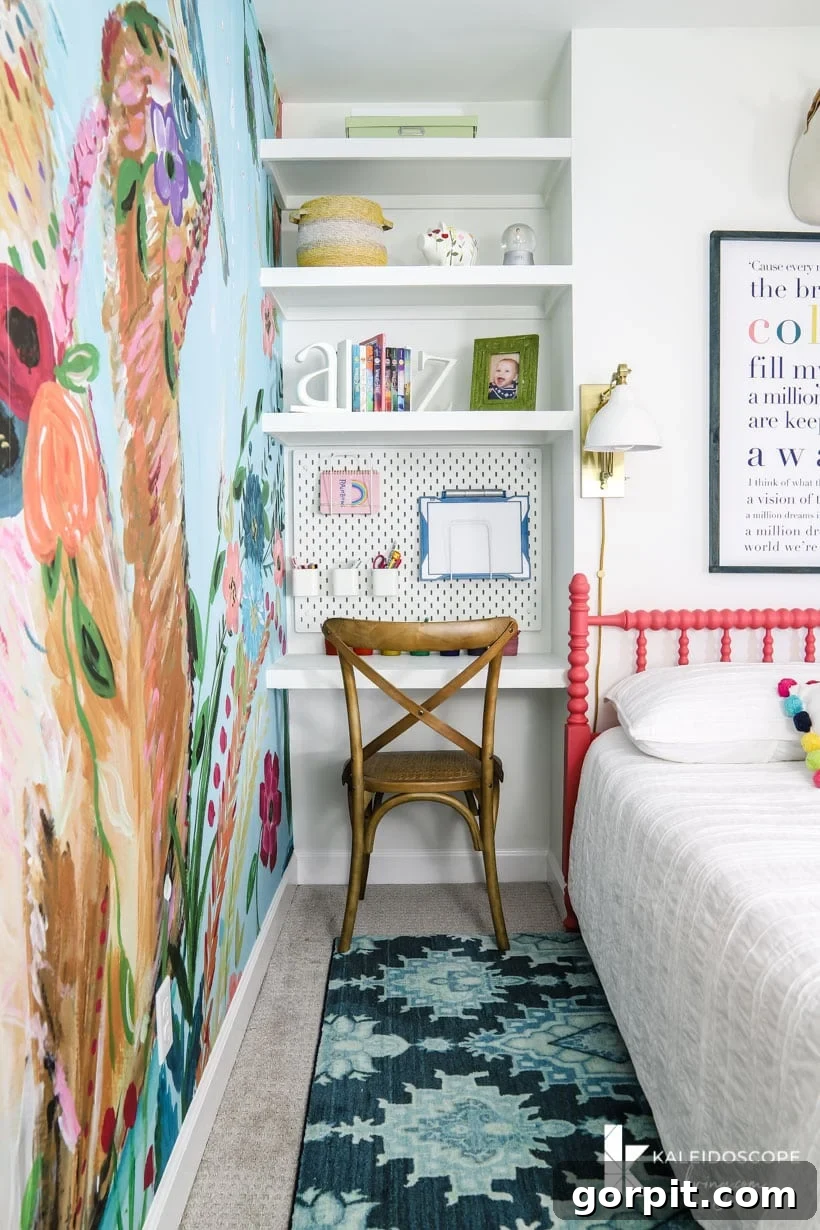
Styling Your New Floating Shelves
Once your shelves are built and finished, the fun of styling begins! Floating shelves offer a fantastic opportunity to express your personal style while keeping things organized. Here are a few tips to help you style them beautifully:
- Mix Textures and Heights: Combine books, plants, decorative objects, and framed photos of varying heights and materials to create visual interest.
- Curate with Purpose: Don’t just fill the shelves. Choose items that are meaningful to you or contribute to the room’s aesthetic. Less is often more.
- Create Vignettes: Group items in odd numbers (threes or fives) to create small, pleasing arrangements.
- Add Greenery: Plants (real or faux) bring life and freshness to any display.
- Personalize: Incorporate personal touches like travel souvenirs, family photos, or handmade items to make the space uniquely yours.
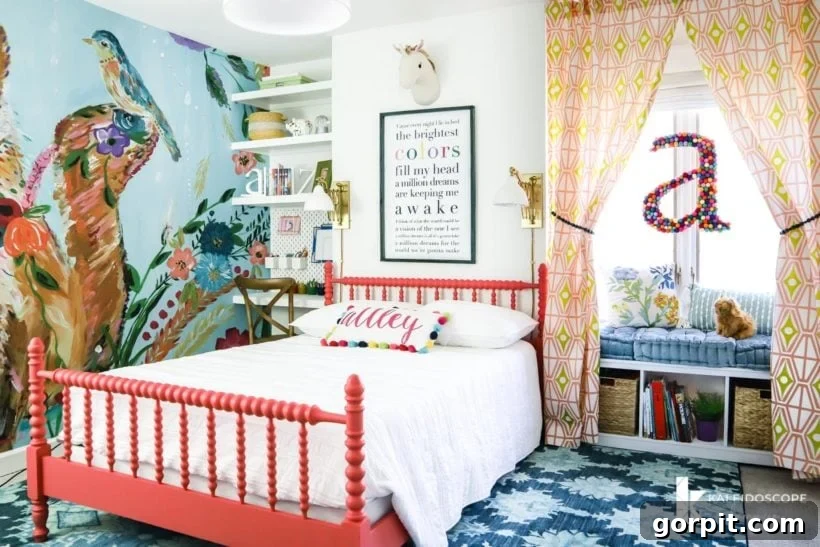
I hope you’re feeling inspired and ready to tackle some DIY floating shelves for yourself! This project demonstrates that with a little effort, even the most challenging spaces can become your favorite features. If you love the idea of adding shelves but are looking for an even simpler option, be sure to check out this tutorial on how to make the easiest wall shelves ever.
More DIY Furniture Posts
SEE ALL DIY POSTS
-
Easy DIY Floating Shelves & Desk for an Awkward Nook
-
How to Paint IKEA Furniture and Mistakes to Avoid
-
How to Make a DIY Dog Crate that Looks Like Furniture
-
How to Decoupage Furniture With Fabric
-
IKEA Lack Hack – A High-End Look on a Dime!
-
Easy and Gorgeous Ikea Desk Hack
Curious about my unique approach to transforming rooms and spaces in our home? Be sure to check out Designer in a Binder® for an affordable and simple way to decorate your own home with confidence.
And if you want exclusive content, behind-the-scenes sneak peeks, and more DIY inspiration delivered straight to your inbox, be sure to subscribe before you head out!