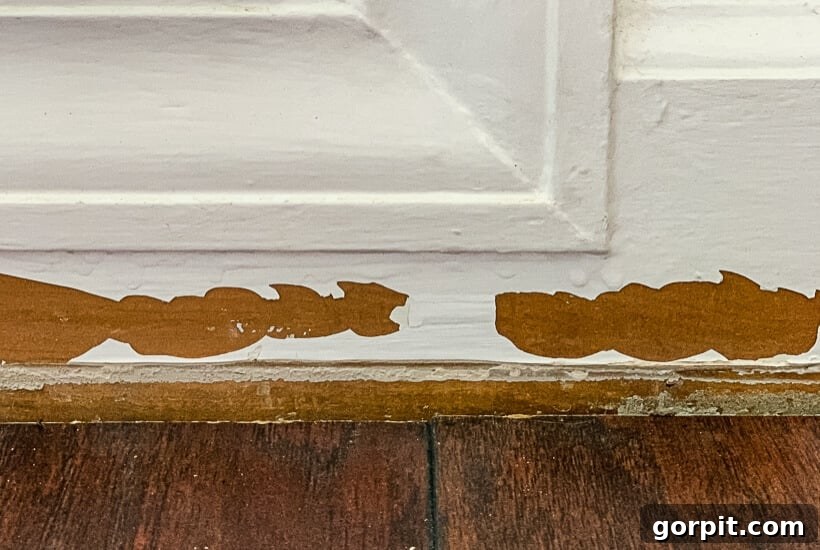
Baseboards are often overlooked, yet they play a crucial role in framing your rooms and contributing to your home’s overall aesthetic. Unfortunately, these foundational elements are highly susceptible to damage. Over time, baseboards can suffer from chips, dings, and scrapes, becoming particularly vulnerable during demanding home renovation projects. The good news is that restoring chipped and damaged baseboard paint to a fresh, clean state is a remarkably straightforward DIY task. With the right materials and techniques, you can easily revitalize your baseboards, making your entire home feel refreshed and well-maintained. Follow this comprehensive step-by-step tutorial to achieve professional-looking results.
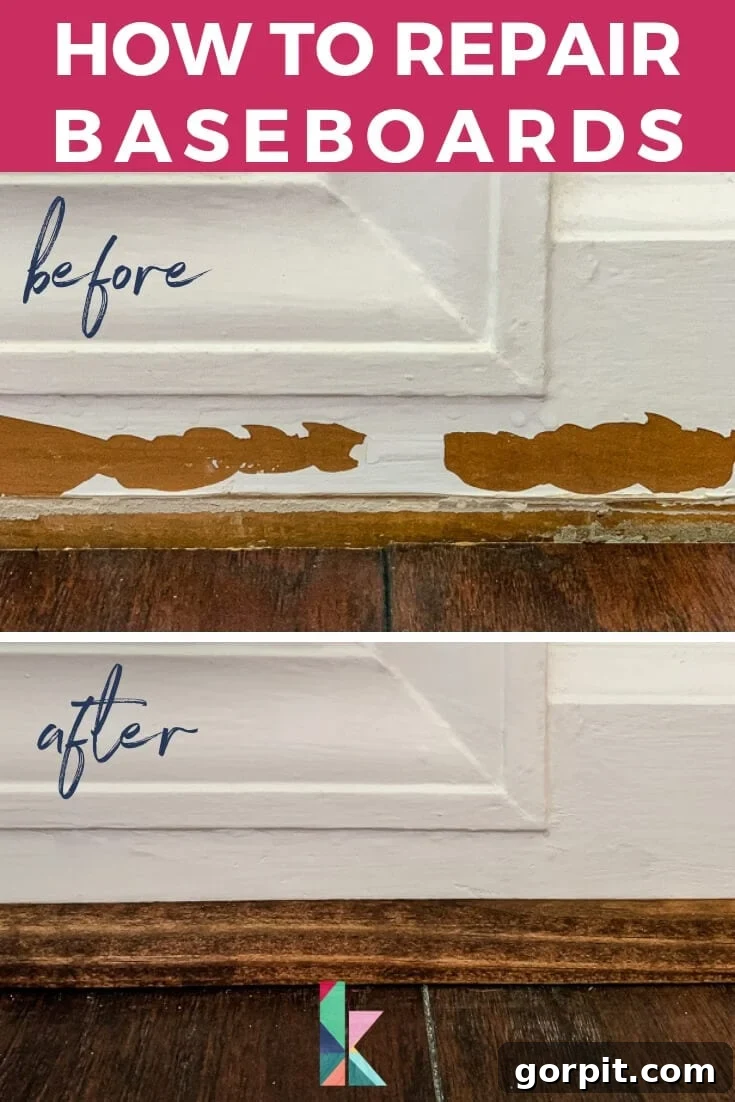
Table of Contents
Have you ever surveyed the baseboards in your home and felt a pang of frustration at their worn appearance? It’s a common scenario. Baseboards, the unsung heroes of interior design, are constantly exposed to the hustle and bustle of daily life. They gather dust, endure accidental kicks, and bear the brunt of moving furniture, leading to chips, dings, and unsightly scratches. While this wear and tear is entirely normal, neglecting it can significantly detract from the overall beauty of an otherwise stunning room. Faded, chipped baseboards can make even a freshly painted space look neglected and tired. This is especially true after the chaos of a major home renovation, where baseboards can really take a beating.
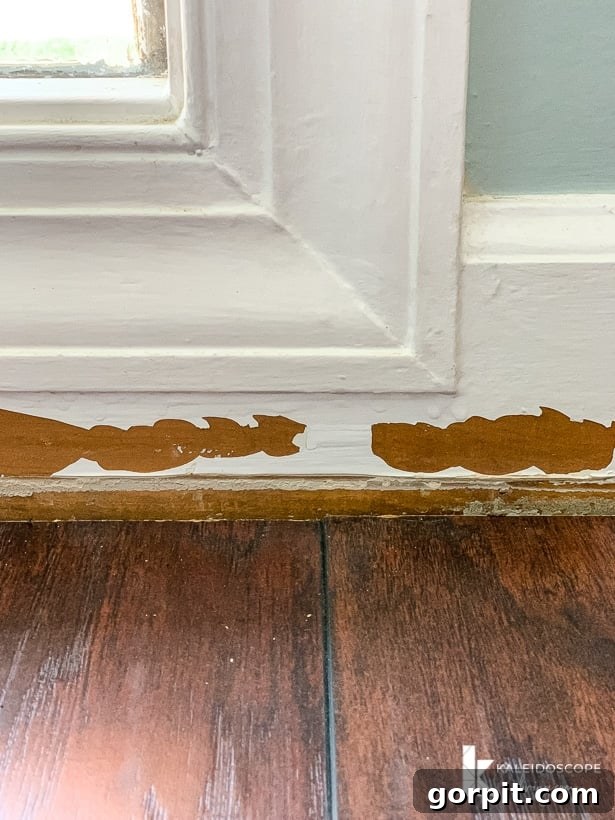
For instance, our own baseboards bore the scars of extensive demolition work during a first-floor and kitchen renovation. The sheer amount of activity, heavy foot traffic, and material handling left them looking, quite frankly, terrible. If you’ve ever found yourself in a similar situation, wondering how to repair baseboards to restore their crisp, pristine look, you’ve come to the right place. This guide will equip you with the essential knowledge, materials, and techniques needed to tackle even heavily damaged baseboards, transforming them back into immaculate architectural features that enhance your home’s appeal. Prepare to learn simple yet effective methods that will leave your baseboards looking brand new.
The Common Causes of Baseboard Damage
Before diving into the repair process, it’s helpful to understand why baseboards often sustain damage. Beyond the obvious impact of home renovations, several everyday factors contribute to their wear:
- Everyday Accidents: Bumping baseboards with vacuum cleaners, moving furniture, or even accidental kicks can lead to chips and dents.
- Pet Activity: Energetic pets can scratch or chew on baseboards, especially if left unattended.
- Moisture Exposure: Leaks or high humidity can cause paint to peel, wood to swell, or even lead to rot in some cases.
- General Wear and Tear: Over many years, the paint on baseboards naturally wears thin, making them more susceptible to chipping and showing imperfections.
- Improper Installation: Gaps between the baseboard and the wall or floor can lead to more vulnerable edges that chip easily.
- Renovation Chaos: As experienced during our own home’s transformation, demolition, new flooring installation, and heavy construction work are prime culprits for significant baseboard damage. We opted to leave some baseboards in place under large foyer windows during tile removal, fearing damage to the window trim. While this saved us one headache, it necessitated extensive patching and repair on these specific sections. This experience vividly demonstrates that even severe damage can be successfully repaired, making minor imperfections even simpler to fix!
A big thanks to DAP Products for sponsoring this post. This post contains some affiliate links for your convenience. Click here to read my full disclosure policy.
Why Baseboard Repair is Essential
Repairing damaged baseboards goes beyond mere aesthetics; it’s a crucial part of maintaining your home’s integrity and value. Here’s why investing a little time in this DIY task is so beneficial:
- Enhances Visual Appeal: Freshly repaired and painted baseboards instantly uplift a room’s appearance, making it look cleaner, more polished, and thoughtfully maintained.
- Protects Your Investment: Damaged baseboards can expose the raw wood underneath to moisture, dust, and further physical impact. Repairing them seals these vulnerable areas, extending the life of your trim.
- Prevents Further Deterioration: A small chip can quickly worsen if left unaddressed. Repairing minor damage promptly prevents it from becoming a larger, more complex, and costly problem down the line.
- Boosts Home Value: For prospective buyers, attention to detail matters. Well-maintained baseboards contribute to a positive impression of the entire home, potentially increasing its market appeal.
- Cost-Effective DIY: Hiring a professional to repair baseboards can be expensive. This guide empowers you to tackle the job yourself, saving money while gaining valuable home improvement skills.
How to Repair Baseboards: A Comprehensive DIY Guide
Essential Materials and Tools
Before you begin, gather all the necessary supplies. Having everything on hand will ensure a smooth and efficient repair process. Here’s what you’ll need:
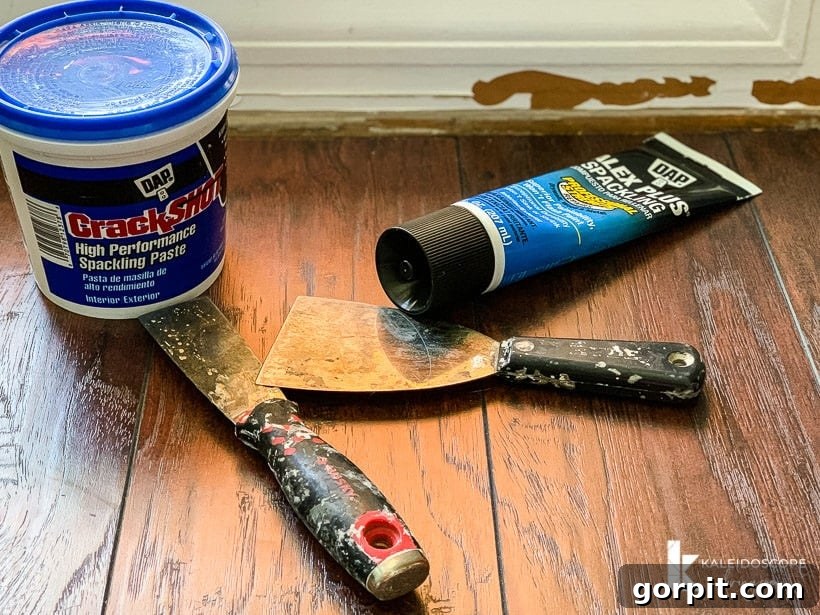
- Spackling Compound: We highly recommend DAP Alex Plus Spackling for its smooth consistency and ease of use. Alternatively, DAP Crack Shot Spackling Paste is an excellent second choice. Choose a tub for larger projects or a squeeze tube for minor repairs.
- Putty Knife: Essential for applying and smoothing spackle. A flexible metal putty knife is often preferred for a smoother finish.
- Sandpaper: Fine-grit sandpaper (around 120-220 grit) for smoothing patched areas. A sanding block can be helpful for even pressure.
- Caulking Gun and Caulk: DAP Alex Plus Caulk is ideal for sealing gaps between baseboards and walls/flooring.
- Trim Paint: Match your existing trim paint. We typically use Behr Ultra-White in a Semi-gloss finish for its durability and clean appearance.
- Paintbrush: A high-quality angled paintbrush (1.5 to 2 inches) is perfect for precise trim painting.
- Damp Cloths/Rags: For cleaning surfaces and wiping away excess spackle or caulk.
- Painter’s Tape (Optional but Recommended): For protecting adjacent walls and flooring, especially for less experienced painters.
Step 1: Prepare the Surface – Remove Loose Paint and Debris
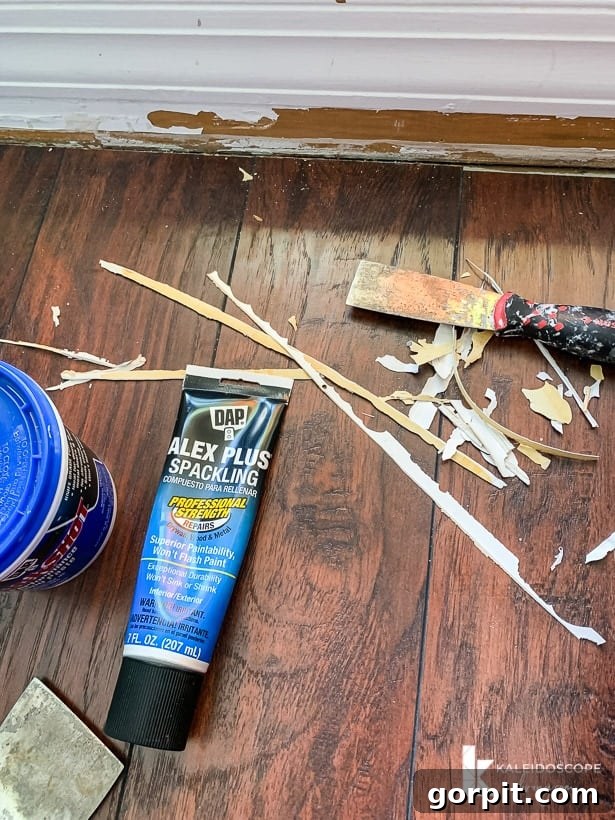
The first crucial step to any successful repair is proper surface preparation. Neglecting this can lead to flaking paint and a short-lived repair. Using your putty knife, gently scrape away any loose, peeling paint from the damaged baseboard. If you’ve recently removed quarter-round trim, you might also have old caulk lines that need scraping. The key here is to be gentle. You want to remove only the paint that is easily lifted or scraped. Aggressive scraping can gouge the wood, inadvertently creating more repair work for yourself. If paint is still firmly adhered to the baseboard, leave it undisturbed. The goal is a stable surface for the new patch and paint. Once loose debris is removed, wipe the area clean with a damp cloth to ensure it’s free of dust and grime.
Step 2: Patch and Smooth Damaged Areas with Spackle
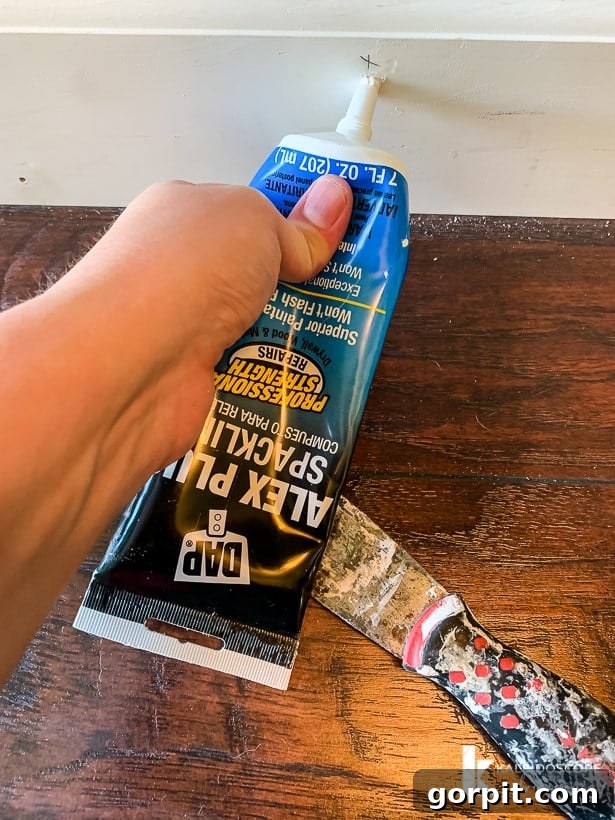
Now it’s time to address the actual chips and dings. We found DAP Alex Plus Spackling to be exceptionally effective for all our baseboard repair work. Its unique consistency — often described as a hybrid between caulk and spackle — makes it incredibly smooth and significantly easier to apply and feather compared to traditional spackle compounds. If DAP Alex Plus isn’t available, DAP Crack Shot Spackling Paste is an excellent alternative.
General Spackling Tips for a Flawless Finish:
- Application Technique: Scoop a small amount of spackle onto your putty knife. Hold the blade of your putty knife at a 45-degree angle to the baseboard. Apply the DAP Alex Plus Spackling over the damaged area using a smooth, feathering motion. The goal is to completely fill the imperfection, making it flush with the surrounding surface.
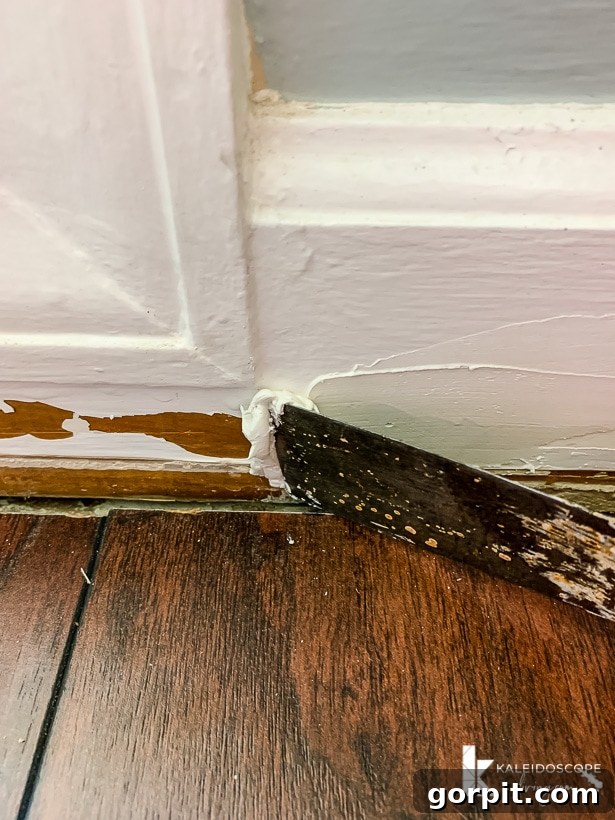
- Removing Excess: Immediately after application, gently scrape away any excess spackle from the surrounding surface by holding your putty knife at a 90-degree angle to the baseboard. Be cautious not to pull the spackle out of the patched imperfection itself. For any stubborn residue on the wall or baseboard, wipe it clean with a damp cloth *before* the spackle dries.
- Thin Coats Are Key: Resist the urge to apply a thick layer of spackle, especially for significant damage. It’s far more effective to apply several thin coats, allowing each to dry thoroughly between applications, than one thick coat which can crack or shrink. Our severely damaged baseboards often required two coats, with some particularly stubborn spots needing a third.
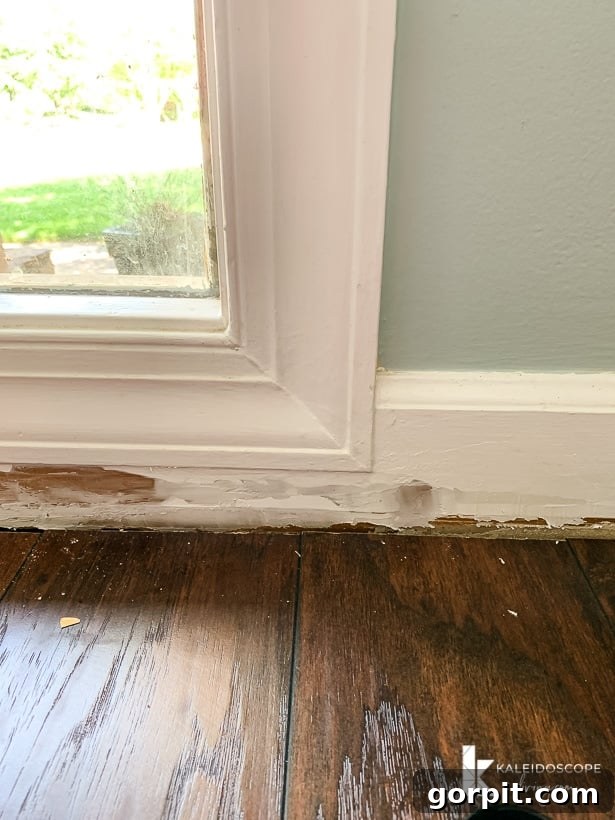
- Sanding Between Coats: After each coat of spackle has dried completely, lightly sand the patched area with fine-grit sandpaper until it’s smooth and perfectly flush with the existing baseboard surface. This creates an invisible repair. Wipe away any sanding dust with a damp cloth before applying the next coat or proceeding to the next step.
- Addressing Small Imperfections: For smaller damages, such as nail holes or tiny chips, simply squeeze a small amount of DAP Alex Plus Spackling directly over the imperfection. Then, use your putty knife to quickly remove the excess, leaving only the filled hole.
Step 3: Seal Gaps with Caulk for a Flawless Finish
Once your spackle repairs are complete and fully dry, the next step is to address any gaps. If your baseboard meets the wall or other trim with visible cracks or gaps, now is the ideal time to apply caulk. Caulking serves multiple purposes: it seals against dust and moisture, provides a seamless, finished look, and makes painting significantly easier by creating crisp lines. Given that we reinstalled most of our baseboards after renovation, we had a substantial amount of caulking to do. The good news is that caulking is generally considered less fussy than spackling, making it a relatively quick and satisfying task. For all our trim caulking, we rely on DAP Alex Plus Caulk, known for its flexibility and paintability.
Caulking Techniques for Perfect Seams:
- Loading the Gun: Insert the caulk tube into a caulking gun. Using a utility knife, carefully cut the tip of the caulk tube at a 45-degree angle. The size of the opening should be slightly smaller than the gap you intend to fill. Puncture the inner seal of the tube with the long wire on your caulk gun.
- Application: Hold the caulk gun at a consistent 45-degree angle relative to the seam you are filling. Apply steady, even pressure to the trigger as you move the gun smoothly along the length of the baseboard. Aim for a continuous bead of caulk.
- Smoothing the Bead: Immediately after applying the caulk, dip your finger (or a specialized caulk tool) in a small amount of water. Run your wet finger along the caulk bead to smooth it out, pressing it firmly into the gap and wiping away any excess. This creates a clean, professional-looking seal. Work in manageable sections to prevent the caulk from drying before you can smooth it.
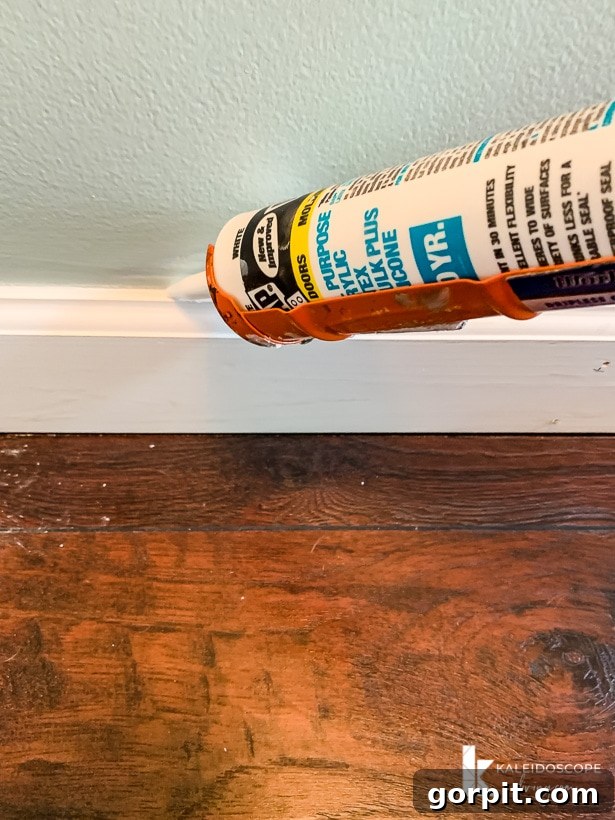
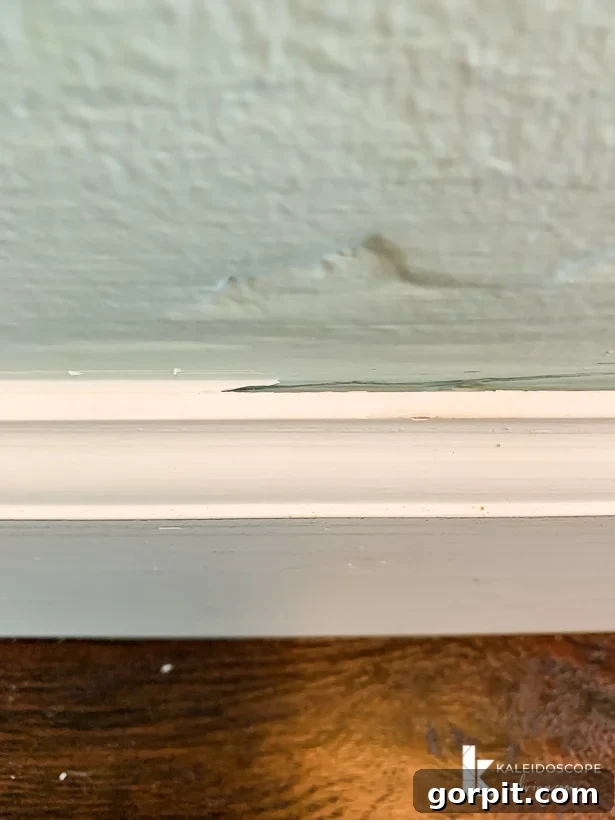
The visual impact of caulking is significant. As demonstrated in the image below, the difference between an uncaulked gap and a freshly caulked seam is remarkable. Caulking effectively fills in any imperfections and gaps, creating a cohesive and beautifully finished appearance for your baseboards.
Step 4: Prime and Paint for a Fresh Look
With all repairs patched and gaps sealed, your baseboards are now ready for their final coat of paint. While painting might seem like the most straightforward step, a little attention to detail here ensures a professional, lasting finish.
Painting Tips for Crisp Baseboards:
- Primer (Optional but Recommended for Heavily Patched Areas): If you’ve done extensive spackling, especially over bare wood or dark repairs, a thin coat of primer will ensure better paint adhesion and a more uniform finish. It helps prevent flashing (where the patched areas show through the topcoat differently). Allow primer to dry completely according to manufacturer instructions.
- Choose the Right Paint: For baseboards, a semi-gloss or high-gloss paint finish is typically recommended. These finishes are more durable, easier to clean, and provide a crisp contrast against matte wall paints. We consistently use Behr Ultra-White in a Semi-gloss finish.
- Technique: Load your angled paintbrush with a moderate amount of paint. Start by painting the top edge of the baseboard, creating a clean line where it meets the wall. Then, paint the face and bottom edge. For best results, apply two thin coats of paint, allowing ample drying time between each coat.
- Masking (For Precision): If you’re confident in your brush skills, you might be able to paint freehand with an angled brush, as I often do. However, if you’re less experienced or simply prefer razor-sharp lines, apply painter’s tape along the bottom edge of your wall and the top edge of your flooring. Ensure the tape is pressed down firmly to prevent bleed-through. Remove the tape while the paint is still slightly wet for the cleanest lines.
 |
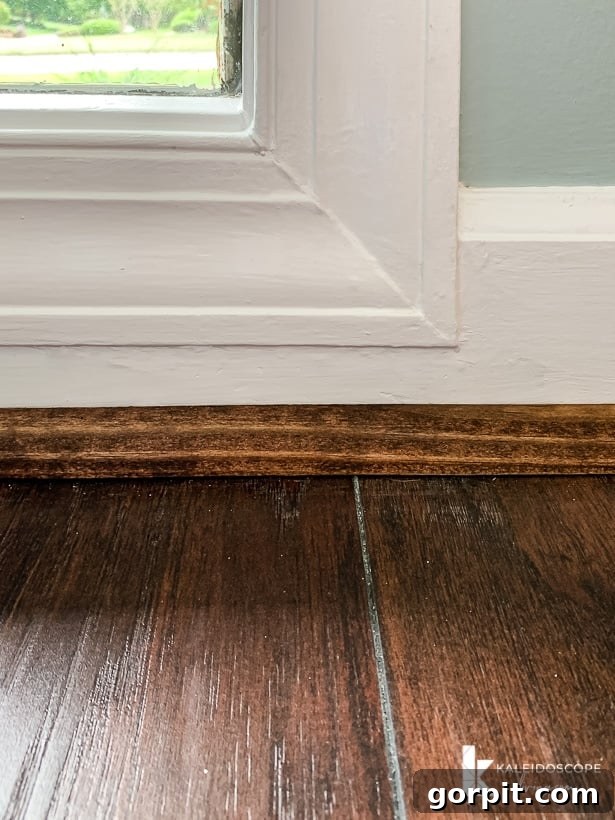 |
That’s all there is to it! Observe the remarkable before-and-after transformation above. While perfection is an elusive goal, the improvement is undoubtedly a zillion times better. And the best part? It wasn’t an arduous task. With minimal effort, you can significantly enhance the appearance and longevity of your home’s trim. If you’re also wondering about installing quarter-round after baseboard repair, don’t miss our detailed guide on how to install quarter-round molding!
Troubleshooting and Pro Tips for Baseboard Repair
Even with careful planning, sometimes unexpected issues arise. Here are some troubleshooting tips and professional advice to help you achieve the best results:
- Dealing with Large Gouges or Holes: For very deep chips or holes that go beyond the paint layer, consider using a wood filler product designed for larger repairs before applying spackle. Wood filler provides more structural integrity and resistance to shrinking compared to spackle, which is best for shallower imperfections. Build up the repair in thin layers, allowing each to dry fully.
- Uneven Drying or Cracking: If spackle or caulk dries unevenly, or if spackle cracks, it’s usually because layers were applied too thickly, or the room temperature was too cold or humid. Ensure proper ventilation and allow generous drying time between coats, especially in cooler or damp conditions. Using a fan can aid in drying, but avoid direct heat sources.
- Preventing Paint Bleed-Through with Tape: When using painter’s tape, always press the edges down very firmly, using a putty knife or your fingernail, to create a tight seal. For extra insurance against paint bleeding underneath, you can paint a thin coat of your wall color (or the existing trim color if you’re not changing it) directly over the edge of the tape first. This seals the tape, preventing the final trim paint from seeping beneath, resulting in crisp, clean lines.
- Matching Existing Paint: If you don’t know your baseboard paint color, don’t despair. Carefully chip off a small piece of the existing paint (from an inconspicuous area if possible) and take it to a local paint store. Most stores have color-matching technology that can analyze the chip and create a custom match, providing you with a fresh can of paint that seamlessly blends with your existing trim.
- Patience is a Virtue: Rushing any step in the repair process, especially the drying times between spackle coats, caulk application, or paint layers, can compromise the final finish and lead to premature failure of the repair. Allow ample time for each product to cure according to manufacturer instructions. A well-executed repair relies on patience.
Maintain Your Beautiful Baseboards
Once your baseboards are repaired and looking their best, a few simple maintenance practices can keep them pristine for years to come, preserving your hard work and enhancing your home’s appeal:
- Regular Cleaning: Dust baseboards frequently to prevent dirt buildup that can dull their finish. For light cleaning, a damp cloth with mild all-purpose cleaner is usually sufficient to remove scuffs and grime without damaging the paint.
- Mindful Vacuuming: Use a vacuum attachment or be extra careful and gentle when vacuuming around baseboards to avoid accidental bumps, scrapes, and chips. Consider attaching soft felt pads to your vacuum’s head if it frequently makes contact.
- Strategic Furniture Placement: Position furniture slightly away from baseboards whenever possible to prevent constant rubbing, scrapes, and dents. Use furniture pads or felt protectors on items that rest directly against the trim.
- Address Damage Promptly: Don’t let small chips grow into bigger, more noticeable problems. Keep a small tube of spackle and a can of touch-up paint on hand for quick and easy fixes as soon as new damage occurs. Early intervention saves time and effort in the long run.
More Home Improvement Resources
Embarking on DIY home repair projects can be incredibly rewarding, offering a great sense of accomplishment and significant cost savings. If you’ve enjoyed transforming your baseboards, you might be interested in these other helpful home improvement tutorials to tackle more projects around your house:
- How to Fix a Hole in the Wall Yourself the Easy Way!
- How to Fix a Door That Won’t Close
- How to Match A Paint Color That’s Already On A Wall
- How to Repair Holes in Your Doors
- How to Repair Drywall: Tips for “Smallish” Repairs
- How to Repair Chipped Baseboards (You are here!)
Curious about how to approach transforming entire rooms and spaces in your home with confidence and ease? Explore our comprehensive guide, Designer in a Binder®, for a structured, affordable, and actionable approach to interior design that empowers you to create spaces you love.
For exclusive content, behind-the-scenes sneak peeks, and the latest home improvement tips delivered straight to your inbox, be sure to subscribe before you leave our site!