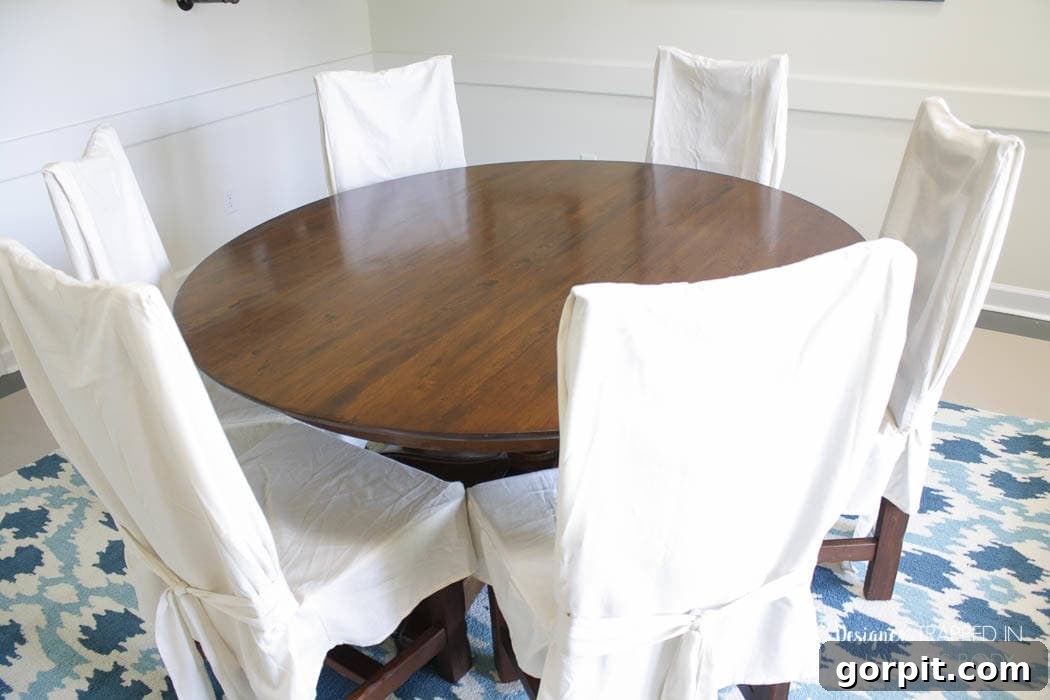
Revolutionize Your Furniture: Refinish a Table Without Sanding or Stripping for Stunning Results
This post is sponsored by Mohawk, a brand I trust implicitly. All opinions expressed here are 100% my own, based on my personal, positive experience using their exceptional products. This post also contains some affiliate links for your convenience. By clicking and making a purchase, I may receive a small commission at no extra cost to you. Click here to read my full disclosure policy.
Effortless Table Restoration: A Guide to Refinishing Without Sanding or Stripping
Hello, fellow DIY enthusiasts! Get ready to be absolutely thrilled, because I’m about to unveil a game-changing method for furniture restoration that will transform your tired tables into showpieces. Imagine breathing new life into your cherished furniture without the messy, labor-intensive, and time-consuming tasks of sanding or stripping. Yes, it’s entirely possible, and I’m going to show you exactly how to refinish a table without sanding or stripping, saving you significant time, effort, and money in the process!
Our Table’s Journey: From Worn to Wonderful
Almost five years ago, my husband and I stumbled upon a fantastic deal on Craigslist: a high-quality, solid wood dining room table, complete with six chairs, all for a mere $400. It was a true Pottery Barn score! While the bones of the table were magnificent, it was already showing considerable signs of wear and tear. We knew, even then, that a refinishing project would eventually be in its future. Fast forward through years of family dinners, craft projects, and everyday life, and our beloved table had endured its fair share of bumps, scratches, and spills. The finish was splotchy, the edges were severely worn, and deep gouges marred its once-smooth surface. The “eventually” part of our plan finally arrived, thanks to discovering an incredible line of products from Mohawk that completely eliminated the need for harsh chemical strippers and extensive sanding.
This innovative approach meant I only had to perform very minimal spot sanding to remove a few stray nail polish marks (a small price to pay for such an easy restoration!). The entire project, from start to finish, took me a mere three hours. If I had known how incredibly simple and effective this method was, I would have tackled it years ago. No more procrastination when furniture refinishing can be this easy!
Witness the Transformation: Before & After
Before we dive into the step-by-step instructions, let me walk you through the condition of our table prior to its incredible makeover. Prepare to be amazed by the “before” pictures:
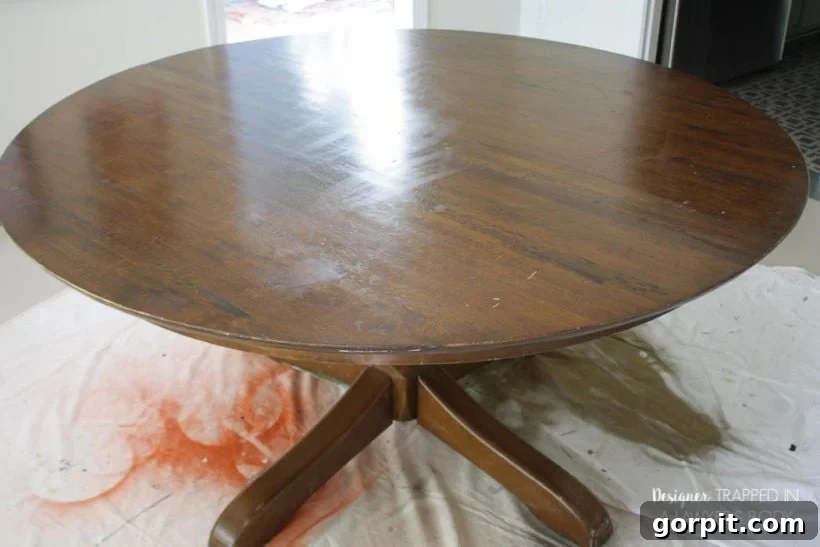
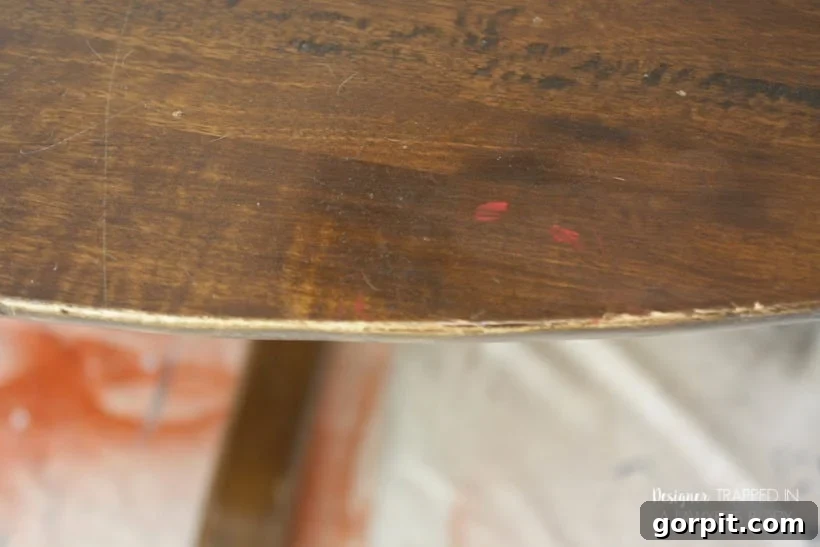
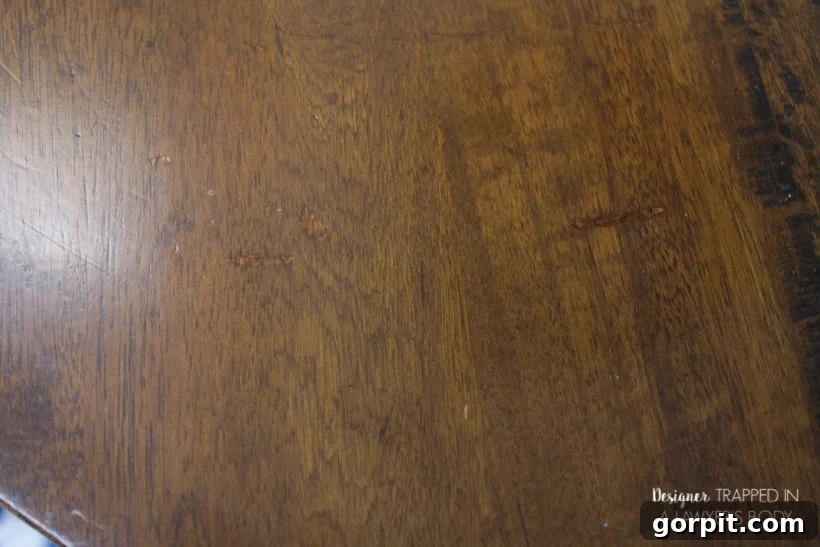
As you can see, the table surface was far from pristine. The once-elegant wax finish had become splotchy and uneven, providing little protection against the rigors of daily use. Scratches, nicks, and dings were prevalent across the tabletop, detracting significantly from its original beauty.
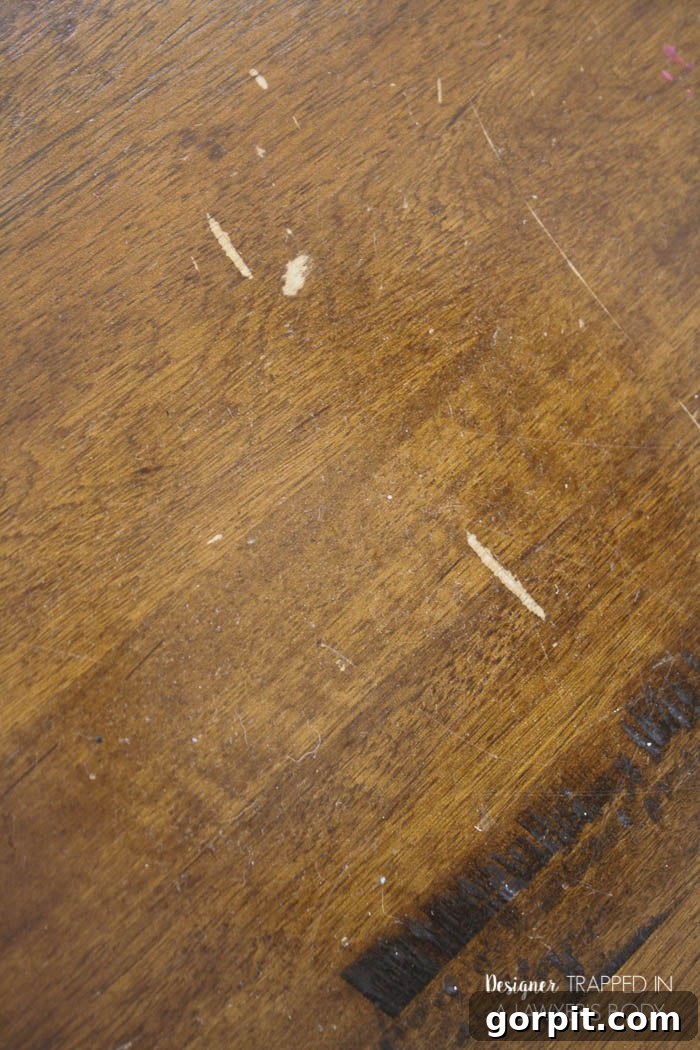
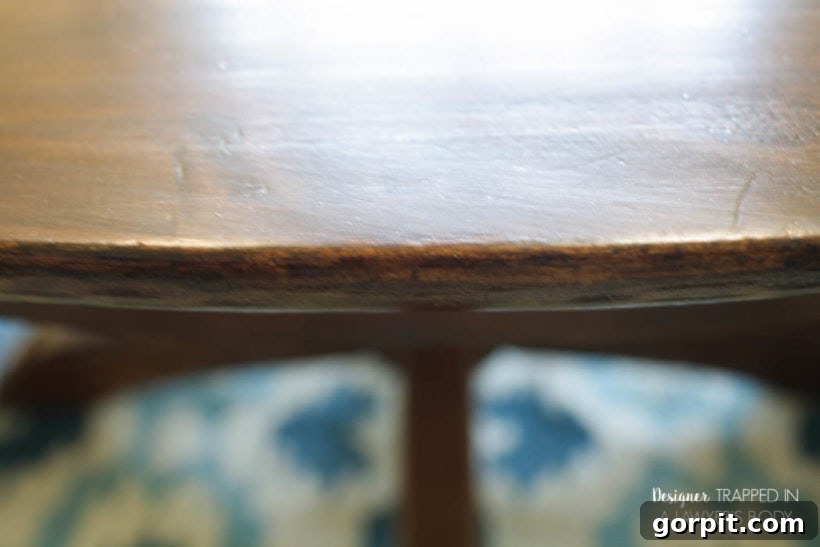
The edges of the table, in particular, were beyond simply “worn.” Years of bumps and rubs had eroded the finish, leaving raw, exposed wood that looked tired and neglected. This was a clear indicator of the need for a comprehensive, yet gentle, restoration.
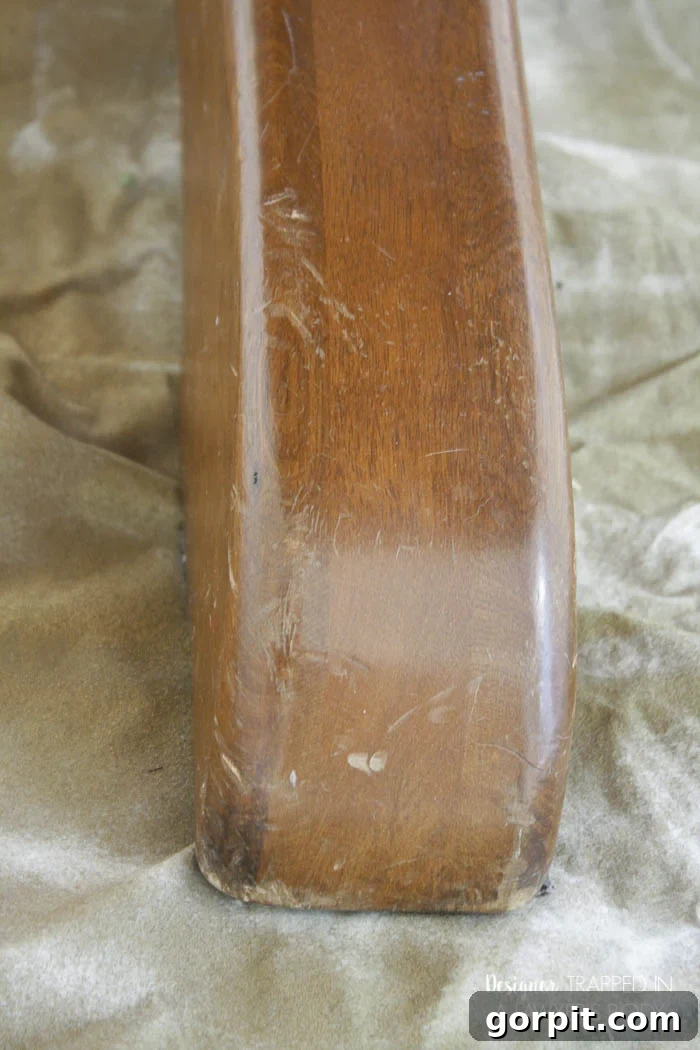
Even the pedestal base and legs, which often escape the direct impact of daily use, showed signs of distress. Minor scratches and scuffs accumulated over time made the entire piece look dull and aged, masking the beautiful craftsmanship underneath.
Essential Materials for Your No-Sanding Table Refinish
I was incredibly fortunate to receive and test these professional-grade Mohawk products as a blogger. The truly exciting news, however, is that Mohawk has now launched a consumer-friendly line of all the products I utilized, making this simple refinishing method accessible to everyone! You can find and shop all the fantastic Mohawk consumer products here to get started on your own project.
- Mohawk Ultra Touch-Up Marker: Essential for blending away minor scratches and worn areas, matching the existing wood tone.
- Mohawk Wax Wash Remover: A crucial first step for tables with an existing wax finish, effectively dissolving old wax and grime without harsh chemicals.
- Mohawk Wiping Wood Stain: A thin, easy-to-apply stain that provides rich color and renews the wood’s appearance without requiring extensive surface prep.
- Mohawk Quick Fill Burn-In Stick and Burn-In Tool: This innovative system allows you to melt and fill deep gouges and chips, creating an incredibly smooth, durable repair. (Pro Tip: For even easier application, consider the Permafill set, which streamlines the process.)
- Satin Wipe-On Polyurethane: For a durable, protective topcoat that offers a beautiful, low-sheen finish, ideal for dining tables.
- Clean Paper Towels or Lint-Free Rags: For wiping, cleaning, and applying stain.
- Latex or Nitrile Gloves: To protect your hands during the process.
- Small Foam Brush: For applying the wiping wood stain.
Your Easy Step-by-Step Guide to Refinishing a Table (Without Sanding!)
This process is designed for simplicity and efficiency, transforming a daunting task into a manageable DIY project. Follow these steps for professional-looking results right in your home:
**Step 1: Clean and Prepare the Surface with Wax Wash Remover**
The first and often overlooked step, especially for older furniture, is thoroughly cleaning the surface. Our table had an existing, splotchy wax finish that needed to be completely removed to ensure proper adhesion of the new stain. For this, I used Mohawk’s Wax Wash Remover. This product is a marvel – I simply sprayed it directly onto the tabletop and immediately wiped it off with clean paper towels. It took about four minutes to clean the entire table surface, making it incredibly easy and effective. The remover swiftly dissolved years of accumulated wax, dirt, and grime, leaving a clean, receptive surface. A word of caution: this spray does emit some fumes, so ensure you work in a well-ventilated area by opening windows or working outdoors if possible.
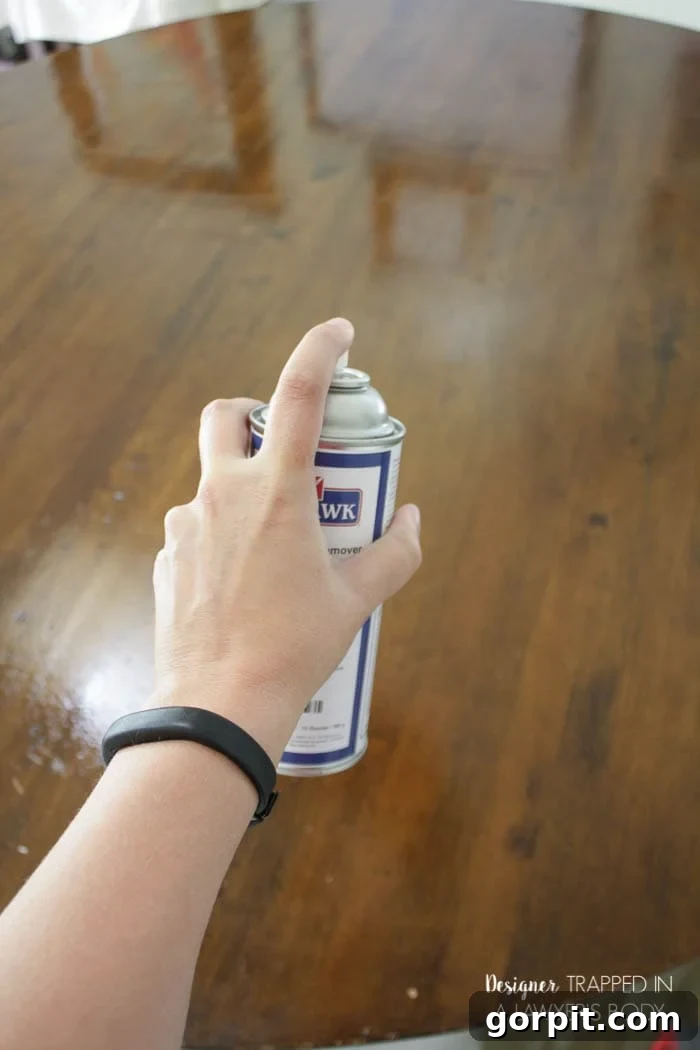
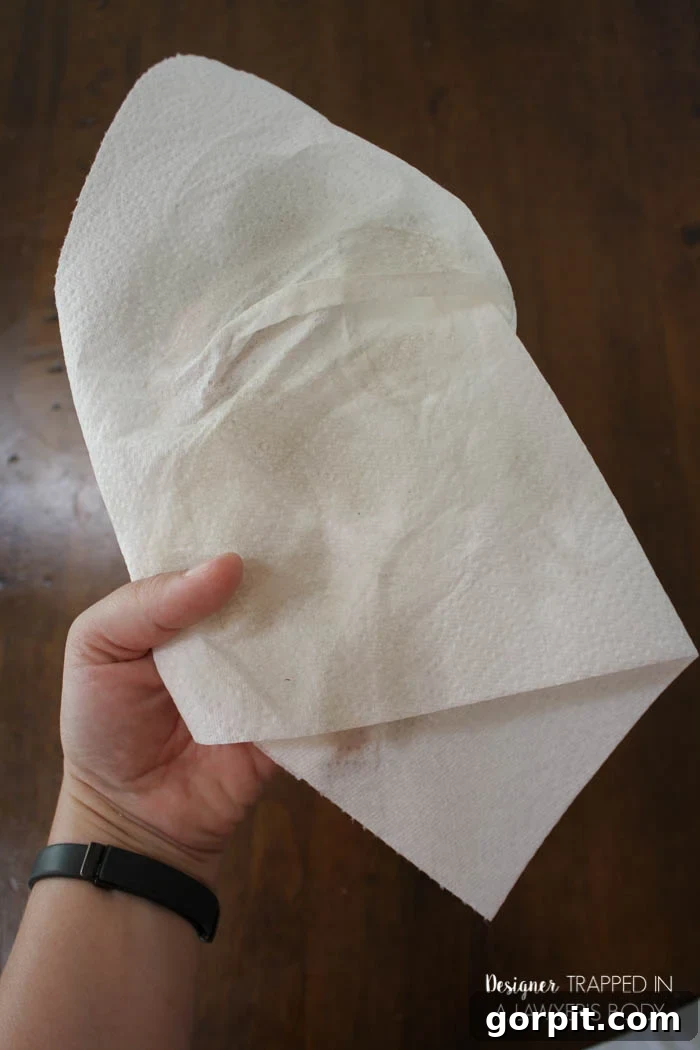
You might be surprised by how much dirt comes off! I was certainly taken aback by the sheer amount of grime that came off our seemingly clean table. Don’t be shy about showing off your “filthy” paper towels – it just proves how effectively this product works!
**Step 2: Address Minor Imperfections with Spot Sanding (If Necessary)**
Let me reiterate: you absolutely do NOT need to sand your entire table with this method. The beauty of these Mohawk products is their ability to work without requiring a perfectly stripped or sanded surface. The only reason I lightly spot sanded was to remove a few tiny, stubborn splotches of fingernail polish I had accidentally gotten on the table over the years. Most people are probably more diligent about protecting their furniture than I am! If you have similar small, localized imperfections that need physical removal, use a very fine-grit sandpaper (220-grit or higher) and sand only the affected area lightly, then wipe away any dust.
**Step 3: Camouflage Scratches and Worn Edges with a Touch-Up Marker**
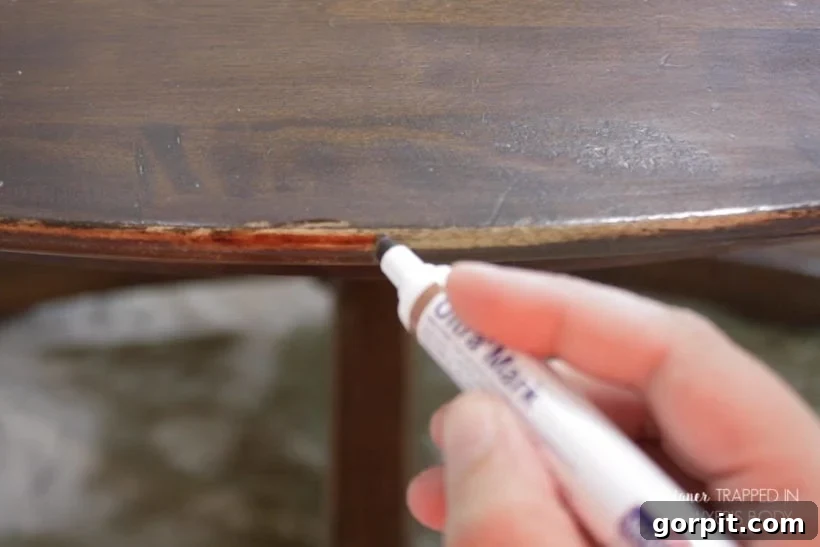
Now for the satisfying part: making those minor blemishes disappear! I used the Mohawk Ultra Touch-Up Marker to seamlessly blend in scratches, scuffs, and the severely worn edges of our table. This step is incredibly straightforward. If you can color with a marker, you can master this! Simply choose a marker shade that closely matches your table’s existing wood tone and carefully apply it to the damaged areas. The marker instantly revitalizes the color, making imperfections much less noticeable.
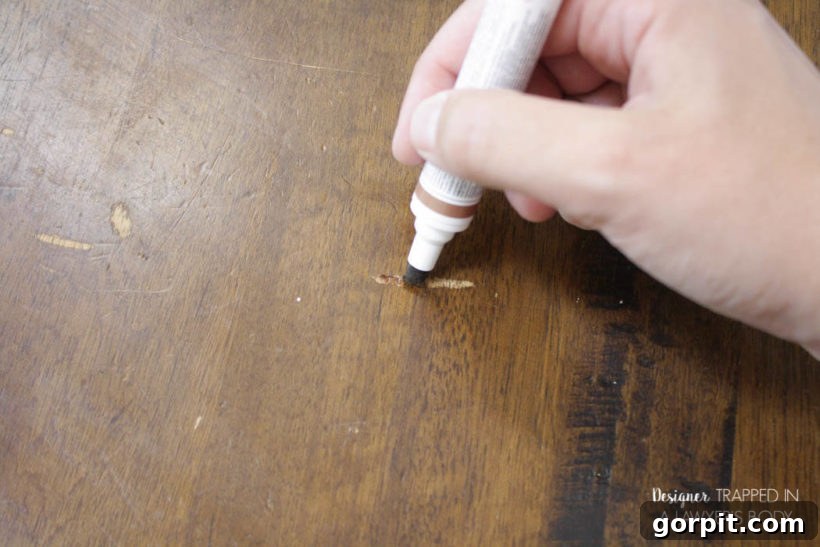
Pay special attention to areas like the table edges, which often suffer the most from daily friction and impact. The touch-up marker provides an instant facelift, preparing the surface for the next steps.
**Step 4: Repair Deep Gouges and Chips with the Quick Fill Burn-In Stick**
This was arguably my favorite step, as it addressed the most significant damage: the deep gouges in the tabletop. For this, I employed the Mohawk Quick Fill Burn-In Stick. This tool is truly ingenious for filling substantial imperfections seamlessly. (Quick Update: Mohawk has since released the Permafill set, which makes this process even more user-friendly and efficient!)
Before you begin, ensure you’ve completed Step 3. You want the base of your gouge to be as close to the table’s color as possible for the best results. The process involves using a specialized wood-burning tool (which heats up the burn-in stick) to melt small drops of the filler into the gouge. As the melted liquid drips into the cavity, use the hot tip of your tool to gently tap and spread the material, ensuring it fills the gouge completely and eliminates any air bubbles. Allow the filled area to dry for at least 30 seconds – it hardens quite quickly. Don’t worry if you get a few extra drips or excess material on your table; these will easily come off later.
You can find an instructional video tutorial here, but honestly, I found it even easier than the video makes it look! It’s surprisingly intuitive once you get the hang of it.
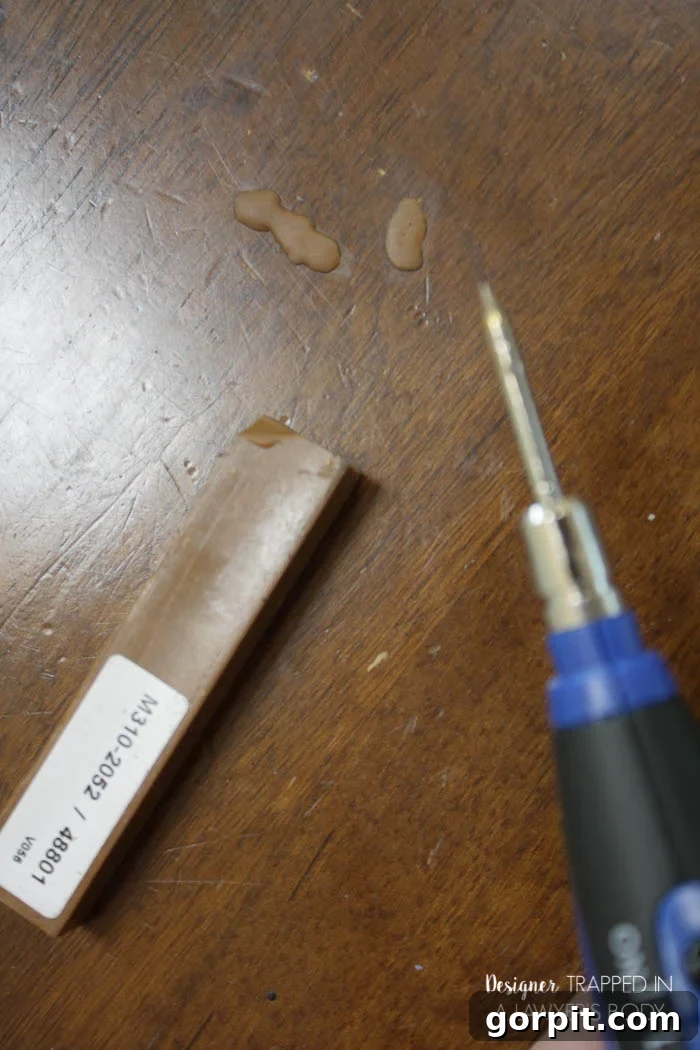
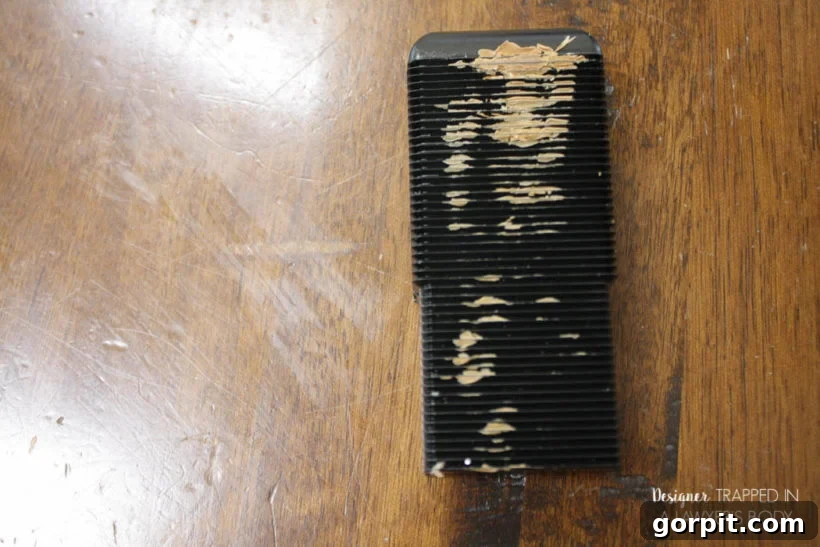
Once the filler has set, use the plastic leveling tool that comes with the burn-in stick. Position the side with the horizontal ridges firmly on top of the filled gouge and gently rub it back and forth. This action removes any excess filler and smooths the surface until the repair is perfectly level with the rest of your table. The result is a remarkably strong and invisible repair that truly blends into the wood grain.
**Step 5: Final Cleaning Before Staining**
After all the repairs and touch-ups, it’s a good practice to give the table one final wipe-down. I used the Wax Wash Remover again to ensure the surface was absolutely clean and free of any dust, oils, or residue from the burn-in stick. A pristine surface is crucial for the optimal adhesion and even application of the new stain.
**Step 6: Apply the Wiping Wood Stain**
Now, for the magic of bringing back the wood’s rich color! This Mohawk Wiping Wood Stain is truly outstanding. It has a very thin consistency, which makes it easy to work with but also means you should handle it carefully to avoid splatters. I applied the stain using a small foam brush, working in sections. The key to this product is to apply it and then wipe it off almost immediately with clean paper towels, following the wood grain. This technique allows you to control the depth of color and prevent it from becoming too dark. I found that a single coat was sufficient to achieve the desired rich, even tone for our table. Just like the wax wash, this stain can emit fumes, so ensure you continue to work in a very well-ventilated area.
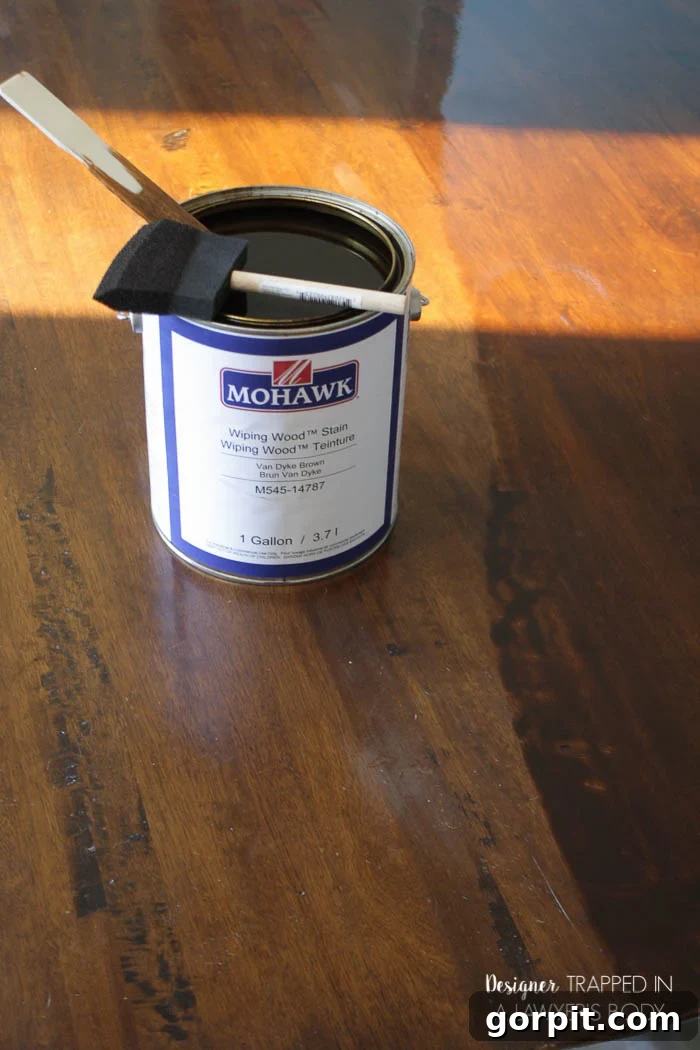
**Step 7: Apply a Protective Topcoat**
The final step is to protect your newly refinished table. Initially, I applied two coats of a tung oil finish. While beautiful, I found the glossy sheen to be a bit too much for my personal taste and the practical needs of a busy dining table. To achieve the perfect balance of protection and aesthetics, I followed up with two coats of a satin, wipe-on polyurethane. Wipe-on polyurethanes are fantastic for DIYers as they are easy to apply smoothly, minimizing brush strokes and providing a durable, long-lasting finish that can withstand daily use. The satin finish offered a sophisticated, understated elegance that perfectly complemented our dining room decor while providing superior protection.
The Stunning Reveal: A Table Reborn
Are you ready to see the breathtaking transformation? I am absolutely thrilled with the results – our table looks brand new, and the process was incredibly straightforward!
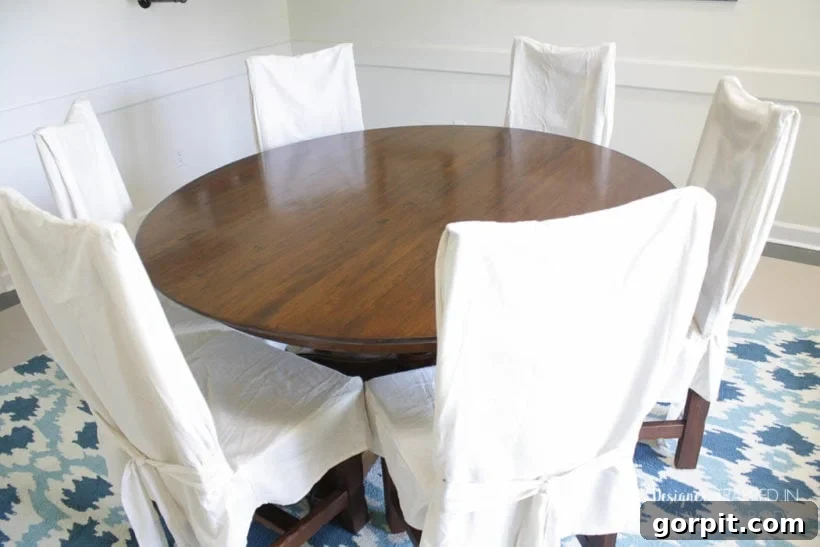
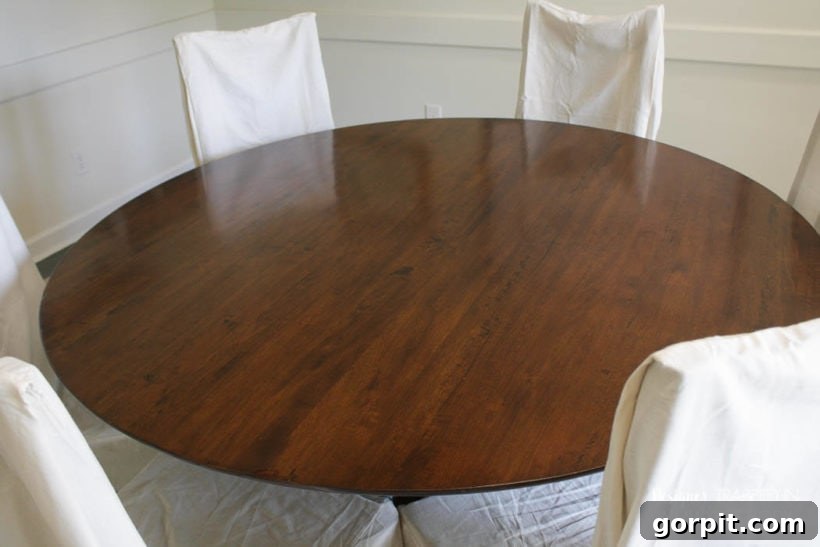
Those unsightly gouges that once plagued our tabletop are now virtually invisible! The Quick Fill Burn-In Stick truly performed miracles, creating a seamless surface that belies the table’s previous damage. It’s hard to believe they were ever there.
The worn edges, which were a major eyesore, have been completely restored. The touch-up marker and subsequent staining have brought back the rich color and integrity to these high-traffic areas, making them look pristine once again.
And the pedestal base! I honestly thought it was beyond simple repair, but with a bit of attention, it now looks absolutely amazing, complementing the rejuvenated tabletop beautifully.
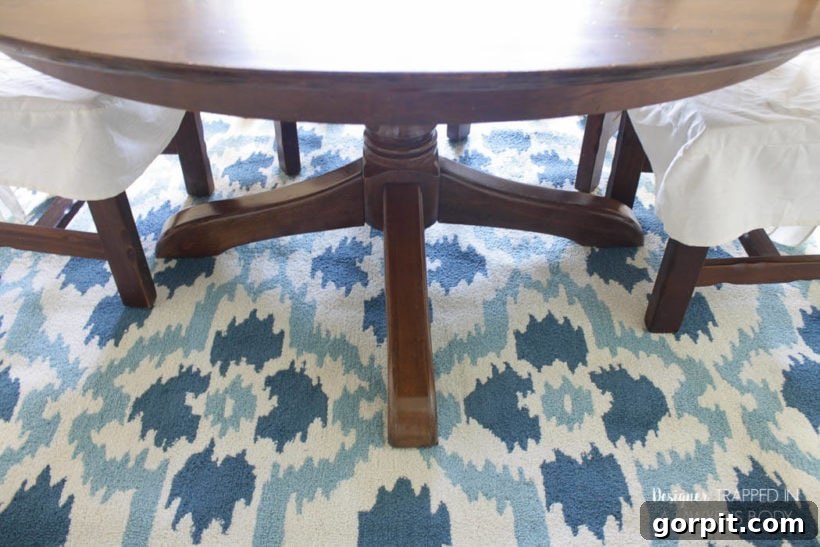
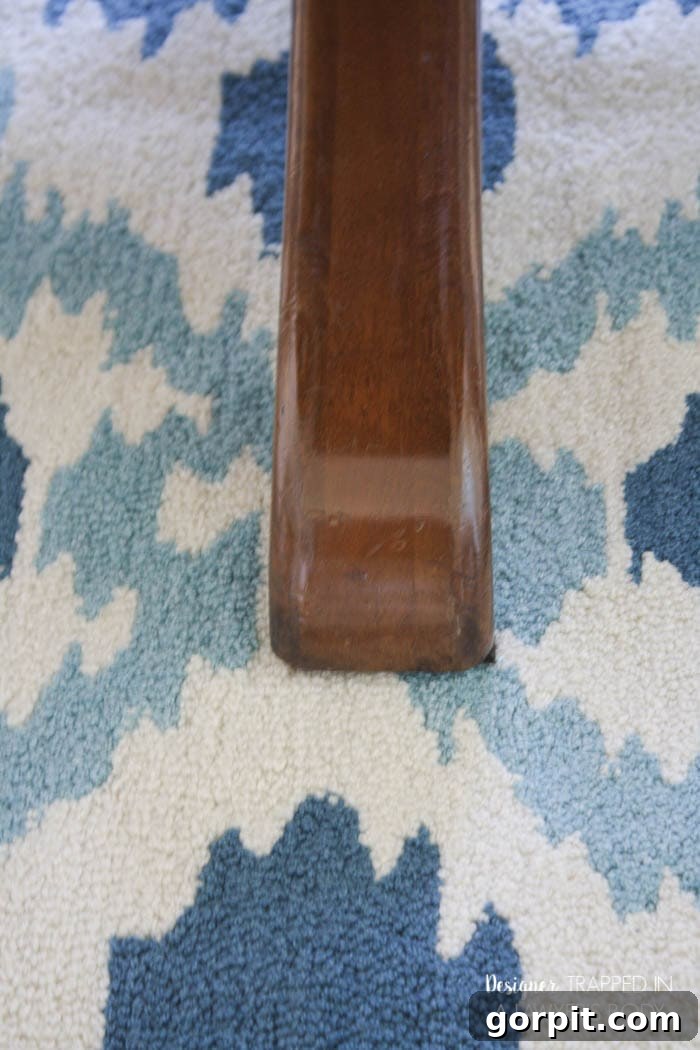
Curious to see the full dining room reveal? Click here to explore all the intricate details of our refreshed space! But for now, here’s a little sneak peek of the table in its newly decorated environment:
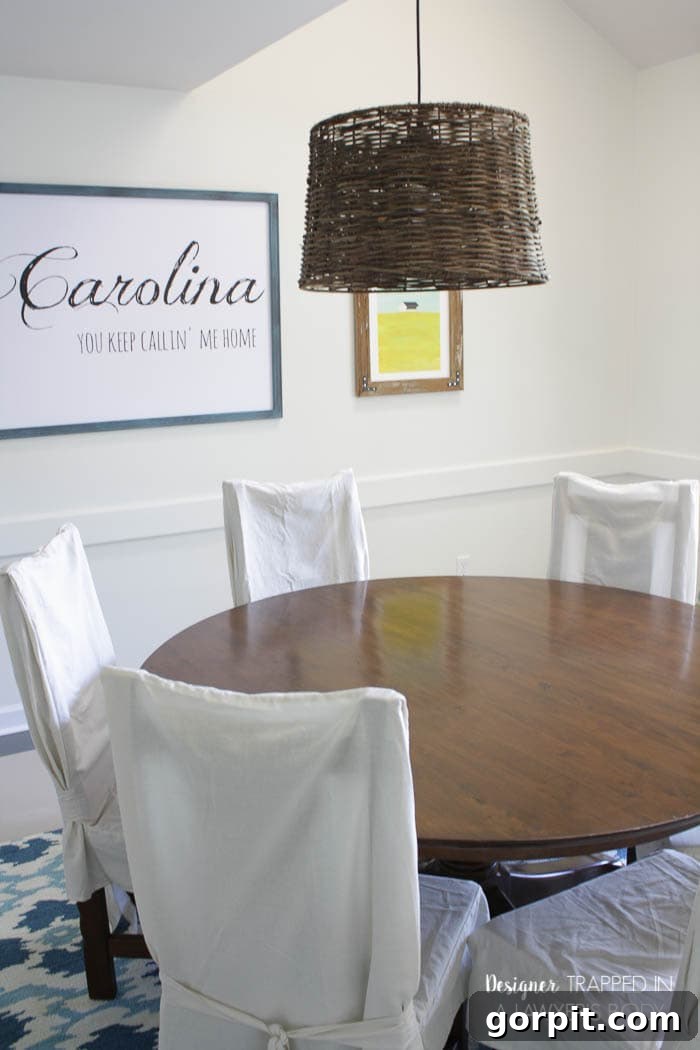
And one last admiring glance at our beautifully refreshed, no-sanding, no-stripping table – a testament to the power of smart DIY and excellent products!
Ready to Transform Your Furniture?
What do you think? Has this tutorial convinced you that refinishing furniture doesn’t have to be an overwhelming or intimidating project? I truly hope so! The ease and stunning results achieved by avoiding sanding and stripping have opened up a world of possibilities for DIY furniture makeovers.
If you’re eager to learn more about simple DIY furniture treatments and how to rejuvenate other pieces in your home, check out some of my other popular tutorials:
- We gave two beautiful chairs a new lease on life with this incredibly simple wood chair refinishing tutorial.
- I’ve also tackled countless projects involving painting furniture to achieve a completely fresh look! Explore these guides:
- How to Paint Furniture With Chalk Decorative Paint: A Step-by-Step Guide
- DIY Furniture Restoration Tutorial
Before you head off to start your own furniture transformation project, don’t forget to explore all the free guides, valuable information, printables, and more that my VIP subscribers enjoy! Subscribe today to gain exclusive access to a convenient digital library packed with resources designed to empower your DIY journey.