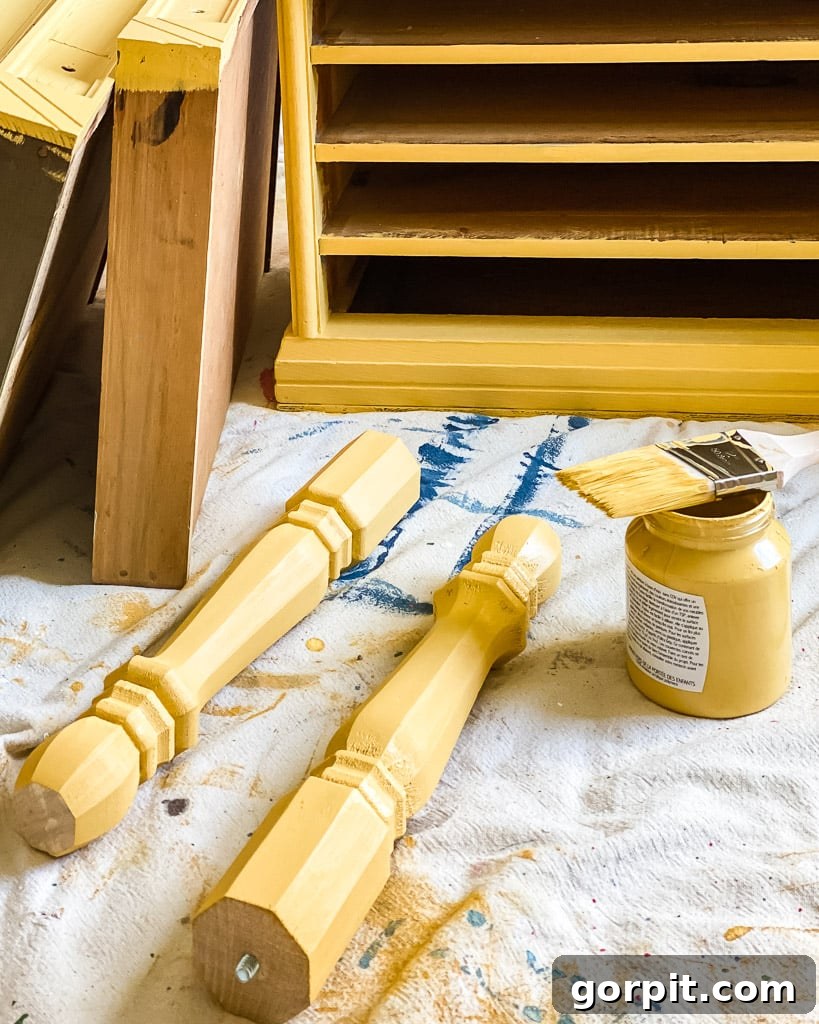
As a passionate DIY enthusiast, I’ve had the pleasure of transforming nearly 100 pieces of furniture over the last two decades. There’s an undeniable joy in breathing new life into old, forgotten items with a fresh coat of paint, not only making them beautiful but also achieving stunning home decor on a budget. However, selecting the right paint is paramount to achieving professional-looking and durable results that truly last. Not all paints are created equal, and choosing wisely is the single most crucial step in your furniture painting journey.
If you’ve ever found yourself asking, “What is the best paint to use on furniture?” then you’ve come to the right place. This comprehensive guide will reveal the top-performing and most durable paints for furniture, suitable for both traditional wood and modern laminate pieces. With the right product and a little know-how, you can achieve a flawless, long-lasting finish on any item, turning your vision into a beautiful reality. I promise, the secret lies in the paint choice and proper preparation.
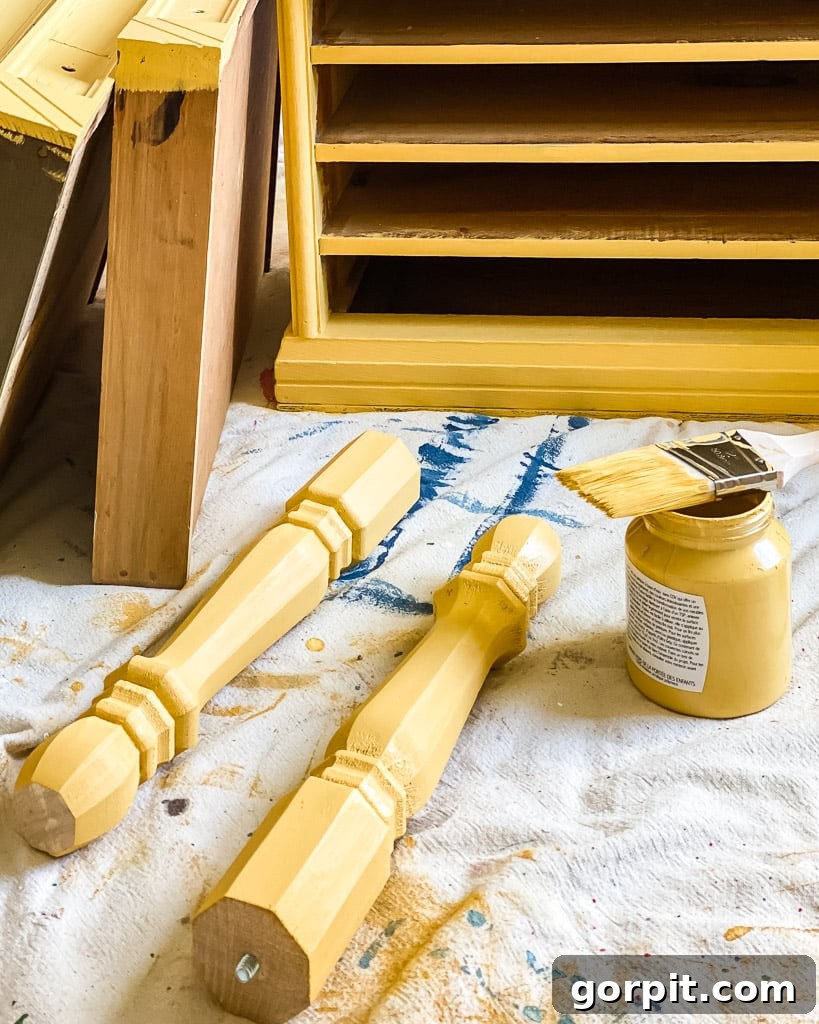
The Best Furniture Paints for Any Project: Wood or Laminate
Surprisingly, my top paint recommendations remain consistent whether you’re tackling a solid wood dresser or a slick laminate bookshelf. The key distinction, however, lies in your preparation method, especially when dealing with laminate surfaces. For laminate furniture, I cannot stress enough the importance of following this specialized tutorial for painting IKEA laminate furniture. It highlights a specific primer that is absolutely essential, even when using the high-adhesion paints discussed in this post.
Below, you’ll find a curated list of the best paints I personally recommend for furniture transformations. Regardless of your choice, remember that some preliminary prep work is always necessary to ensure optimal adhesion and longevity. We’ll delve deeper into the specifics of preparation shortly, but first, let’s explore these fantastic paint options.
This post contains affiliate links for your convenience. Click here for my full disclosure policy.
Chalk Paint: Effortless Charm and Excellent Adhesion
Chalk-based paint has become a favorite among DIYers for its distinctive ultra-matte finish and remarkable adhesion properties. This water-based paint truly stands out because it demands minimal preparation. In most cases, you can skip the tedious steps of sanding or priming your furniture piece, making it an incredibly appealing choice for quick transformations. Its low or zero-VOC (Volatile Organic Compound) formulation also means you can comfortably use it for indoor projects without concerns about strong fumes, making it ideal for nurseries and living spaces alike.
While chalk paint offers a decent level of durability on its own, its lifespan and resistance to wear can be significantly enhanced with a protective wax finish. Applying wax is a straightforward process that adds both resilience and a beautiful, soft sheen, or even an antiqued look if desired. Another significant advantage of chalk paint is its impressive self-leveling capabilities. This means that brush marks are naturally minimized, leading to a smoother, more professional-looking finish even for novice painters.
My go-to chalk-based paint that consistently delivers outstanding results is:
Amy Howard One-Step Paint
The Amy Howard at Home paint collection was meticulously developed by Amy Howard, a seasoned furniture designer and manufacturer with years of experience. Her signature product, the One Step Paint, is a revolutionary chalk-based formula engineered to simplify the furniture and cabinetry transformation process. It truly lives up to its name by allowing you to update pieces in a single “step” – meaning no stripping, sanding, or priming is typically required on most surfaces. Being water-based and free of VOCs and other harsh toxins, it’s a safe and eco-friendly option, even suitable for painting baby furniture.
This paint provides exceptional coverage, making your projects more efficient. A 32oz quart of One Step Paint covers approximately 135-140 square feet, while a 16oz pint handles about 65 square feet. Even a small 4oz sample size can cover around 16 square feet. It’s important to clarify that “One Step” refers to the minimal prep, not necessarily a single coat of paint. In my experience, most colors require at least two coats for full, even coverage. However, its fast-drying nature means that applying multiple coats is rarely an inconvenience, allowing you to move through projects swiftly.
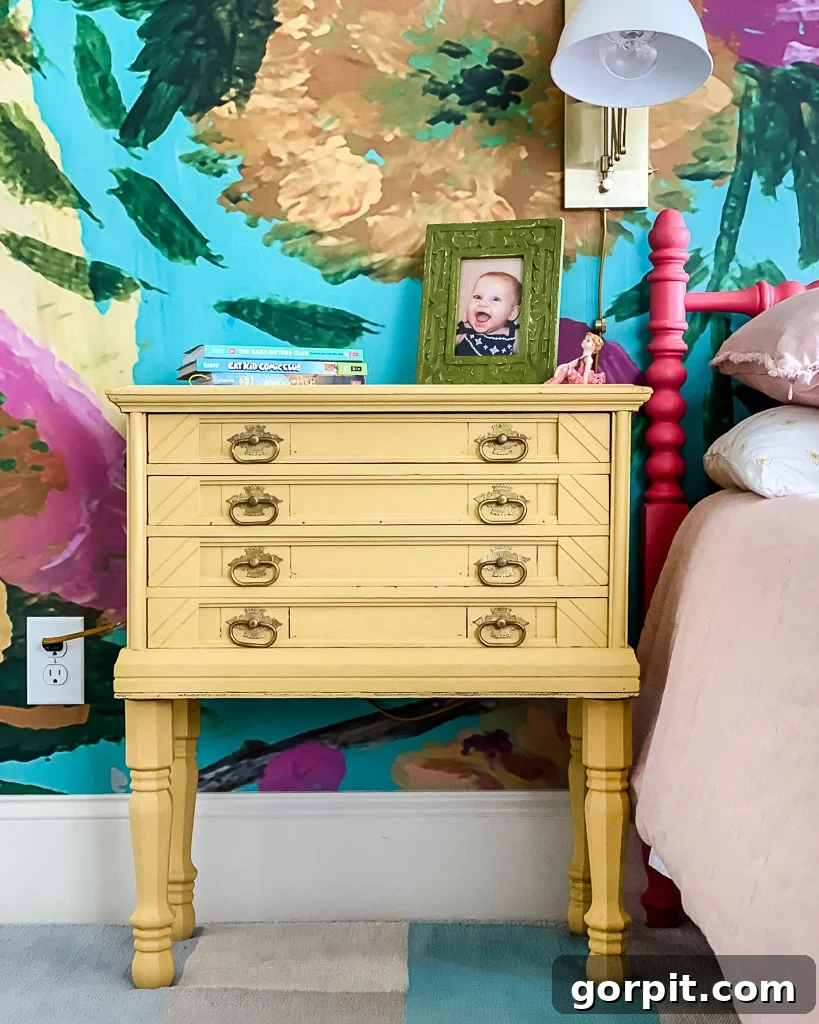
I have utilized One Step Paint for countless furniture pieces over the years, losing count of the transformations. One notable example is the dresser featured in our vibrant colorful guest room (pictured below). I’ve even dedicated an entire post to how to paint a dresser using this fantastic product, detailing the minimal prep required, how to apply the paint, and even techniques for achieving an antique wax finish if that’s the look you desire. Its ease of use and beautiful finish make it a perennial favorite for DIY furniture makeovers.
Mineral Paint: Exceptional Durability with a Built-in Top Coat
Mineral paint represents a fantastic choice for furniture painters seeking both vibrant color and unparalleled durability. This type of paint is crafted using natural earth minerals for its rich color pigments. These minerals are then expertly blended with a robust binder, typically an acrylic resin, and a solvent. The inclusion of acrylic resin is key to mineral paint’s superior adhesion and its ability to create an incredibly hard-wearing finish that stands up to daily use without the need for extensive additional sealing.
The inherent durability and ease of application make mineral paints a professional-grade option that is still very accessible for the everyday DIYer. They offer a smooth, low-sheen finish that often requires no extra top coat, saving both time and effort in your painting projects. Furthermore, many mineral paints are formulated to be non-toxic and low-VOC, ensuring a safer painting experience indoors.
My ultimate favorite mineral paint, which I consistently turn to for its exceptional performance, is:
Fusion Mineral Paint
Fusion Mineral Paint is truly a “professional paint for the everyday DIYer.” I absolutely adore this highly durable paint for its ease of use and stunning results. With an impressive palette of over 50 colors, and endless possibilities for custom color mixing, your creative options are virtually limitless. What sets Fusion Mineral Paint apart is its innovative formulation with a built-in top coat, thanks to its 100% acrylic resin content. While you can opt for an additional topcoat for extreme protection in high-traffic areas, it’s often not necessary, making your projects even simpler.
Beyond its aesthetic appeal and durability, Fusion Mineral Paint is also a responsible choice. It is non-toxic, lead-free, virtually odorless, and contains no ammonia or formaldehyde, ensuring a safe environment for your home and family. Similar to chalk paint, Fusion requires minimal preparation. A thorough cleaning and sometimes a light scuff sanding are all that’s typically needed for excellent adhesion.
I’ve personally used Fusion Mineral Paint to revitalize everything from beloved furniture pieces to entire sets of kitchen cabinets. It is, without a doubt, my personal favorite furniture paint and the one I reach for most often. It’s important to note that I have never been sponsored or paid by Fusion Mineral Paint; my enthusiasm comes purely from being a genuinely satisfied user and a huge fan of their products.
EXCLUSIVE DISCOUNT
While I haven’t been sponsored by Fusion Mineral Paint, they have kindly extended a generous 10% discount to my valued readers. This discount will be automatically applied to your order when you click and shop directlyhere. It’s a fantastic opportunity to try this incredible paint!
Keep in mind that a little Fusion Mineral Paint goes a remarkably long way, so you often need less than you might expect. For instance, we painted the entire wood surface of our kitchen cabinets as part of our budget-friendly kitchen makeover using only four pints! This efficiency makes it not only a high-quality choice but also an economical one.
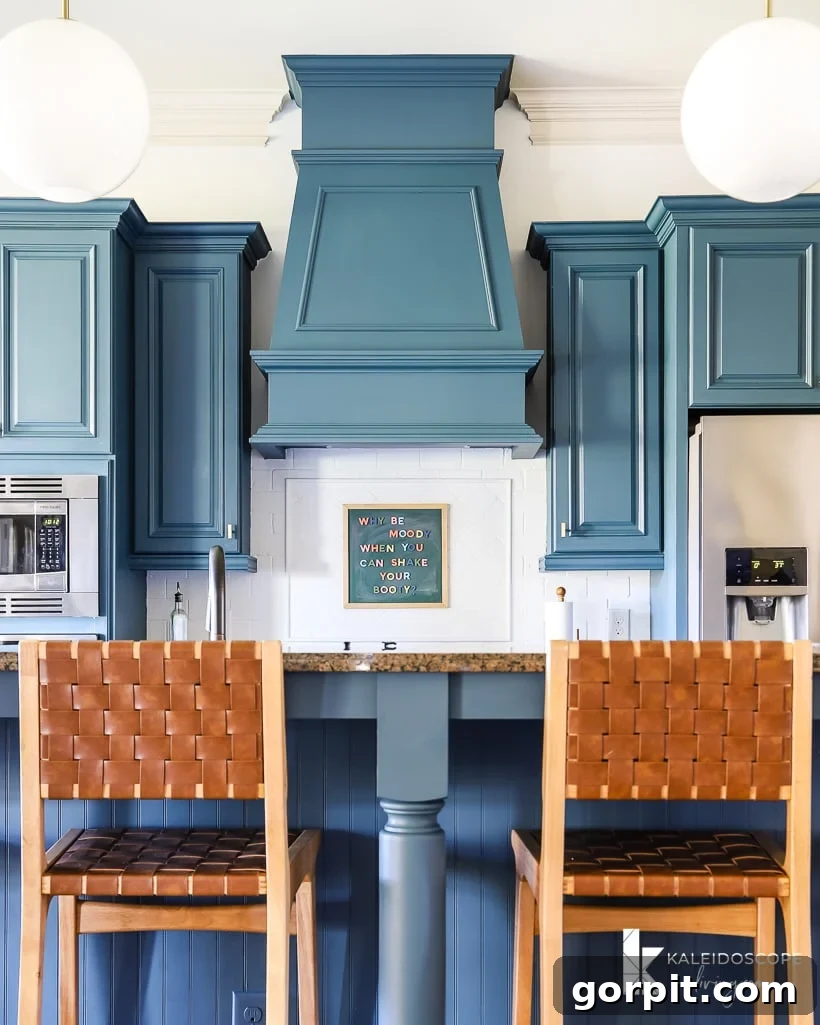
One of Fusion Mineral Paint’s greatest assets is its minimal preparation requirement. Often, all that’s needed is a clean surface and a light hand-sanding. This was exactly the process we followed for Thea’s kitchen cabinets. The light sanding took no more than 30 minutes for all cabinets combined, so don’t let that small step deter you. Her kitchen cabinets underwent an amazing transformation and, years later, are still in perfect condition—no peeling or chips whatsoever! The durability truly speaks for itself. Look at that incredible before and after!
Fusion Mineral Paint truly stands out for its incredible coverage, boasting an impressive 75 square feet per pint. In many cases, a single coat is all you’ll need for complete opacity and a beautiful finish, which is a major reason I often prefer it over other options like One Step Paint when aiming for speed and efficiency.
When I transformed our kitchen cabinets with Fusion Mineral Paint, I was amazed that only four pints were required for the entire project! What’s even better is its inherent durability, which holds up beautifully with or without an additional top coat. For a deep dive into using this fantastic product, be sure to check out my full tutorial on applying Fusion Mineral Paint to kitchen cabinets. This guide also applies perfectly to painting any furniture piece and includes detailed instructions on proper preparation and how to seal and protect both light and dark colors for maximum longevity, should you choose to add an extra layer of protection.
Acrylic Paint: Smooth Application and Reliable Durability
High-quality acrylic paint offers an excellent balance of ease of application, a smooth finish, and robust durability, making it a strong contender for furniture painting projects. Acrylic paints are known for their exceptional self-leveling properties, which help to minimize brush strokes and achieve a remarkably smooth, factory-like finish. They are also significantly more durable than standard latex paints and boast excellent adhesion to various surfaces, often requiring only minimal prep work. This inherent durability means that a separate top coat, while always an option for added protection, is frequently optional rather than essential.
Acrylic paints are water-based, making cleanup simple with just soap and water, and they typically have low odor, contributing to a more pleasant painting experience indoors. Their versatility and resilience make them a superb choice for pieces that will see regular use.
My favorite high-quality acrylic paint that consistently impresses me is:
General Finishes Milk Paint (Acrylic Blend)
General Finishes Milk Paint is a premium, water-based acrylic paint specifically formulated for interior and exterior use, distinguished by its Zero VOC colorants. It’s important to note that despite its name, it’s not a traditional casein-based milk paint but rather a highly advanced acrylic blend, offering superior performance and durability. This paint provides a beautiful low-sheen finish, which I would describe as falling somewhere between an eggshell and a satin finish – a perfect middle ground that isn’t as chalky-flat as traditional chalk paints or some mineral paints. If you’re unfamiliar with paint sheens, my paint sheen guide can help clarify the differences.
Just like my other recommended paints, General Finishes Milk Paint excels at minimizing brush strokes, effortlessly self-leveling to leave a pristine surface. We famously used this paint to transform the kitchen cabinets in our old house without the need for sanding or priming, and we were absolutely stunned by their enduring durability. For those cabinets, we did opt for a top coat to ensure the most robust finish possible, given the high-traffic nature of a kitchen. Even five years after painting, they still looked beautiful when we eventually undertook a full gut renovation of that kitchen.
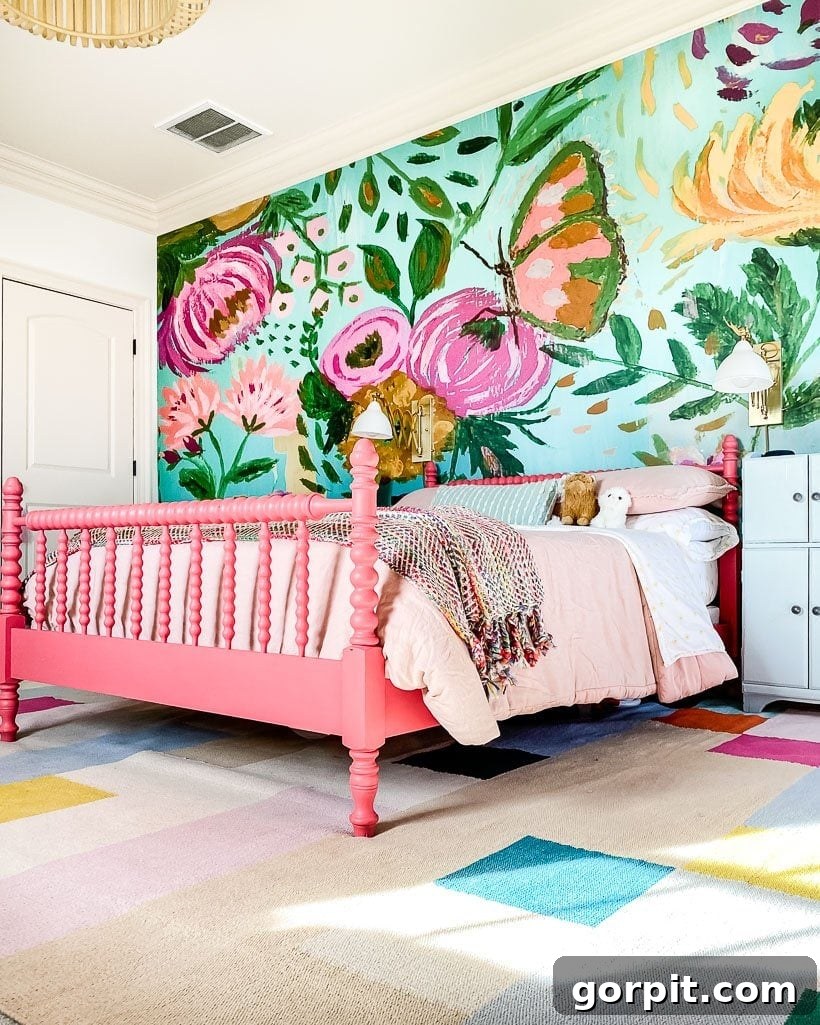
Since then, I’ve utilized General Finishes Milk Paint for numerous furniture projects, including the charming vintage Jenny Lind bed in Attley’s bedroom. It applies like a dream, offering incredible coverage and a beautifully smooth finish. Even without an additional top coat on many of these pieces, the furniture has proven to be exceptionally durable, maintaining its fresh look through everyday use.
Urethane Enamel Paint: The Ultimate in Hard-Wearing Finishes
For projects demanding the highest level of durability and a robust, protective coating, urethane enamel paint is an outstanding choice. These modern water-based enamel paints offer significant advantages over traditional oil-based options, primarily by resisting yellowing over time while still delivering an exceptionally hard and durable finish. This makes them perfectly suited for furniture that will experience heavy use or surfaces prone to wear and tear, ensuring your painted pieces remain pristine for years.
Urethane enamels are engineered to create a tough, resilient surface that can withstand bumps, scratches, and everyday scuffs, performing admirably in high-traffic areas or on items that are frequently handled. Their ability to form a strong, protective layer makes them ideal for cabinets, tabletops, and children’s furniture where longevity is a top priority.
The only brand of urethane enamel paint I have personally used and can enthusiastically recommend is:
Sherwin Williams Emerald Urethane Trim Enamel
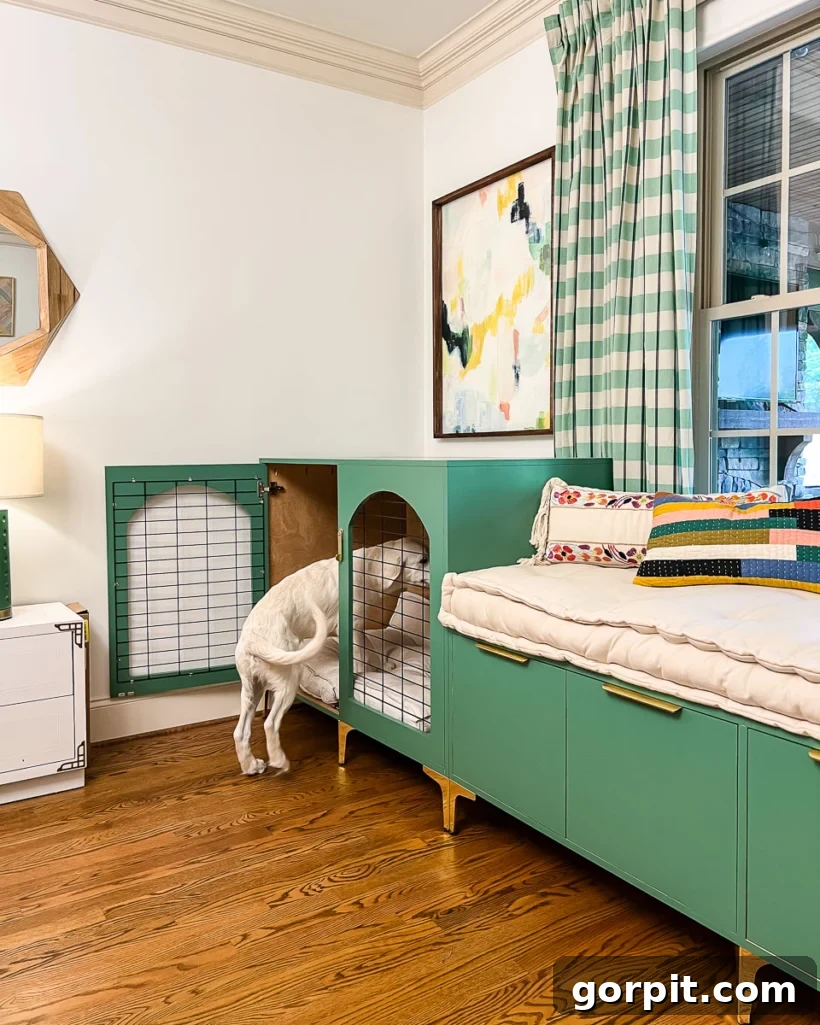
I first discovered the prowess of Sherwin Williams Emerald Urethane Trim Enamel when we embarked on our project to replace our stair balusters and update our stair railing. I was incredibly impressed by its outstanding durability and the flawless finish it provided. This experience led me to use it again for painting the DIY dog crates and a matching bench we built a few months ago. The results were nothing short of spectacular.
This paint boasts excellent self-leveling properties, which contribute to a beautifully smooth and professional finish. While I did perform a light sanding between coats on these projects, the end result was an incredibly silky surface that feels luxurious to the touch. I’ve become a huge fan and am confident I’ll be incorporating it into more furniture painting projects in the future! An added bonus is its availability in gallon sizes, which is incredibly convenient and cost-effective for larger furniture pieces or multiple projects.
Types of Paint to AVOID When Painting Furniture for Lasting Results
While knowing which paints perform best is essential, it’s equally crucial to understand which types of paint are generally unsuitable for furniture projects. Avoiding these common pitfalls will save you time, effort, and frustration, ensuring your hard work translates into a durable and beautiful finish rather than a chipping, peeling disaster.
Latex Paint: Not Designed for Furniture’s Rigors
It can be incredibly tempting to reach for leftover wall paint to tackle a furniture project. The affordability and widespread availability of latex paint also make it seem like a convenient option. However, through years of experience, I can confidently say that using standard latex paint (the kind you use on walls) for furniture is a common mistake that leads to disappointing results. Latex paint lacks the robust adhesion and flexibility required for furniture surfaces.
When applied to furniture, latex paint often struggles to bond effectively, leading to unsightly chipping and/or peeling, especially in areas of high use or impact. Even if you attempt to bolster its performance with a protective top layer, the fundamental lack of strong adhesion means it will likely still underperform compared to paints specifically formulated for furniture. For truly lasting and beautiful furniture transformations, it’s best to steer clear of conventional latex wall paint.
Spray Paint: A Limited Option for Furniture Applications
Spray paint often appears to be the ultimate convenience for painting furniture due to its quick application and seemingly effortless finish. However, its utility for high-quality furniture painting is quite limited. The only scenario where I might recommend spray paint for furniture is when you’re painting plastic outdoor chairs or other items where a specialized spray paint designed to bond with plastic is necessary. In these specific cases, it can provide decent results.
For most other furniture pieces, especially those intended for indoor use or requiring a refined finish, spray paint falls short. It can be challenging to achieve an even, smooth coat without drips or an “orange peel” texture, particularly on larger or more intricate surfaces. Furthermore, managing overspray can be a significant hassle, and for bigger projects, purchasing enough cans of spray paint can quickly become more expensive than using traditional brush-on or roll-on options. For a truly professional and durable furniture paint job, spray paint is generally not your best option.
The Non-Negotiable Step: The Importance of Prep Work
Achieving a durable, professional, and lasting finish when painting furniture boils down to two critical factors: the “Two Ps” – PREP and PRODUCT. We’ve thoroughly discussed my favorite paint products, but now it’s time to shine a light on the equally vital, often overlooked, aspect of preparation. Skipping proper prep work, even with the best paints, is a recipe for disappointment and a finish that won’t stand the test of time.
Always Clean First: The Foundation of Good Adhesion
You might have noticed that many of my favorite paints boast “little to no” prep work as a key advantage, which is precisely why I love them. However, even with these forgiving formulas, there is one absolute, non-negotiable step: you must always, always, always thoroughly clean any piece of furniture before applying paint. This might seem obvious, but it’s a step frequently skipped by DIYers, especially if the furniture piece doesn’t visually appear “dirty.”
What you might not see with the naked eye are accumulated layers of dust, grime, oils from hands, and lingering polishes. If you fail to properly clean your furniture first, all that invisible dirt and residue will not only compromise the smoothness and overall appearance of your paint job but, more critically, it will severely interfere with the paint’s ability to adhere properly. This poor adhesion inevitably leads to chipping, peeling, and a significantly shortened lifespan for your painted piece.
My secret weapon for cleaning furniture before painting is Simple Green, diluted according to the instructions on the bottle. This powerful yet safe cleaner effectively cuts through grease and grime. After scrubbing your piece with Simple Green, it’s crucial to wipe it down again with plain, clean water. This ensures that all residue of the cleaner is removed, leaving a perfectly clean and ready-to-paint surface.
Sometimes Additional Prep is Necessary: Knowing When to Go the Extra Mile
Many of you likely wonder, “Can you paint wood without sanding it first?” As a general rule, my preferred furniture paints are designed to *usually* not require sanding or priming beforehand. However, there are a few specific exceptions where a little extra effort in the prep stage will make a world of difference in the final outcome and durability of your project.
If Your Piece is Real Wood But Has a Very Smooth or Shiny Finish
Even if you’ve confirmed that your furniture is solid wood or wood veneer, an exceptionally smooth or glossy finish can pose adhesion challenges. In such cases, I highly recommend performing a bit more prep work. This involves lightly “scuffing” the surface. You can achieve this either with a liquid deglosser (also known as liquid sandpaper) or by giving it a very light hand-sanding with fine-grit sandpaper. Deglossing or scuff sanding creates microscopic imperfections on the surface, providing the paint with a better “tooth” to grip onto. This crucial step significantly enhances the paint’s adhesion, ensuring that your beautiful finish lasts for many years to come.
If Your Piece is Laminate or Another Synthetic Material (The Primer is Critical!)
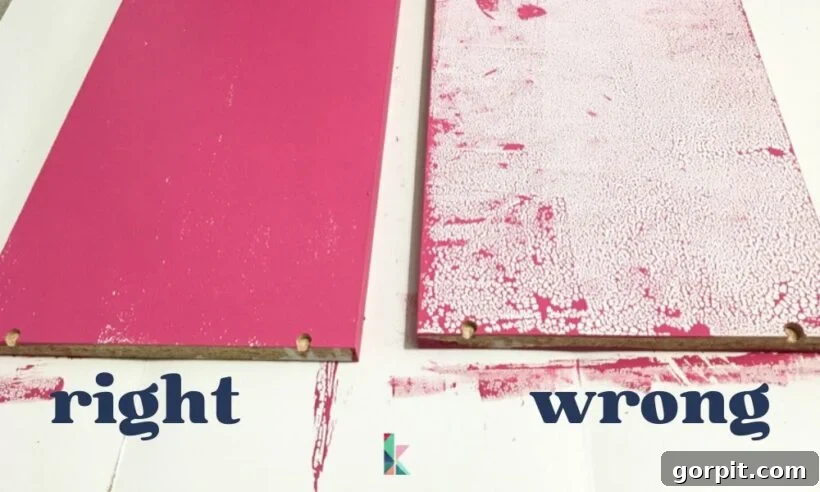
When working with furniture made from plastic, laminate, or other synthetic materials, proper priming is absolutely non-negotiable. Without the correct primer, you’ll find that your paint will likely bead up, separate, or simply refuse to adhere properly to the slick surface. If you’re unsure whether your furniture piece is genuine wood or a synthetic material, a quick test in an inconspicuous area can reveal its true nature. Simply apply a small dab of paint and observe how it reacts.
For laminate or any other synthetic material, you *must* use a BIN (shellac-based) primer. This is a CRUCIAL step for achieving a successful and durable result. Don’t worry about making it look perfect; the primer’s job is simply to create a bonding surface. Just purchase your BIN primer, grab any basic paintbrush, and apply a thin, even coat to the entire piece. Skipping this step will almost guarantee that your paint will not stick properly, leading to frustrating failures and wasted effort.
Frequently Asked Questions About Painting Furniture
Over my many years of furniture painting, I’ve received countless questions about techniques, tools, and general advice. To help you on your DIY journey, I’ve compiled answers to some of the most common inquiries about painting supplies and best practices.
In my personal experience, using a paint sprayer consistently delivers the smoothest, most professional-looking finish. It also drastically speeds up the entire painting process. However, there are a couple of downsides to consider: 1) you need an appropriate space for spraying, ideally a well-ventilated area or a dedicated spray tent; and 2) the setup and thorough cleaning of the spray gun after use can consume a fair amount of time, offsetting some of the initial time savings. For many everyday projects, especially smaller pieces or when I want to avoid the extra setup and cleanup, I often opt for a combination of a roller and brush.
While I’m not overly particular about specific paintbrush brands, I do have a strong preference for angled brushes. Angled brushes offer superior control for cutting in and handling detailed work, which is essential for furniture. I typically reserve brushes for intricate areas, corners, and edges. For larger, flat surfaces, I swear by 4 or 6-inch smooth paint rollers like these. These smaller rollers are perfect for furniture, providing an even application and minimizing brush strokes for a smoother overall finish.
Honestly, no, I typically don’t sand between coats. I know, I probably should! Most reputable paint brands, especially those I recommend, suggest a light sanding with fine-grit sandpaper between coats to achieve the absolute smoothest and most durable finish. This step helps to knock down any raised grain or tiny imperfections. However, since I’m almost always painting furniture for my own household and value efficiency, I tend to skip this extra step. If I were refinishing furniture to sell or for a client, I would definitely incorporate this step to achieve a truly flawless, professional-grade result. For personal projects, I find the results are still excellent without it.
Oil-based paints are renowned for their exceptional durability and hard-wearing finish, often outperforming water-based latex paints in terms of resilience. In theory, their robustness would make them an excellent candidate for painting furniture. However, I personally choose to avoid them for a few key reasons. The strong fumes emitted by oil-based paints are often quite potent and require extensive ventilation, making them less ideal for indoor DIY projects. Additionally, the cleanup process for oil-based paints is significantly more involved, requiring mineral spirits or paint thinner rather than simple soap and water. For these practical reasons, despite their durability, I gravitate towards the user-friendly nature of water-based alternatives.
For serious DIYers, the cordless paint sprayer we’ve owned for a while is an absolute game-changer, and we love it. We used it to paint all the upstairs doors when installing our DIY board and batten in the hallway, and it saved us an incredible amount of time. Be aware, though, it’s a bit of an investment. If you’re looking for a more budget-friendly entry point, we previously owned this corded spray gun for many years and were quite satisfied with its performance. The main drawback is the cord, which can surprisingly get in the way more than you’d expect when maneuvering around a piece of furniture. That said, it’s a fantastic starter spray gun for a very reasonable price.
Technically, yes, you can apply paint directly to bare, raw wood. However, I wouldn’t recommend it as a standard practice for furniture projects. Why? For starters, raw wood is highly porous and tends to soak up paint very quickly. This means you’ll likely need significantly more coats of your chosen paint to achieve full coverage and an even finish, which can become quite costly since paint is typically more expensive than primer. Priming raw wood first is a much more cost-efficient approach. Primer effectively seals the wood, creating a uniform, non-porous surface that allows your paint to adhere better, cover more efficiently, and result in a much smoother, more even finish with fewer coats. It’s an extra step that pays dividends in both quality and economy.
I genuinely hope this comprehensive guide to the best furniture paints has empowered you to confidently choose the perfect option for your next DIY furniture painting project! Armed with this knowledge, you’re now ready to transform any piece into a cherished part of your home. Happy painting!
More Paint Posts
SEE ALL PAINT POSTS
-
9 Life-Changing Painting Hacks Everyone Should Know
-
How Durable are DIY Painted Kitchen Cabinets?
-
How to Paint Kitchen Cabinets (From a DIYer Who Has Done it 3 Times)
-
How Have Our Painted Countertops Held Up?
-
How to Paint IKEA Furniture and Mistakes to Avoid
-
How Much Paint Do I Need for My Room?
Curious about my personal approach to transforming rooms and spaces within our home? Explore the strategies and tips outlined in Designer in a Binder®.
For exclusive content, behind-the-scenes sneak peeks, and the latest DIY tips delivered straight to your inbox, be sure to subscribe before you leave!