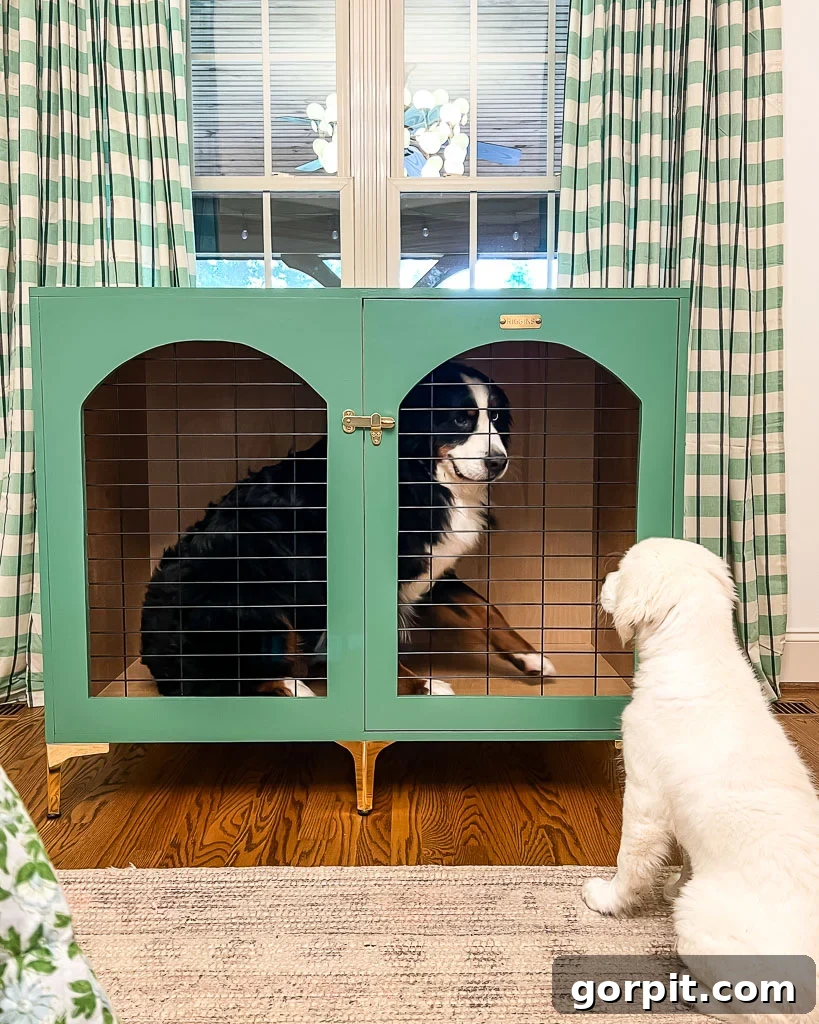
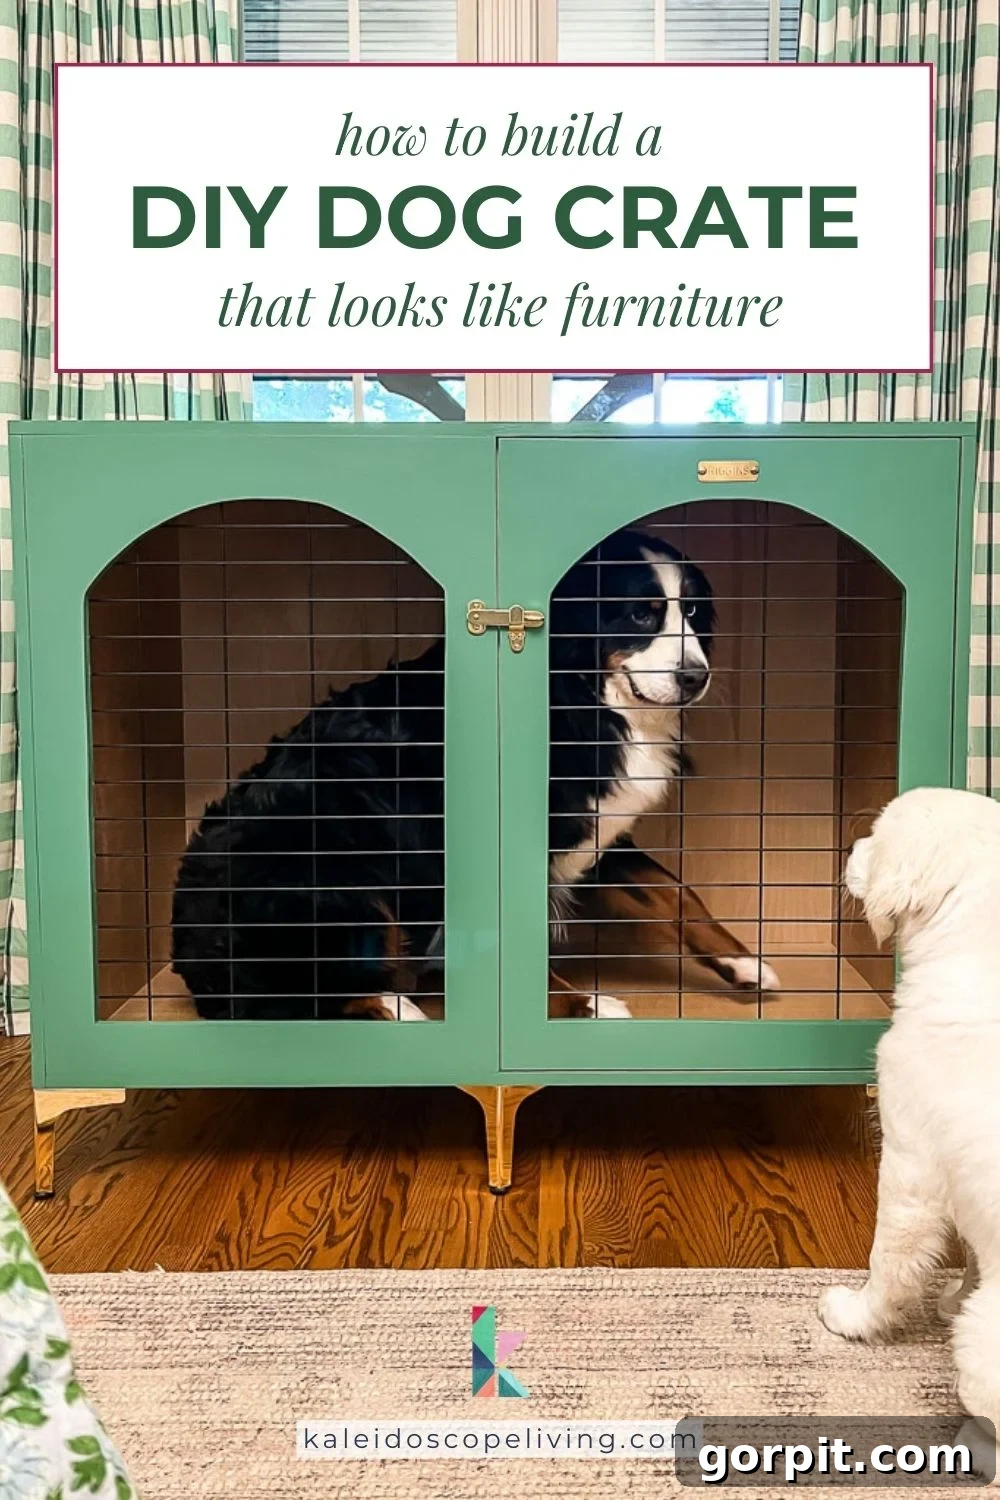
Let’s face it… standard metal dog crates are undeniably functional, but they often clash with the carefully curated aesthetic of our homes. For years, I tolerated unsightly crates in our primary bedroom, sacrificing design for practicality. With two dogs—Riggins, our magnificent Bernese Mountain Dog, and Chief, our new Golden Retriever puppy—the presence of two large, utilitarian crates became a significant eyesore, detracting from our vibrant decor. That’s why we embarked on a rewarding DIY journey to build custom wooden dog crates that seamlessly blend into our bedroom as beautiful pieces of furniture. If you’re tired of functional yet visually unappealing dog crates, this step-by-step tutorial will guide you through creating a stylish and comfortable haven for your beloved canine companion.
Thank you to DAP Products for sponsoring this post. This post contains affiliate links for your convenience. Click here for my full disclosure policy.
As dedicated dog lovers, we adore our furry family members, but the industrial look of traditional metal dog crates often presents a challenge in home decor. Our bedroom, a space designed for comfort and tranquility with a colorful gallery wall and cozy furnishings, was visually disrupted by these essential pet accessories. We needed a solution that offered both the necessary containment for our dogs and enhanced our interior design. This project was born out of that necessity, transforming basic crates into elegant furniture pieces.
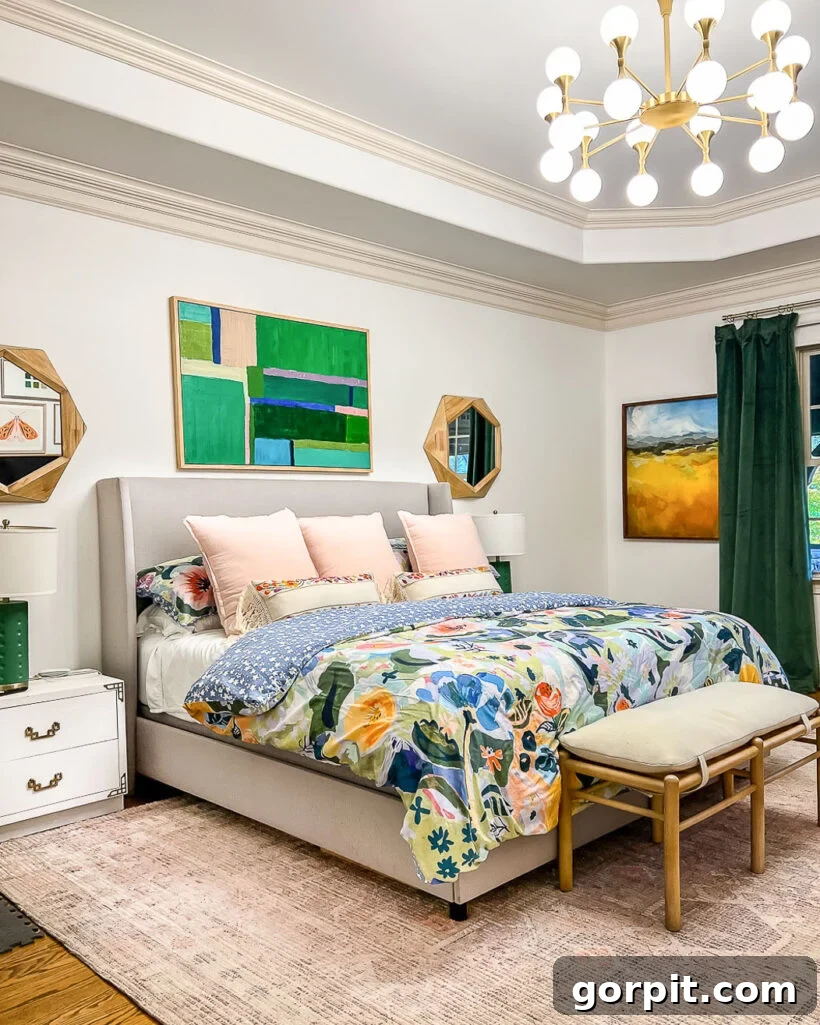
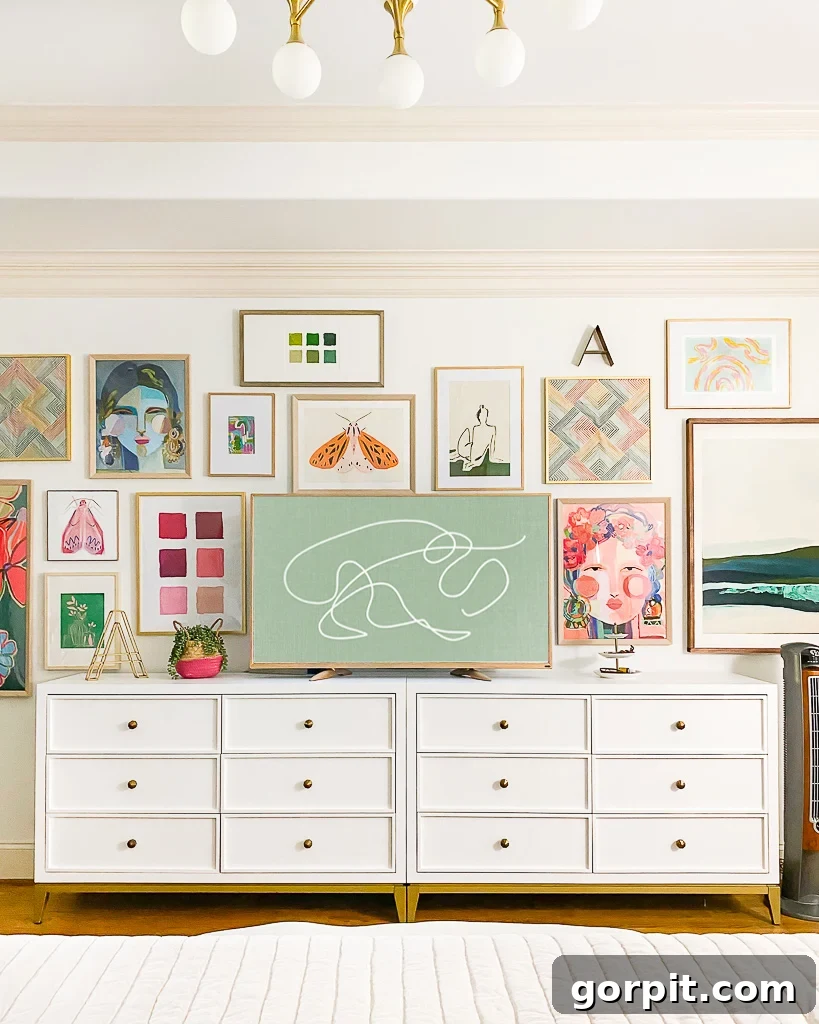
Below, you can see the “before” picture—our metal dog crates that clearly did not align with the desired ambiance of our bedroom. Prepare to be inspired as we transform these practical enclosures into stylish statement pieces!
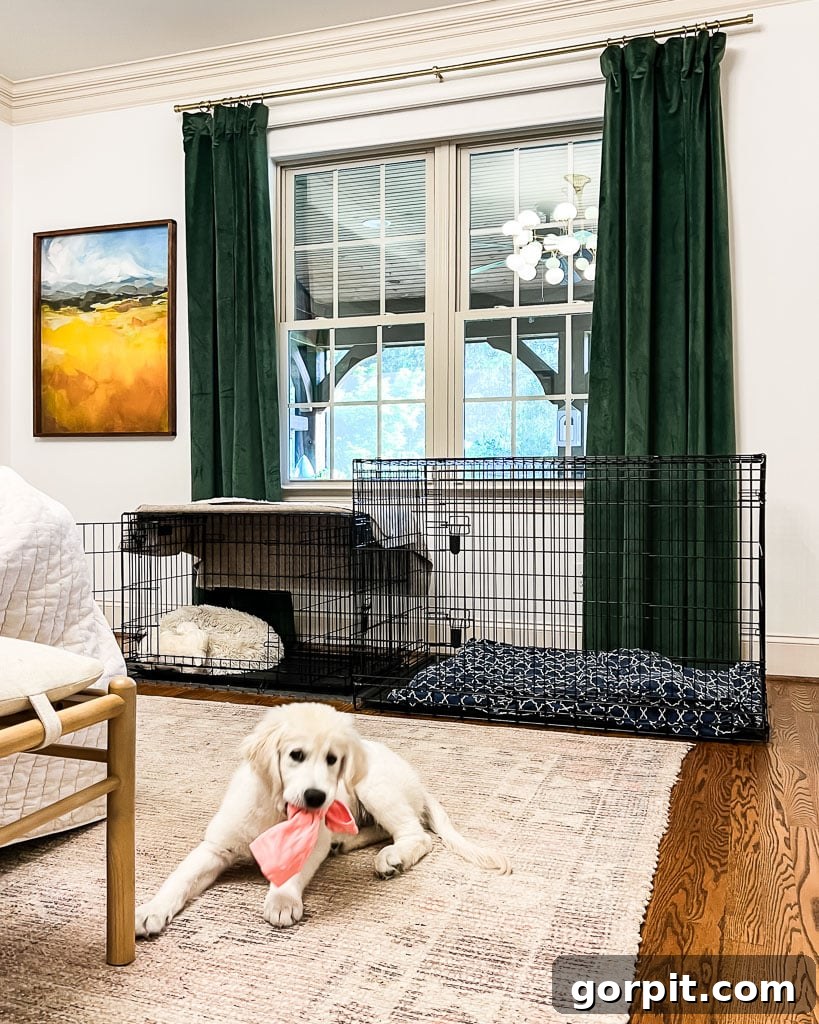
Why Choose a DIY Furniture Dog Crate?
Beyond simply hiding an unattractive metal cage, building a custom DIY wooden dog crate offers a multitude of benefits:
- Seamless Integration with Home Decor: Unlike standard crates, a furniture-style dog crate can be designed to match your existing decor, whether it’s modern, farmhouse, or eclectic. This means your dog’s space becomes an intentional part of your interior design, rather than an afterthought.
- Customized Comfort & Fit: You can tailor the dimensions precisely to your dog’s size, ensuring they have ample space to stand, turn around, and lie down comfortably. This bespoke approach also allows you to fit the crate perfectly into a specific nook or alongside other furniture, optimizing your living space.
- Enhanced Durability & Quality: By selecting high-quality plywood and robust construction methods, your DIY crate can be significantly more durable than many store-bought options, providing a long-lasting and safe enclosure for your pet.
- A Cozy Den for Your Pet: A well-built wooden crate offers a sense of security and a private den-like space, which many dogs instinctively crave. This can aid in crate training and provide a safe retreat for your dog.
- Cost-Effective Elegance: While high-end furniture dog crates can be very expensive, building your own often proves to be a more budget-friendly option, allowing you to achieve a luxurious look without the hefty price tag.
- The Satisfaction of DIY: There’s immense pride in creating something beautiful and functional with your own hands. This project is not just about building a crate; it’s about crafting a personalized piece of furniture for a cherished family member.
Project Difficulty & Pre-Requisites
This comprehensive tutorial is quite detailed, reflecting the numerous steps involved in building a furniture-grade dog crate. While the process isn’t overly complicated for those with some woodworking experience, it’s not ideal for absolute beginners. We highly recommend having at least one or two simpler furniture-building projects under your belt to familiarize yourself with tools and techniques like pocket holes and precise cutting before tackling this project. Patience and attention to detail are your best allies here.
To give you a better understanding of the project’s scope and how all the elements come together, we recommend watching a quick overview video before diving into the written instructions.
Tools and Equipment Needed for Your DIY Dog Crate
Having the right tools is crucial for a successful and enjoyable woodworking project. Here’s what you’ll need:
- Circular Saw (our trusted model) – Essential for precise, straight cuts on large plywood sheets.
- Circular Saw Guides – Highly recommended for accuracy, especially if you don’t have a table saw:
- Kreg Rip Cut Guide – For making repetitive rip cuts quickly and accurately.
- Kreg Accu-Cut Guide – For perfectly straight cross-cuts across plywood.
- Kreg Pocket Hole Jig – Key for strong, concealed joints that give your crate a professional, seamless finish.
- Jig Saw – Necessary for cutting curves and intricate shapes, such as the decorative arches on the front panels.
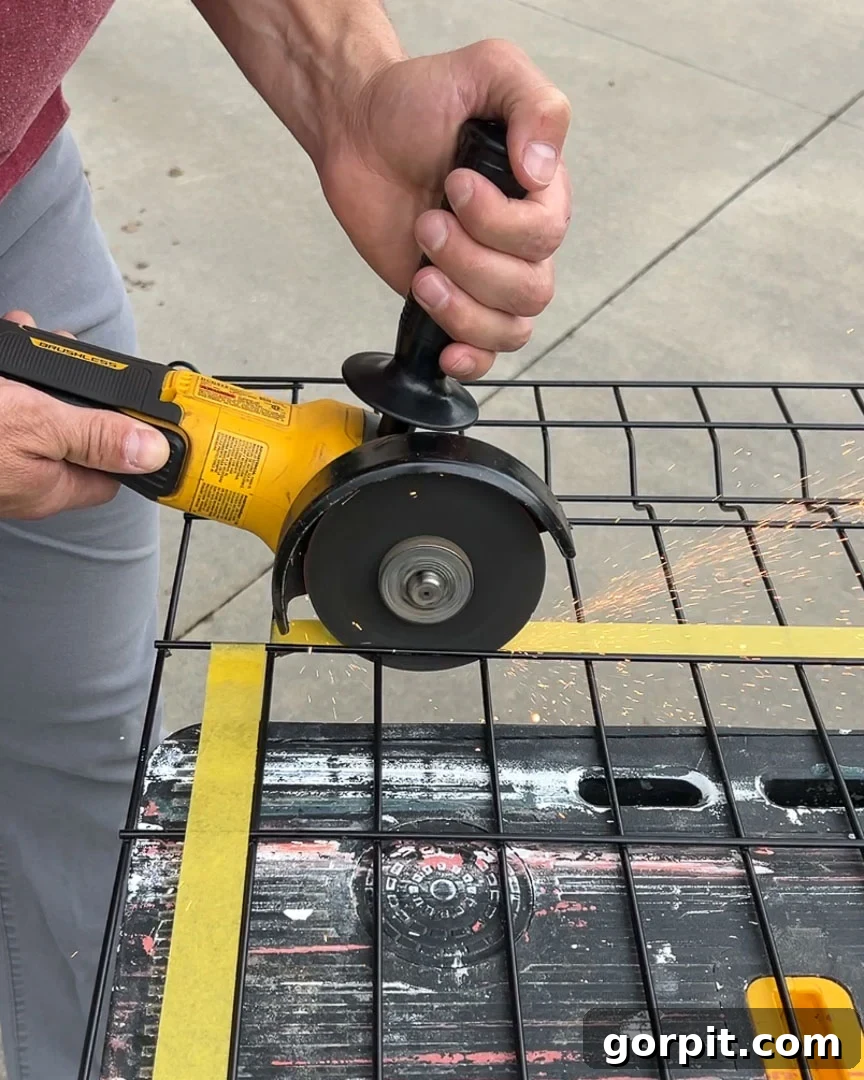
- Metal grinder or hack saw – For cleanly cutting the steel fence panels to size.
- Iron – Used for applying iron-on edge banding.
- Drill – For pre-drilling holes and driving screws.
- Measuring Tape – For accurate measurements throughout the project.
- Speed Square – For marking and checking 90-degree angles.
- Safety glasses and ear protection – Always prioritize safety when working with power tools.
- Sandpaper – Various grits (e.g., 80, 120, 220) for smoothing wood and preparing surfaces for finishing.
Materials Needed for One DIY Dog Crate
The quantity of materials will vary based on your desired crate size. Our crates are quite large, measuring 34″ tall (excluding legs) x 48″ long x 28″ deep, designed for our Bernese Mountain Dog, Riggins. We opted to make our Golden Retriever puppy’s crate the same size for a symmetrical look in our bedroom. Adjust your material list accordingly.
- ¾ inch x 4 ft x 8 ft sheets of plywood (we used high-quality birch plywood from Home Depot for its smooth finish and durability)
- 6” furniture legs (we used 6 legs per crate due to its length for added stability; 4 legs are sufficient for smaller crates)
- (1) brass cabinet latch – For securing the door elegantly.
- Hand-punched brass name plate (optional, but adds a lovely personalized touch)
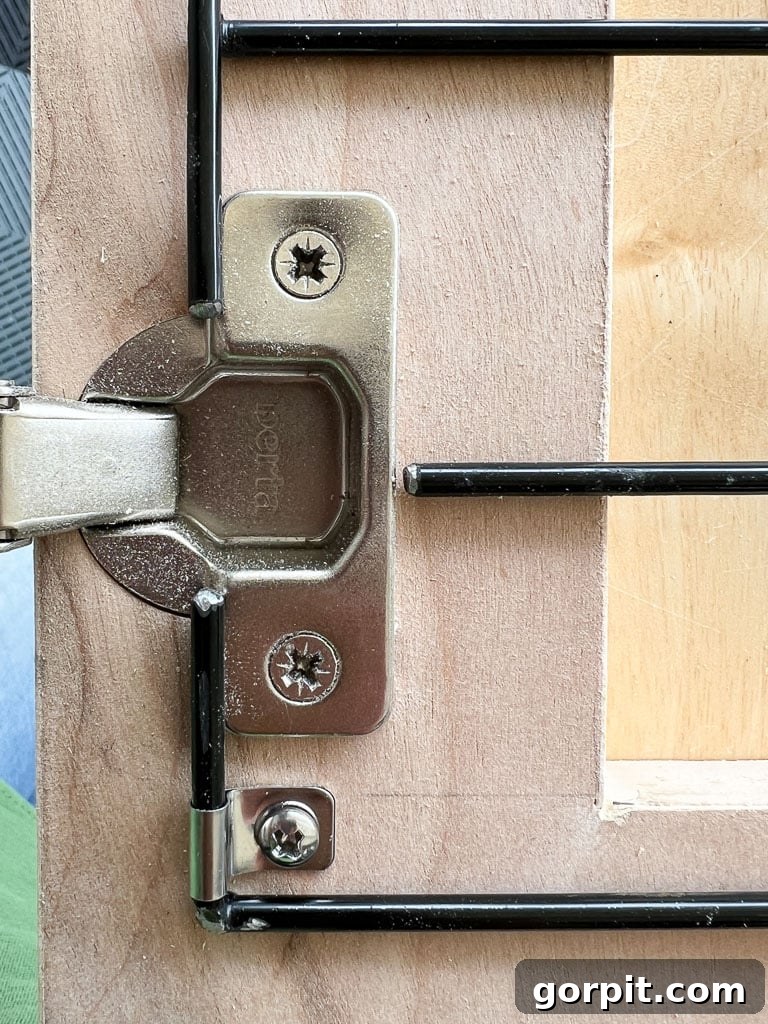
- (2) inset concealed hinges – For a clean, invisible door hinge mechanism.
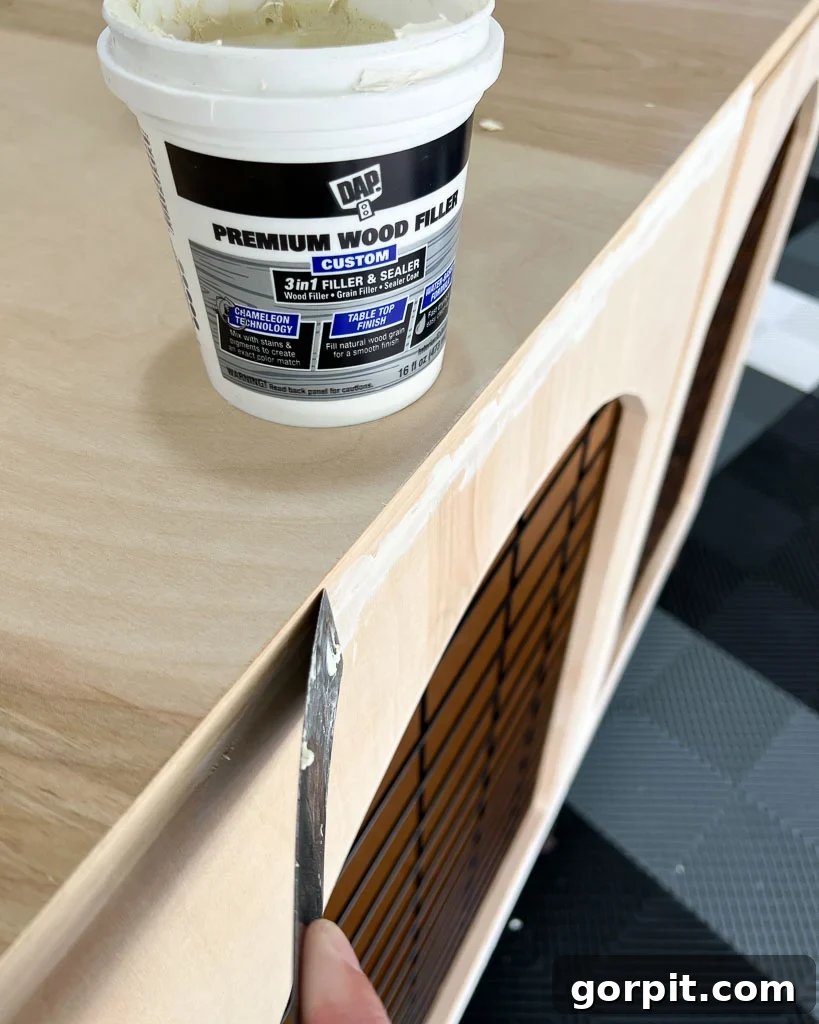
- DAP Premium Wood Filler – For repairing imperfections on surfaces to be painted.
- DAP Plastic Wood All Purpose Wood Filler – Excellent for interior imperfections, as its natural color blends well with raw wood.
- 3/4 inch edge banding to match your plywood – To give all exposed plywood edges a finished, professional look.
- Edge banding trimmer or utility knife – For neatly trimming excess edge banding.
- Sandpaper – Various grits for a smooth finish.
- 1.25″ softwood Kreg screws – Specifically designed for pocket hole joinery in ¾” thick material.
- Wire clamps – For securing the steel fence panels.
- Steel fence panel(s) – For the ventilated sections of the door and stationary panel, providing security and airflow.
- Clear Polycrylic (optional) – To protect and finish the inside of your dog crate, providing a durable and easily cleanable surface.
- Stain or paint to finish the outside (we chose Jadite by Sherwin-Williams for a fresh, vibrant look).
Steps to Build a Wooden DIY Dog Crate
Time needed: 8 hours
While we tackled two crates and a connecting bench over several days, you can expect to complete a single custom dog crate, including building and finishing, in approximately 8 hours. Plan your time accordingly and enjoy the process!
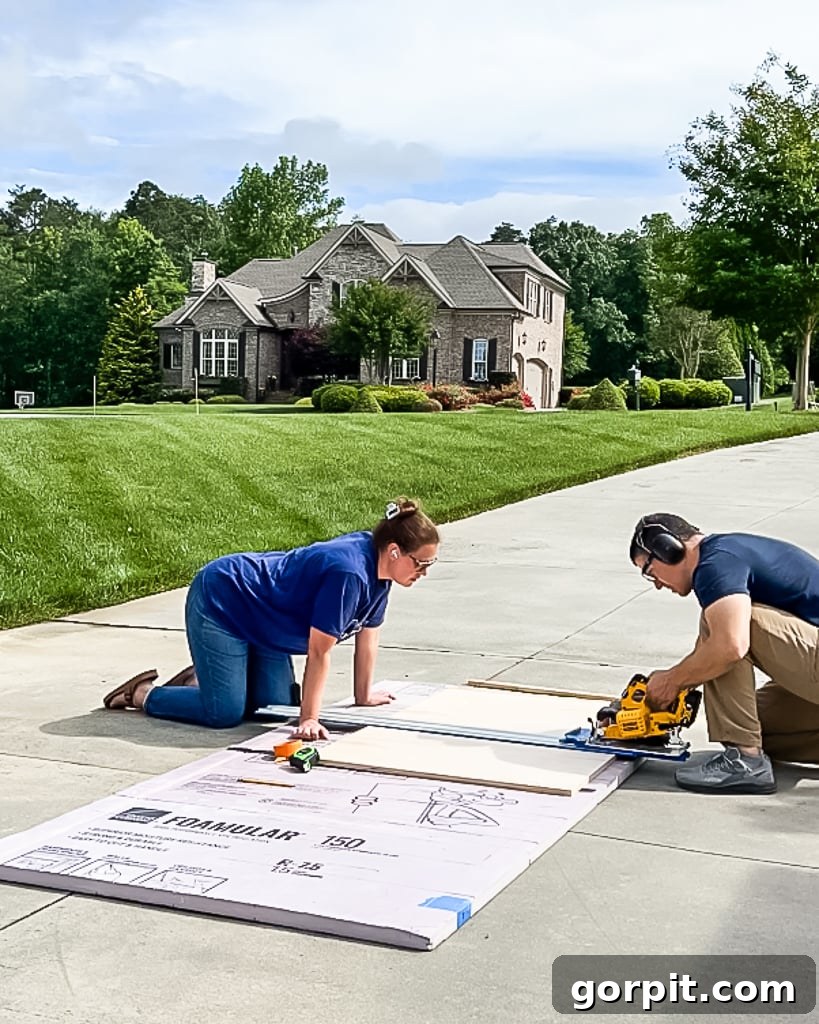
- Cut the Top and Side Panels for Your Crate.
Begin by accurately measuring and cutting the top and two side panels from your ¾-inch plywood sheets. Precision here is key for a professional-looking finished product. We utilized a combination of our Kreg Rip Cut and Kreg Accu-Cut cutting guides with our circular saw to ensure perfectly straight and precise cuts. Remember, your panel dimensions will be determined by the specific size you’ve chosen for your dog crate.

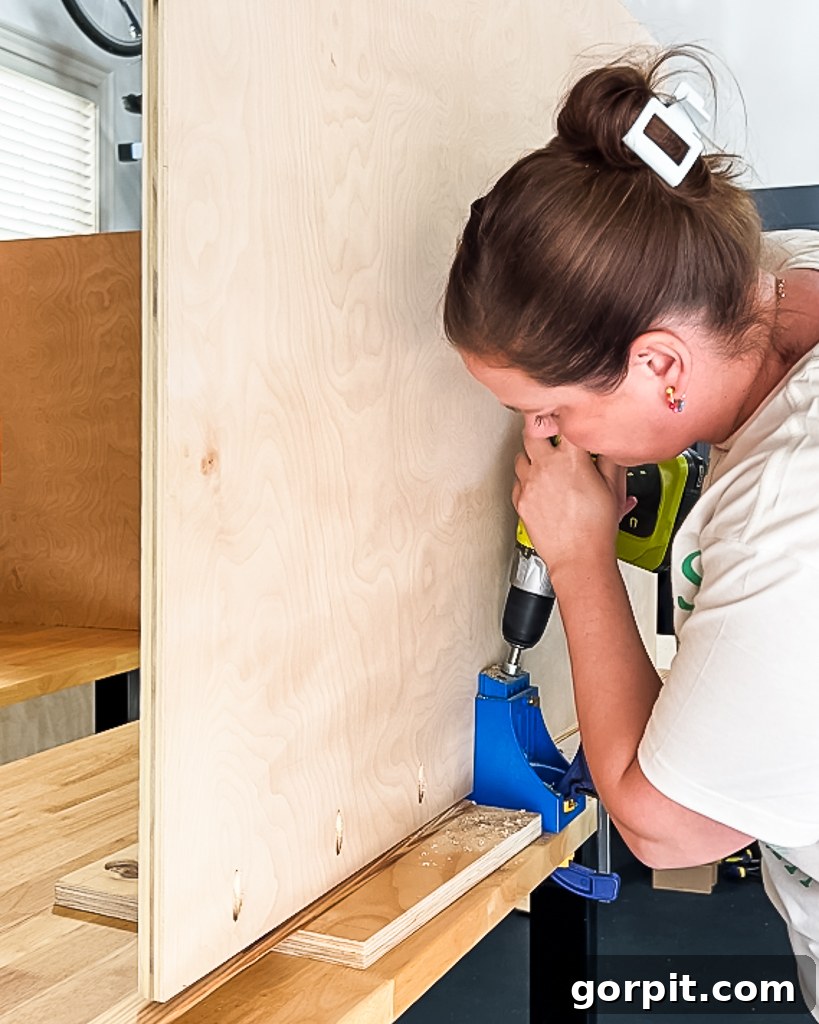
- Drill Pocket Holes for Assembly.
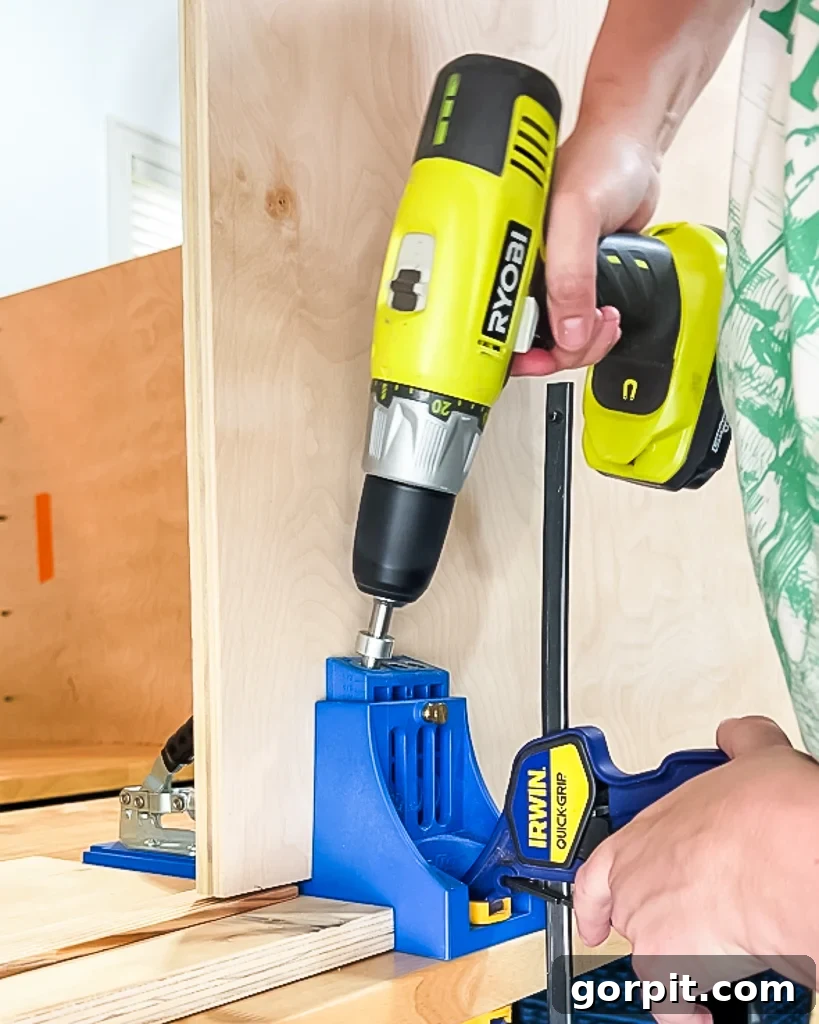
Next, prepare your side panels for assembly using your Kreg Pocket Hole Jig. Set the jig to ¾-inch, which matches the thickness of your plywood. Drill pocket holes along ONE short edge of each of the two side panels. These strategically placed holes will allow you to create strong, concealed joints. The top panel, which will sit flush on top of the side panels, does not require any pocket holes at this stage.
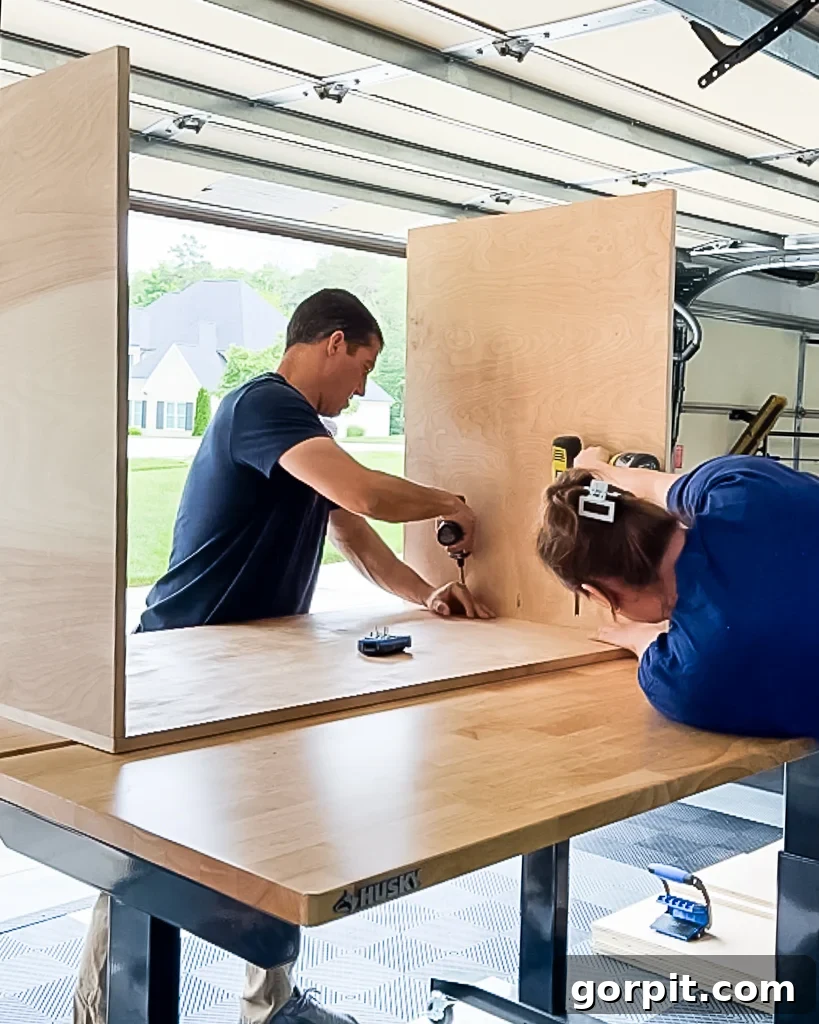
- Temporarily Assemble the Side Panels to the Top Panel.
Using the Kreg screws, temporarily attach the two side panels to the top panel. This initial assembly is crucial for taking accurate measurements for your bottom and back panels. It’s important NOT to use wood glue yet, as you will need to disassemble these pieces again shortly. This temporary fit allows you to verify your overall dimensions and ensure everything aligns correctly before making permanent cuts for the interior pieces.
- Measure for the Bottom and Back Panels.
With the top and sides temporarily assembled, take precise measurements for your bottom and back panels. The bottom panel will fit between the two side panels, so its length will be shorter than the top panel. The back panel, on the other hand, should be measured to fit inside all other surrounding panels (top, bottom, and sides). Accuracy at this stage prevents gaps and ensures a snug fit. Once your measurements are confirmed, carefully disassemble the top and side pieces.
- Cut the Bottom and Back Panels to Size.
Using the measurements obtained in the previous step, cut your plywood for the bottom and back panels. Just like with the top and side panels, we highly recommend using a circular saw with Kreg Rip Cut and Kreg Accu-Cut guides to achieve perfectly square and smooth cuts. This ensures all pieces will fit together seamlessly during final assembly.
- Drill Pocket Holes in Bottom and Back Panels.
Now, using your Kreg Pocket Hole Jig (still set to ¾”), drill pocket holes into specific edges of these new panels: drill holes into BOTH short edges of the bottom panel, and into ALL four edges of the back panel. These holes are essential for firmly securing these internal panels within the crate’s frame, creating a robust and stable structure.
- Apply Edge Banding to Exposed Edges.
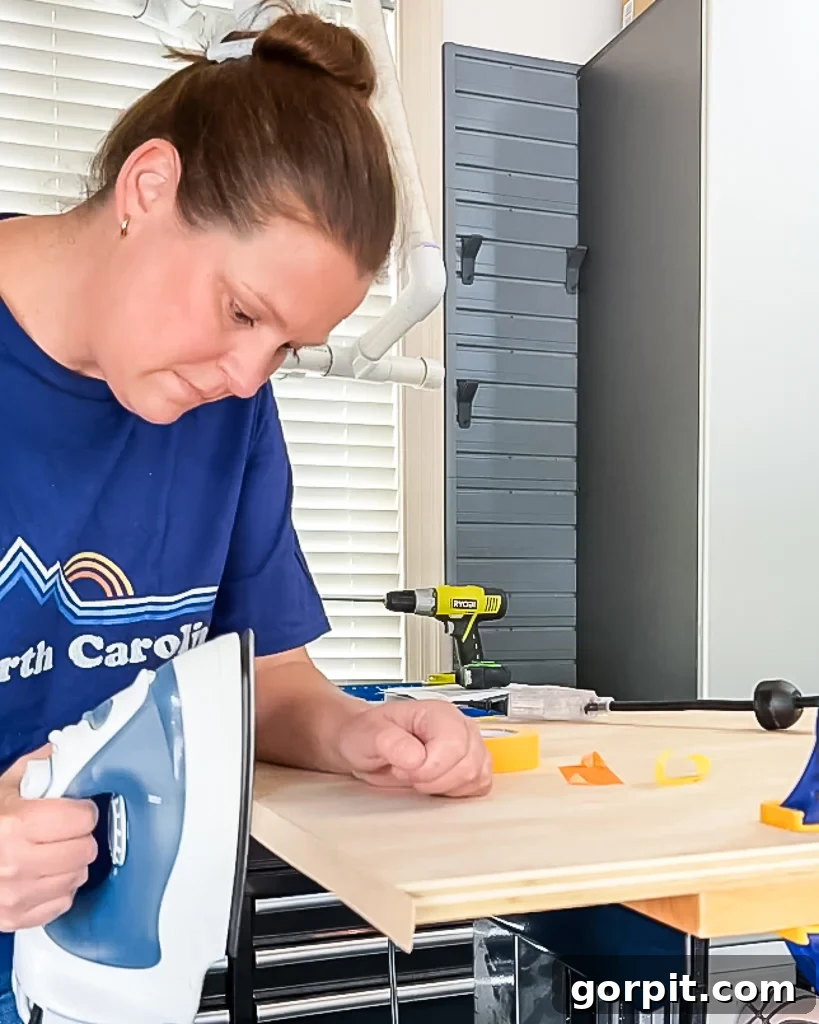
To give your plywood crate a polished, furniture-like appearance, apply iron-on edge banding to all edges of the plywood panels that will be visible or exposed once the crate is fully assembled. This covers the raw, unfinished plywood edges, making them look like solid wood. Simply use a household iron to activate the adhesive on the banding, then trim any excess with an edge banding trimmer or a sharp utility knife for a clean finish.
- Fill Imperfections with Wood Filler and Sand Smooth.
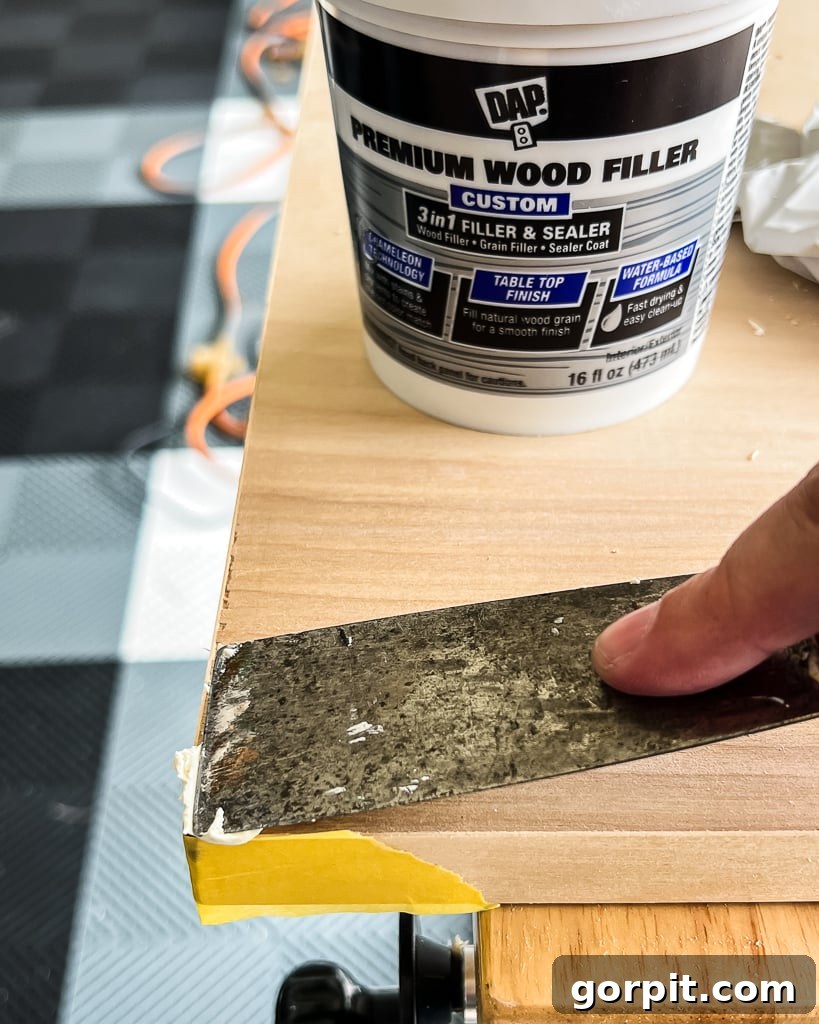
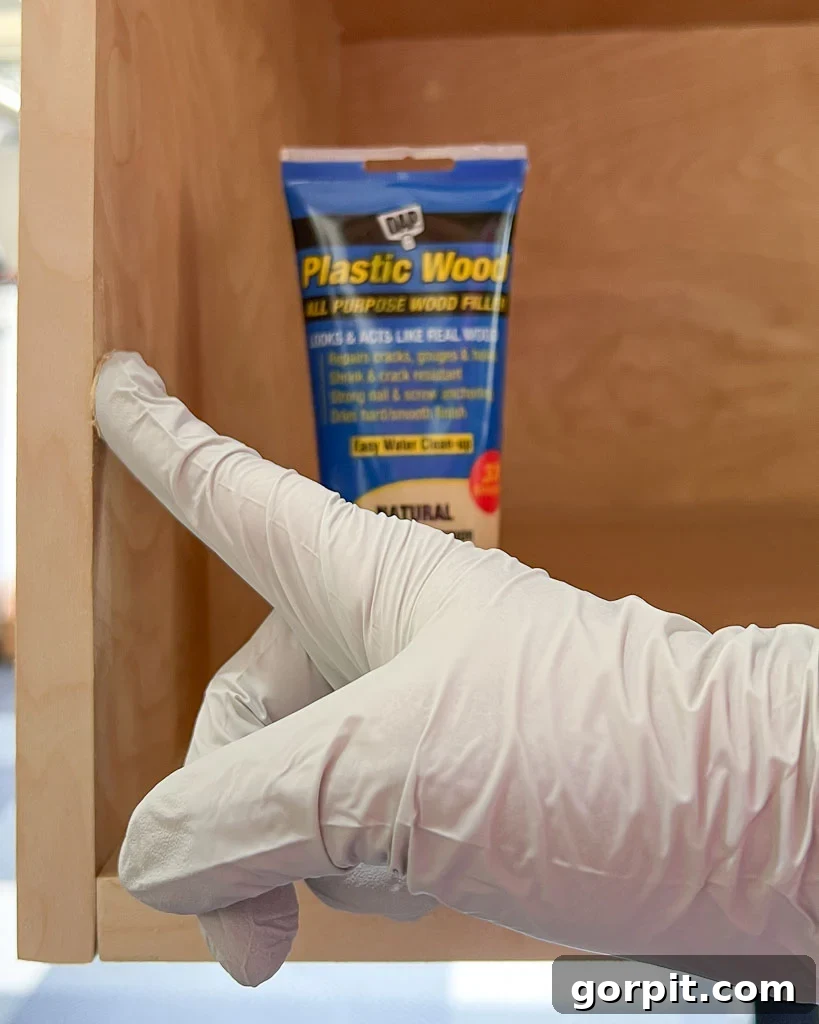
Despite careful cutting, plywood can sometimes have small voids or tear-out. Use DAP Premium Wood Filler to fill any imperfections on the outer surfaces of your crate that will be painted. This filler is incredibly smooth and easy to work with, ensuring a flawless base for your paint. Once dry, sand the filled areas smooth. For the interior of the crate, which we opted to clear coat with Clear Polycrylic rather than paint, we used DAP Plastic Wood All Purpose Wood Filler. Its natural wood color blends well with the birch plywood, making any repairs less noticeable under a clear finish. Pro tip: If you plan to stain your wood, you can mix stain into the wood filler before application for a perfect color match!
- Permanently Assemble the Crate Frame.
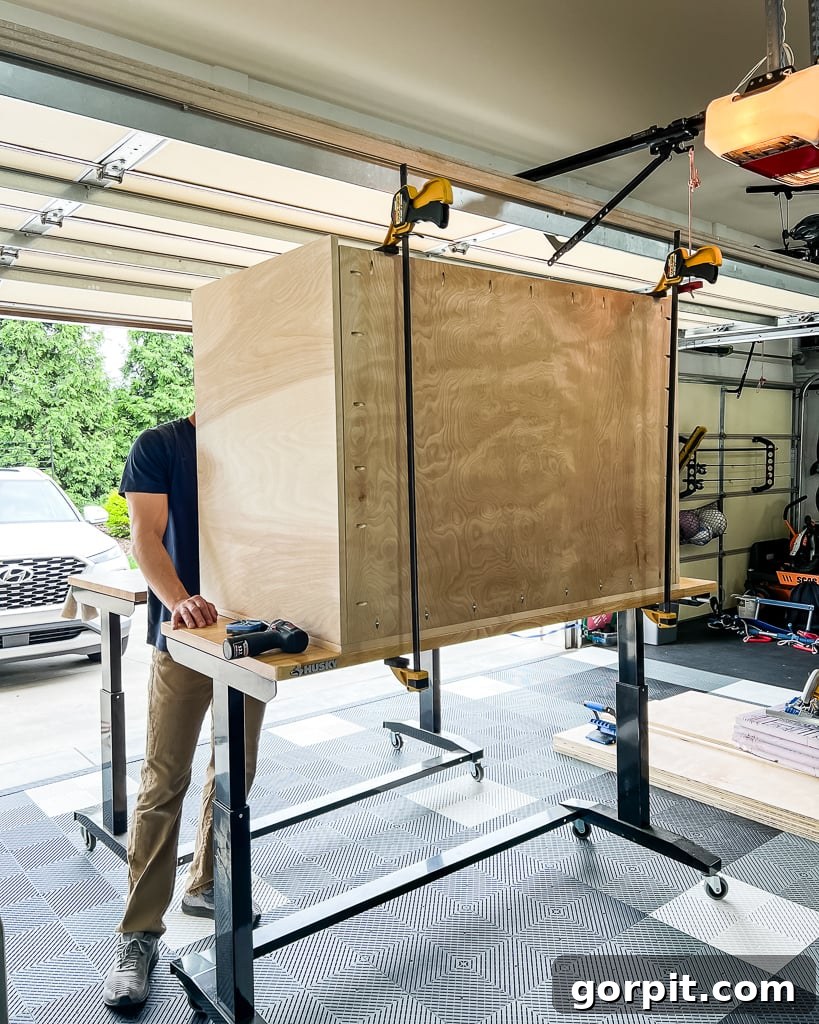
With all panels cut, pocket holes drilled, and edges banded, it’s time for permanent assembly. Apply wood glue to all mating surfaces before driving your Kreg screws. Use clamps to hold panels firmly in place while you work, ensuring tight and square joints. We installed the back panel with its pocket holes facing outward, as our crates would be pushed against a wall, making these holes invisible. This method results in a very sturdy and clean-looking frame for your furniture-style dog crate.
- Prepare the Front Panel and Door.
Once the main crate frame is fully assembled, measure the exact dimensions of the front opening. Cut a single plywood panel to precisely fit inside this opening, without any overhang. This piece will serve as both the stationary front panel and the door. Carefully cut this panel in half widthwise to create two distinct pieces: one for the fixed front section and one for the hinged door. This meticulous step ensures a snug and professional fit for the crate’s entry point.
- Trim the Door Panel for Smooth Operation.
For the door to open and close smoothly after edge banding is applied, it needs a slight clearance. Trim ¼ inch off both the height and the width of the door panel. This small but crucial adjustment creates enough space to accommodate the edge banding on all four sides of the door, preventing it from binding against the crate frame once installed. This attention to detail ensures your DIY dog crate functions as beautifully as it looks.
- Add Pocket Holes to the Stationary Panel.
Using your Kreg Pocket Hole Jig, drill pocket holes into three sides of the stationary front panel. The side that will meet the door in the center of the crate should remain free of pocket holes, as it will be a visible edge. These pocket holes will be used to securely attach the stationary panel to the crate’s main frame, creating a strong and clean attachment point.
- Design and Create the Decorative Arches.
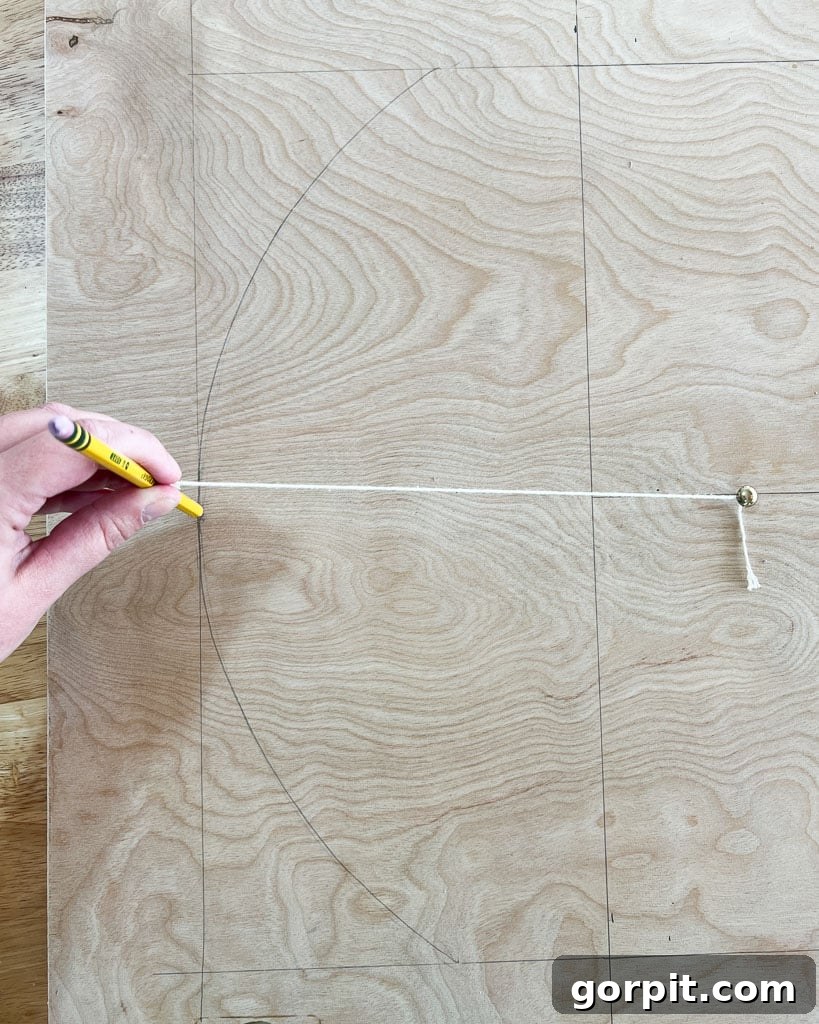
Adding an arch detail elevates the look of your DIY dog crate. First, determine your desired door frame dimensions: we chose 2.5 inches for the side and bottom edges and 3 inches for the top. Decide on the arch’s starting height; we began ours 8 inches from the top of the door. Use a level to mark a straight line along the bottom of your door frame. Then, draw two vertical lines, 2.5 inches in from each side, stopping at your chosen arch height. Mark the exact center point between these vertical lines. To draw the arch, tack or nail a piece of string to this center point. Tie a pencil to the other end of the string, adjusting its length so the pencil tip touches the top of your vertical lines when pulled taut. With the string taut, draw a smooth arch from each vertical line to meet in the center. This classic method ensures a perfect, symmetrical curve.
- Cut Out the Arches with a Jigsaw.
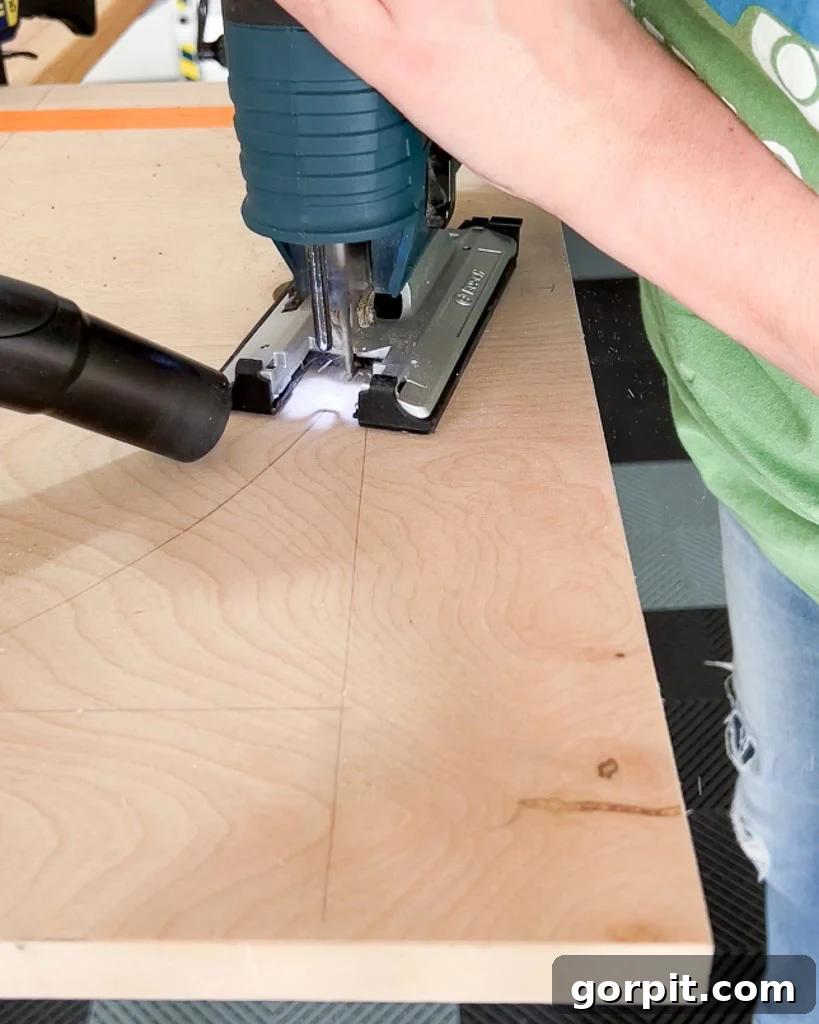
Carefully use a jigsaw to cut along the arch lines you’ve drawn on your crate door. Take your time to ensure a smooth, clean cut. Once the door arch is cut, place the door precisely onto the stationary panel. Since your stationary panel is ¼ inch taller and wider, ensure the door is perfectly centered before tracing the arch shape onto it. Then, use your jigsaw to cut out the corresponding arch on the stationary panel. This method guarantees that both arches are identical and align perfectly, enhancing the overall symmetry and appeal of your wooden dog crate.
- Apply Edge Banding to the Door and Stationary Panel.
Now it’s time to refine the appearance of your door and stationary panel. Apply iron-on edge banding to all four trimmed edges of the door. For the stationary panel, apply edge banding to its three exposed edges—the top, bottom, and outer side—leaving the center edge (where it meets the door) unbanded. Crucially, also apply edge banding along the inside of each newly cut arch. This meticulous step covers all raw plywood edges, providing a clean, finished look that mimics solid wood and greatly enhances the furniture quality of your DIY dog crate.
- Attach the Furniture Legs.
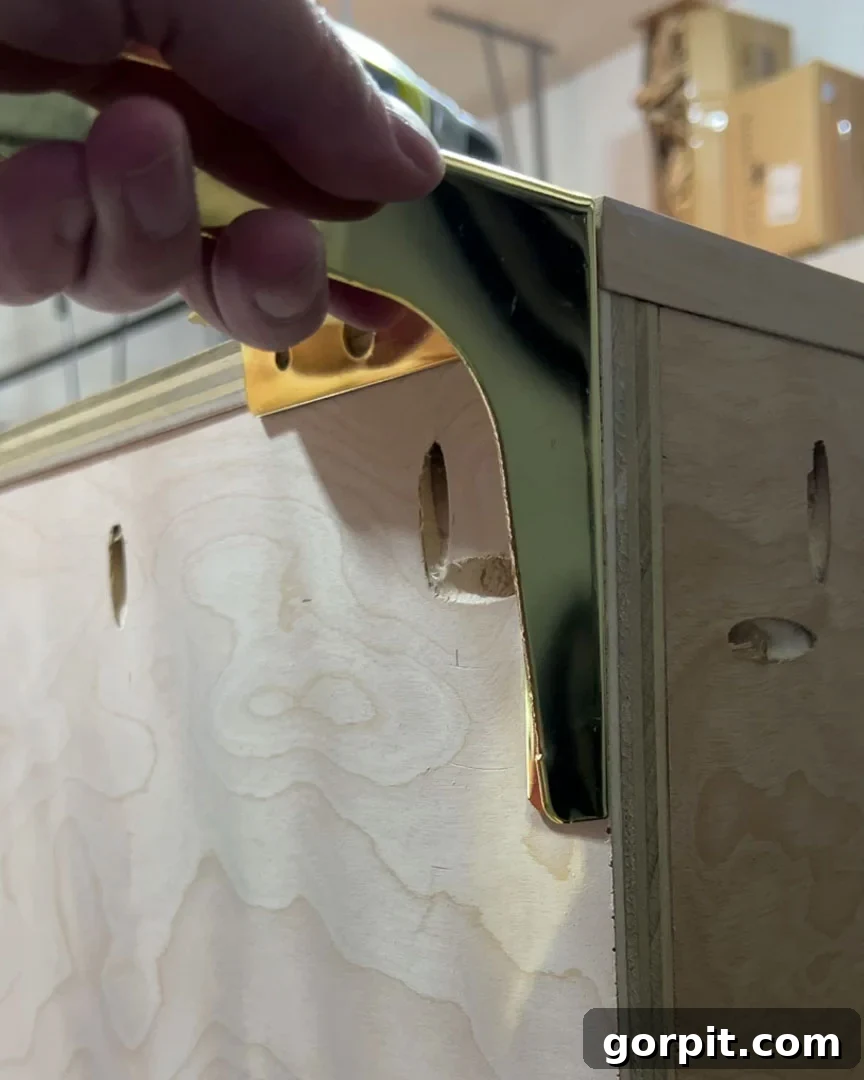
Install the pre-made 6” furniture legs to the bottom of your crate using the screws provided. For added stability on our wide and deep crates, we used six legs: one at each corner, and two extra legs positioned in the middle of the front and back edges. For these middle legs, we rotated them 90 degrees so that their decorative arch details were not visible, maintaining a sleek profile. For smaller crates, four corner legs should provide ample support. These legs lift the crate, adding to its furniture aesthetic and improving airflow.
- Install the Center Panels (Bars).
You now need to fill the arched openings of your stationary panel and door with a material that provides both ventilation and security for your dog. We chose to use steel fence panels, which are durable and allow for excellent airflow. You could also opt for wooden or metal dowels for a different look. Cut the steel panels to size using a metal grinder or hack saw, ensuring a snug fit within the arches. After cutting, meticulously file down any sharp edges to ensure your dog’s safety. Attach these panels to the inside of the crate door frame and stationary panel using wire clamps. Pay close attention to the hinge areas on the door, making any necessary cuts to the steel to prevent interference with hinge operation.
- Install Your Stationary Panel.
With the center panel in place, attach the stationary front panel to the crate’s frame using Kreg pocket screws. Ensure it is flush and securely fastened. To achieve a perfectly seamless, furniture-quality finish, we opted to fill the small gaps between the stationary panel and the crate frame with DAP Premium Wood Filler. While optional, this step creates a uniform appearance that eliminates any visual discrepancies with the hinged door.
- Install the Crate Door with Concealed Hinges.
Now, attach your carefully crafted door to the crate frame using inset concealed hinges. These hinges offer a clean, modern look by hiding the hardware within the door and frame. If you’re new to installing concealed cabinet hinges, this process can be a bit tricky, but there are many excellent resources available. For a detailed guide, we recommend this very helpful post by our friend Zoe, which walks you through how to install concealed cabinet hinges and hang cabinet doors. Once installed, adjust the hinges for smooth door operation.
- Apply Paint or Stain for a Finished Look.
With the crate fully assembled, it’s time for the finishing touches. Remove the door to make painting easier. We chose to apply Clear Polycrylic to the inside surfaces of our crates for durability and easy cleaning, as it stands up well to doggie toenails. For the exterior, we used a beautiful paint color (Jadite by Sherwin-Williams), but you could opt for a wood stain to highlight the natural grain of the plywood. Ensure all surfaces are clean and prepped before applying your chosen finish.
- Install Door Stop(s) and Cabinet Latch.
To prevent the door from swinging inward and potentially hitting your dog, install a door stop. A simple piece of scrap wood glued ¾ inch back from the edge of the top crate frame can serve this purpose. Alternatively, we chose magnetic door catches installed on the top of our crate frame; these act as both door stops and help keep the door securely closed. Finally, install your brass cabinet latch for secure closure and a touch of elegance.
- Add Any Finishing Details.
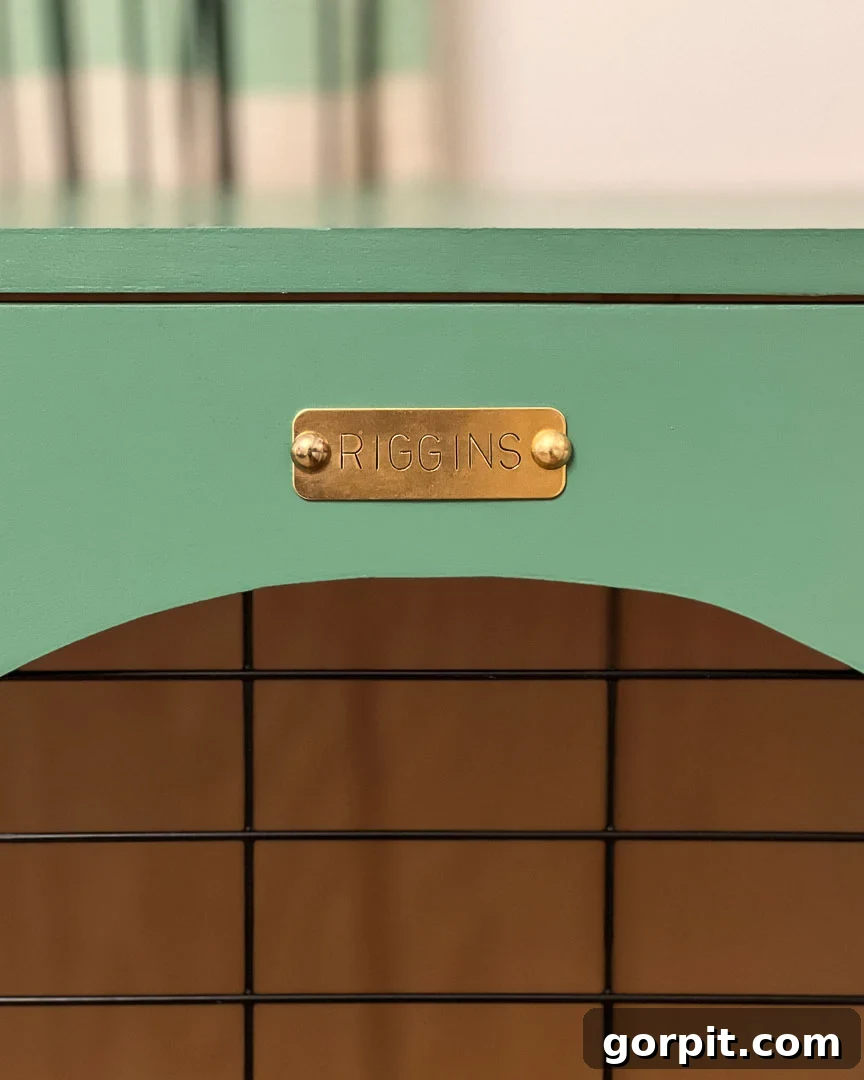
This optional step truly personalizes your DIY dog crate. We added charming hand-punched brass nameplates to each crate for just $8, and they are easily our favorite detail! Instead of basic screws, we used pretty brass tacks found in our hardware organizer to attach them, adding an extra touch of bespoke craftsmanship. These small details transform a functional crate into a cherished piece of furniture tailored for your furry friend.
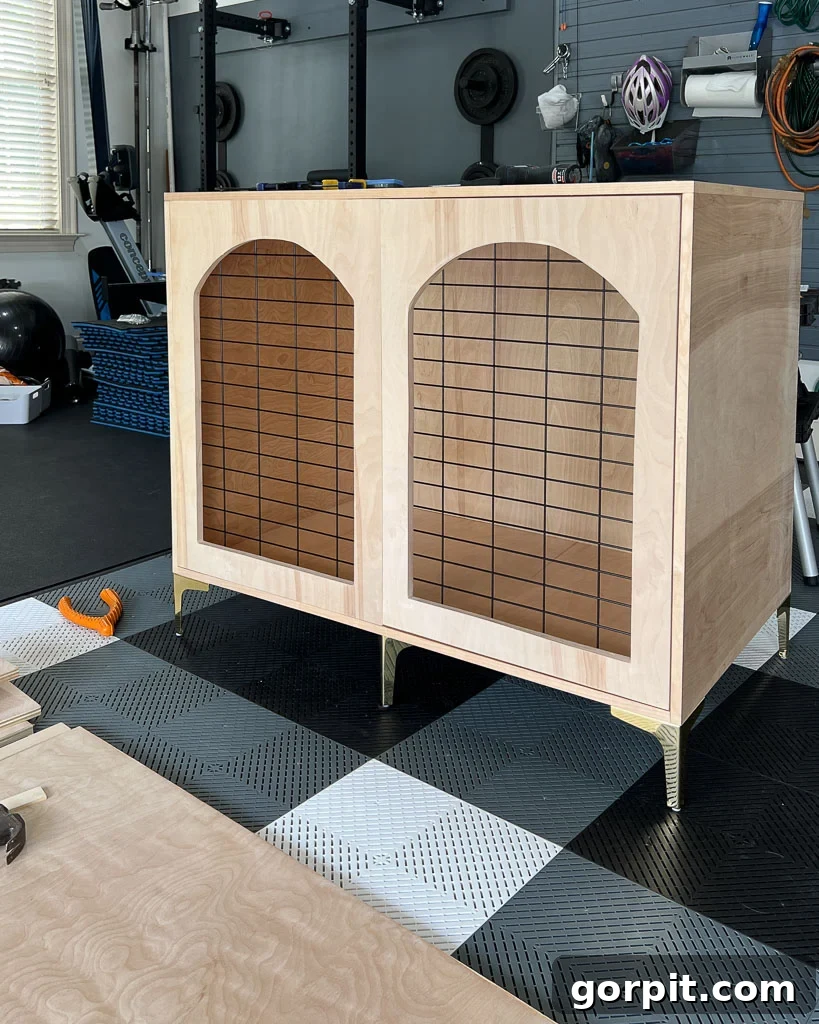
And here it is—a look at our completed custom wooden dog crate! We’re absolutely thrilled with how it turned out, and the new curtains complete the updated look of this space. What do you think of this transformation?
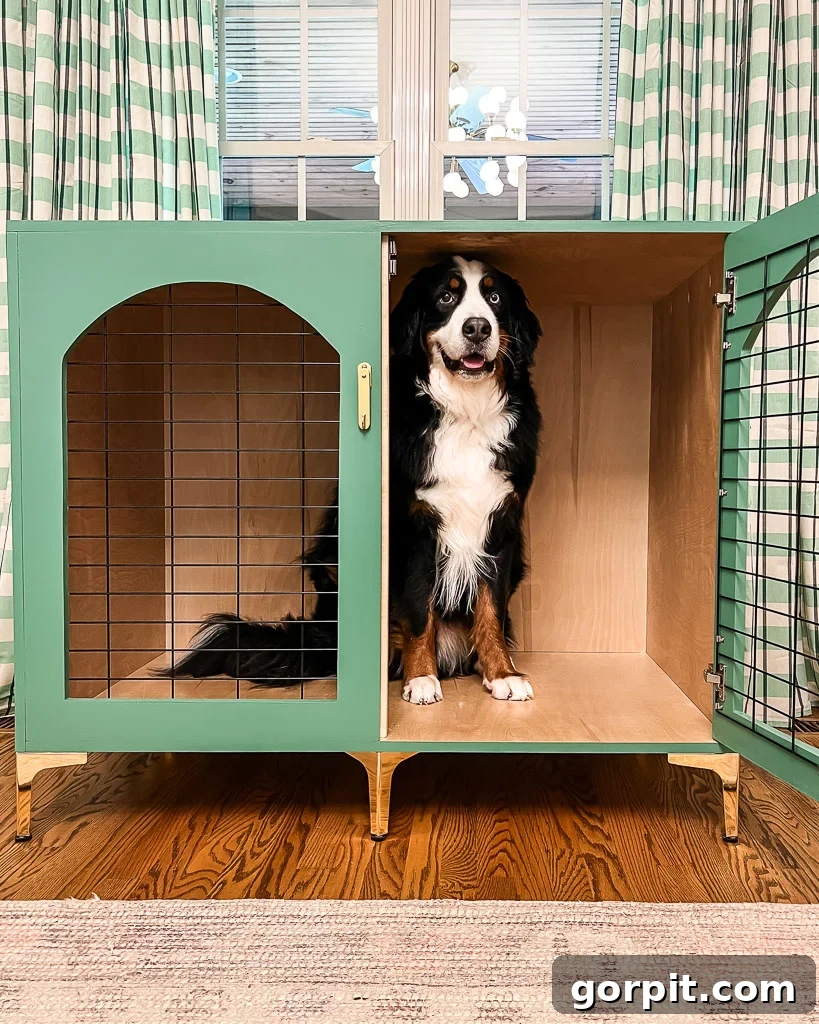
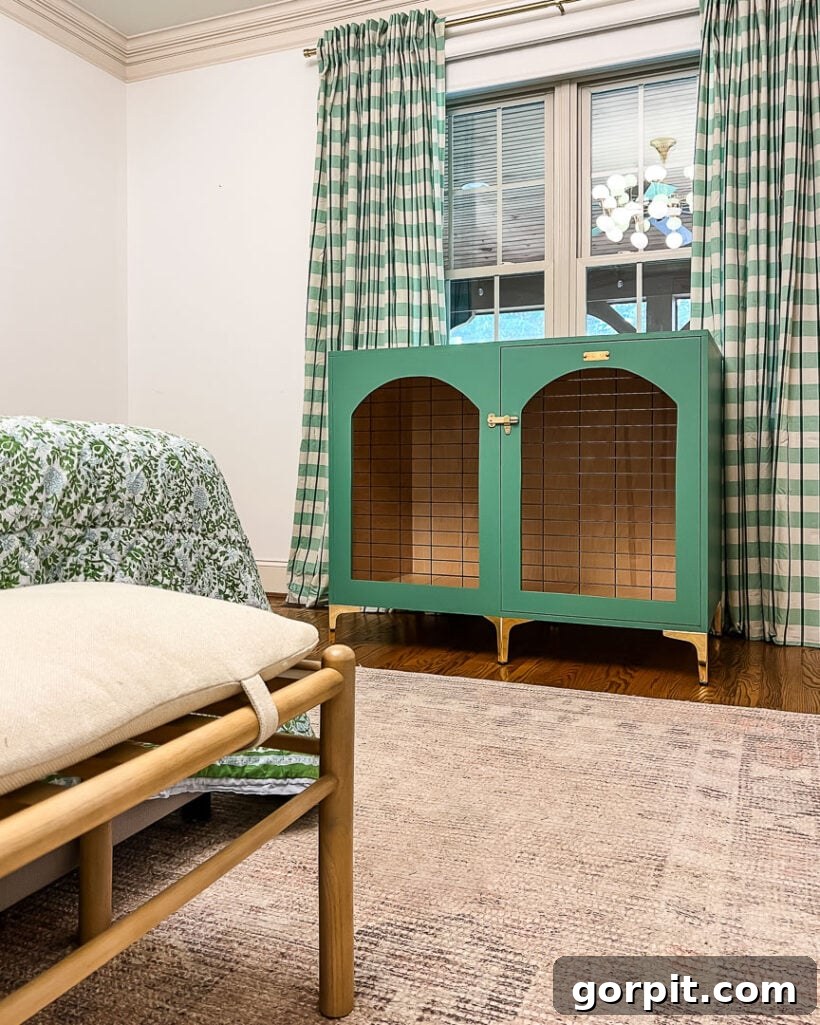
We’re still in the process of finishing the second crate and building the custom bench that will sit between the two dog crates. Once all the pieces are complete and the decorative touches are finalized, we’ll share an updated view of this transformed area. Stay tuned to see the full, cohesive setup!
More DIY Furniture Posts
SEE ALL DIY POSTS
-
Easy DIY Floating Shelves & Desk for an Awkward Nook
-
How to Paint IKEA Furniture and Mistakes to Avoid
-
How to Make a DIY Dog Crate that Looks Like Furniture
-
How to Decoupage Furniture With Fabric
-
IKEA Lack Hack – A High-End Look on a Dime!
-
Easy and Gorgeous Ikea Desk Hack
Curious about my unique approach to transforming rooms and spaces within our home? Discover the strategies and insights shared in Designer in a Binder®. It’s an affordable and simple way to achieve your dream home decor.
For exclusive content, behind-the-scenes glimpses, and insider tips on transforming your living spaces, be sure to subscribe before you go! You won’t want to miss our next exciting DIY project or design revelation.