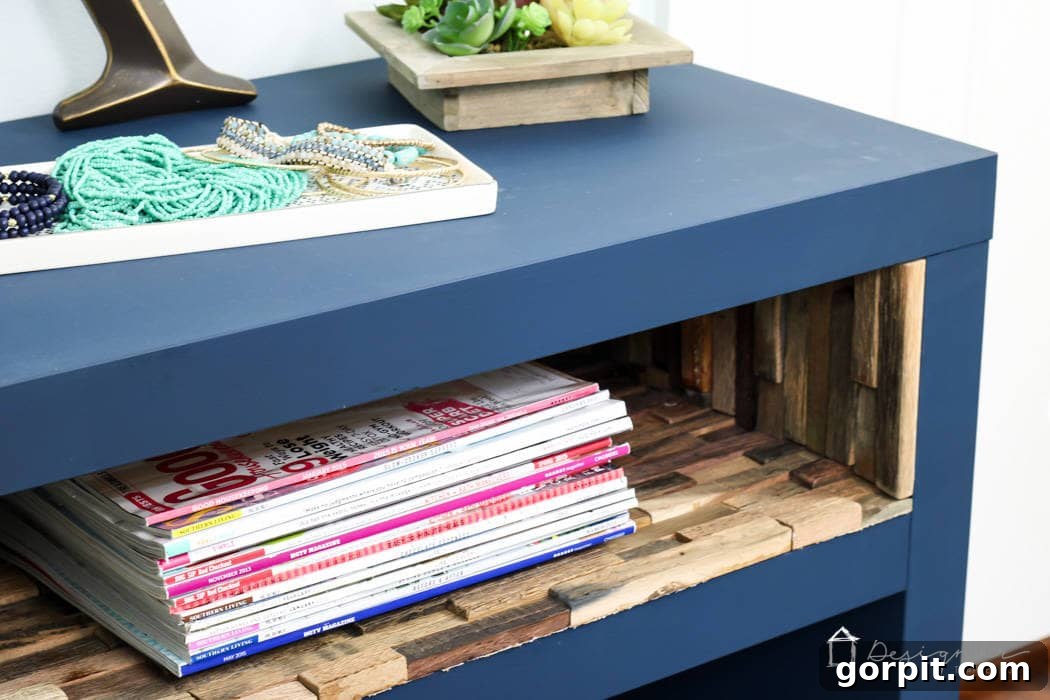
Transforming ordinary furniture into extraordinary showpieces doesn’t have to break the bank. With a dash of creativity and a simple IKEA Lack sofa table, you can craft a custom, high-end piece that will captivate your guests and fill you with immense pride. This IKEA Lack hack isn’t just remarkably straightforward; it’s also incredibly economical, proving that stunning design is within everyone’s reach. Prepare to roll up your sleeves and immerse yourself in an exciting, rewarding DIY adventure that redefines affordable luxury.
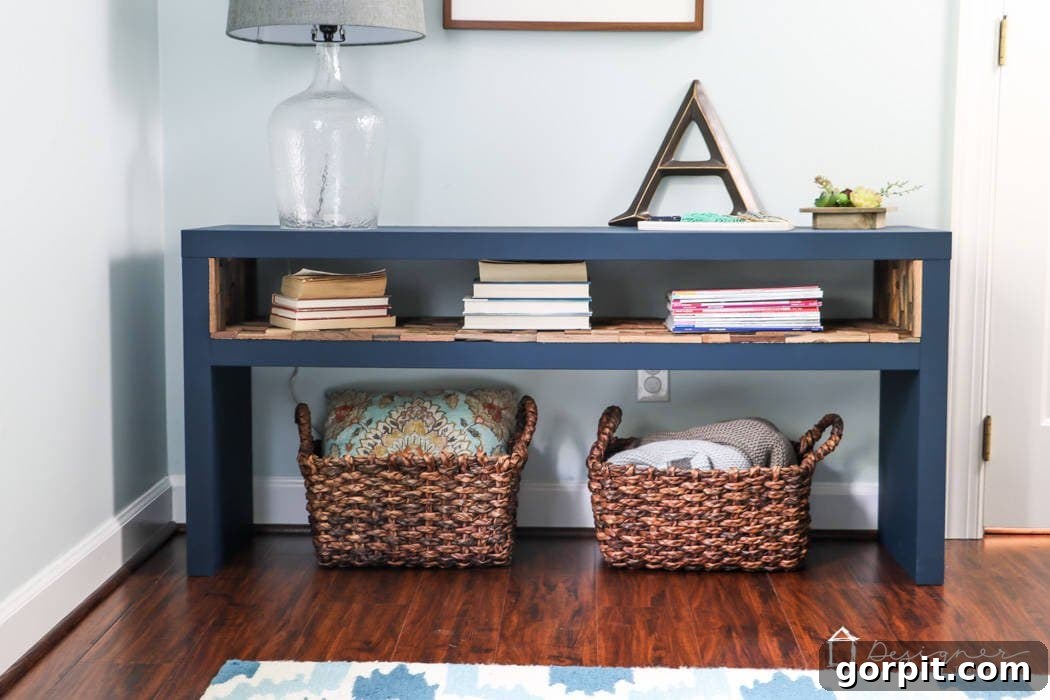
Table of Contents
A big thank you to DAP for sponsoring this Ikea Lack hack project. As always, all opinions are 100% my own based on my experience. This post contains some affiliate links for your convenience. Click here to read my full disclosure policy.
The IKEA Lack Table: A Versatile Canvas for Customization
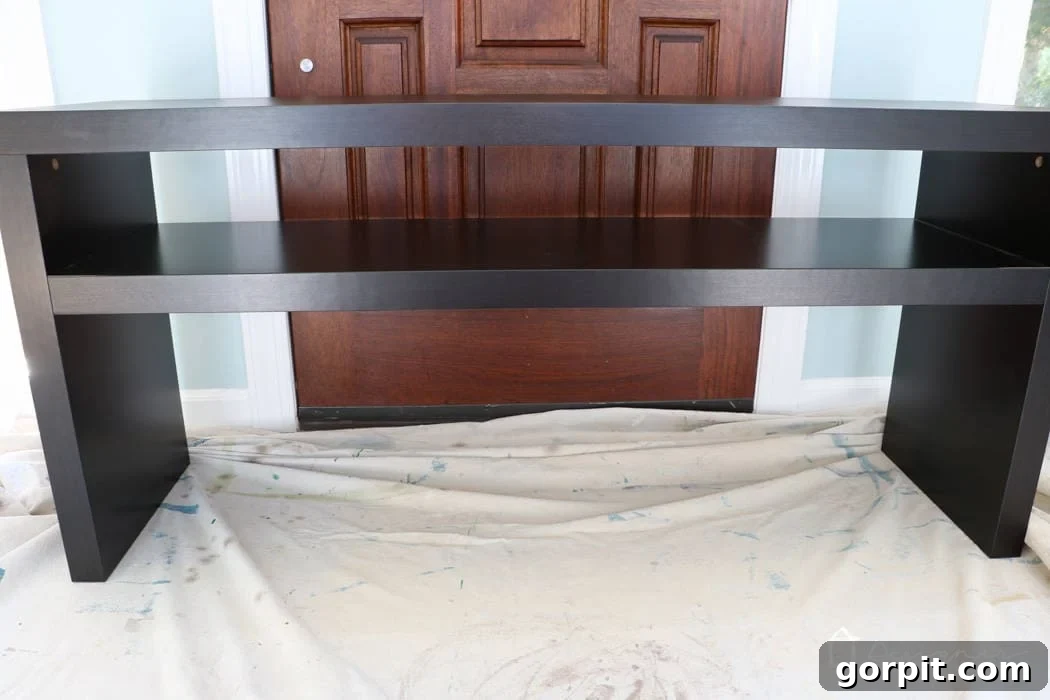
Before we embark on this exciting DIY journey, let’s take a moment to appreciate the humble origins of our project: the IKEA Lack sofa table. This minimalist piece, renowned for its affordability and simple design, often serves as a blank canvas for countless customization ideas. It’s a staple in many homes, known for its clean lines and functional shelf, making it a perfect candidate for an upgrade. Despite its basic appearance, the Lack table is surprisingly durable and robust, a quality we’ve consistently found with many IKEA products since acquiring ours in 2016.
Its straightforward structure makes it an ideal foundation for various hacks, allowing DIY enthusiasts to transform it into something truly unique. We’d grown tired of its very basic, unadorned look over the years, despite its dependable quality. It was time to infuse it with character and elevate its style without sacrificing its functionality or breaking the bank. This transformation proves that even the most unassuming pieces can be reimagined into bespoke decor elements, offering both aesthetic pleasure and practical utility.
Inspiration: Achieving a High-End Look on a Budget
The vision for this IKEA Lack hack was sparked by an incredibly elegant, albeit expensive, bookshelf. What truly captured my imagination were the exquisite wood mosaic tiles lining the interior shelves – a detail that instantly elevates any piece from ordinary to exceptionally chic. The rich texture and intricate pattern of the wood added a layer of sophistication that felt both modern and timeless. Replicating this luxurious look, specifically the distinctive wood-lined interior, became the primary goal for our Lack table transformation.
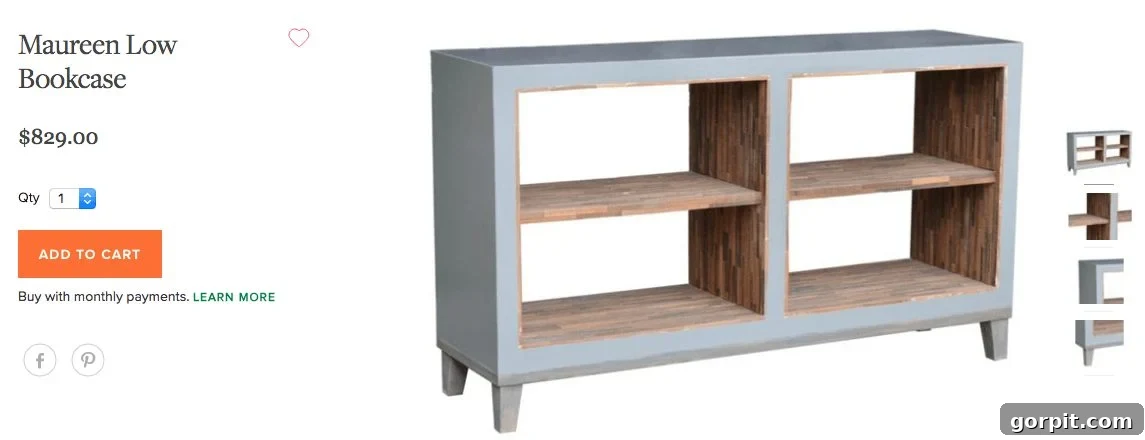
This expensive inspiration piece demonstrated how subtle details could make a massive difference in perceived value and aesthetic appeal. Our challenge was to distill that essence of high-end design into an affordable, DIY-friendly project. The goal wasn’t just to mimic the look, but to achieve a similar impact – creating an impression of custom craftsmanship and thoughtful design. By focusing on key elements like color and texture, we aimed to transform the simple Lack table into our very own budget-friendly version of that stunning, designer-tier furniture, proving that luxurious aesthetics don’t require an exorbitant price tag. Continue reading to discover precisely how this vision was brought to life and how you can achieve a similar stunning result for your home!
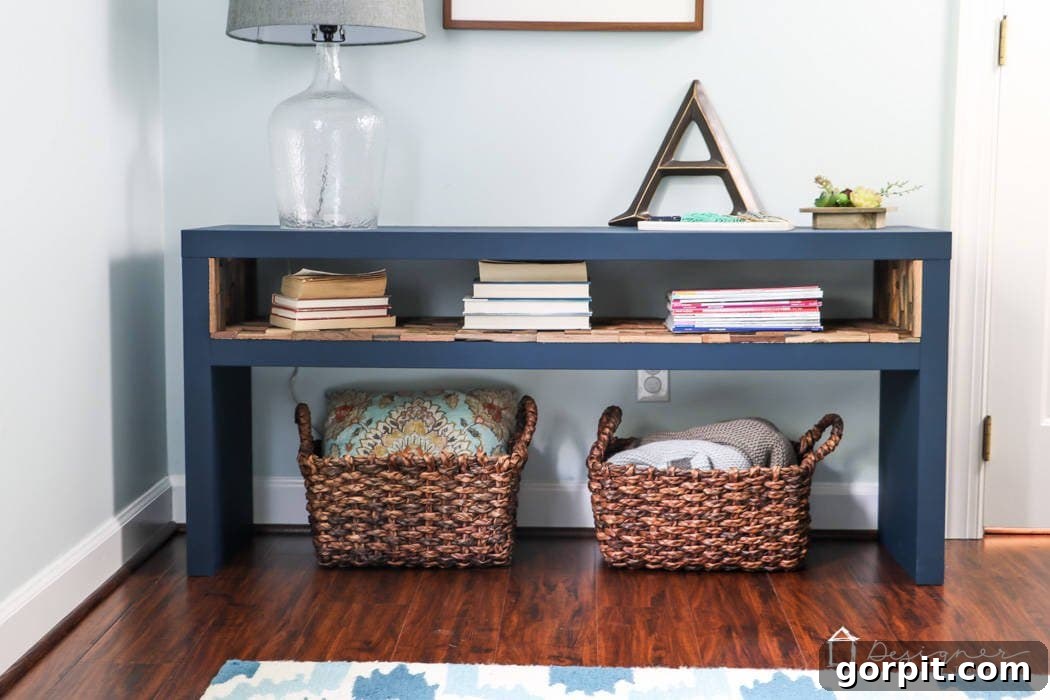
IKEA Lack Hack Tutorial
Essential Materials and Tools
- Paint of Your Choice: Selecting the right paint is crucial for achieving a lasting, professional finish on laminate IKEA furniture.
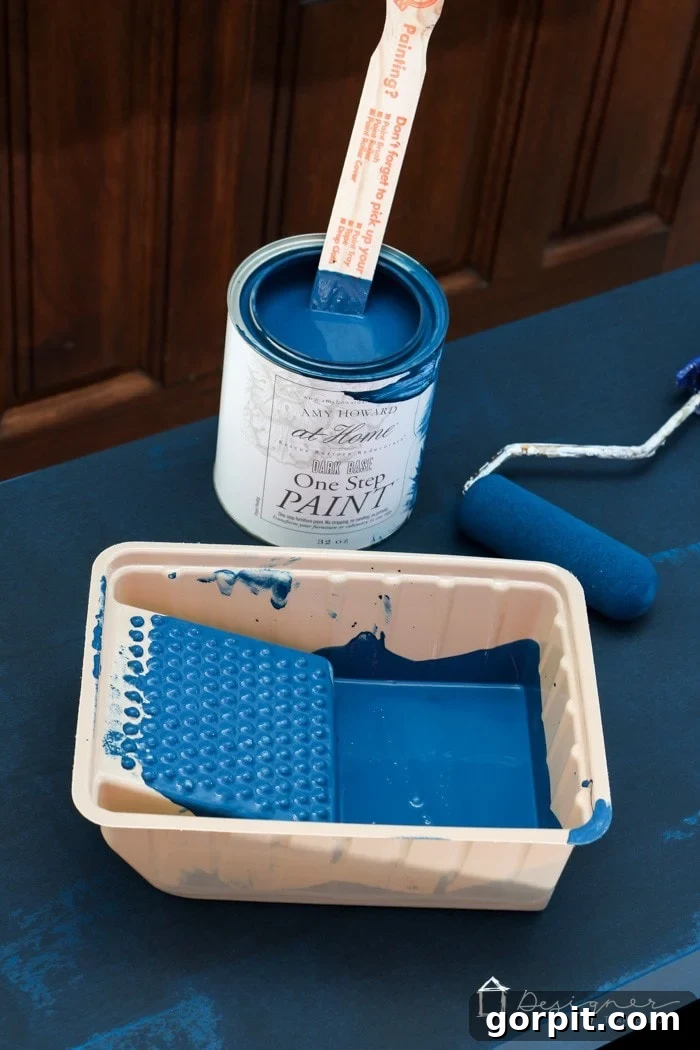
- Recommendation: For minimal prep work (no priming or sanding often required), I highly recommend a high-quality chalk-based paint. Its excellent adhesion properties and matte finish are perfect for transforming slick surfaces. I personally used “Lady Singing the Blues” One-Step Paint by Amy Howard At Home for its vibrant color and durability. Consider testing your chosen paint on an inconspicuous area first to ensure proper adhesion.
- DAP Rapid Fuse Wood Adhesive: This is your secret weapon for securely attaching the wood mosaic tiles without unsightly nails or screws. Its strong bond and quick-drying formula make it ideal for this project, ensuring a clean, seamless look for your wood-lined interior.
- Why it’s crucial: Traditional fasteners like nails would be visible and compromise the high-end aesthetic. A strong, reliable wood adhesive is paramount for a professional, durable finish.
- Wood Mosaic Tiles: These are the star of the show, providing that luxurious, textured interior.
- I sourced my tiles from a local specialty store, but similar and often more affordable options are available at major home improvement retailers like Home Depot. These typically come adhered to a flexible mesh backing, which significantly speeds up installation. For this project, I used slightly over 6 square feet, but with careful planning and precise cutting, exactly 6 square feet might suffice. Measure your Lack table’s interior carefully before purchasing.
- Clamps: Essential for holding pieces securely in place while the adhesive cures, ensuring a tight bond and preventing shifting. Having a variety of sizes can be very helpful.
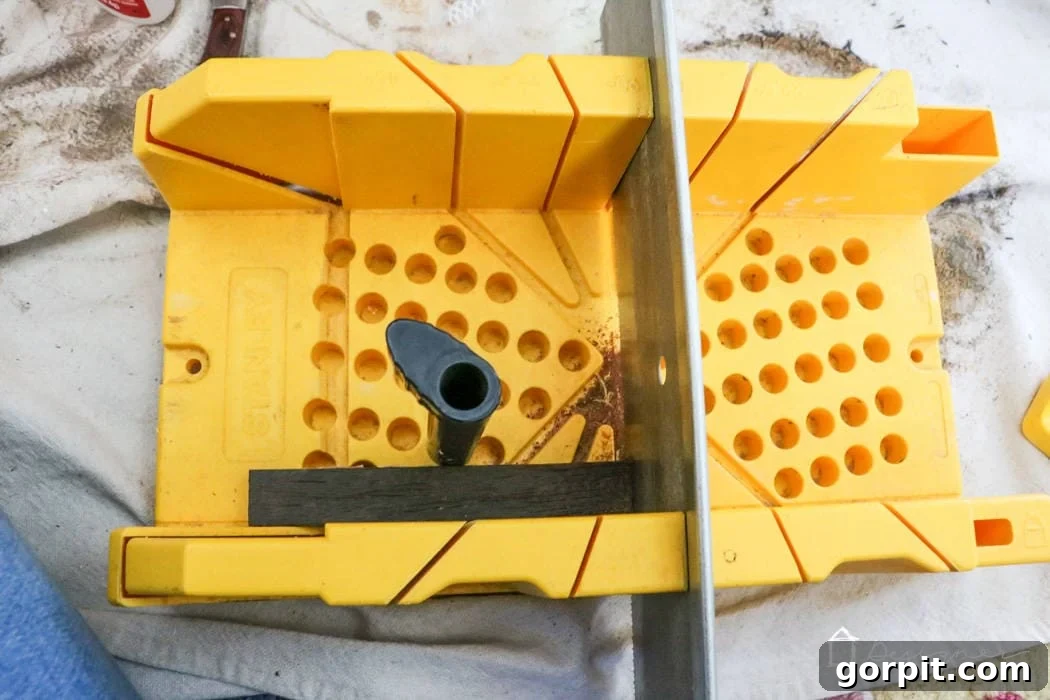
- Clamping Miter Box with Saw: Useful for making precise, straight cuts on individual wood pieces, especially for the intricate side panels where accuracy is key. This offers more control than a freehand saw.
- Table Saw or Circular Saw with Straight Edge: Required for larger, more precise cuts on the mosaic tile sheets, ensuring clean, perfectly straight edges that sit flush against the table’s interior.
- Safety Note: Always prioritize safety when using power tools. Ensure all guards are in place, wear appropriate protective gear (safety glasses, hearing protection), and familiarize yourself with the tool’s operation before beginning.
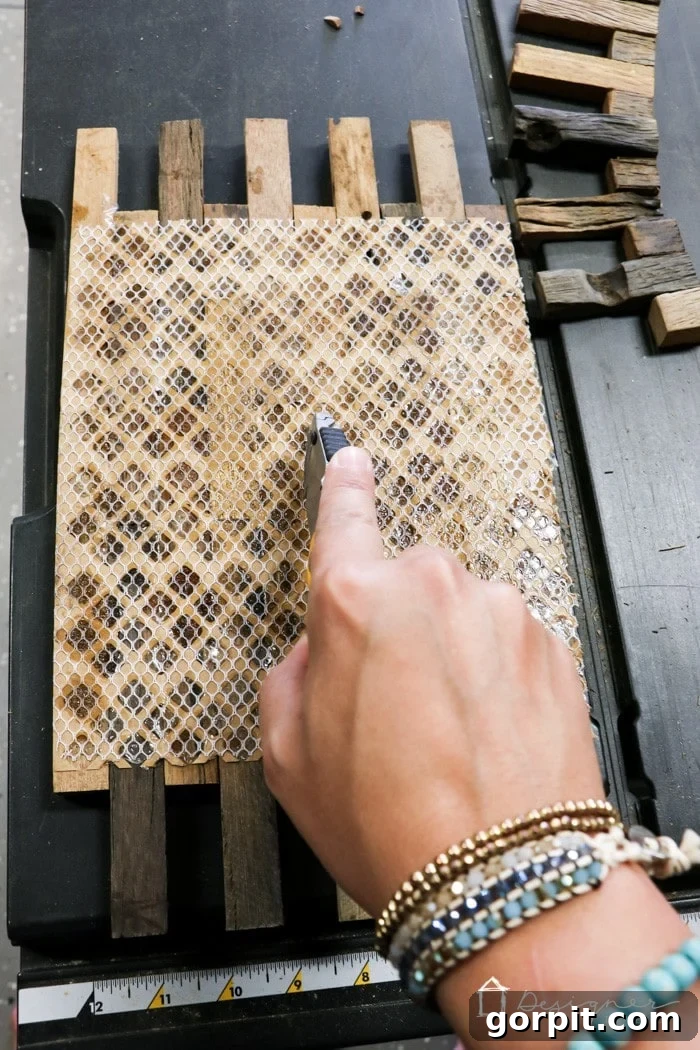
- Utility Knife: Indispensable for accurately cutting the mesh backing of the mosaic tiles, allowing you to separate individual wood pieces or trim larger sheets to fit awkward dimensions. A sharp blade is crucial for clean cuts.
Step-by-Step Guide to Your Lack Transformation
Time needed: 3 hours (excluding paint drying time)
This IKEA Lack hack is designed to be a swift and satisfying project, requiring only a few hours of active work. The most significant time commitment will be allowing for adequate drying time for your paint layers, but the transformation itself is remarkably quick and rewarding!
-
Step 1: Prepare and Paint Your Table.
Begin your transformation by thoroughly cleaning the entire IKEA Lack table. Use a mild all-purpose cleaner and a damp cloth to remove any dust, grime, or oils that might hinder paint adhesion. Even though chalk paint often negates the need for extensive sanding or priming on laminate surfaces, a pristine surface is always best for optimal results. If you opt for regular latex or acrylic paint, ensure you follow proper guidelines for painting laminate furniture, which typically includes a light scuff-sanding with fine-grit sandpaper (180-220 grit) and the application of a good quality bonding primer. Once prepped, apply your chosen paint in thin, even coats, allowing each coat to dry completely according to the manufacturer’s instructions before applying the next. Depending on your paint color and desired coverage, 2-3 coats are usually sufficient to achieve a vibrant, opaque finish. A consistent, smooth paint application will provide a flawless backdrop for the intricate wood mosaic accents you’re about to add.

-
Step 2: Prepare Your First Wood Mosaic Tile Sheet.
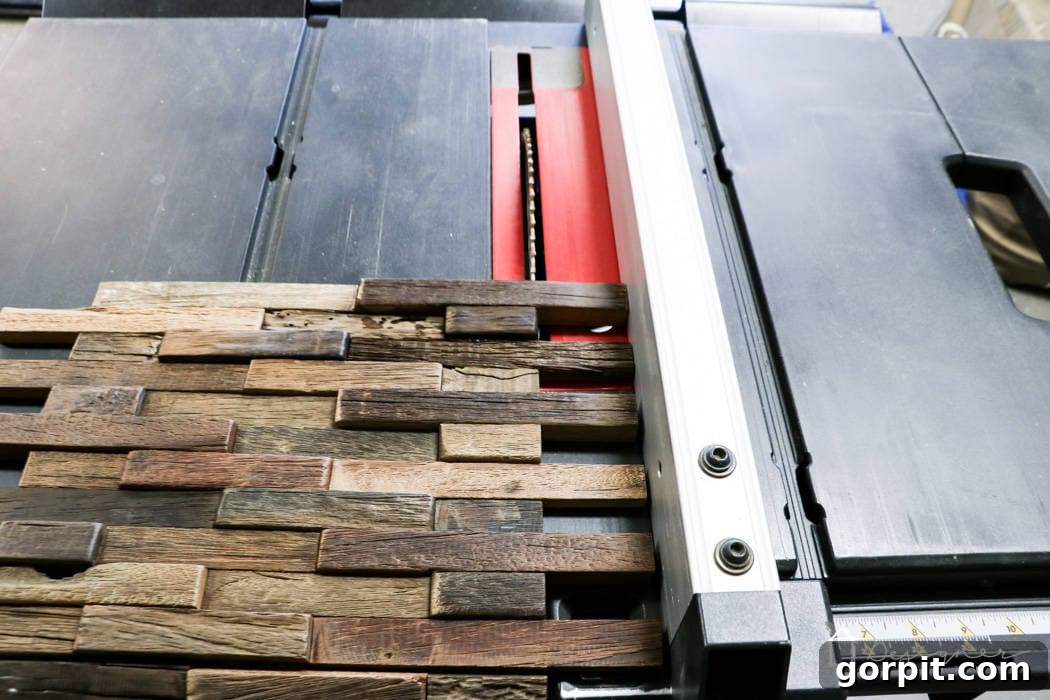
Carefully take one full sheet of your wood mosaic tile. Using a table saw or a circular saw with a reliable straight edge guide, precisely cut one long edge of this sheet. The goal is to create a perfectly straight edge that will sit flush against the inside left vertical support of your Lack table’s shelf. This initial cut is crucial for setting up the entire layout, so accuracy here is paramount for a professional, seamless appearance. Before cutting, double-check your measurements against the table’s interior dimensions. For safety, always ensure the material is securely held, the blade is clean and sharp, and *always* use the protective blade guard on your power tools. It’s easy to overlook this step, especially when working on familiar projects or alone, but safety should never be compromised! If you don’t have access to power tools, a sharp hand saw combined with a clamping miter box can also achieve a clean, straight cut with a bit more patience and effort.
-
Step 3: Dry Fit the Bottom of the Shelf.
Before applying any adhesive, it’s absolutely critical to dry fit all your wood mosaic sheets for the bottom shelf. Begin by placing your pre-cut sheet from Step 2 against the left side, then gradually work your way to the right. As you approach the right edge, you’ll almost certainly need to trim the final sheet to perfectly fit the remaining space. Measure this gap precisely and cut the mosaic sheet to size using your table saw or circular saw, just as you did for the first piece. You’ll also notice that the depth of the Lack table’s shelf is typically greater than the width of a single mosaic tile sheet. This means you’ll need to repeat the process, cutting additional strips of mosaic tiles to fill the full depth. This is straightforward: simply use a utility knife to score and cut the mesh backing on the mosaic sheets, allowing you to create narrower strips that fit perfectly. Continue this iterative process of measuring, cutting, and dry-fitting until the entire bottom shelf is covered. Resist the urge to glue anything down at this stage; meticulous patience with dry fitting ensures a flawless, professional-looking final installation.
-
Step 4: Dry Fit the Side Pieces of the Shelf.
With the bottom of your shelf perfectly dry-fitted, it’s time to tackle the side panels. This step requires a bit more meticulous attention, akin to a challenging game of Tetris, but the custom, intricate result is well worth the effort. For the sides, you’ll need to peel individual wood pieces off their mesh backing. The reason for this is that the wood tiles on the bottom shelf are not uniform in their exposed edges – they interlock in a staggered, organic pattern. To achieve a truly custom, seamless look, each individual side piece needs to be measured and cut to a specific length to ‘finger’ perfectly into the irregular edge of the bottom tiles. This isn’t a task for a simple table saw cut across an entire sheet. Instead, you’ll measure each small gap, cut individual wood strips using your clamping miter box and saw, and carefully dry fit them into place. This process is more time-consuming but absolutely crucial for achieving the high-end finish that inspired this hack. Put on your favorite audiobook or podcast and enjoy the meditative process of piecing together this intricate detail.
-
Step 5: Glue the Side Pieces into Place.
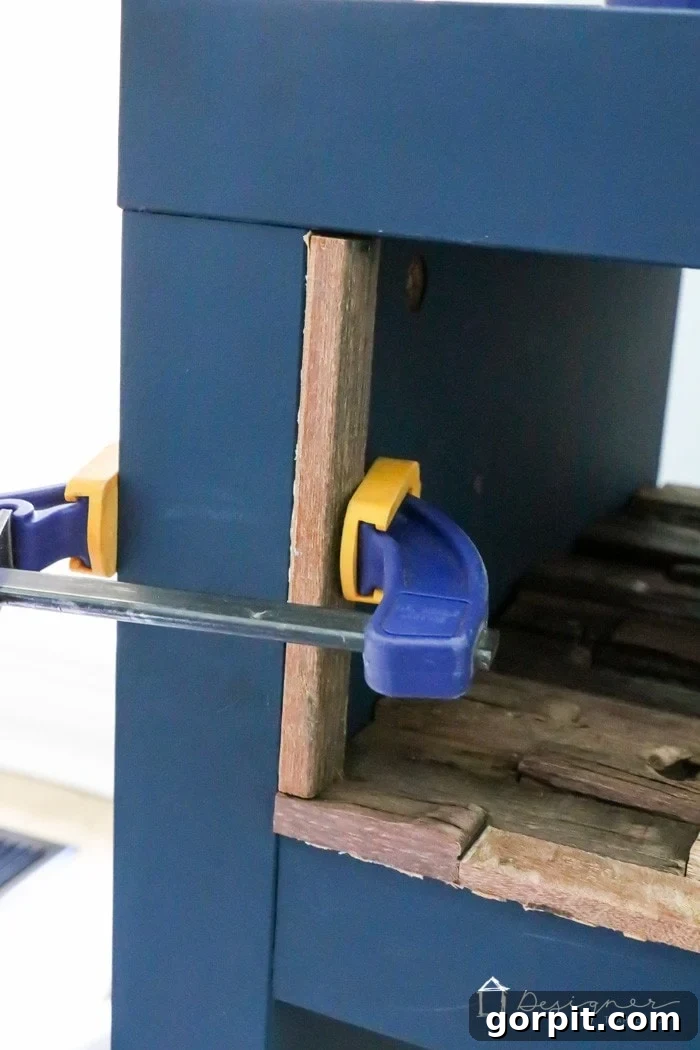
Now for the permanent attachment! Begin by placing a temporary wood tile or a thin spacer on the bottom of the shelf. This acts as a guide, ensuring your side pieces are positioned at the correct height relative to the bottom tiles – remember, do NOT glue this bottom spacer piece yet, it’s just for spacing. Apply a small, consistent amount of DAP Rapid Fuse Wood Adhesive to the back of each individual wood strip for the sides. For the very first piece on each side, use a clamp to hold it firmly in place while it cures completely. This initial piece provides crucial stability for the subsequent ones. As you work your way further into the shelf, clamps may become impractical for every piece due to the tight space. In such cases, applying firm, even pressure for about 10-15 seconds per piece should be sufficient, thanks to the rapid-curing nature of the adhesive. Work methodically, cutting and gluing until both side panels are fully adorned with the wood mosaic, ensuring each piece is snug and flush.
-
Step 6: Secure the Bottom Tiles.
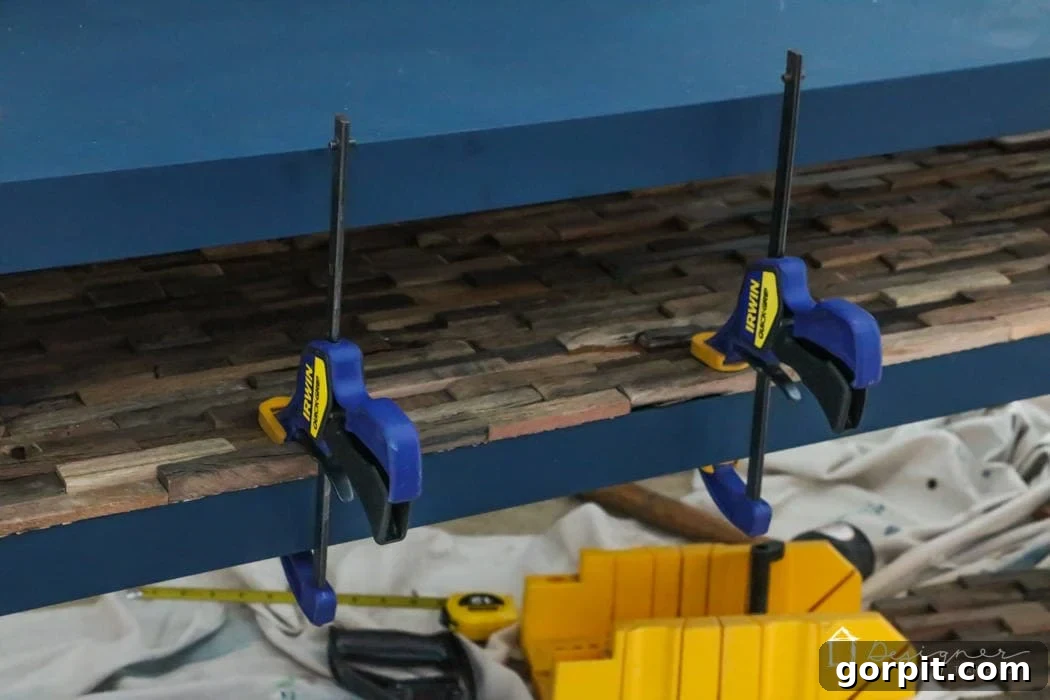
With the side pieces now firmly in place, it’s time to glue down the bottom mosaic tile sheets. A significant advantage of having the side pieces installed first is that they act as natural guides, preventing the bottom sheets from shifting forward or backward. Therefore, you don’t need to apply adhesive across the entire back of each sheet, which saves on adhesive and application time. Instead, simply lift the edges of your dry-fitted bottom sheets and apply a small, continuous bead of DAP Rapid Fuse Wood Adhesive along the bottom edges of the shelf, particularly where the tiles meet the newly installed side panels and the table’s frame. Once the adhesive is applied, press the sheets firmly into place and use clamps along the edges where possible to ensure maximum contact. Allow ample time for the adhesive to cure fully according to the manufacturer’s instructions. This final step secures your beautiful new shelf interior, completing your high-end IKEA Lack hack!
The Stunning Reveal: Your Transformed Lack Table
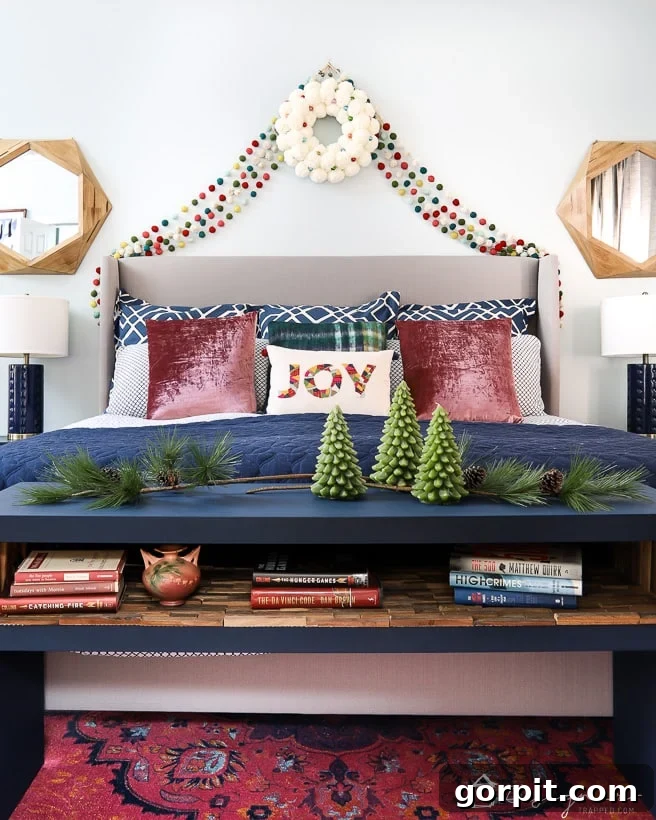
And there you have it – the magnificent culmination of your efforts! This IKEA Lack hack has successfully transformed a basic, unassuming sofa table into a true showstopper. I am absolutely captivated by the finished product; it brings such a sophisticated and custom feel to the space, truly exceeding expectations. The combination of the fresh paint color and the intricate wood mosaic interior creates an illusion of a much more expensive, bespoke furniture piece. What are your thoughts on this dramatic makeover? This entire project, from start to finish (excluding paint drying time), took approximately 3 hours of active work. The total cost, including the original IKEA Lack table, came to a mere $157. That’s an incredible value for achieving such a high-end, designer-inspired look without the hefty price tag! It’s a testament to the power of DIY and the immense potential hidden within affordable furniture. Take a moment to admire the exquisite details up close…
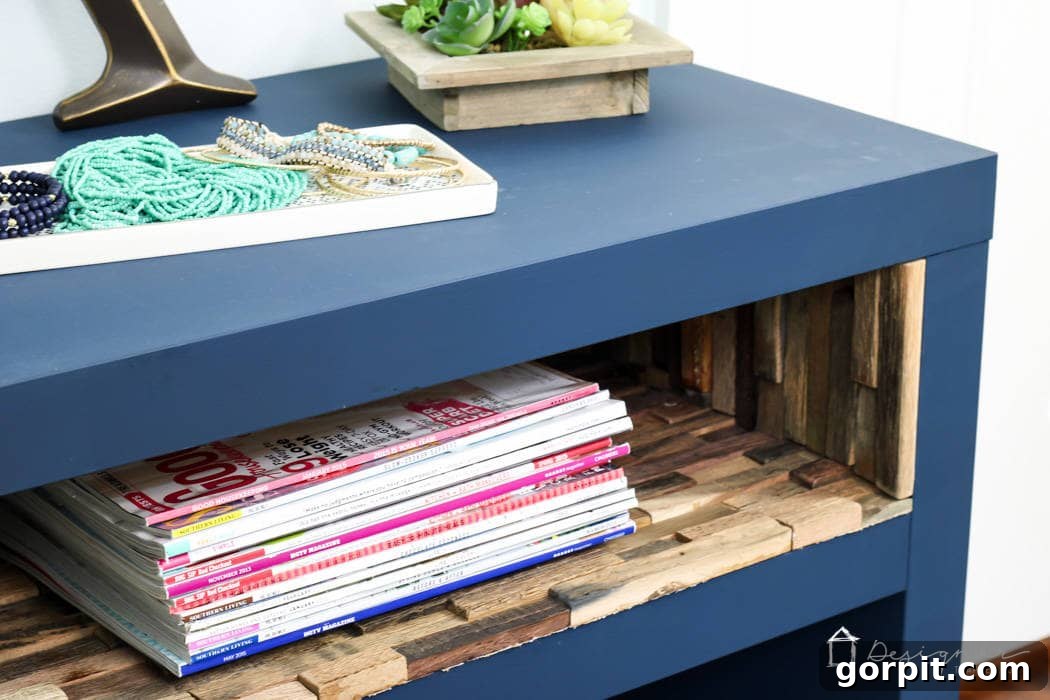
The versatility of this newly elevated piece is remarkable. It serves wonderfully as a stylish sofa table in a living room, offering both a surface for decor and a tucked-away shelf for books or magazines. Alternatively, it makes an excellent entryway console, providing a landing spot for keys and mail, or even a chic bedside table with added storage. We eventually found its perfect spot at the foot of our bed, where it adds both beauty and practical storage, proving its adaptability within different home environments. This project truly embodies the spirit of creative home decor on a budget, inspiring you to see beyond the ordinary and transform everyday items into cherished pieces.
Explore More IKEA Hacks
SEE ALL DIY POSTS
-
Creative Hacks for IKEA Bookshelves and Built-In Cabinets
-
Easy Furniture Repair to Match IKEA Paint Colors!
-
IKEA Billy Bookcase Hack for Loads of Storage
-
Affordable IKEA Desk Hacks You Will LOVE
-
How to Paint IKEA Furniture and Mistakes to Avoid
-
50 IKEA Hacks You Have to See to Believe
Mastering Home Decor with Designer in a Binder®
Curious about my personal approach to transforming rooms and creating cohesive, beautiful spaces throughout a home? I’ve distilled my entire design philosophy and process into Designer in a Binder®. It’s a comprehensive, actionable guide designed to empower you to tackle any decorating challenge with confidence and achieve stunning results, regardless of your budget or experience level. It covers everything from space planning to color selection, helping you to truly become your own interior designer and create a home that perfectly reflects your style and personality.
For those eager to dive even deeper into creative DIY projects, home design tips, and behind-the-scenes sneak peeks, don’t forget to subscribe to our newsletter before you leave! Join our thriving community of fellow DIY enthusiasts and get exclusive content delivered straight to your inbox, ensuring you never miss out on the latest inspiration, expert advice, and exciting tutorials to elevate your home decor game.