
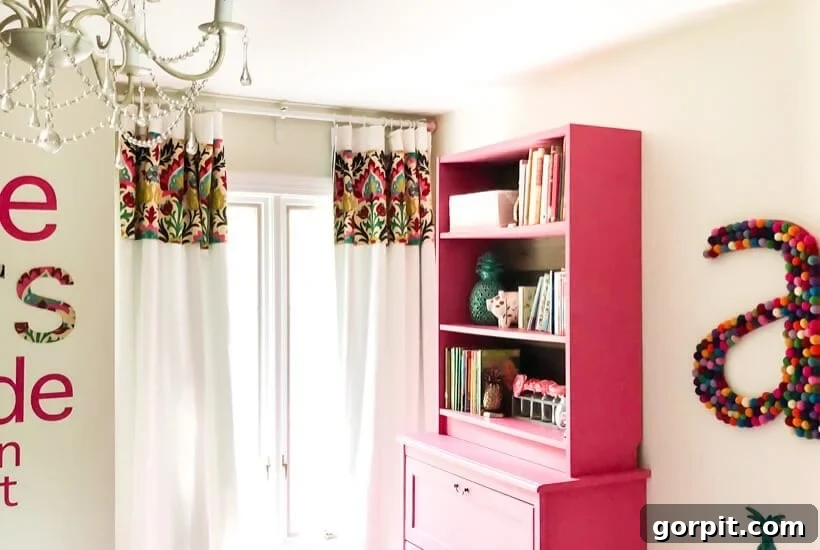
DIY No-Sew Curtains: Create Custom Window Treatments Effortlessly
Transforming your home with custom window treatments doesn’t have to be an expensive or time-consuming endeavor. If you’ve ever dreamt of personalized curtains but are intimidated by sewing or the high cost of custom options, you’re in the right place. This comprehensive guide will walk you through how to make beautiful, high-end looking curtains using a revolutionary no-sew, “lazy” method. Say goodbye to complicated patterns and hours at the sewing machine, and hello to stylish, budget-friendly window decor!
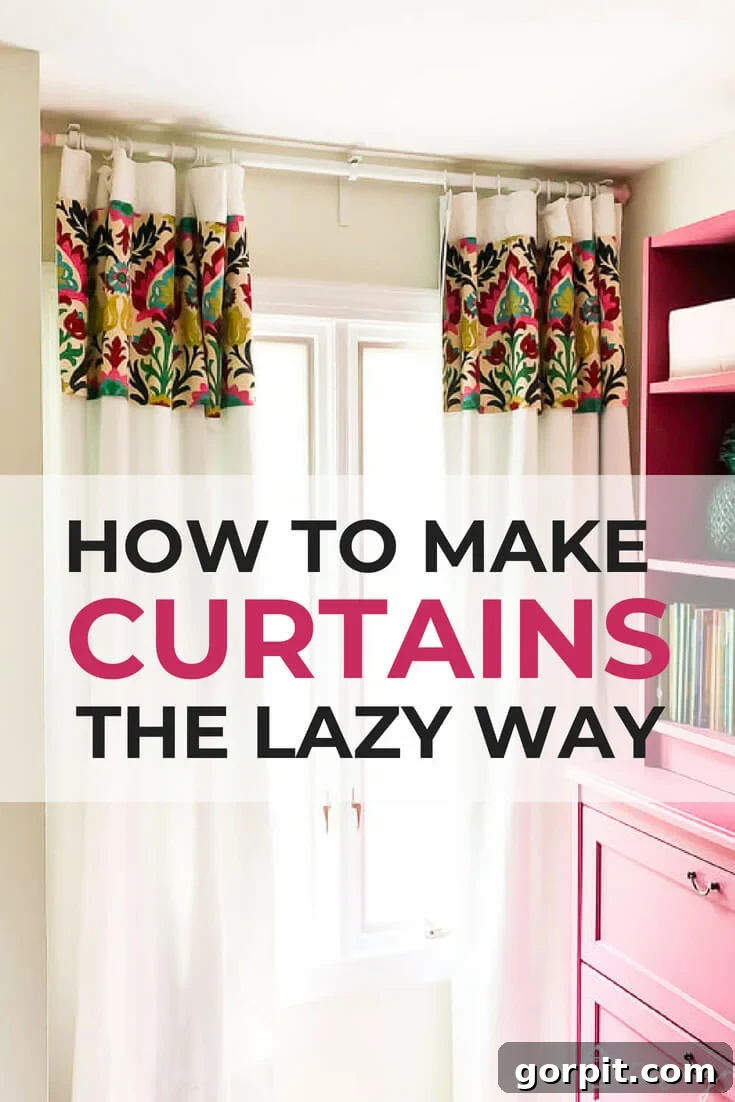
This post contains some affiliate links for your convenience, meaning if you make a purchase after clicking a link, I will earn a small commission at no extra cost to you. Click here to read my full disclosure policy.
Why Choose No-Sew Curtains? The Smart Way to Decorate
For many years, the idea of “custom curtains” conjured images of expensive designers, complex sewing projects, or a significant dent in your home decor budget. However, times have changed! The beauty of no-sew curtains lies in their accessibility and affordability. Whether you’re a complete novice when it comes to crafts or simply prefer projects that offer maximum impact with minimal effort, this method is a game-changer.
I’ve always leaned towards simple DIYs, and while I can handle basic sewing tasks like crafting straightforward curtain panels, a DIY bed canopy, or even duvet covers, I actively seek out alternatives to avoid the sewing machine whenever possible. This philosophy led me to develop this incredibly easy technique for stunning window treatments.
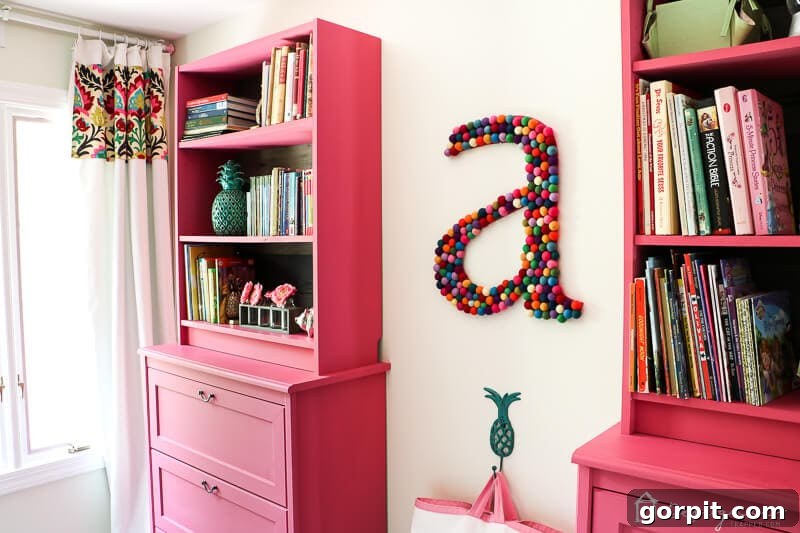
The inspiration for this particular project struck when I discovered this absolutely gorgeous fabric – a Waverly Santa Maria Desert Flower pattern – which was perfectly suited for my daughter Attley’s room. I immediately knew two things: First, purchasing enough of this beautiful fabric to create full, floor-to-ceiling curtain panels would be excessively expensive. Second, even if cost wasn’t an issue, the thought of sewing entire panels was simply unappealing.
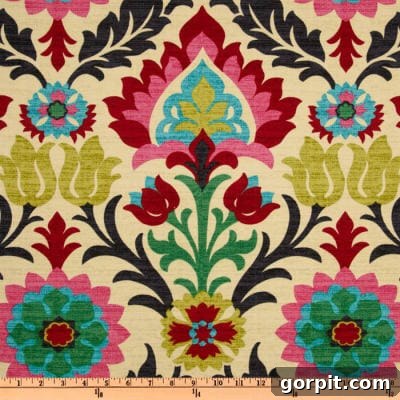
That’s when the “lazy way” truly came to life. Instead of sewing, I found an ingenious method to incorporate this stunning accent fabric into pre-made curtain panels, achieving a high-end, custom look for a fraction of the cost and effort. Read on to discover how you can replicate this super simple, no-sew curtain project for your own home!
Getting Started: Your No-Sew Custom Curtain Journey
Embarking on a DIY project should be exciting, not intimidating. This no-sew curtain tutorial is designed for maximum ease and impressive results. Before we dive into the step-by-step instructions, let’s gather our essential materials. The beauty of this project lies in its simplicity and the minimal tools required.
Materials Needed for Your DIY No-Sew Curtains:
- Accent Fabric of Your Choice: This is where your personality shines! Select a fabric that complements your room’s decor and personal style. As mentioned, I used this particular fabric. The quantity you’ll need will depend on several factors:
- The desired length and width of your curtain panels.
- How thick or prominent you want your accent strip to be.
- The width of the fabric you purchase (fabric often comes in 44-inch or 54-inch widths).
- For my project, I found that 1 yard of accent fabric was sufficient for two panels, creating roughly 12-inch thick strips. Always err on the side of caution and buy a little extra if unsure.
- Pre-made Curtain Panels: These serve as the base for your custom creation, saving you significant time and effort. Choose panels in a color and material that will beautifully showcase your accent fabric. These are the specific panels I used, which measured 57 inches wide and 108 inches long, offering a generous foundation for customization.
- Iron-on Hem Tape: This is the secret weapon for all no-sew projects. It creates a strong, durable bond without a single stitch. Ensure you have enough for all edges you plan to “hem” and attach.
- Iron: Essential for activating the hem tape and achieving crisp, professional folds.
- Ironing Board: Provides a stable, heat-resistant surface for pressing.
- Sharp Scissors: For clean, precise fabric cuts.
Step-by-Step Guide: Crafting Your No-Sew Custom Curtains
Now, let’s get down to the exciting part – bringing your custom curtain vision to life! Follow these simple steps for a flawless finish. Remember, patience and careful pressing are key to a professional-looking result.
Step 1: Prepare Your Pre-made Curtain Panels
Begin by thoroughly ironing your pre-made curtain panels. This crucial first step removes any creases or wrinkles, ensuring a smooth, flat surface for applying your accent fabric. My panels were generously sized at 57 inches wide and 108 inches long. If your panels are too long for your windows, don’t worry – you can easily hem them to the desired length using your iron-on hem tape later in the project.
Step 2: Measure and Cut Your Accent Fabric Strips
Next, determine the desired thickness for your accent fabric strip. Mine was designed to be about 12 inches thick, providing a noticeable pop of pattern. Once you’ve decided on your thickness, you’ll need to cut two strips of your accent fabric. Each strip should be 2 inches thicker than your desired finished strip width. For example, if you want a 12-inch thick finished strip, cut your raw fabric strips to 14 inches thick. The length of these strips should match the width of your pre-made curtain panels (or slightly less if you plan to center them, as I did). After cutting, iron both strips thoroughly to ensure they are perfectly smooth and ready for the next step.
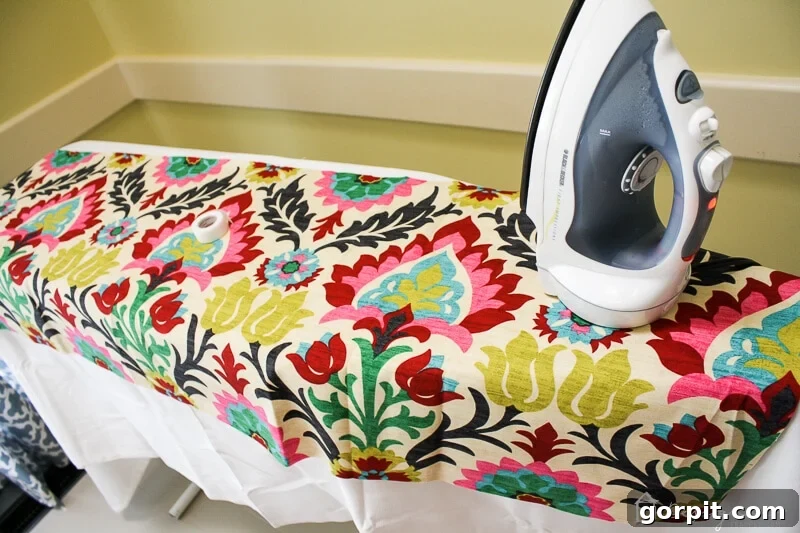
Step 3: Create Clean Edges on Your Accent Strips
Now, we’ll create neat, finished edges for your accent strips without any sewing. Take one of your cut fabric strips. Fold the top edge over by approximately 1 inch and press it firmly with your iron to create a crisp crease. Repeat this process for the bottom edge of the same fabric strip, folding it over by 1 inch and pressing it into place. This pre-pressing ensures a straight, professional-looking hem.
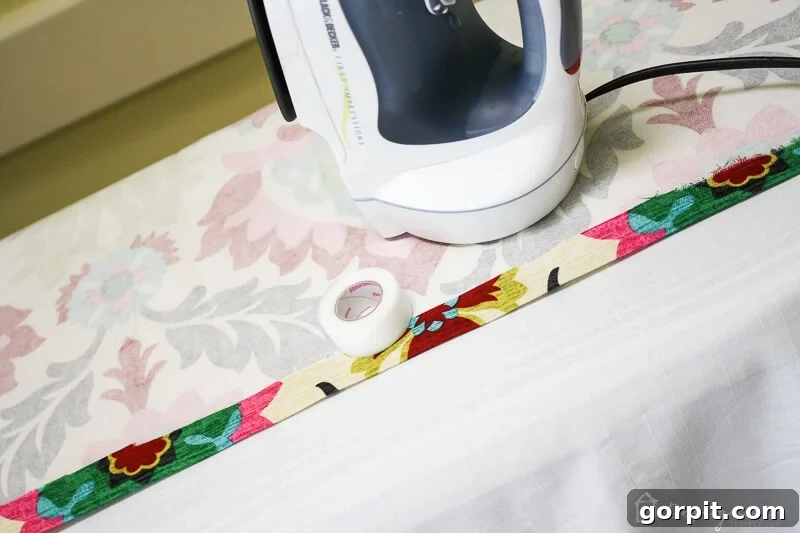
Step 4: Secure the Folds with Iron-On Hem Tape
With your folds pressed, it’s time to make them permanent. Carefully position a strip of iron-on hem tape underneath each of the 1-inch folds you just created. Follow the instructions provided with your specific brand of hem tape, as heating times and pressure can vary. Generally, this involves pressing down with a hot iron for a specified duration until the adhesive melts and bonds the fabric securely. Repeat this process for the short edges of your fabric strip as well, folding them over 1 inch and securing them with hem tape. Once complete, all four edges of your accent strip will have a clean, finished appearance, as if professionally sewn.
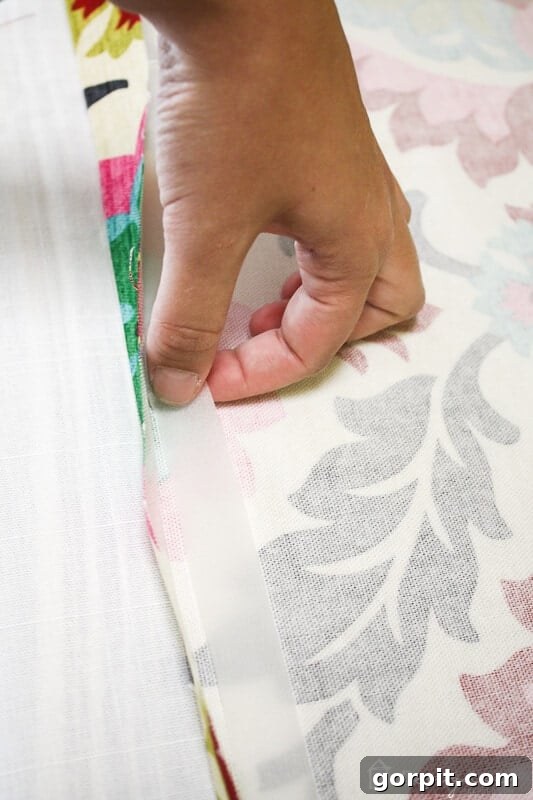
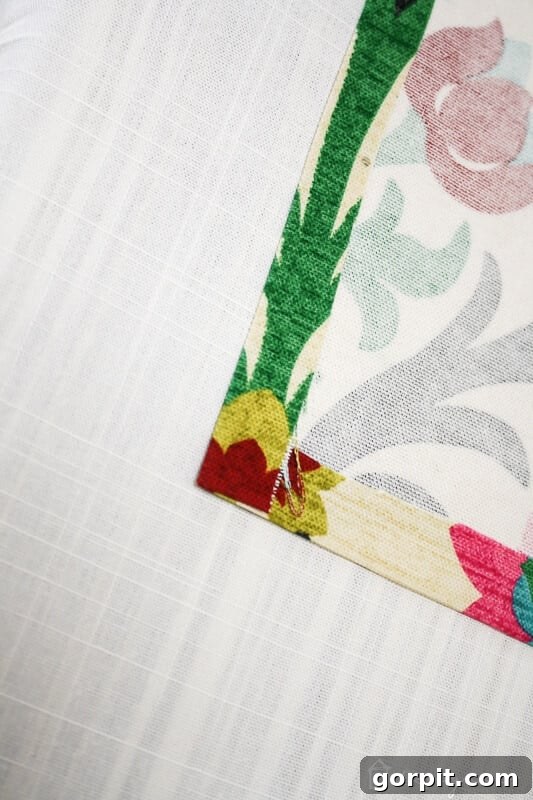
Step 5: Attach the Accent Strip to Your Curtain Panel
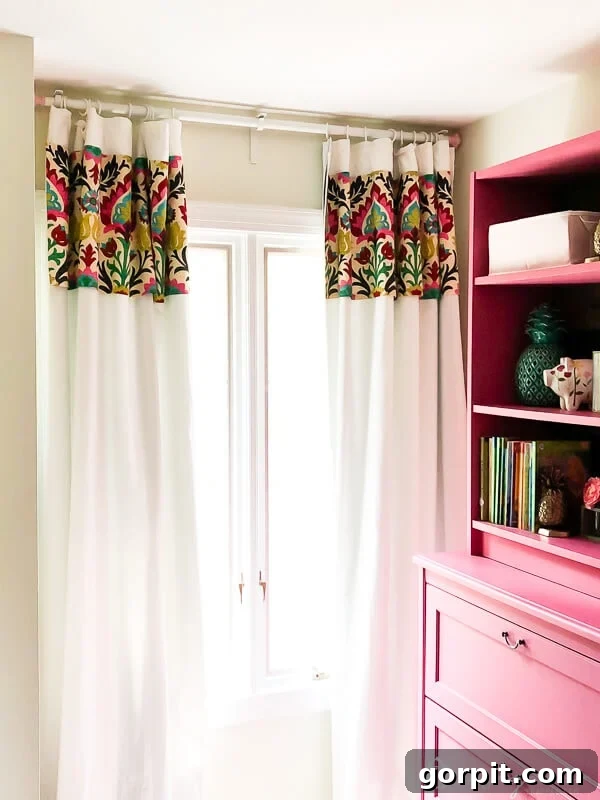
Now for the final step! Decide exactly where you want to position your beautiful accent strip on your pre-made curtain panel. I chose to place mine just below the curtain rod pocket at the top of each panel, creating a distinctive header effect. Lay your curtain panel flat and position your prepared accent fabric strip right side up onto the panel, precisely where you intend to adhere it. Take your time to ensure it’s straight and evenly aligned.
Once happy with the placement, lift each edge of the accent strip slightly and place strips of hem tape underneath all four edges. Carefully press each edge with your iron, following the hem tape manufacturer’s instructions, to create a strong, permanent bond between the accent fabric and the main curtain panel. Work slowly and methodically to avoid shifting the fabric.
It’s worth noting that my chosen accent fabric (this lovely Waverly pattern) was 54 inches wide, while my pre-made curtain panels were 57 inches wide. This meant my accent strip wasn’t quite as wide as the panels. In this situation, I simply centered the accent strip on each curtain panel, allowing a small border of the main curtain fabric to show on either side. This didn’t bother me at all, and once the curtains were hung, the slight difference was completely unnoticeable. This adaptability is one of the many perks of this DIY method!
The Amazing Results: Custom Curtains on a Budget
And that’s it! I told you this was the no-sew, lazy way to make curtains, and I wasn’t kidding. The entire process is surprisingly simple and incredibly cost-effective. Imagine the hundreds of dollars custom curtain panels from a boutique might cost; this entire project came in at around $50, including the fabric and pre-made panels. The satisfaction of creating something so beautiful and personalized for such a modest investment is truly rewarding.
My daughter, Attley, absolutely adores her new curtains, and I couldn’t be happier with how they transformed her room. My partner, Joe, is equally pleased that the project didn’t break the bank. It’s a win-win for everyone!
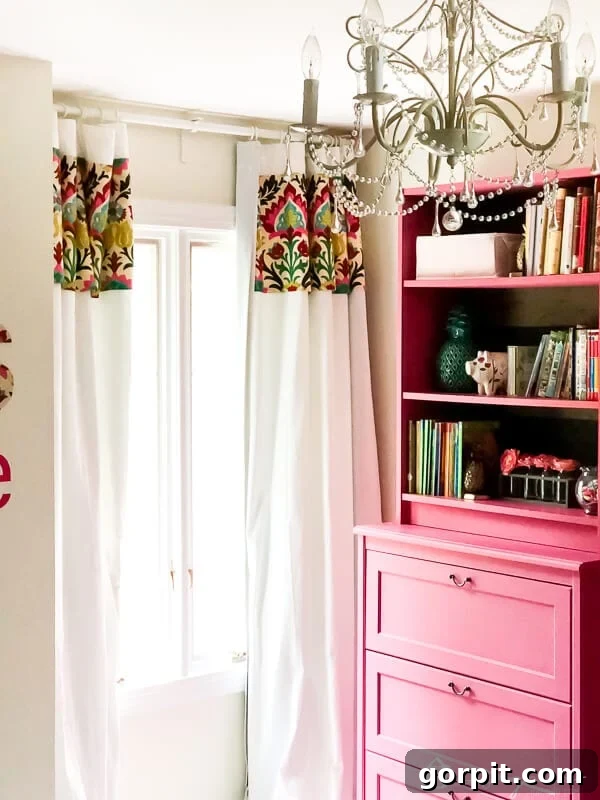
Beyond the Basic: Customization and Inspiration
This no-sew method opens up a world of possibilities for customizing your window treatments. Don’t limit yourself to just one accent strip! Consider adding multiple strips in varying widths or colors for a bolder statement. You could also experiment with placing accent fabrics at the bottom of your panels, or even vertically along the inner or outer edges. This technique is also fantastic for incorporating trims, tassels, or other decorative elements that you can secure with fabric glue or additional hem tape.
Think about seasonal changes: a quick swap of accent fabric can completely refresh a room’s look without replacing entire curtain panels. This flexibility makes it incredibly easy and affordable to keep your home decor updated and reflective of your current style or holiday themes. The durability of iron-on hem tape, when applied correctly, ensures these custom creations will stand the test of time, enduring regular use and even gentle washing (always check your hem tape’s specific care instructions).
Final Thoughts: Embrace the Joy of DIY Decor
I genuinely hope this tutorial empowers you to dive into the world of DIY home decor. Creating your own custom window treatments doesn’t require advanced sewing skills or a huge budget. With a little patience, an iron, and some clever hem tape, you can achieve a sophisticated and personalized look that rivals high-end alternatives. There’s immense satisfaction in stepping back and admiring something beautiful you’ve made with your own hands.
If you found this idea inspiring, please consider saving it to Pinterest to share with others and for your future reference! And before you leave, be sure to explore my other popular DIY posts and free design guides for more home decor inspiration and budget-friendly projects. Happy crafting!