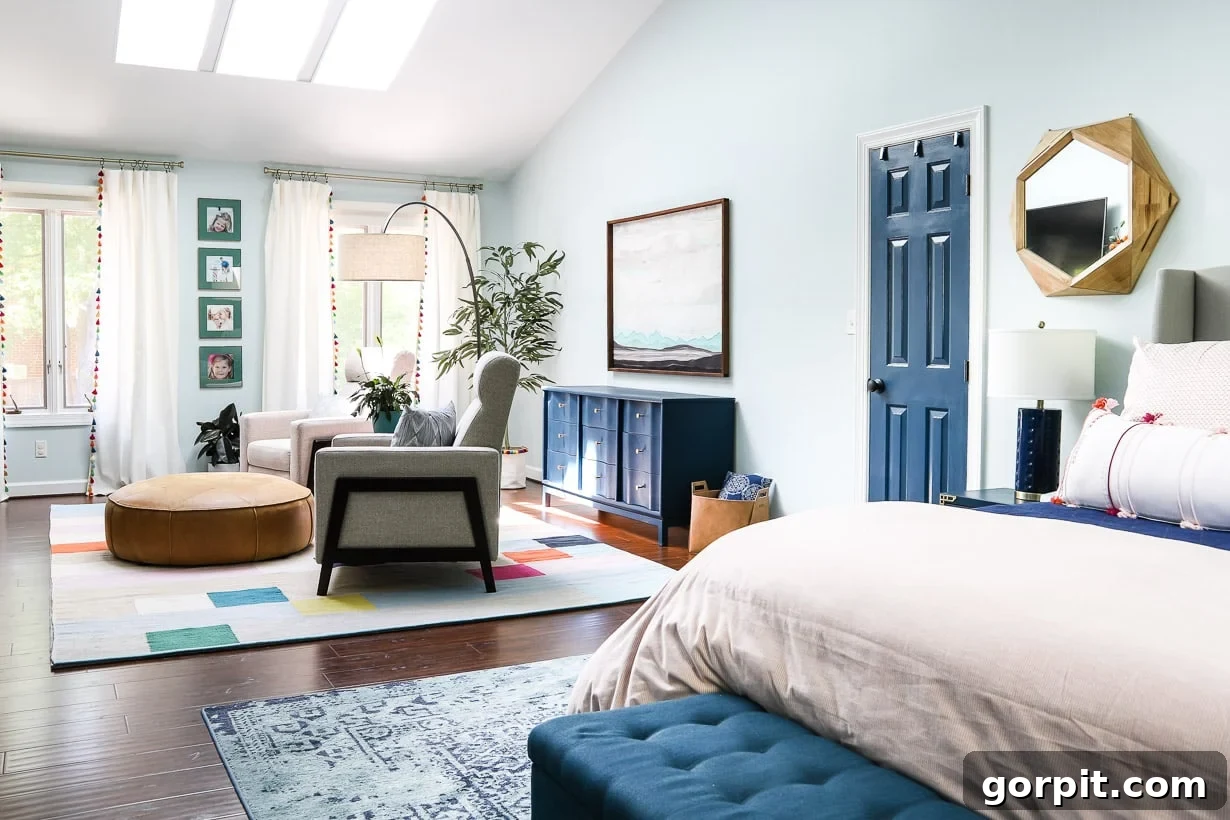
The Long-Awaited Reveal: Our Vibrant & Tranquil Master Bedroom Makeover
After five months of dedicated effort, our master bedroom makeover is finally complete! We’re thrilled to unveil a space that perfectly balances vibrant energy with soothing tranquility. This room is a testament to mindful design, transforming into a happy and fun sanctuary that also provides a deeply relaxing escape. If you’ve been following our journey on Instagram, you know this renovation has been a labor of love, spanning from December until now. We deliberately took our time, determined to get every detail right after several previous iterations of this room never quite hit the mark. For our own sanity and design satisfaction, we absolutely needed to nail it this time. You’ll find a comprehensive source list at the bottom of this post, and I’ve linked to many items throughout the article to make it easy for you to explore.
Let’s take a quick trip down memory lane. We’ve called this house home for over seven years, a place built in 1986. When we first moved in, the master bedroom, like much of the house, was steeped in a sea of beige – incredibly boring and lacking any personality. It was a blank canvas, but one that desperately needed a splash of life and intention. You can get a fuller sense of our home’s transformation by taking our full house tour here.
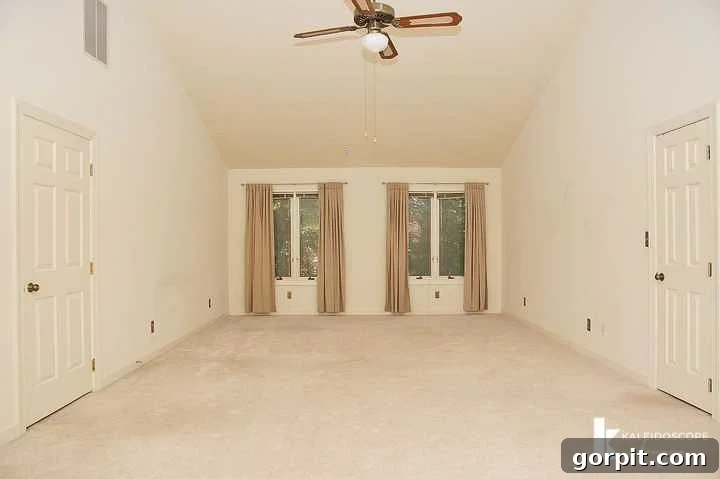
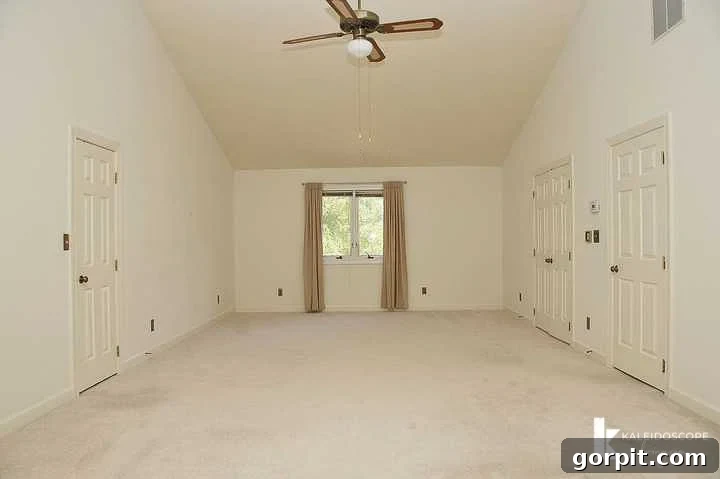
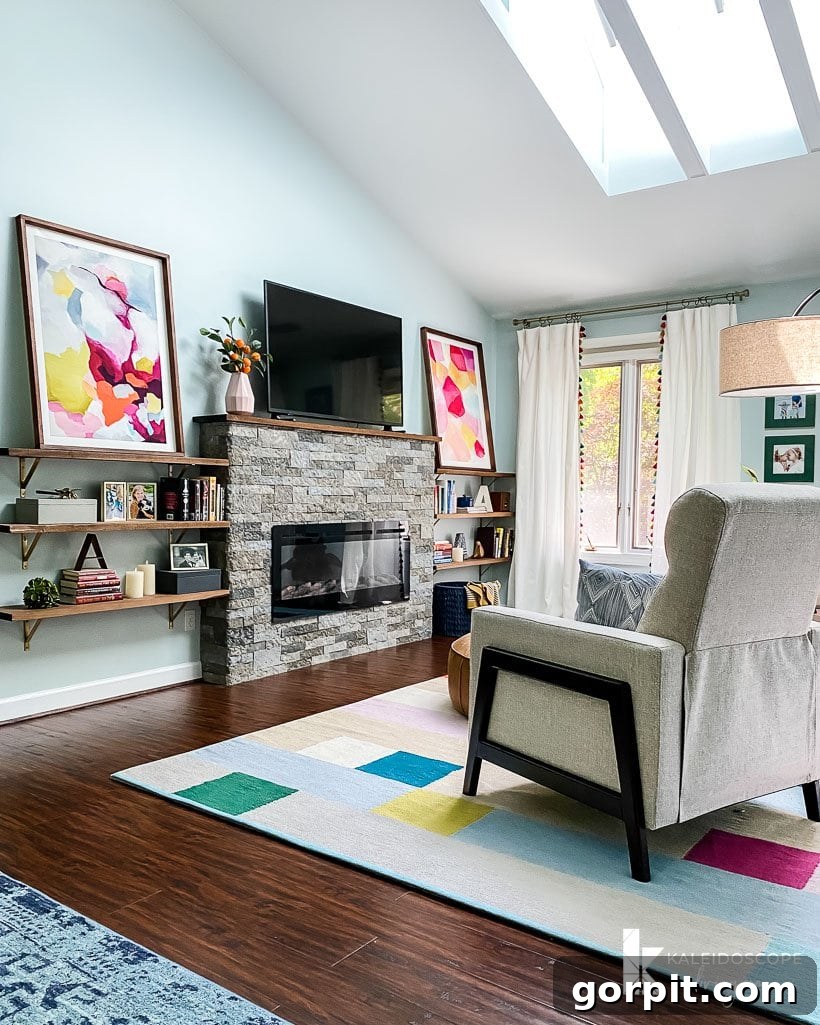
Over the years, our master bedroom has gradually evolved. Each step was a deliberate move towards creating the ideal space we envisioned. We began by tackling the flooring, ripping out the old carpet and replacing it with our favorite laminate flooring, a choice we’ve confidently extended throughout our home for its durability and aesthetic appeal. The bland walls and trim received a fresh coat of paint, instantly brightening the room. That sad, tiny ceiling fan was finally upgraded to a much larger, more efficient version, improving both air circulation and visual balance. More recently, I undertook the project of painting all the interior doors, a small but impactful detail that contributes significantly to the cohesive feel. We also introduced more natural light by adding beautiful skylights, transforming the room’s ambiance. To enhance comfort and create a focal point, we installed a DIY electric fireplace, offering both warmth and a cozy glow. And for the ultimate in privacy and light control, we finally added roller shades to our bedroom windows. It’s clear that this transformation wasn’t an overnight success; it took years of careful planning and the eventual development of a cohesive design plan to bring our bedroom to this point of colorful perfection.
And now, without further ado, feast your eyes on what our colorful and refreshed master bedroom looks like today!
This post contains affiliate links for your convenience. Click here for my full disclosure policy.
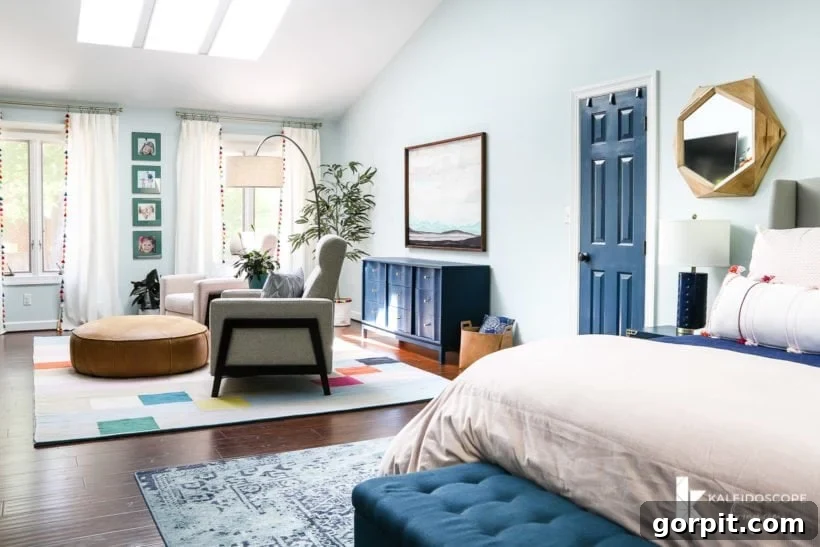
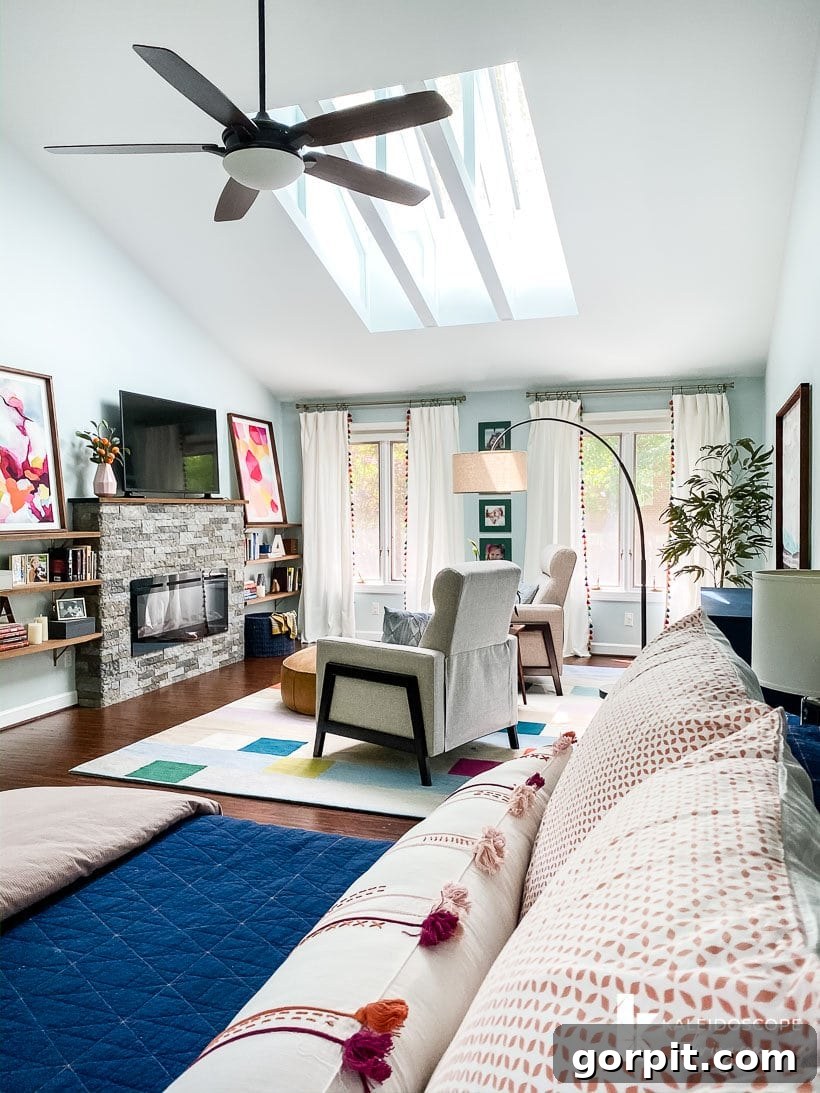
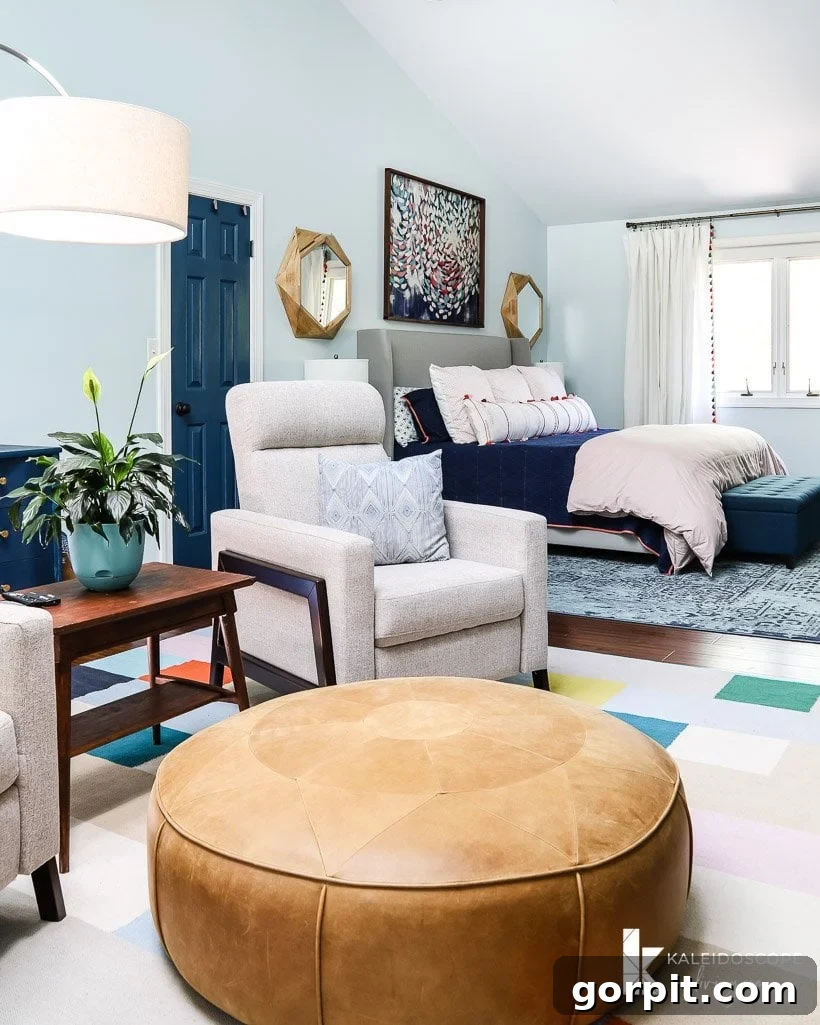
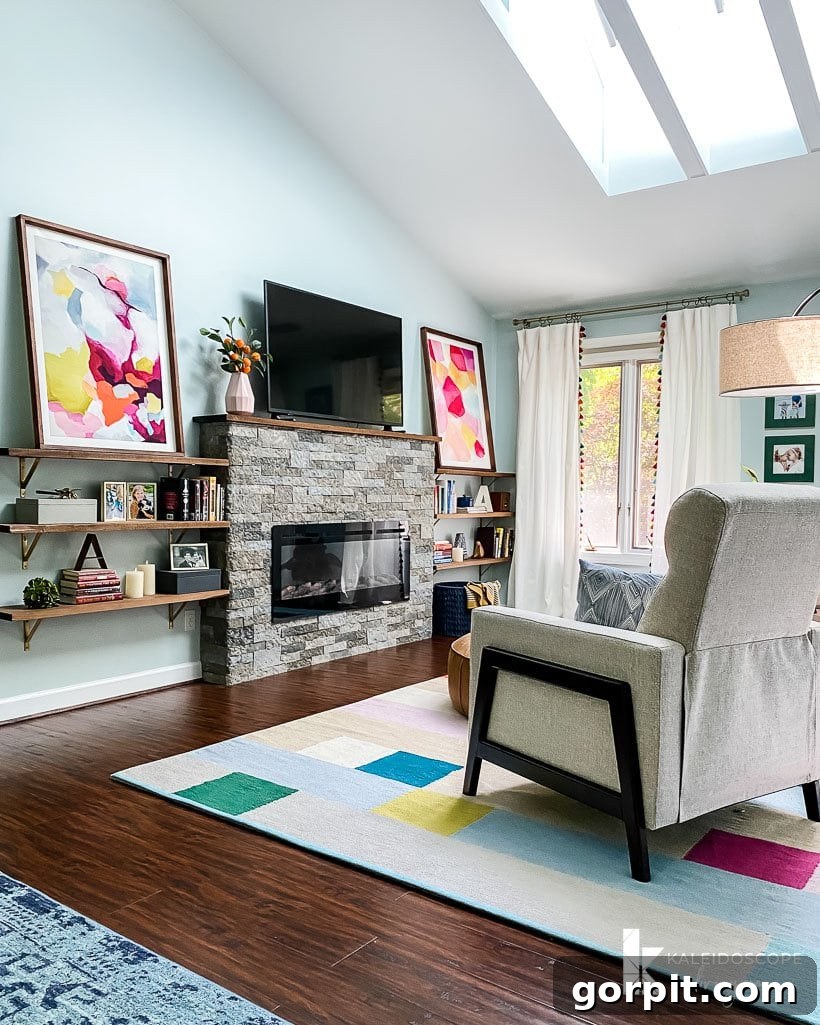
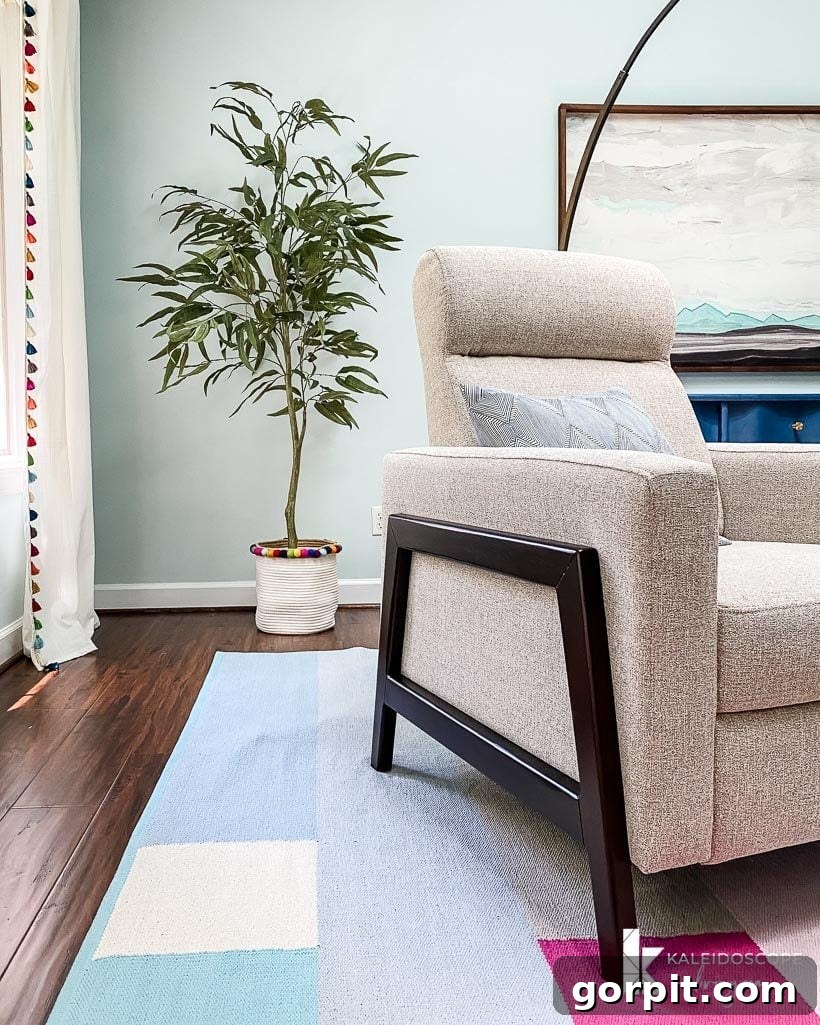
I can confidently say that this room now feels not just complete, but genuinely “right.” One of the biggest design challenges was finding the perfect furniture for the dedicated seating area. Joe was keen on recliners, having fallen in love with the comfort of this one in our family room. My preference leaned towards a small sectional sofa to maximize seating. In the end, we discovered these stunning, modern recliners at an incredible price point, which swayed my decision. And spoiler alert: I absolutely adore them and believe they were a far superior choice to a sectional for this space. Don’t tell Joe I said that, though, he’d never let me hear the end of it!
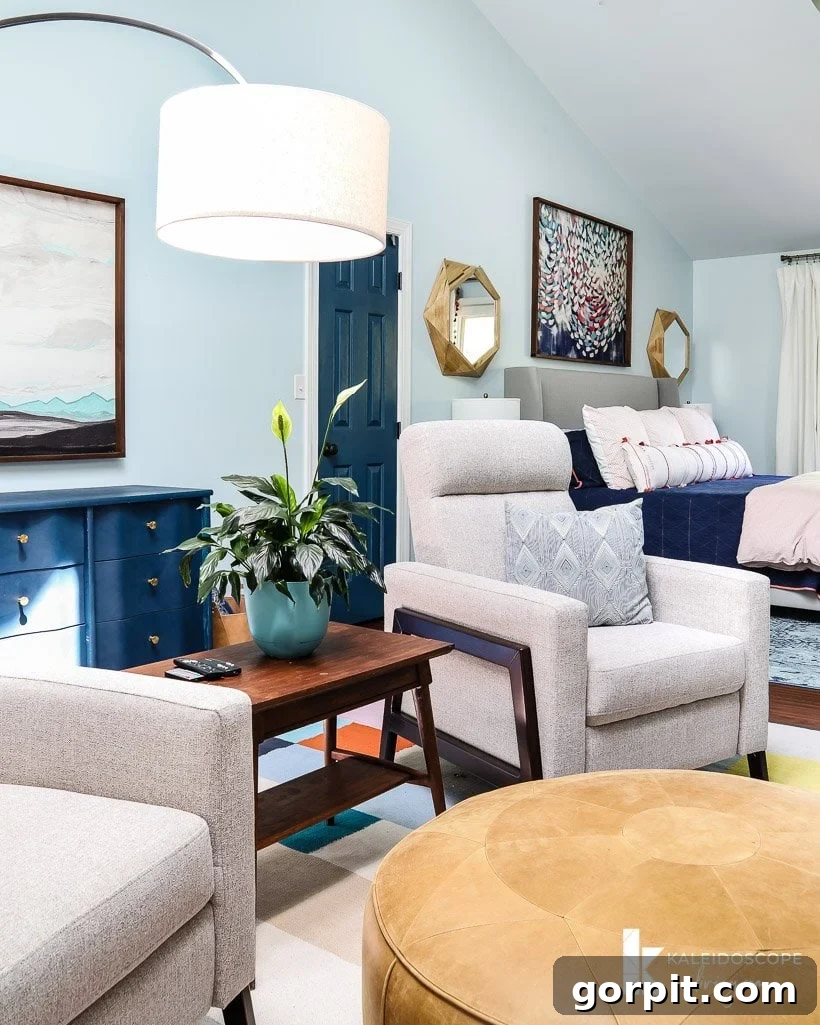
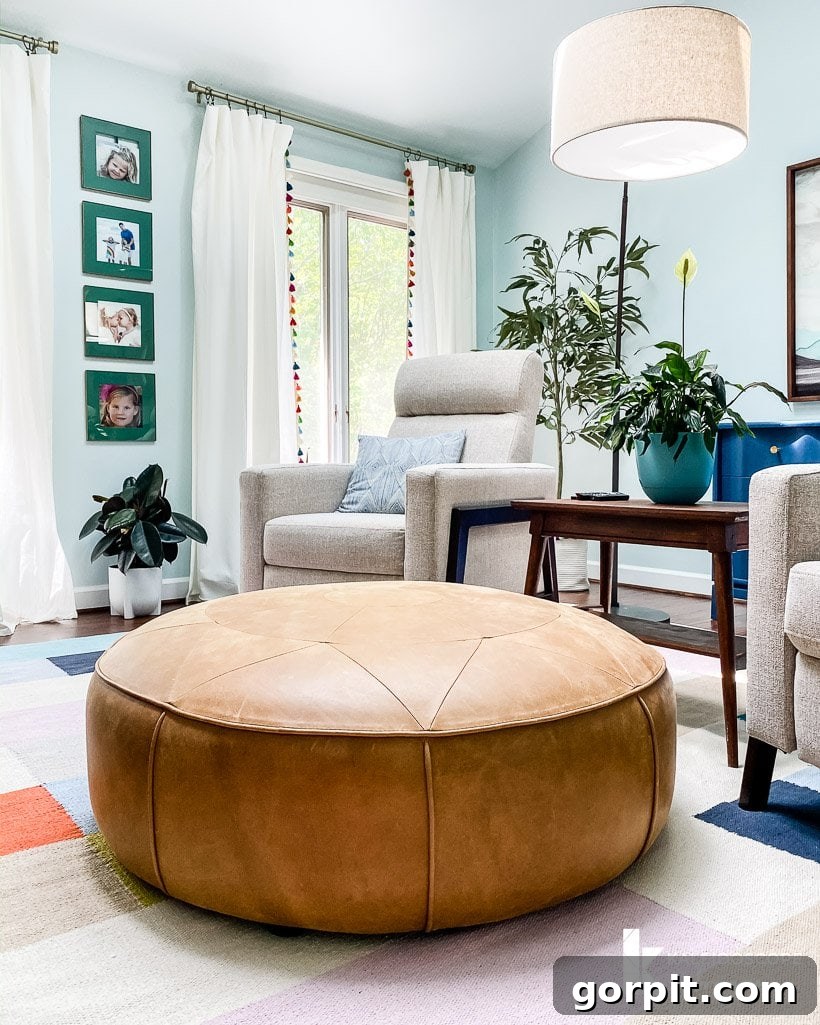
We cleverly repurposed the gorgeous leather ottoman from our kitchen’s sitting area, where it had been just a touch too large. Here in the bedroom, it’s absolutely perfect, offering a comfortable spot for both of us to rest our feet while enjoying our stylish recliners. The charming side table was a fantastic $15 find from Facebook Marketplace. It still needs a little refinishing, but I’m completely smitten with its character. We also “stole” the elegant arc lamp from our family room, realizing it creates a much better ambiance and fits the scale of this space perfectly. To tie the seating area together, we introduced this beautiful rug, and I’m totally smitten with it! The true bonus, however, is that JOE ACTUALLY LIKES THE RUG! That, my friends, feels like an absolute miracle in interior design!
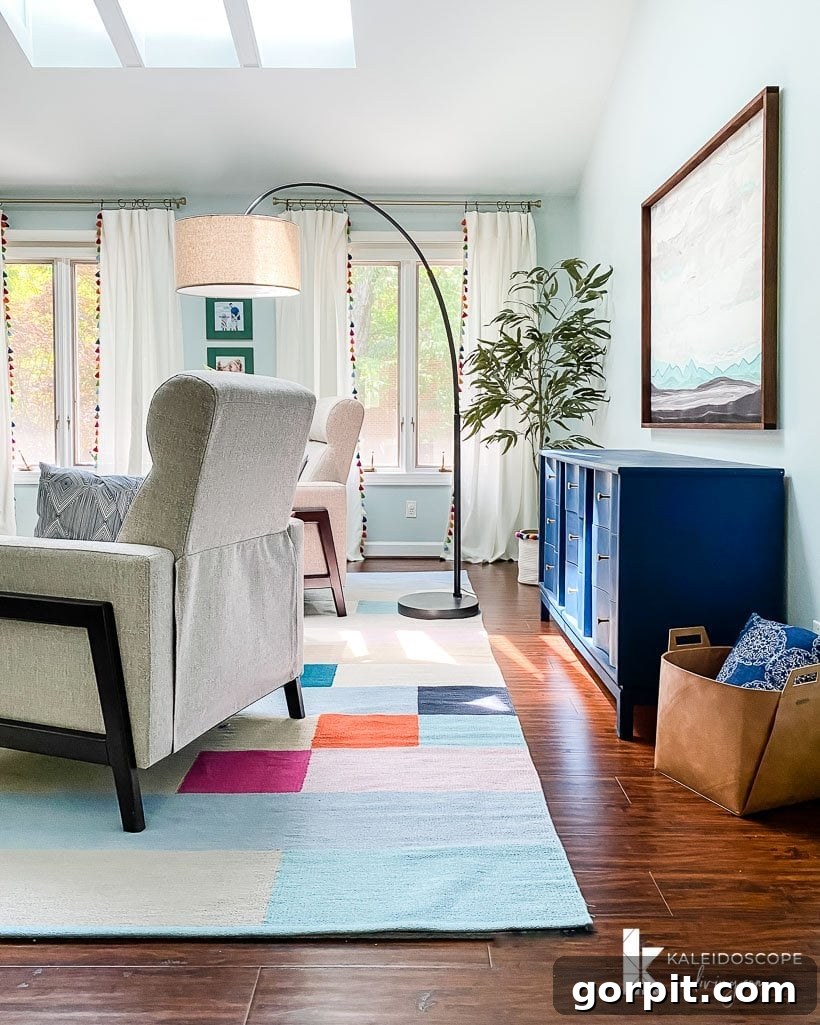
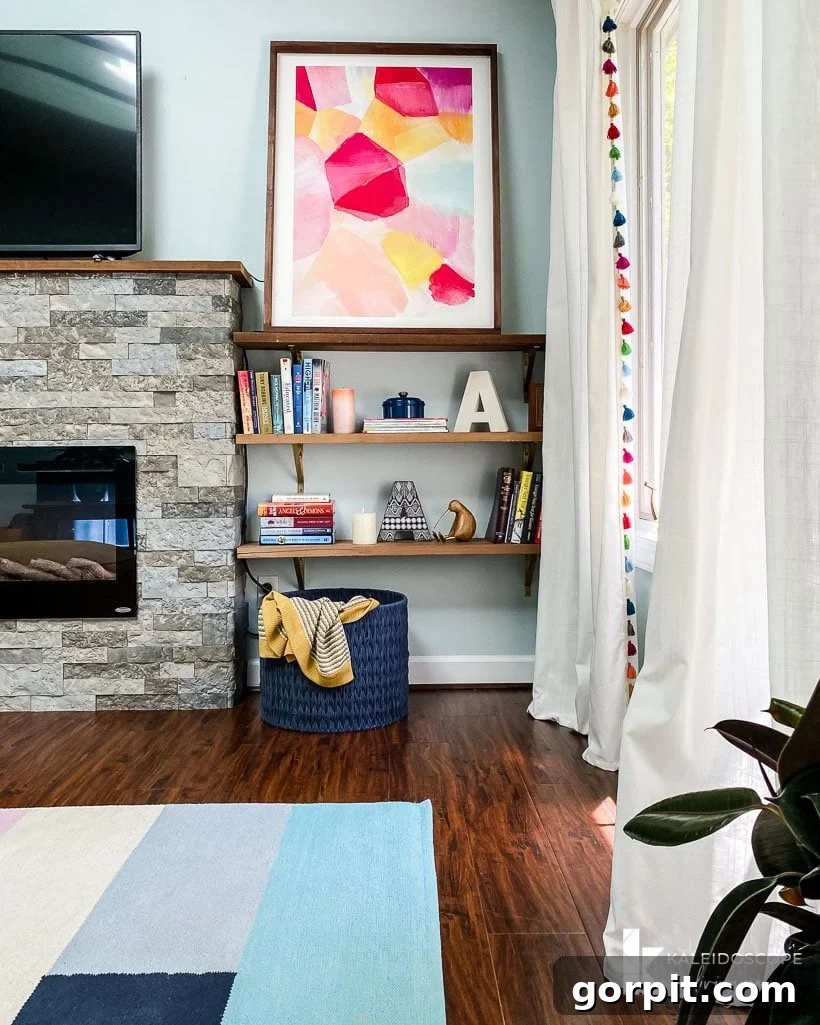
Beyond the new recliners and the delightful second-hand side table, we achieved a significant win by not purchasing any other new furniture for the space. This was largely accomplished by strategically rearranging existing pieces. This includes the beloved dresser that I found at a thrift store an astonishing 14 years ago – it remains one of my absolute favorite pieces in our entire home. We also made clever use of most of our existing artwork, although this piece and this piece on the wall above the dresser are new additions. To ensure we could incorporate large prints without breaking the bank, we framed them ourselves using our simple DIY frames, which cost less than $20 each to construct. This approach allowed us to add significant visual impact affordably.
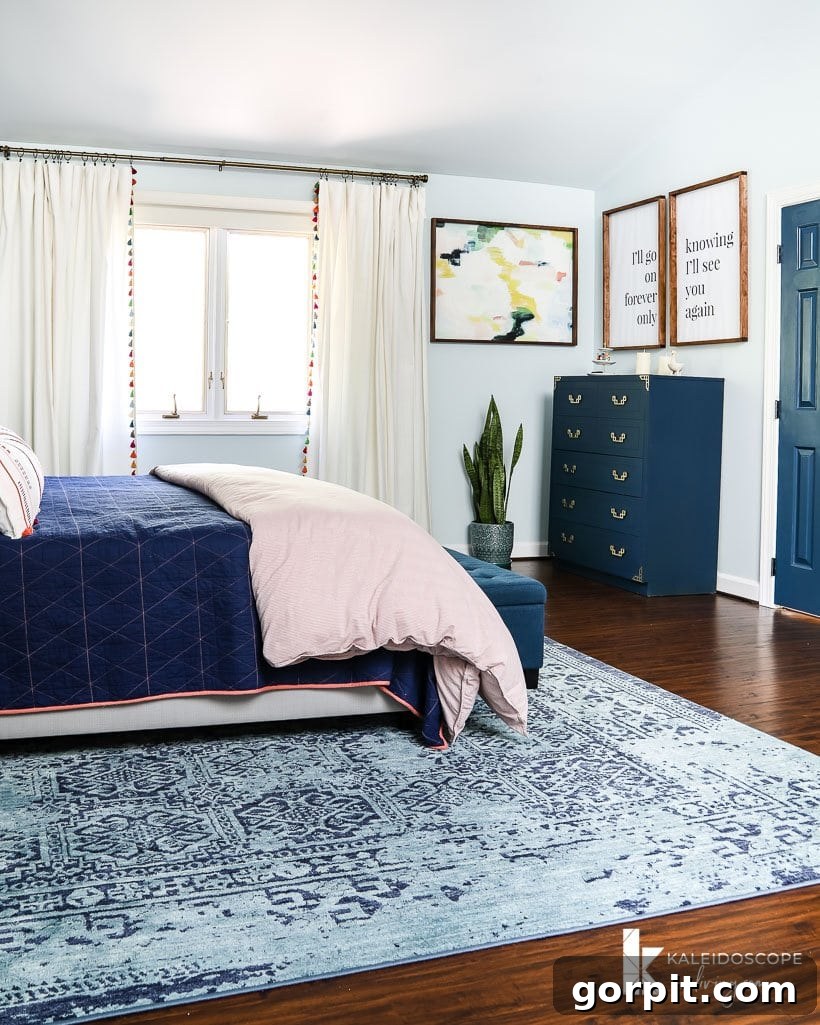
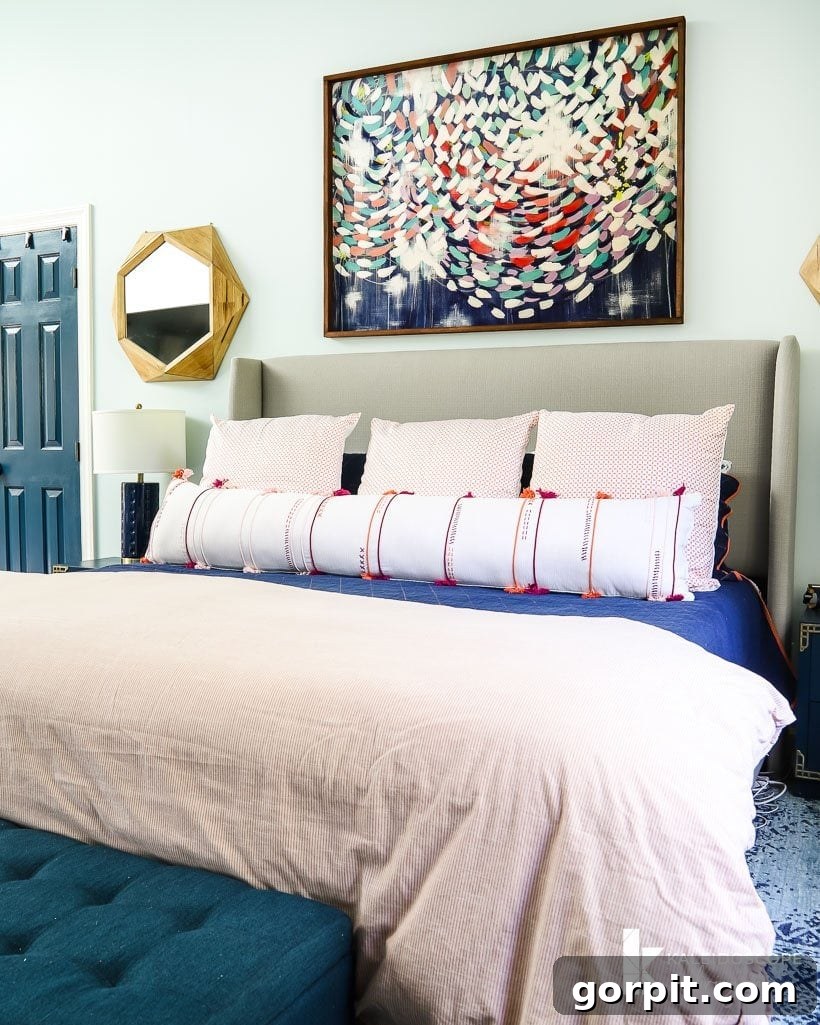
On the sleeping side of our master bedroom, the changes were more subtle but equally impactful. Primarily, it involved some furniture rearranging and relocating one of our existing art prints to its new, perfect spot. Oh, and I had the pleasure of crafting that cozy DIY bolster pillow and the charming tassel curtains myself – tutorials for both will be coming soon, so stay tuned! The striking rug beneath our bed has been a fixture here for a while and remains one of my absolute favorites. We love it so much, in fact, that we also have one in Avery’s room and our foyer, a testament to its enduring appeal and ability to anchor a space with both style and comfort.
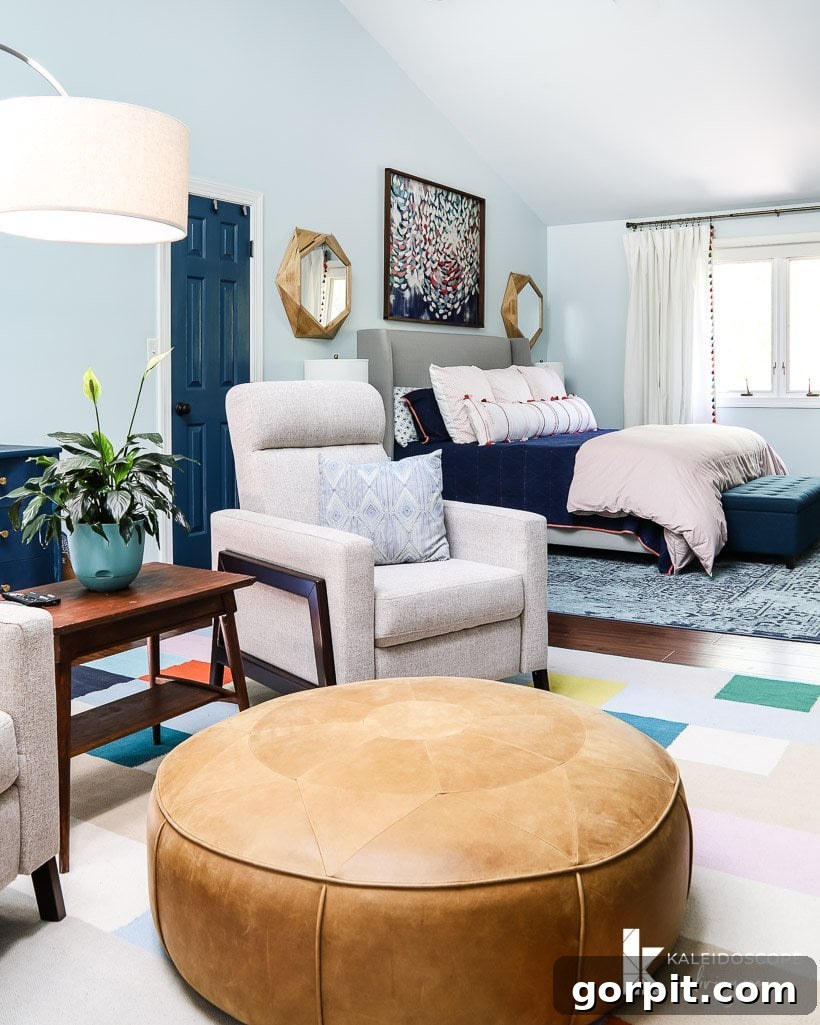
The tall dresser, which previously resided on the other side of the room, now commands this space beautifully, feeling much more at home here. I’m especially delighted that I was able to retain those special prints I designed, featuring lyrics from the Dave Matthews Band song we danced to at our wedding, hanging proudly above it. (P.S. You can get those free printables and access much more by subscribing to our community).
Here are some additional perspectives of our revitalized master bedroom. The seating area has quickly become our favorite retreat, a cherished spot to unwind and watch a show after our girls are tucked into bed. It’s truly a sanctuary within our home. Of course, I couldn’t resist incorporating some treasured family photos, displayed in these DIY gold frames, each costing less than $10 to make. I further personalized them by painting the new photo mats a lovely shade of green, adding another layer of color and warmth to the space. Every detail, from the grand furniture arrangements to the smallest decorative accents, has been carefully considered to cultivate an atmosphere of comfort, joy, and relaxation.
And there you have it, friends! Our colorful master bedroom makeover is now fully unveiled. It’s a space that truly embodies brightness and happiness, while still providing the soothing and relaxing sanctuary we always dreamed of. This project has been a journey of patience and intentional design, and we couldn’t be happier with the outcome. As promised, you’ll find a detailed source list below, making it easy for you to recreate elements of this vibrant and tranquil retreat in your own home. Dive in and explore the pieces that brought this vision to life!
Colorful Bedroom Source List
PAINT COLORS: Wall paint color: Morning Fog by Olympic | Dresser, chest of drawers and bedside table color: Lady Singing the Blues by AmyHowardat Home One-Step Paint
DIY PROJECTS: DIY Fireplace Build| DIY Bedside Table Makeover |DIY Art Frames| Typography Art Prints (click to get them FREE) | How to Paint Wood Furniture
For those unique pieces we lovingly thrifted, purchased second-hand, or even rescued from the side of the road (like our charming nightstands), I’ve included links to similar items so you can achieve a comparable look. Simply click on any of the images for full product details and discover how these elements contribute to our vibrant bedroom design.
Seating Area Sources
Sleeping Area Sources
I must admit, I am incredibly relieved and proud that we resisted the urge to rush this project. In the past, impulsiveness led to hasty decisions and numerous re-dos, which explains why this room has undergone so many transformations over the years. Does this mean I’ve finally learned my lesson and will embrace a slower, more deliberate pace from now on? Perhaps. It’s certainly a goal to strive for, recognizing the immense satisfaction that comes from truly thoughtful design.
If you’re curious about the system I use to craft a cohesive design plan for any space, you can explore it here. It’s been instrumental in helping us achieve rooms we genuinely love. And before you navigate away, consider joining our vibrant community as a VIP – it’s completely free! As a valued member, you’ll gain exclusive access to a wealth of freebies, including helpful guides that will empower you to design and decorate spaces in your own home that truly reflect your style and bring you joy.
For an in-depth look at my comprehensive approach to transforming rooms and spaces throughout our home, be sure to check out Designer in a Binder®. It’s a resource designed to simplify the design process and help you create spaces you adore.
And if you desire even more exclusive content, including behind-the-scenes sneak peeks into our latest projects and design insights, make sure to subscribe to our newsletter before you leave!