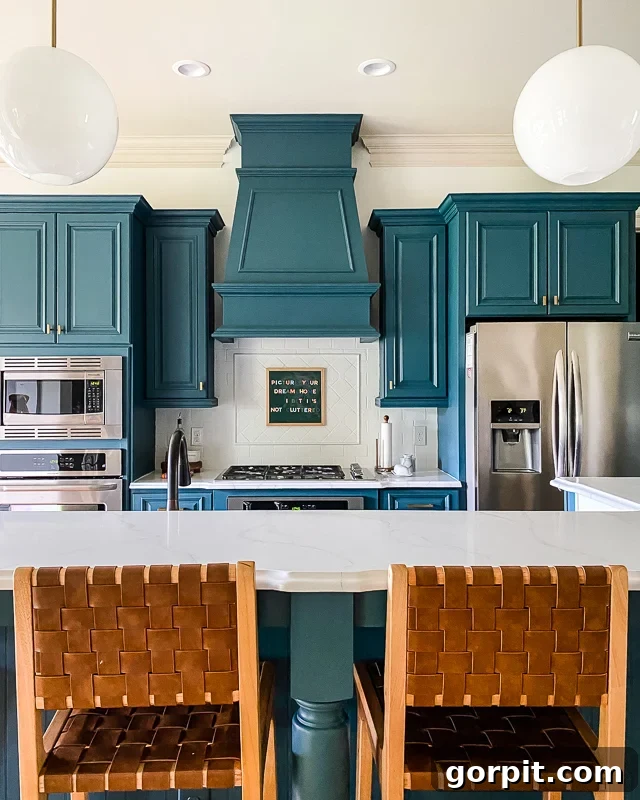
Do you dream of beautiful, stylish countertops but find the cost of replacement daunting? What if I told you that you could completely transform your existing countertops with paint? It might sound unconventional, but trust me, it’s a game-changer! Nearly two years ago, I painted our drab, brown granite countertops, giving them a fresh, modern marble-like finish, and I haven’t looked back since. While the results have been fantastic, there are crucial insights I wish I had known before embarking on this journey. This comprehensive guide will share all the essential knowledge, tips, and tricks for successfully painting your countertops to mimic the elegance of natural marble.
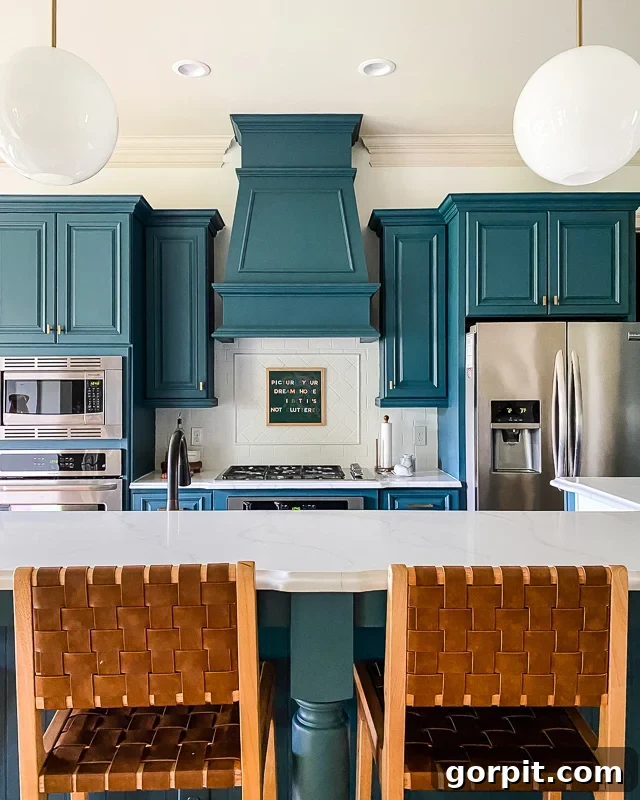
Table of Contents
It’s no secret that our kitchen was far from my ideal aesthetic when we first moved into this house a couple of years ago. We embarked on a significant yet budget-friendly kitchen makeover that included painting our kitchen cabinets and even painting our tile backsplash. The transformation was incredible, bringing our kitchen much closer to our personal style. However, the existing brown, speckled granite countertops remained, significantly detracting from the overall updated look. We disliked both their color and pattern, but a full countertop replacement was simply not an option within our budget at the time.
This led me to explore various affordable DIY countertop options. After thorough research, I decided that using a specialized countertop paint kit to achieve a sophisticated marble look was the perfect solution. The Giani countertop paint kit proved to be incredibly effective, delivering the exact aesthetic we envisioned. I was so delighted with the results in our kitchen that I’ve since applied the same method to update the countertops in both of our daughters’ bathrooms and our vibrant, modern laundry room. In this post, I will share my honest review, invaluable tips and tricks, and a comprehensive, easy-to-follow tutorial so you can achieve similar stunning results in your own home.

SEE THE UPDATE
We extensively used our painted countertops for several years before our kitchen was eventually demolished to make way for a complete kitchen renovation. Discover the one crucial step I would approach differently if I were to do it again, and view a video and photos showcasing their condition after 3.5 years of daily use. Click the button below for a detailed long-term update!
Is Painting Countertops a Good Idea?
Absolutely! If you’re currently dealing with outdated or undesirable countertops but lack the budget for a full replacement, painting them is an excellent and highly recommended alternative. I’ve personally experimented with various DIY countertop solutions, including peel-and-stick countertop wraps for a different area of our home. In my experience, these wraps were significantly more challenging to apply than paint and didn’t achieve nearly the same realistic or high-quality finish as our painted kitchen countertops. Painting offers a superior aesthetic result and greater flexibility in achieving your desired look, especially if you’re aiming for something as intricate as marble veining.
Benefits of Painting Countertops
Let’s delve into the compelling advantages of choosing to paint your countertops. The most significant benefit is undoubtedly the incredible cost-effectiveness. A complete countertop replacement can easily run into thousands of dollars, a hefty investment for most homeowners. In contrast, painting your countertops, even with high-quality primer, paint, and sealer, typically costs around $200-$300. Many specialized countertop paint kits are available, formulated specifically for this purpose and conveniently including all necessary supplies, making it an even more straightforward and budget-friendly option.
Beyond the cost savings, painting countertops is a remarkably achievable DIY project, even for those with minimal experience. The process is not overly complex and can even be quite enjoyable. For instance, my daughters, who were only ten years old at the time, enthusiastically helped with the intricate veining process on our counters, demonstrating just how accessible this project is. The steps are intuitive, and with a good quality kit, it’s hard to make irreversible mistakes.
Finally, durability is a major plus. When you invest in a high-quality countertop paint kit and follow the instructions diligently, your newly painted countertops will stand up beautifully to daily wear and tear. They are designed to be resilient and long-lasting, providing years of enjoyment without the need for costly replacements.
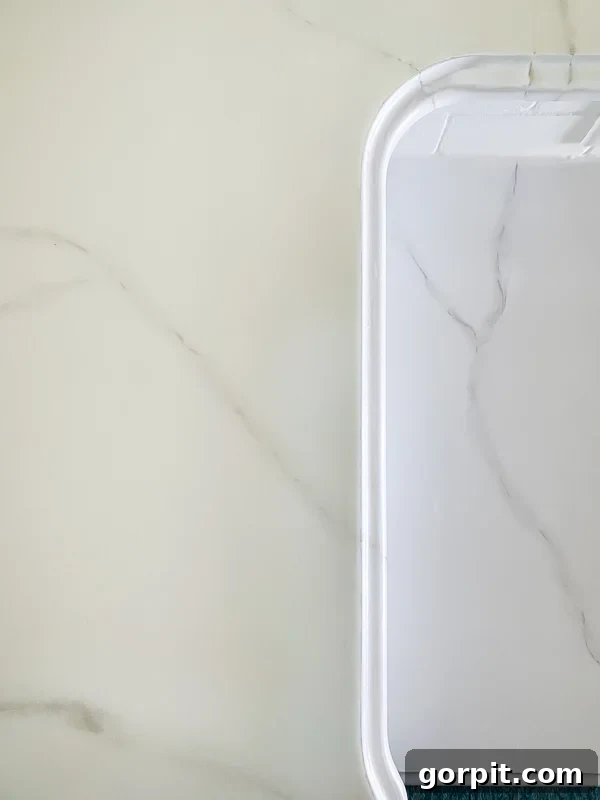
Potential Downsides of Painting Countertops
Based on my personal experience, there are primarily two considerations when deciding to transform your counters with paint. First, it is a time-consuming project. While it’s certainly not difficult, it requires patience and adherence to drying times between coats. This means you will temporarily lose access to your kitchen or bathroom for a period of several days, which requires some planning. Although the active painting time might be relatively short, the curing process demands patience.
The second, and perhaps more significant, drawback for some is that you cannot place hot pots or pans directly onto your newly painted countertops. The topcoat, typically an epoxy, is heat-resistant to a certain degree (often around 150°F or 65°C), but direct contact with high heat from a stove or oven can cause damage. For us, this wasn’t a major issue as we already used trivets or hot pads for our granite countertops. However, if you’re accustomed to placing hot items directly on your current surfaces, this is an important lifestyle adjustment to consider. Always use appropriate protection to maintain the integrity of your painted finish.
This post contains affiliate links for your convenience. Click here for my full disclosure policy.
Choosing the Right Paint for Countertops
When it comes to painting countertops, selecting the right product is paramount for both durability and aesthetic success. I strongly advocate for purchasing a specialized kit specifically formulated for countertops. These kits are engineered to withstand the unique demands of kitchen and bathroom surfaces, offering superior adhesion, resilience, and a protective finish that standard paints simply cannot match.
After extensive personal research, including reading hundreds of user reviews, I chose the Giani countertop paint kits. My conclusion was that Giani offered the best combination of durability, affordability, and ease of use. They provide a wide array of styles and colors, making it easy to find a kit that aligns with your design vision. These kits are known for their high-quality epoxy topcoats, which are crucial for creating a long-lasting, protective barrier.
My decision was also heavily influenced by conversations with individuals who had firsthand experience painting their countertops. The feedback was remarkably consistent: those who used the Rustoleum Countertop Paint kit generally reported issues with peeling and chipping within a relatively short period, and consequently, did not recommend it. Conversely, every single person I spoke with who had used a Giani countertop kit expressed immense satisfaction with their results and reported no significant issues regarding performance or longevity. This anecdotal evidence strongly reinforced my decision to choose Giani, and I have been thoroughly pleased with its performance across multiple projects in my home.
Can You Paint Laminate Countertops? What Surfaces Are Suitable?
One of the remarkable advantages of the Giani countertop paint kit is its incredible versatility. It’s designed to adhere to and transform a vast array of countertop materials, making it a viable option for almost any home. While we personally used it to update our granite counters, the kit is equally effective on many other popular surfaces. This includes laminate, which is a very common and often outdated countertop material in many homes, as well as Formica, Corian, ceramic tile, butcher block, and even cultured marble.
The ability to paint such a diverse range of materials opens up a world of possibilities for homeowners looking to update their spaces without the high cost of replacement. However, it is critically important to note that while the kit works on many surfaces, each material may require a slightly different preparation process. Always refer to the manufacturer’s specific instructions provided with your Giani kit to ensure proper surface preparation for your particular countertop type. Adhering to these guidelines is key to achieving optimal adhesion, a smooth finish, and long-lasting durability.
How to Paint Countertops to Look Like Marble: A Step-by-Step Tutorial
Now for the exciting part! I’m going to walk you through the exact process we followed to paint our countertops, achieving that stunning marble aesthetic using the recommended Giani kit. This tutorial is incredibly detailed because I believe in providing all the information you need for a successful DIY project. I’ll also address the many questions that have come my way since completing this transformation. So, settle in and read through this entire guide – it will be well worth your time if you’re considering tackling this project yourself. Get ready to create the marble look you’ve always dreamed of!
To make your project even smoother, consider grabbing the FREE “How to Paint Countertops” printable instructions. This handy guide summarizes the key steps for quick reference!
Thank you to DAP Products for sponsoring this post. As always, all opinions are 100% my own. This post contains some affiliate links for your convenience. Click here to read my full disclosure policy.
Materials Needed
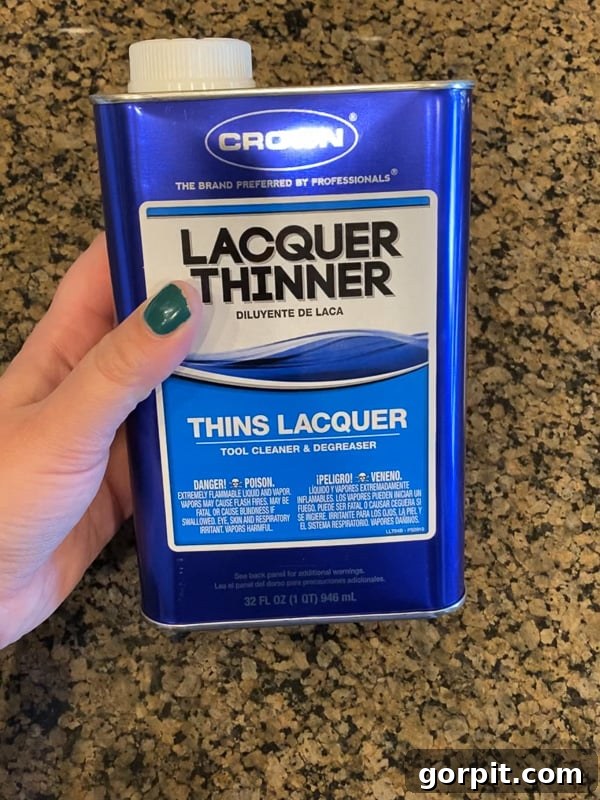
- Lacquer thinner (essential for cleaning granite countertops prior to painting)
- Giani Countertop Paint Kit
- This comprehensive kit includes virtually EVERYTHING you’ll need: primer, mineral paint for veining, epoxy resin, activator, foam brushes, rollers, and plastic sheeting to protect your surrounding cabinets.
- Giani states that one kit covers approximately 35 square feet of countertop. We had just under 100 square feet of countertop, and one kit provided plenty of primer and mineral paint. However, for the epoxy topcoat, we *almost* had enough with a single kit, but ultimately needed one additional set of epoxy resin and activator. If I were to do it again, I would order 1 full kit and 1 extra set of the epoxy topcoat, which can be purchased separately. This ensures you have ample topcoat for complete coverage and peace of mind.
- Brown paper flooring protection (not included in the kit, but highly recommended to safeguard your floors from drips and spills)
- Tweezers (invaluable for removing any lint or debris from the wet epoxy topcoat)
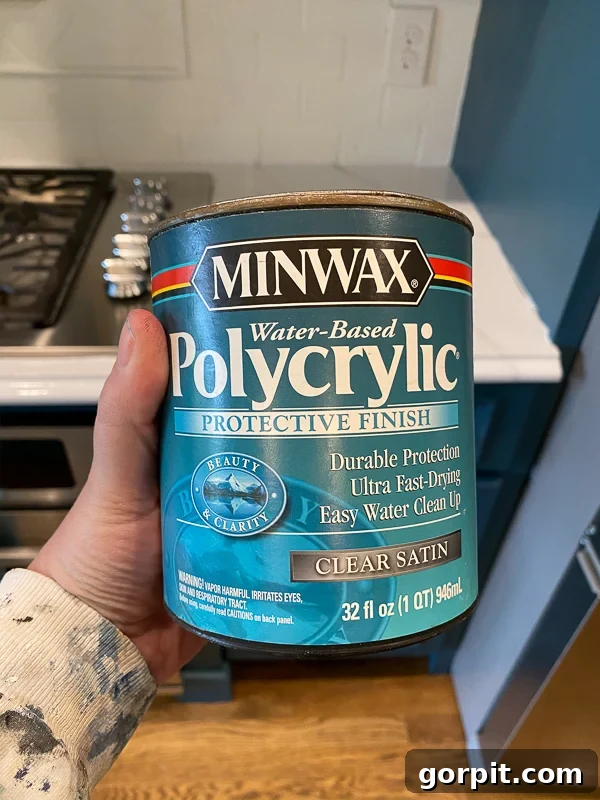
- Polycrylic topcoat in a satin finish (this is OPTIONAL, used only if you desire a honed, less glossy look for your finished counters)
- Caulk removal tool (for cleanly removing old caulk)
- Paper towels
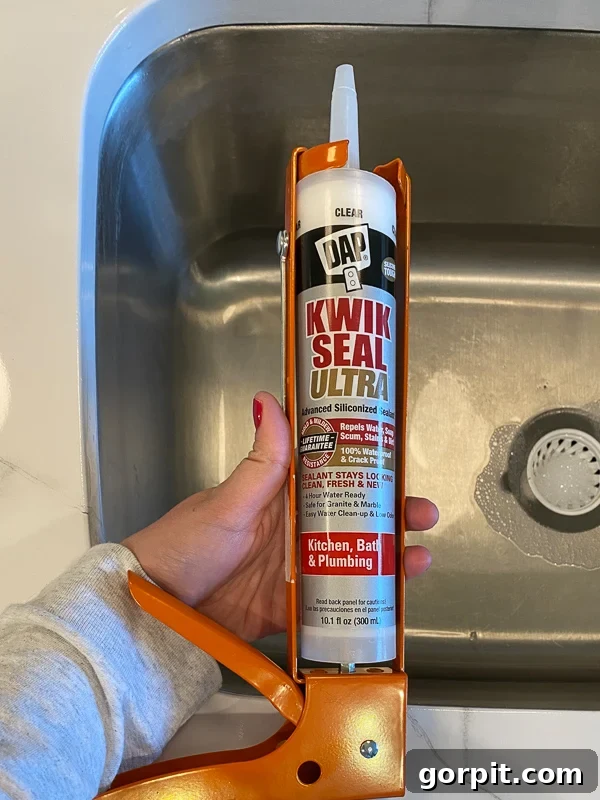
- DAP Kwik Seal Ultra (ideal for sealing around sinks and other high-moisture areas)
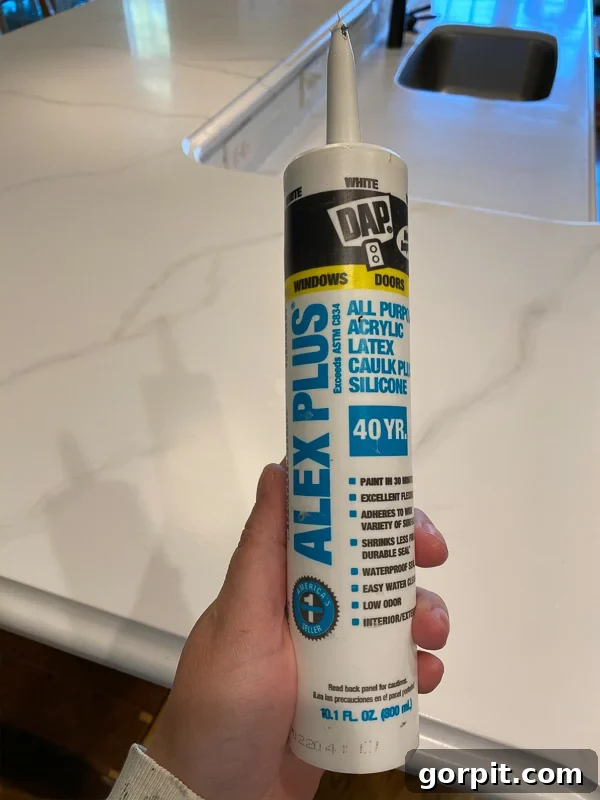
- DAP Alex Plus caulk (for sealing gaps along walls, backsplashes, and appliances)
Steps
Before diving into the detailed step-by-step instructions, take a moment to watch the overview video below. It provides a helpful visual summary of the entire process, making it easier to grasp each phase before you begin!
Phase 1: Prepping and Cleaning
Step 1: Remove Old Caulking. Begin by thoroughly removing any existing silicone caulking around your sink, backsplash, and edges. Use a caulk removal tool for a clean lift. Once the old caulk is gone, wipe down any residual material with rubbing alcohol to ensure a completely clean surface for new caulk later.
Step 2: Deep Clean and Prep Your Surface. Every type of countertop surface, regardless of material, must be meticulously cleaned with a scouring pad to eliminate all traces of grease, dirt, and grime. This is a critical step for paint adhesion. After this initial scrub, specific prep methods vary depending on your countertop material. Consult the chart below provided by Giani for detailed surface-specific instructions.

If you’re painting granite counters, like we did, an additional step is necessary. You’ll need to clean your counters with lacquer thinner, which helps degrease the stone and promote better adhesion for the primer. Follow this by wiping them down with rubbing alcohol for a final clean. Don’t worry—this part is quick and easy, but vital for granite surfaces.
Step 3: Repair Imperfections. Inspect your countertops for any deep gouges, noticeable seams, or other imperfections. Use wood filler or a suitable epoxy filler to smooth these out. Once the filler is completely dry, sand the repaired areas until they are flush with the surrounding surface. Finish by wiping away any dust with a damp cloth to ensure a perfectly smooth canvas for your paint.
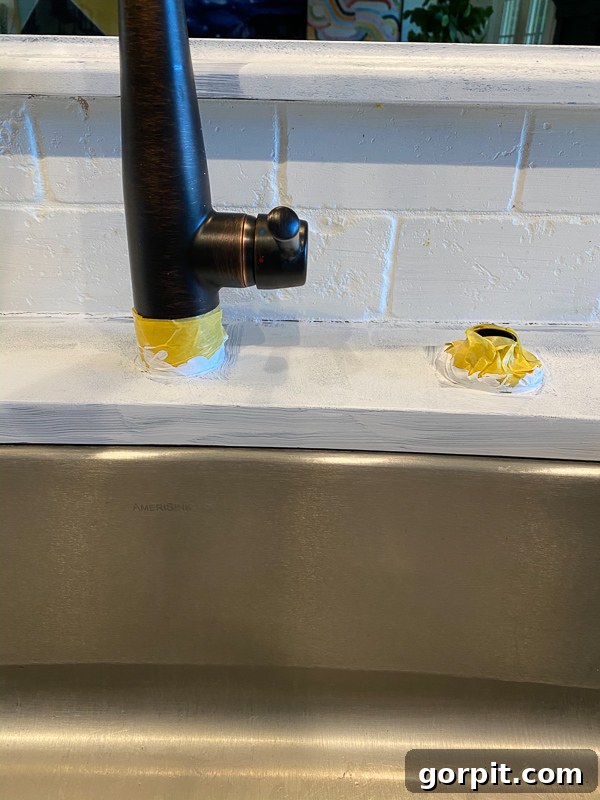
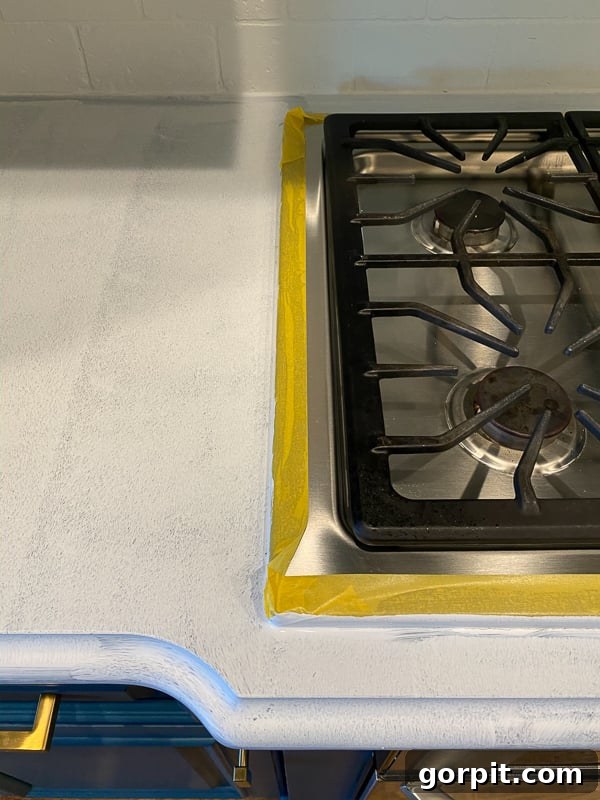
Step 4: Mask Off Surrounding Areas. Protect any areas you don’t want to get paint on. Use painter’s tape to meticulously tape off obstacles such as your stovetop, sink edges (if it’s not an undermount), the perimeter of your cabinets, and any other adjacent surfaces. This careful masking ensures clean lines and prevents accidental drips or splashes on your finished kitchen elements.
Phase 2: Painting and Veining
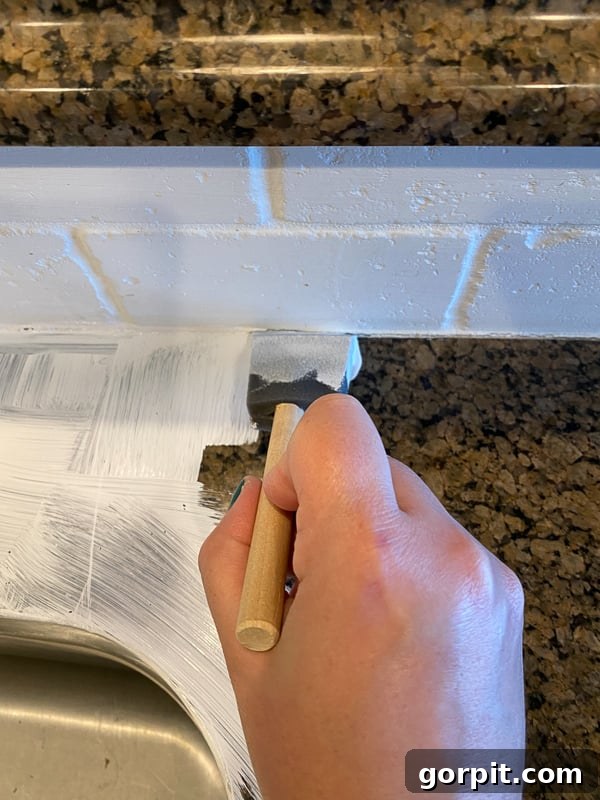
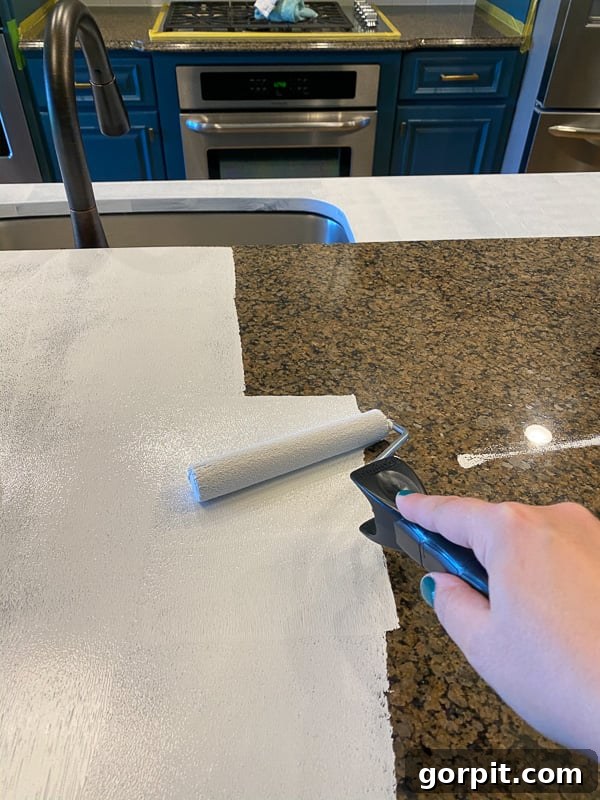
Step 5: Apply the Primer. Now, it’s time to begin the painting process! After thoroughly shaking and stirring your primer can, use the foam brush included in the kit to “cut in” around the edges of your countertops and any integrated backsplash sections made of the same material. Once the edges are done, use the roller to apply a thin, even coat of primer to the larger, flat surfaces. The key here is to work quickly and efficiently to ensure seamless blending between painted sections. Allow the first coat to dry for 4 hours before applying a second thin coat. Given the dark nature of our original granite, I ended up applying a third coat for complete opacity. Even with three coats across nearly 100 square feet of counter space, we had more than enough white primer from a single can. Always ensure your final primer coat dries for a full 4 hours before proceeding.
Step 6: Practice Your Veining Technique. Before touching your primed counters, spend some time studying photos of real marble patterns that appeal to you. Observe the natural flow, thickness, and branching of veins. The Giani kit includes a practice board for this very purpose. Use it! I knew I preferred a subtle veining, so I focused on images of marble slabs with minimal, elegant patterns while our primer was drying.
Step 7: Create the Marble Veining. Once your primer is completely dry, you can begin the exciting process of painting your veins. If there’s one thing I cannot emphasize enough, it’s this: painting the veins is incredibly easy and forgiving! Do not let it intimidate you. I even allowed my 10-year-old daughters to contribute to some of the veining, which speaks volumes about its simplicity. You’ll use the gray mineral paint included in the kit for this step.
Start by gently holding the end of the included artist’s brush and dragging it across your countertop to create thin, natural-looking veins. The goal is to mimic the organic flow of real marble, so aim for subtle waves and curves rather than straight lines. Giani suggests: “For the most organic shape, we recommend dragging your brush and moving it loosely to create more natural waves and flows. Tip: You can slightly wiggle or twist your brush as you drag it along the surface. Work in small, about 1-foot, sections as you build your veins. For longer veins, split up the length that you want to cover into 1-foot sections rather than connecting it all the way across at once. Also, you’ll paint on your major veins over the entire countertop prior to painting the edges or backsplash. However, you can paint those areas as you move along if you wish. Be sure to attach those veins at angles rather than straight up and down; like a real slab of marble!”
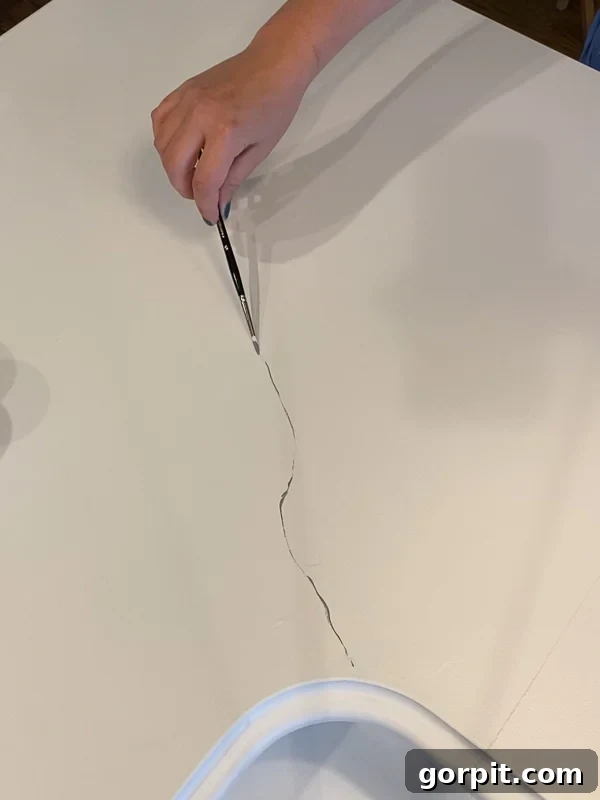
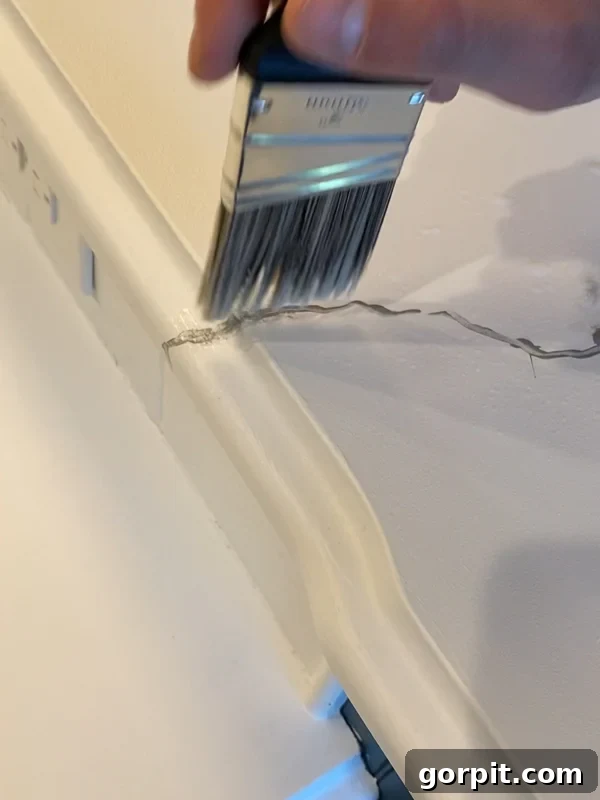
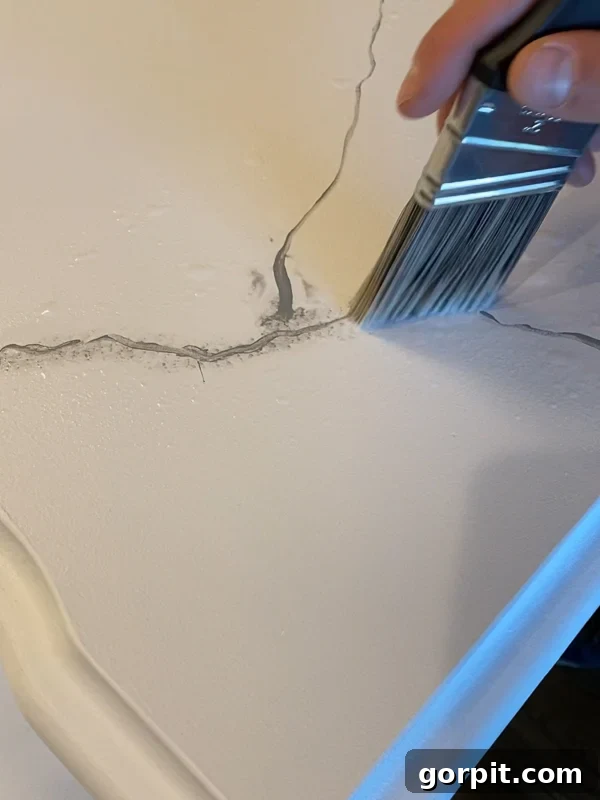
After creating a vein with the gray mineral paint, immediately mist it with water using the included spray bottle. Apply enough water so that the paint gently begins to bleed and diffuse. Then, use your larger bristle brush (also included) to softly dab along the entire length of the vein. This “mist and dab” technique is crucial for achieving that incredibly realistic, soft, and blended marble appearance. You can carefully wipe off any excess water with a paper towel, but be cautious not to accidentally wipe away your carefully placed veining. (Note: Giani suggests sanding with 600-grit sandpaper after veining, but we overlooked this step and our results were still excellent, so don’t fret if you miss it!) The beauty of this phase is its forgiving nature – if you’re unhappy with a vein, a bit more misted water and a wipe can erase it, allowing you to try again.
Phase 3: Applying the Top Coat
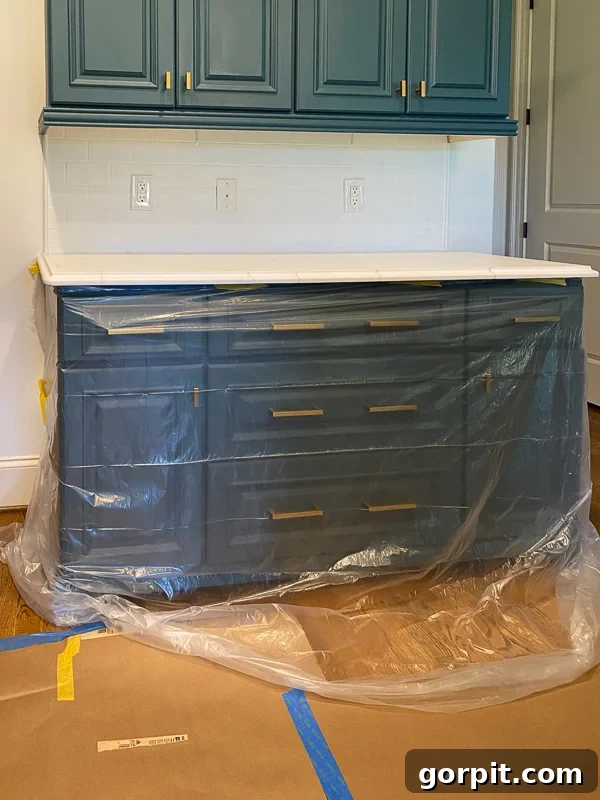
Step 8: Protect Your Surroundings. Before mixing the epoxy, meticulously prepare your workspace. Use painter’s tape to secure plastic sheeting to the underside of your countertops, allowing it to drape all the way to the floor. This creates a protective barrier for your cabinets and drawers from epoxy drips. We also utilized brown paper flooring protection to cover our hardwood floors comprehensively. If you have an undermount sink, ensure it is also thoroughly protected with plastic sheeting to prevent epoxy from adhering to it.
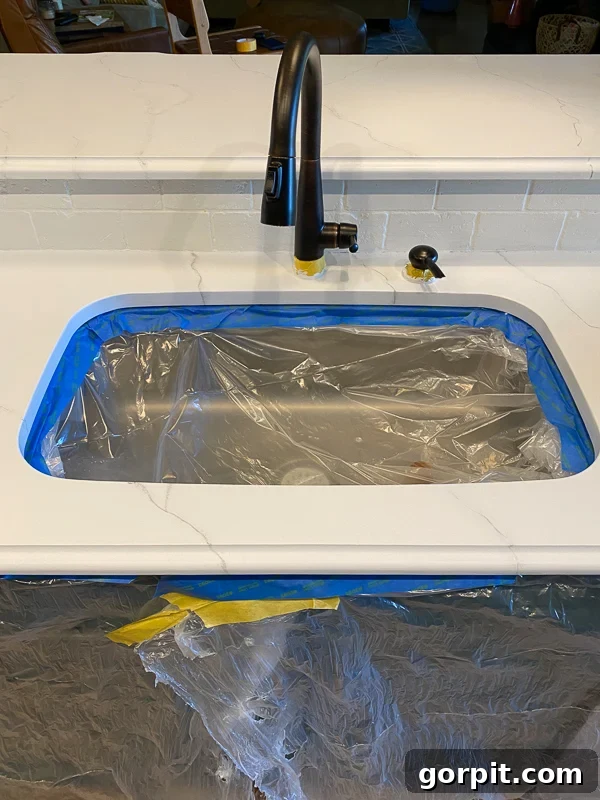
Step 9: Mix the Epoxy Resin. This step is critical, so pay close attention to timing. Each Giani kit includes three sets of resin and activator cans. It is absolutely crucial to mix these one at a time, only as you are ready to apply them. Once the epoxy is mixed, you have a working window of approximately 30 minutes before it starts to harden and becomes unworkable. To mix, pour one entire can of Epoxy Activator into one Ultra Epoxy Resin can. Stir the mixture vigorously and consistently for EXACTLY 3 minutes and 15 seconds. Use a timer! Giani explicitly states that improper mixing time can lead to “performance issues,” which you definitely want to avoid for a durable finish.
Step 10: Apply the Epoxy Topcoat. Work in manageable 6-foot sections to ensure you can apply and spread the epoxy before it sets. Begin by pouring about two-thirds of your mixed topcoat in continuous streams onto the section you are working on. Use the angled brush provided to carefully coat your backsplash (if it matches your countertop) and to “cut in” along the perimeter of the current section. Then, immediately use your roller to spread the remaining epoxy evenly across the larger, flat surfaces. A crucial point here: the epoxy is self-leveling, so avoid overworking it. Your primary goal is to ensure the entire surface is coated, with no bare spots. If you need more epoxy, pour a small amount directly onto the counter. If you have excess, gently push it towards the next section or brush it back into your can.
After coating the main surface, pour a small stream of epoxy close to the edge of your countertops. Use your roller to coat the edges thoroughly. The epoxy *will* drip onto the plastic sheeting you’ve hung, and this is completely normal – don’t panic! It’s important to apply enough topcoat to the edges, as they are high-traffic areas prone to bumps and wear. The topcoat will continue to drip from the front edges for about 30 minutes to an hour as it self-levels. If you have a counter section longer than 6 feet (as we did), mix your next batch of topcoat immediately after finishing the first, and start applying it to the adjacent section as quickly as possible. This allows the two epoxy sections to flow and self-level seamlessly together, avoiding visible seams.
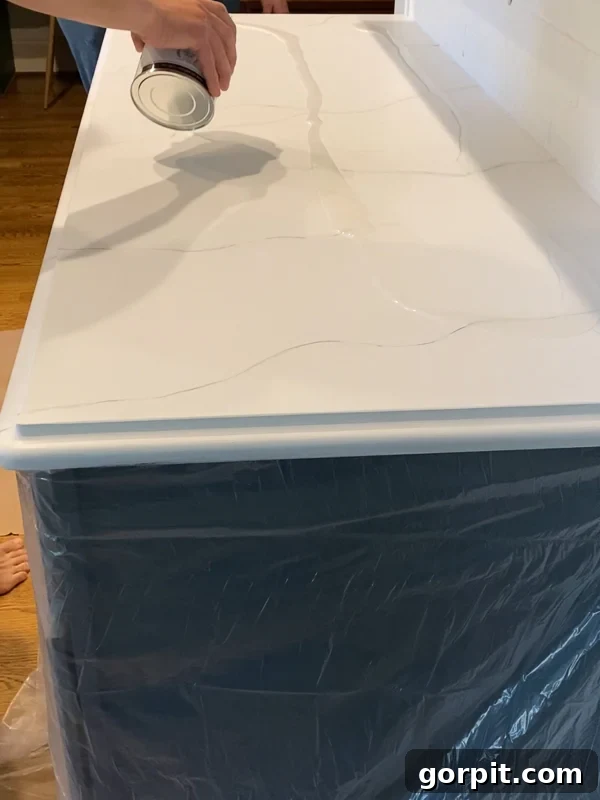
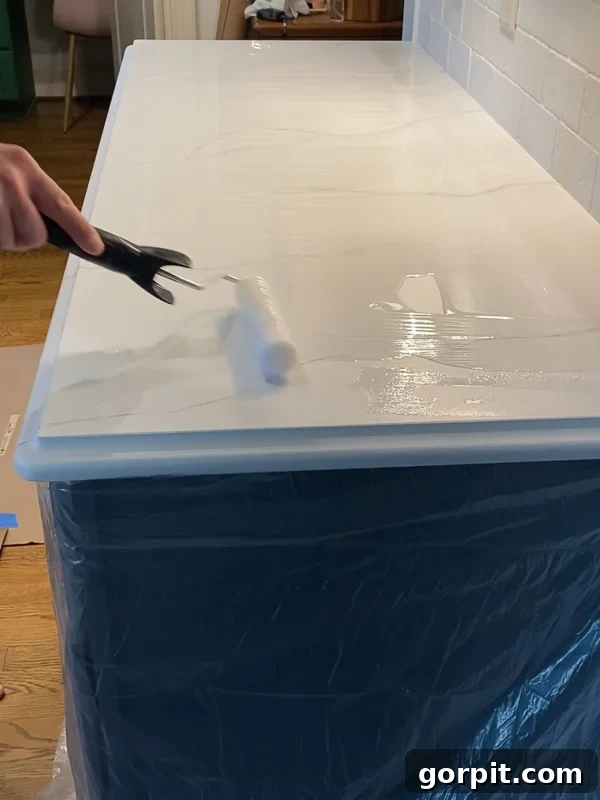
Step 11: Inspect and Refine the Topcoat. As soon as you’ve finished applying the epoxy across all sections, grab a bright light (like a flashlight or work lamp) and meticulously inspect your countertops for any bare spots, lint, air bubbles, or pet hair. If you find any bare spots, fill them in immediately. For lint, hair, or bubbles, use tweezers to carefully pull them out or pop any visible air bubbles. Don’t worry about disturbing the wet epoxy; the self-leveling nature of the topcoat means the area will smooth itself back out. You have approximately one hour from the time of application to remove any debris or fill in missed spots before the epoxy begins to harden irreversibly. After one hour, avoid touching the epoxy, as it will no longer self-level effectively.
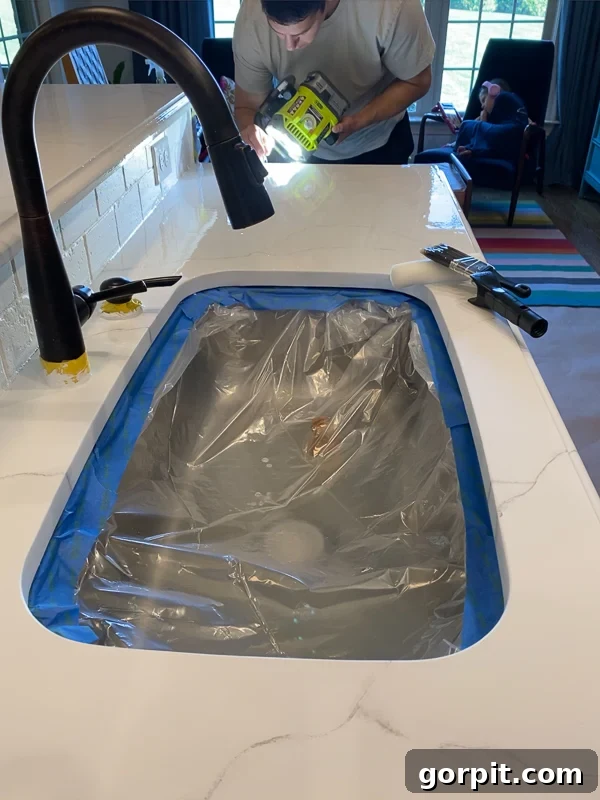
Even with our dog sequestered outside during application, we still had to tweeze out several dog hairs from the epoxy, along with other floating lint. It’s surprising what airborne particles can settle on a surface! While we didn’t catch every single one (we have two dog hairs permanently cemented in our topcoat, though barely noticeable), a thorough inspection is key. Had we not left our house shortly after this step, I’m convinced we would have had far more debris embedded. This highlights the importance of minimizing dust and pet dander in your home during the topcoat application and early curing phases.
Step 12: Remove Painter’s Tape at the Right Time. This is a critically time-sensitive step! You MUST remove your painter’s tape between 1 to 2 hours after you have completed applying the epoxy topcoat. Removing it too early could allow the wet epoxy to seep into unwanted areas beneath the tape. Conversely, waiting too long means the tape could become permanently embedded and hardened within the epoxy, making it incredibly difficult to remove without damaging your new finish. We unfortunately left some of our tape on a bit too long; while we managed to get it off, it pulled some of the white paint with it. Although I was able to fix this with caulk (more on that later), it’s a hassle best avoided by adhering to the recommended timeframe. Set a timer!
Phase 4: Curing
Step 13: Allow Adequate Curing Time. Now comes the hardest part: waiting! Your countertops need ample time to fully cure and harden. They will typically be “tack-free” (dry to the touch) in about 8 hours, but this does not mean they are ready for use. You must wait a full 24 hours before using your dishwasher, and a minimum of 2 days before placing any items or lightly using the counters. For full hardness and maximum durability, wait the complete cure-time of 7 days before placing anything heavy, such as a mixer, blender, or coffee maker, on your countertops.
To make this waiting period more manageable, I highly recommend scheduling this project around a time when you can be out of your house for at least the initial 24 to 48 hours. We left our house immediately after completing Step 12, taking our children and dog for a two-night getaway. This strategy worked perfectly: we weren’t inconvenienced by not being able to use our kitchen, and crucially, our countertops weren’t bombarded with any more Bernese Mountain Dog hair! Planning ahead for this curing phase can significantly reduce stress and contribute to a flawless finish.
Phase 5: The Finishing Details
Step 14 OPTIONAL: Achieve a Honed Marble Look with Polycrylic. The Giani epoxy resin topcoat, by default, provides a very shiny, high-gloss finish. While this is beautiful on its own, I personally desired the more subtle, sophisticated look of honed marble. If you share this preference, after the full 7-day cure time for the epoxy has passed, you can apply a polycrylic topcoat. I applied two coats of Minwax Polycrylic in a satin finish to gently knock down the high shine. I recommend applying it with a good quality bristle brush rather than a roller, as rolling can sometimes introduce air bubbles in polycrylic. The satin finish provides a slight sheen, perfectly mimicking the natural appearance of honed marble. You might notice some faint brush strokes when the light hits the surface at certain angles, but for us, this minor detail was a worthwhile trade-off for achieving the desired honed aesthetic.
Step 15: Caulk for a Professional Finish. After the 7-day curing period (and optional polycrylic application) is complete, caulking is an absolutely essential step to give your newly painted countertops a truly finished, polished appearance. If you’ve followed my projects before, you’ll know I consistently use DAP caulk because of its superior quality and performance. I recommend applying caulk along any built-in appliances or fixtures (like your stovetop or sink faucet) and along the edges where your countertops meet cabinets and your backsplash.
The difference this step makes is astounding. You won’t believe how unfinished the edges along our stovetop and cabinets looked before I applied caulk, in contrast to their flawless look afterward. Just take a moment to compare the “before” and “after” images below. If you’re new to caulking, don’t worry! It’s a simple skill to master. Check out this step-by-step guide on How to Caulk for Beginners for all the tips and tricks you’ll need.
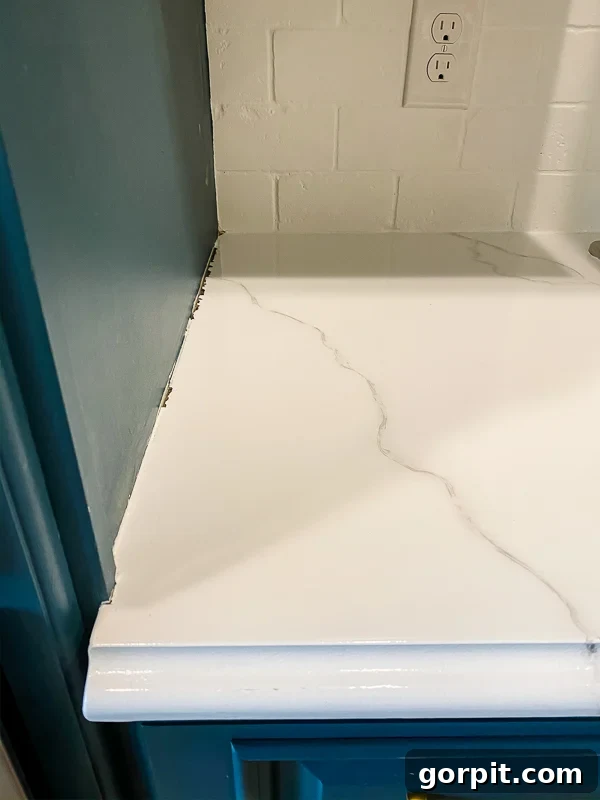
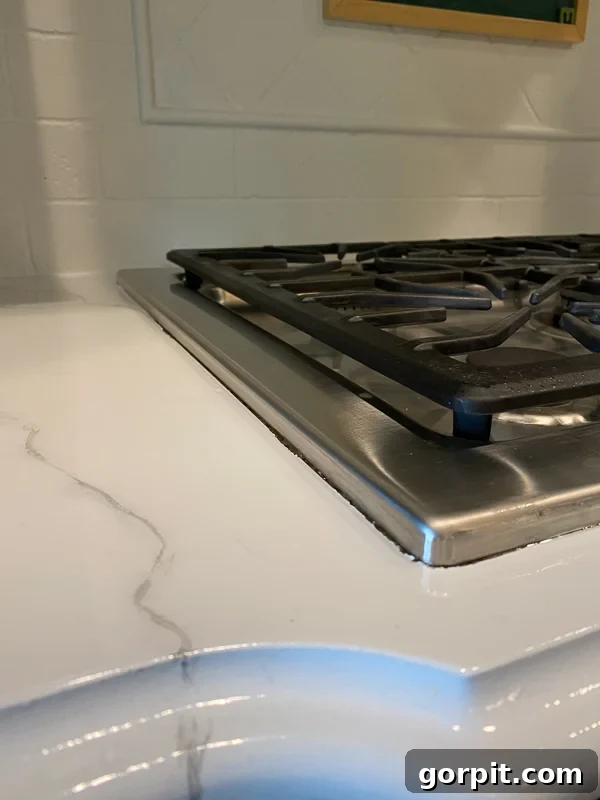
As you can see, the contrast is remarkable. Caulking instantly elevates the entire appearance, making your DIY project look professionally completed. It’s an extra effort that pays off immensely in visual impact and overall satisfaction.
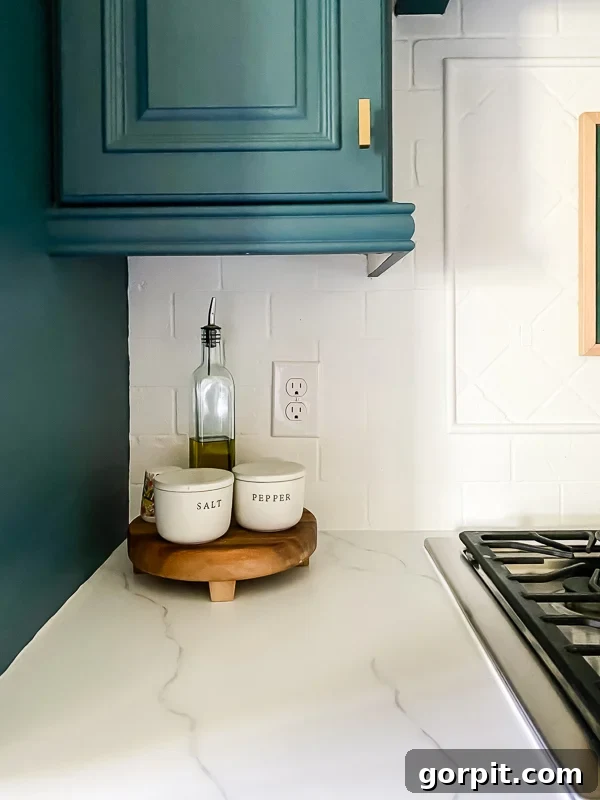
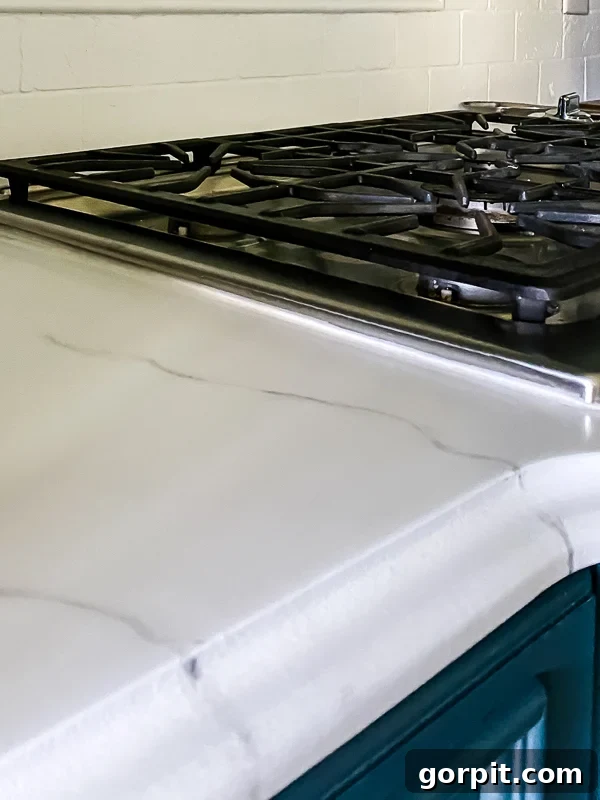
For our project, we first meticulously removed all the old caulk from the gap between the sink and the countertop. I then used DAP Alex Plus caulk for all general gaps, such as those along the backsplash and cabinets. For the specific gap where the countertop meets our undermount sink, I opted for DAP Kwik Seal Ultra, which is specifically designed for kitchen and bath areas, offering superior flexibility and water resistance. Choosing the right caulk for each area ensures a lasting, watertight seal and a professional finish.

SEE THE UPDATE
As mentioned earlier, our painted countertops were in heavy daily use for several years until our kitchen underwent a full renovation. To understand their long-term performance and to see what I would do differently next time, check out the detailed video and photos showcasing their condition after 3.5 years of life. Click the button below for the full update!
Frequently Asked Questions About Countertop Paint
How long does countertop paint last? Do painted countertops chip?
Giani claims their product, with proper care, will last as long as conventional countertops. While they are incredibly durable, I wouldn’t entirely agree with an “indefinite” lifespan. Our painted countertops held up exceptionally well for approximately 2 years of heavy daily use. We did experience some small chips around the edge of our undermount sink. I believe this area was particularly difficult to coat thickly with the epoxy topcoat, leading to a thinner layer in a high-impact, heavily used area. These small chips would be easy to touch up and recoat with more Polycrylic. However, since we eventually embarked on a full kitchen renovation, I didn’t find these minor imperfections bothersome enough to warrant a touch-up. For a comprehensive look at their condition after 3.5 years of daily use, be sure to check out my painted countertops update post.
What kinds of countertops can you use the Giani marble kit on?
The Giani kit is remarkably versatile! It’s designed to be used on nearly every common countertop material. We successfully painted our granite counters, but you can also use this kit to transform Formica, laminate, Corian, ceramic tile, butcher block, and cultured marble. The specific preparation required for each type of countertop varies slightly, so it’s essential to consult the detailed chart provided by Giani in their instructions for your particular surface. Proper prep is key to a lasting finish.

I’ve heard you have to use a blow torch on epoxy topcoats to get rid of air bubbles. Did you have to do that?
No, thankfully! One of the fantastic features of Giani’s Epoxy is that it does not require a blow torch or heat gun to release air bubbles. This product has been specifically formulated with “air release agents” that eliminate bubbles on their own, simplifying the application process and making it safer for DIYers. We did not encounter any issues with air bubbles in our Giani epoxy application.
I’ve heard epoxy can yellow over time. Aren’t you worried about that?
Giani’s product is specifically engineered to resist yellowing, and Giani emphasizes that any potential UV effect on their epoxy will be minimal. In our nearly two years of using the painted kitchen countertops, we did not observe any yellowing whatsoever. The primary cause for epoxy coatings turning yellow is prolonged exposure to direct UV light, which can lead to a photochemical reaction known as “polymer degradation.” Our countertops did not receive direct sunlight. If your countertops are located in an area that receives significant direct sunlight, it might be a factor to consider, as the chances of subtle yellowing over a very long period could be higher, although Giani’s formulation aims to mitigate this.
Are you worried that the polycrylic you applied to give your counters a honed look will yellow?
Polycrylic can indeed react with white paints, potentially causing a yellowing effect over time. However, using a water-based polycrylic, as I did, significantly minimizes this risk. Typically, if yellowing is going to occur, it becomes noticeable relatively quickly. We haven’t seen any yellowing on our counters at all. I believe one reason for this success might be that the epoxy layer acts as a buffer between the polycrylic topcoat and the white base paint, preventing any direct chemical reaction that might cause discoloration.
What do you use to clean your painted countertops?
Giani recommends using only mild dish soap and water or a gentle window cleaner for routine cleaning. For stubborn stains, you can carefully use rubbing alcohol or nail polish remover (acetone) applied to a paper towel. It is crucial to strictly avoid harsh chemicals such as bleach, abrasive household cleaners, Magic Eraser, Pine-Sol, disinfectant wipes, or any abrasive scrubbing pads (like Comet or Soft Scrub). Also, do not use furniture polishes or granite cleaners. Even diluted solutions of these harsher cleaners can degrade the durability of the topcoat over time. Similarly, avoid harsh natural cleaners like vinegar, undiluted rubbing alcohol, hand sanitizers, and air freshener or essential oils, as these can also compromise the finish.
Can you cut directly on your painted countertops or put hot pots on them?
No, it is not recommended to cut or chop directly on your painted countertops after using this kit, much like you wouldn’t on granite or Formica. Doing so can damage your knives and scratch the surface. We always used cutting boards even on our old granite, so this wasn’t a change for us. Regarding hot items, while Giani’s epoxy is heat-resistant up to 150°F (65°C), it is strongly advised to always use a hot pad or trivet for anything directly from the stove or oven. This was a slight adjustment for us, as we previously placed hot items on our granite. However, having had wood countertops in a past home with the same rule, we found it relatively easy to remember and adapt to this precaution to protect the painted finish.
Could you skip the epoxy topcoat and just use a polycrylic topcoat if you want the honed marble look?
If you are painting kitchen countertops, I would absolutely NOT skip the epoxy topcoat! The epoxy resin topcoat is designed to provide exceptional durability, often equated to 50 layers of standard polycrylic. It is truly necessary for high-traffic areas like a kitchen where counters endure heavy, daily use. We cook frequently and needed maximum protection, so the epoxy was non-negotiable. If you desire a honed look in your kitchen, the recommended approach is to apply the polycrylic on top of the epoxy after its full 7-day cure period.
However, if you are painting less heavily used countertops, such as those in a guest bathroom or a laundry room, you *can* consider skipping the epoxy topcoat. I used only polycrylic after painting the countertops in our girls’ bathrooms and our laundry room, and they have held up beautifully due to the lighter use. Skipping the epoxy in these areas makes the project quicker, easier, and less expensive. But for any kitchen or other room that experiences significant daily wear and tear, the epoxy topcoat is an essential component for long-term success and durability.
PHEW! This was an extensive post, but I believe in providing thorough details and practical information before embarking on any significant DIY project. I sincerely hope this guide has been incredibly helpful for you as you consider transforming your own countertops!
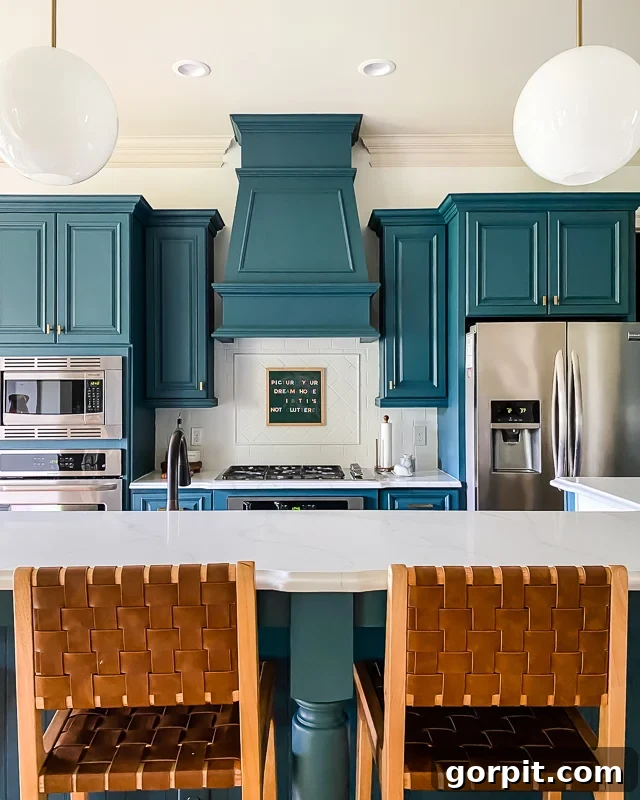
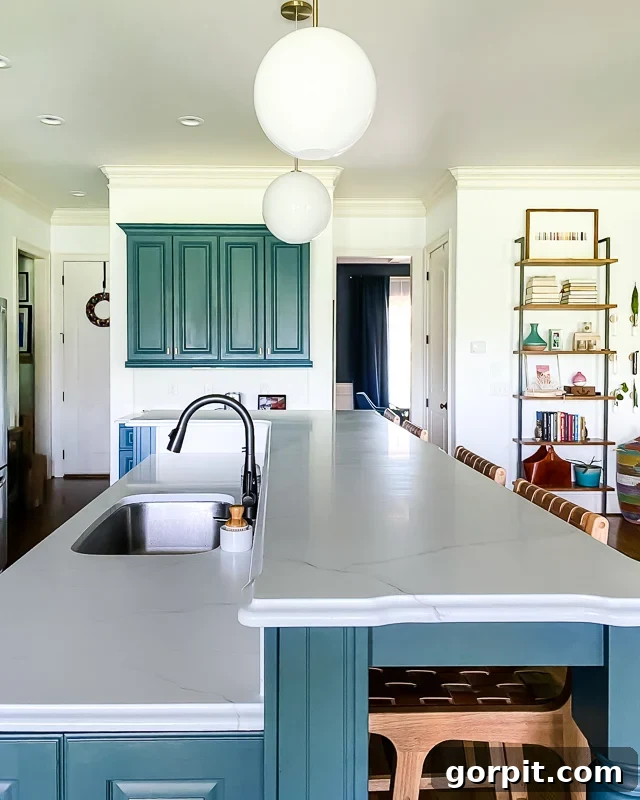
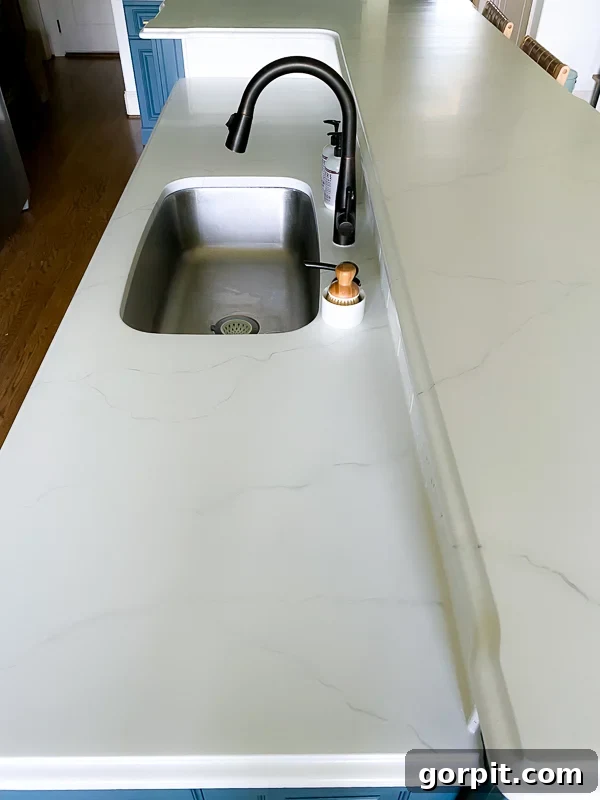
Photos of the Finished Countertops
After all that reading, give your brain a well-deserved break and simply enjoy these inspiring photos of our beautifully transformed, marble-look countertops!
You may also find these related DIY posts helpful:
- How to Paint Kitchen Cabinets Without Sanding or Priming!
- How to Paint Your Tile Backsplash in 5 Simple Steps
- How to Paint IKEA Furniture and Mistakes to Avoid
- Gorgeous But Cheap Flooring Ideas
- The Easy Way to Update Bathroom Tile Without Replacing It!
Curious about my complete approach to transforming rooms and spaces in our home? Explore Designer in a Binder® – your ultimate guide to affordable and stylish home decorating.
And for exclusive content, behind-the-scenes sneak peeks, and fresh DIY inspiration delivered straight to your inbox, be sure to subscribe before you go!