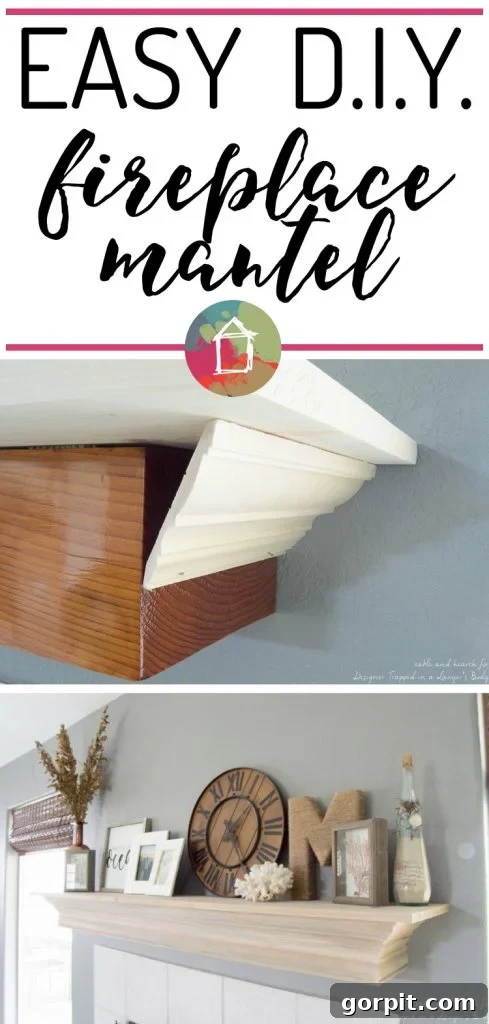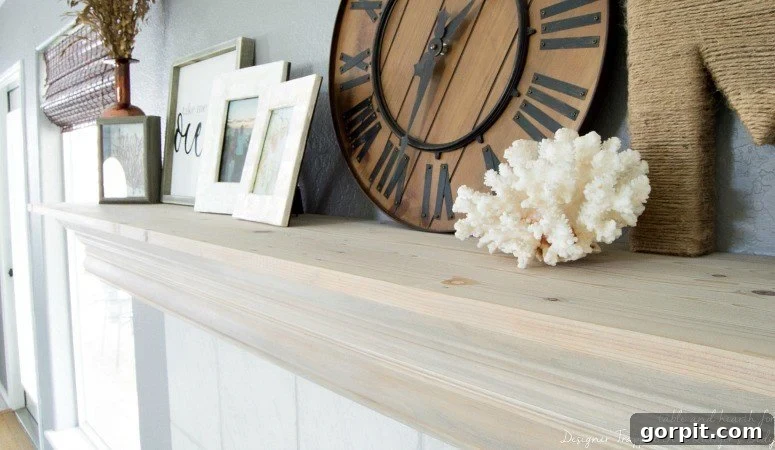
Hello, fellow home decor enthusiasts! Emily from Table & Hearth is back, and I’m thrilled to share another favorite DIY project that dramatically transformed a major eyesore in our home. If you’ve been following along, you know I love tackling those tricky spots that just don’t quite fit the aesthetic vision. This month, we’re diving into a DIY fireplace mantel update that took our living room from drab to fab with just a few simple materials and a fantastic technique for achieving a beautiful, weathered driftwood finish.
For years, our living room was dominated by a fireplace mantel that simply didn’t align with our style. It was a rather unremarkable 7-inch by 7-inch square pine beam, heavily lacquered to the point of having a strong, shiny orange tone. It lacked character, depth, and any semblance of the neutral, light, and coastal vibe we strive for in our home. More than just being plain, it was a visually jarring element that felt out of place. I particularly disliked how its width mirrored the surrounding fireplace tile, making it blend in rather than stand out as the elegant focal point a mantel should be. Stripping and refinishing the existing wood seemed like a daunting task, and honestly, I felt the mantel needed more presence anyway – it needed to be beefed up to truly make a statement.
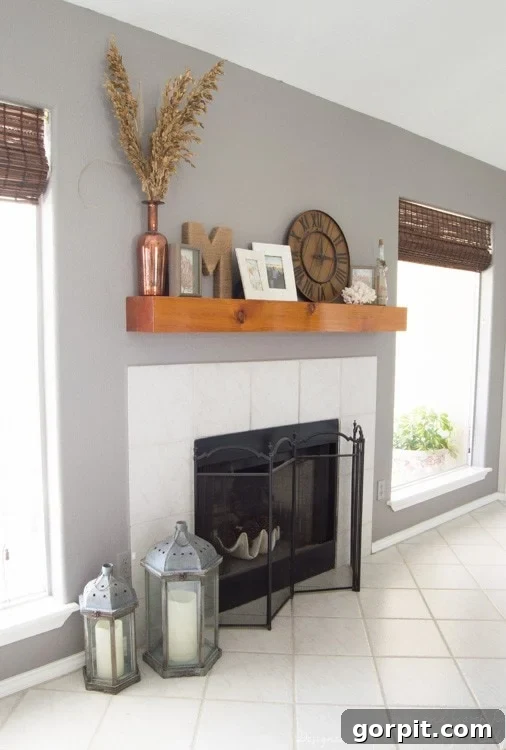
My vision for a new mantel involved creating a more substantial, layered look without the intensive labor of a full demolition. After taking careful measurements, I realized that with a wide enough top board as a foundation, I could creatively use various types of molding – specifically, elegant crown molding and simple flat molding – to wrap around the existing structure. This innovative approach would allow me to dramatically alter the mantel’s appearance, size, and style without having to remove the original beam. And thus, the idea for this DIY fireplace mantel transformation was born! The days of that uninspiring orange mantel were definitely numbered. Read on to discover the exact steps I took to achieve this stunning upgrade. Please note: This post includes some affiliate links for your convenience, which means I may earn a small commission if you make a purchase through them, at no extra cost to you. For full details, you can read my disclosure policy here.
Transform Your Home with This DIY Fireplace Mantel Tutorial
Revamping your fireplace mantel can dramatically change the feel of your entire living space. This DIY project offers a relatively straightforward path to a high-end look without the high-end cost or the need for extensive carpentry experience. Here’s everything you’ll need to create your own beautiful, custom mantel with a charming driftwood finish:
Essential Supplies for Your DIY Fireplace Mantel Makeover:
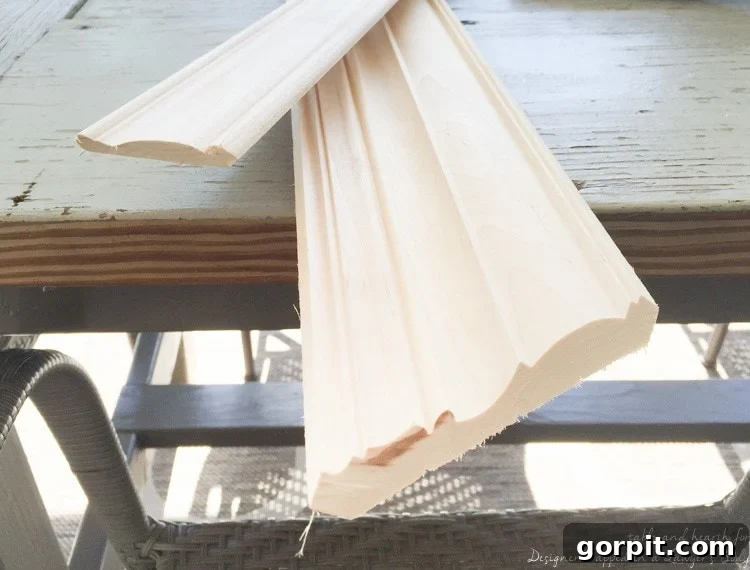
- Tall Pine Crown Molding: Opt for a size around 3 inches or more. This molding will provide the main decorative bulk and architectural detail to your new mantel, giving it a grander, more finished appearance.
- Pine Flat Trim/Molding: I used a chair rail molding, but the key is to choose a flat trim that complements the profile of your crown molding. This piece will add an additional layer of detail and help tie the design together seamlessly. Browse options to find what best suits your chosen crown molding.
- Pine Project Panel Board: This will serve as the new, wider top surface of your mantel. My project utilized a board measuring 3/4″ x 12″ x 72″, which provided ample depth and length to significantly enhance the mantel’s presence.
- Power Sander: A quality sander is crucial for preparing your wood surfaces and achieving a smooth, professional finish. This cordless model is my absolute favorite and was indispensable for this project, offering incredible freedom of movement without the hassle of cords.
- Brad Nailer: For quick and secure assembly without visible fasteners. This brad nailer is fantastic because it doesn’t require an air compressor, making it perfect for DIYers who don’t want to invest in bulky equipment.
- Wood Filler: Essential for concealing nail holes and small gaps, ensuring a flawless, professional look.
- Compound Miter Saw or Handsaw with a Miter Box: For precise angle cuts on your molding. A compound miter saw is ideal for crown molding, but a handsaw with a miter box can also achieve good results with patience.
- Driftwood Stain: To achieve that beautiful, aged driftwood effect. I highly recommend Weatherwood Stain in “Reclamation” for its authentic and reactive properties.
- Top Coat/Sealant: To protect your new finish and enhance its beauty. I used Weatherwood Stain’s White Maintenance Oil, which provides a subtle whitewash and durable seal.
Step-by-Step Guide to Crafting Your DIY Fireplace Mantel:
1. Prepare and Secure the New Top Board:
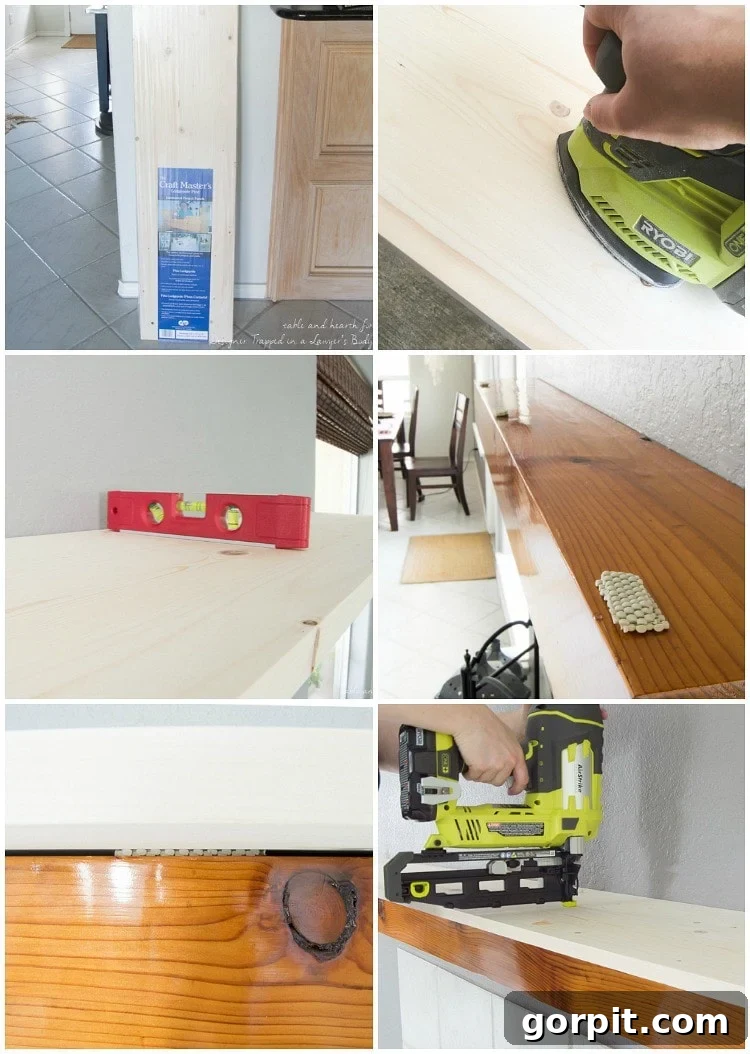
The initial step involved meticulously preparing the pine project panel board. I started by thoroughly sanding it to create a smooth, clean surface, ensuring optimal adhesion and finish quality. A critical challenge with our original mantel was its unevenness; it slanted approximately 1/4″ towards the front. To rectify this and ensure our new top board sat perfectly level, we employed a simple yet effective solution: strategically placed strips of non-slip grip material along the front edge of the existing mantel. These clever “leveling devices” effectively compensated for the slant. Once the old mantel was properly shimmed, we carefully positioned the new wood panel on top, ensuring it was perfectly centered and level. With everything aligned, I used my brad nailer to securely fasten the new top board in place, forming a stable and robust foundation for the rest of the build.
2. Prepare Your Molding for Wrapping:
To achieve the desired layered and substantial look, I opted to wrap the old mantel using both the wide crown molding and the flatter trim molding. Working with two separate pieces, rather than one large, complex piece, significantly simplified the cutting process, especially for a beginner. The crown molding, which forms the prominent decorative element, requires precise miter and bevel cuts to create seamless corners. In contrast, the flat molding, often used as a base or accent, typically only needs simpler 45-degree miter cuts, which are more straightforward to execute. This two-part approach allowed for greater flexibility and made achieving crisp, clean corners much more attainable.
3. Master Crown Molding Cuts (Practice Makes Perfect!):
If you’re new to working with crown molding, this step is arguably the most critical and can be the most challenging. I certainly learned this firsthand! After a quick “crash course” in crown molding miter cuts – involving plenty of online research and a few YouTube tutorials – I dedicated a significant amount of time to practicing on scrap pieces of molding. I cannot stress enough the importance of practice here! I had never cut crown molding before, and as someone who definitely wasn’t a math major, it took numerous attempts to truly grasp the angles and visualize how the pieces would fit together to form a perfect corner. Understanding the interplay of bevel and miter settings on your saw, and how the molding sits against the wall versus the ceiling, is key. Investing in inexpensive “practice” crown molding is a smart move; it’s far more cost-effective to make mistakes on throwaway pieces than on the beautiful pine you intend for your mantel.
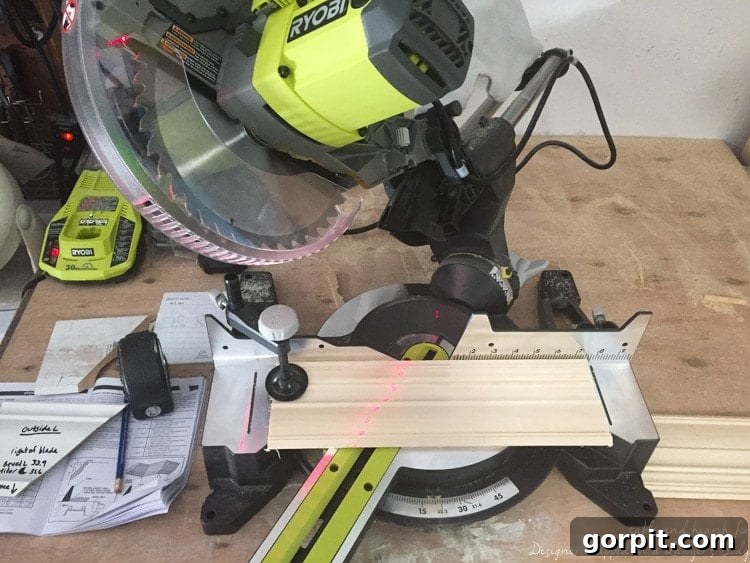
4. Assemble the Molding onto the Mantel:
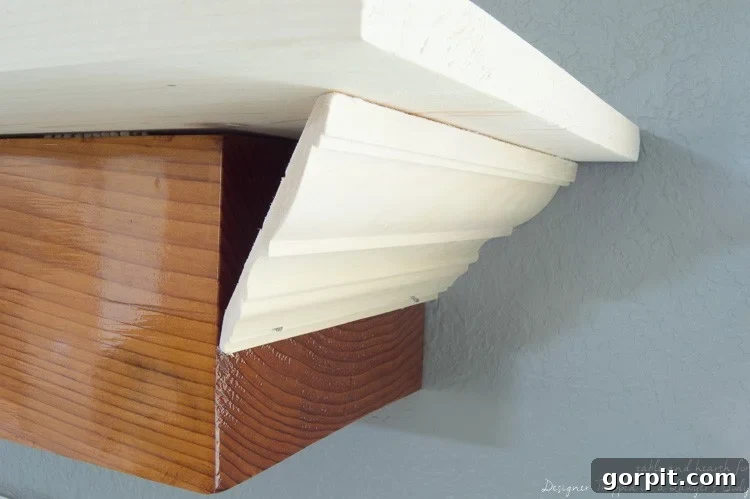
Once I felt a reasonable level of confidence in my cutting abilities, the real work of transforming the DIY fireplace mantel began. I proceeded to cut all three pieces of the “good” molding – the front and two side pieces – ensuring each cut was as precise as possible. Before permanent attachment, I always recommend a “dry fit.” This means temporarily positioning all the cut pieces around the mantel without adhesive or nails to confirm that they fit together perfectly and form tight, seamless corners. This step allows for any minor adjustments before committing. Satisfied with the fit, I then carefully attached each piece using my brad nailer. After the molding was secured, I went back and gently hammered in any brad nails that were sticking out slightly. To achieve a smooth, professional finish, I meticulously filled all visible nail holes and any tiny gaps between the molding pieces with wood filler. This creates a flawless surface ready for finishing.
5. Achieve the Beautiful Driftwood Finish:
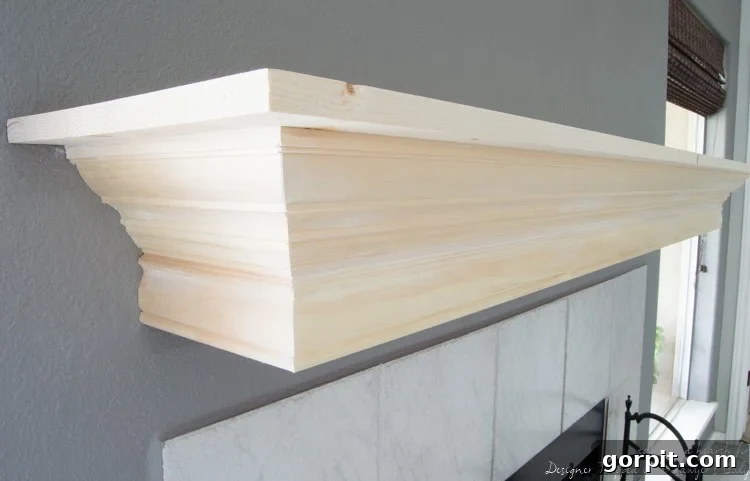
With the wood filler completely dry, the next crucial step was to prepare the surface for staining. I meticulously sanded around all the filled nail holes and along any seams to ensure a perfectly smooth and even surface. Following sanding, I thoroughly vacuumed the entire mantel to remove all dust and debris, as any leftover particles can affect how the stain penetrates and adheres. Then came the exciting part: applying the driftwood stain. Weatherwood Stain is, without a doubt, my go-to product for achieving an authentic, gorgeous driftwood finish on new wood. Its magic lies in its reactive properties; it’s not a pigment that sits on the surface, but rather a solution that interacts with the tannins in the wood, creating varying shades of weathering. On pine, which I used for this project, it transforms the wood into a subtle, beautiful gray that literally changes before your eyes – it’s an incredibly cool process to witness! After the initial coat, I carefully reapplied a little more stain to areas that hadn’t grayed as much, ensuring an even and consistent weathered look. I allowed the stain to dry thoroughly for a few days to ensure the chemical reaction was complete. Finally, I applied a protective and enhancing coat of Weatherwood White Maintenance Oil over the entire mantel. This oil not only seals and protects the wood but also imparts a lovely, subtle whitewash finish, enhancing the coastal, weathered aesthetic and making the mantel truly shine.
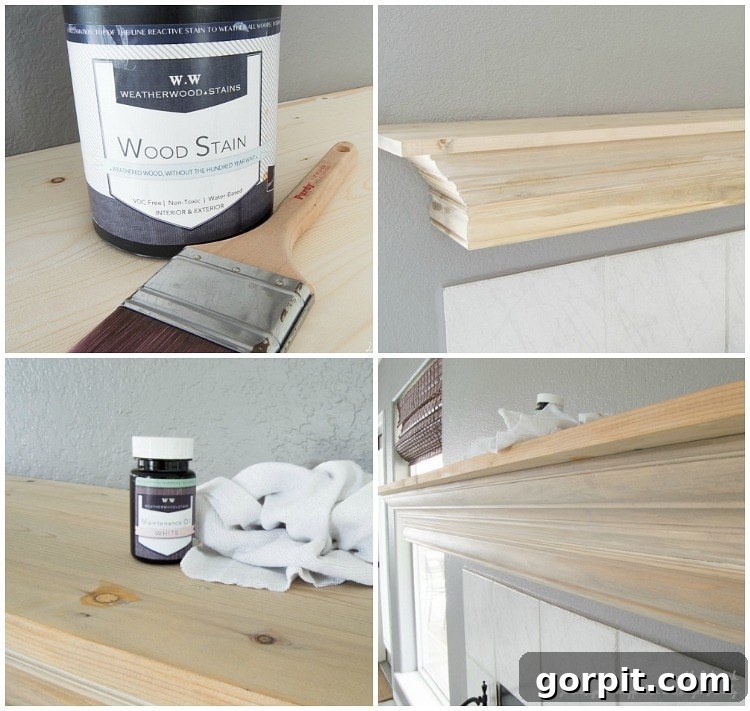
This entire transformation only took a single afternoon to complete, and the results are truly remarkable. We now have a stunning DIY fireplace mantel with a bespoke driftwood finish that we absolutely adore. The new mantel is significantly bigger, wider, and perfectly aligns with our home’s light, neutral, and coastal style. It exudes a sense of calm and sophistication that the old orange beam completely lacked. This project proved to be a far superior alternative to the tedious and messy process of stripping, sanding, and refinishing the original mantel, offering a fresh, modern update with much less effort and a much more impactful outcome. It’s amazing how such a focal point can dictate the entire mood of a room, and ours now feels perfectly curated.
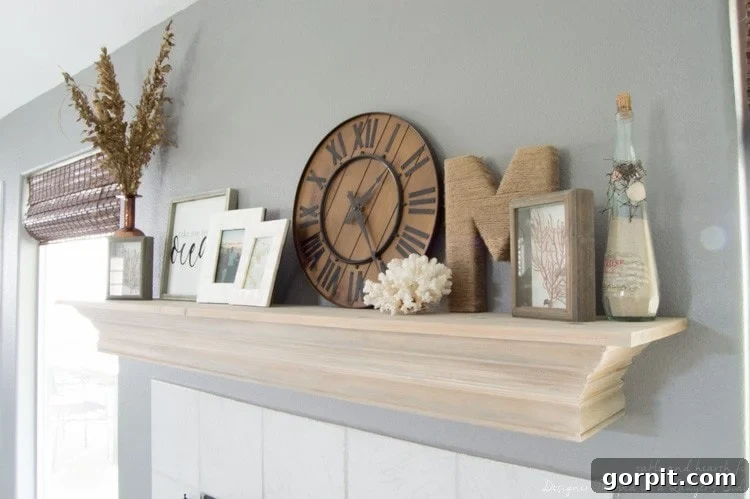
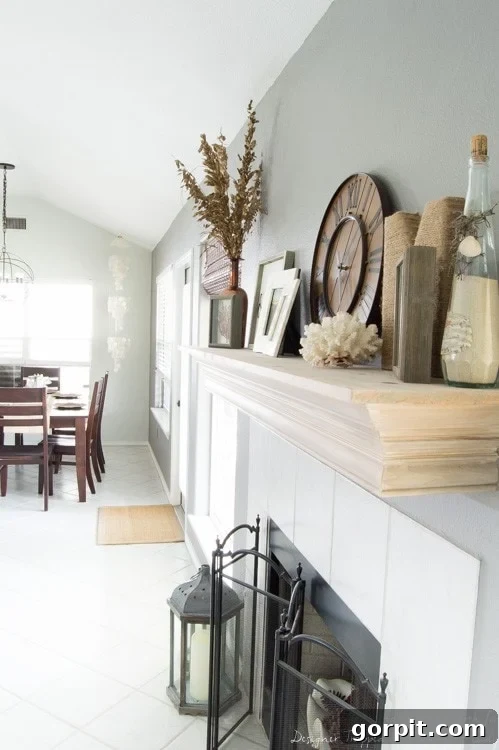
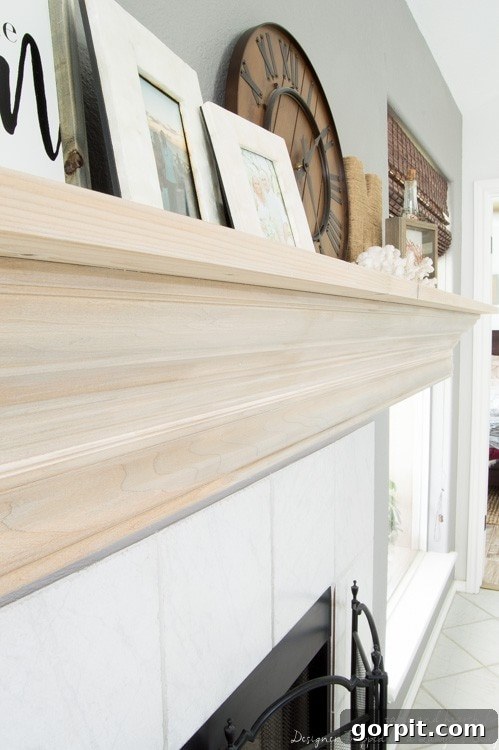
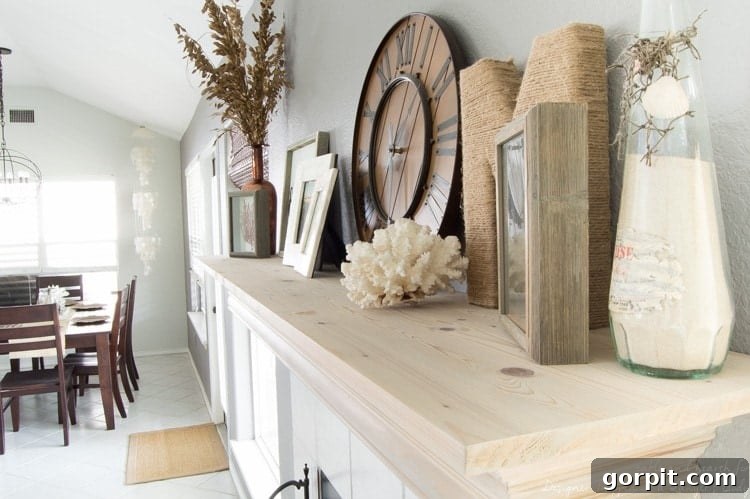
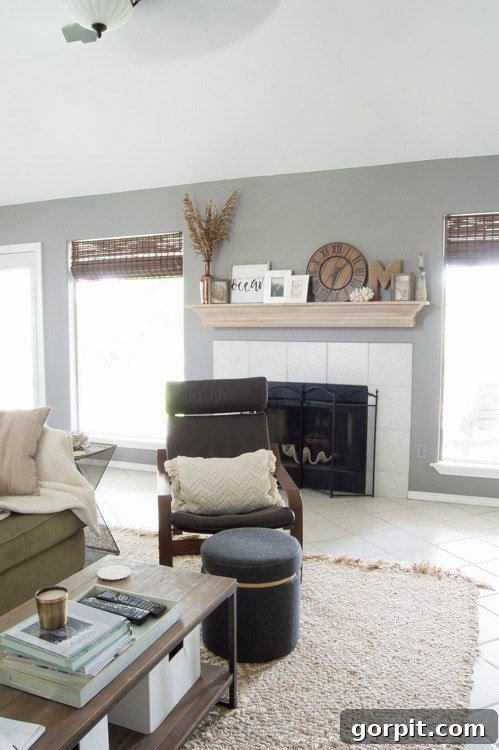
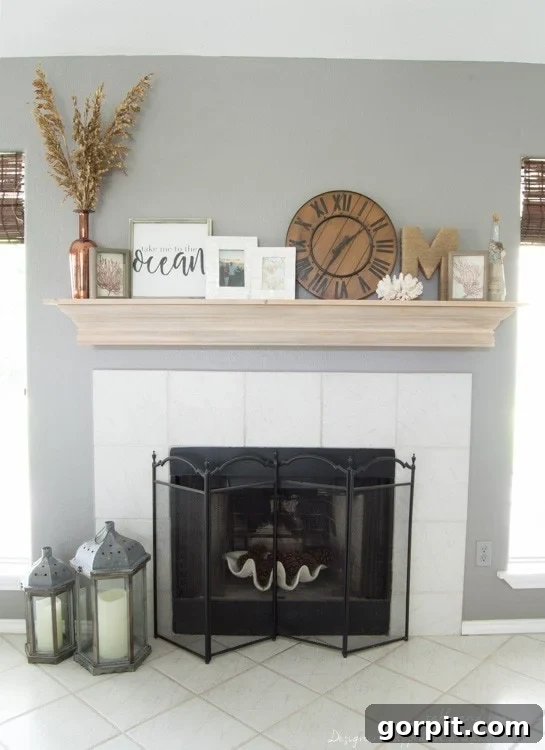
I sincerely hope this DIY fireplace mantel makeover tutorial inspires anyone who might be dealing with a similarly unsightly orange bar, or any other outdated mantel, in their home. It truly is a quick, accessible, and incredibly rewarding update that will transform your fireplace into a much prettier and more personal focal point, perfectly reflecting your unique style. I am absolutely delighted with our bigger, more beautiful mantel that now blends seamlessly into the rest of our decor. It was a project that brought immense satisfaction and proved to be far easier and more enjoyable than I had initially imagined!
Thank you for joining me on this creative journey. Have a wonderful summer, and I look forward to sharing more exciting projects with you in a few months! In the meantime, I’d love for you to visit me over at Table & Hearth, or connect with me on social media: Facebook, Instagram, Twitter, or Pinterest. If you loved this mantel project, you’ll probably also enjoy exploring these other popular DIY transformations on my blog (click on each photo to view the full post):
If you found this post helpful and inspiring, please be sure to pin it! This way, you can easily refer back to it whenever you’re ready to embark on your own fireplace mantel makeover journey. Happy crafting!