
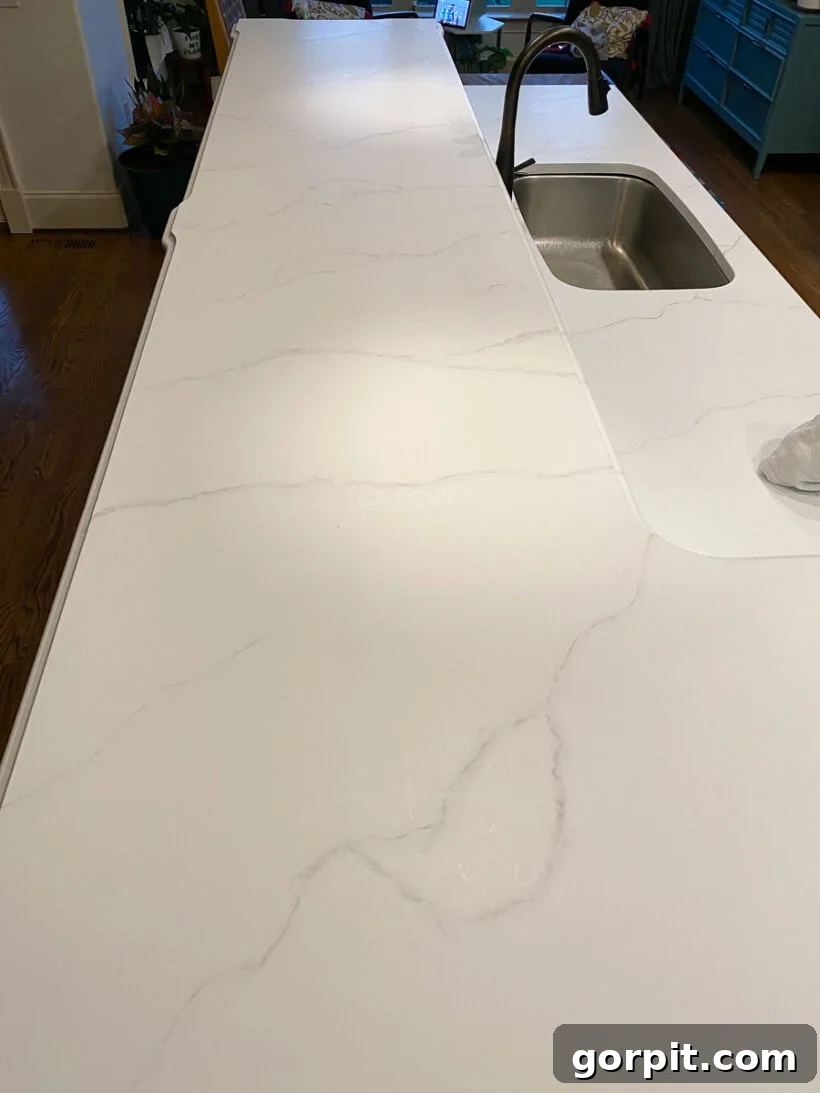
When we embarked on the journey to transform our brown granite countertops to mimic luxurious marble over three and a half years ago, many skeptics voiced their doubts. The resounding opinion was that it was a terrible idea, predicting rapid deterioration and eventual regret. So, were they right? Or did our budget-friendly painted counters defy expectations and stand the test of time?
In this comprehensive update, we’re diving deep into the most frequently asked questions about the durability of our DIY painted countertops. You’ll find candid insights, detailed photographs, and even a video showcasing how our countertops performed after years of rigorous daily use. We’ll also help you determine if painting your kitchen counters is the right solution for your home (and who might be better off exploring other options), along with revealing what we would approach differently if we were to tackle this rewarding project again.

The Vision: Why We Opted to Paint Our Kitchen Countertops
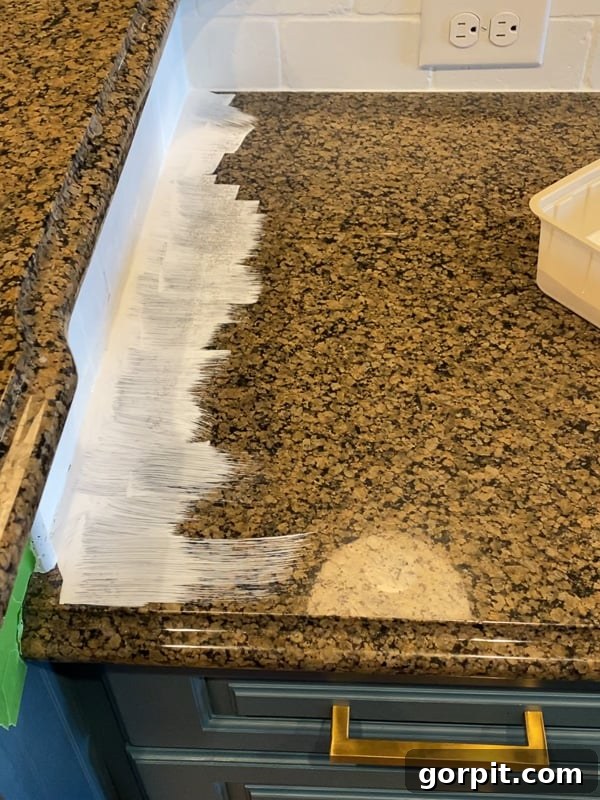
Let’s rewind to early 2021 to understand the genesis of this project. Our kitchen, while functional, yearned for a style upgrade that aligned more closely with our aesthetic. We had already initiated a budget-friendly kitchen makeover by refreshing the cabinets and even painting the tile backsplash. These changes dramatically improved the space, but one persistent element continued to bother me: the dated, brown-speckled granite countertops.
Replacing countertops can be an incredibly expensive endeavor, and a full replacement wasn’t financially feasible at that time. We knew it would be a significant waiting period before we could afford new stone surfaces. In the interim, our goal was to achieve a fresh, modern look without breaking the bank. We extensively researched numerous affordable DIY countertop ideas, exploring everything from unique finishes to overlays. We even considered repurposing the DIY concrete overlay technique we had successfully used on other projects. However, after careful deliberation and weighing all our options, we ultimately decided to paint our existing granite countertops to emulate the elegant look of marble in April of 2021. This decision, while exciting for us, was met with considerable skepticism and even outright criticism from thousands across the internet and social media platforms, many labeling it a “huge mistake.”
How to Paint Countertops to Look Like Marble
For those interested in the complete DIY journey, including a detailed list of supplies and a step-by-step tutorial, you can find our original guide here!
This post contains affiliate links for your convenience. Click here for my full disclosure policy.
Setting Expectations: How Long Did We Anticipate Our Painted Counters Would Last?
When it comes to DIY home improvement projects, especially those involving high-traffic areas like kitchen countertops, it’s crucial to establish realistic expectations. From the outset, we never harbored the illusion that painting our kitchen counters would be a permanent, flawless solution that would last indefinitely. Such an expectation, we believed, would be unreasonable given the nature of painted surfaces compared to natural stone or high-end composites.
That being said, we were uncertain about the exact lifespan of the specific countertop paint kit we selected. While our chosen kit boasted thousands of glowing positive reviews, a common observation was that most of these reviews were submitted shortly after the completion of the painting project, when the results were fresh, perfect, and brand new. There was little information available on how these surfaces performed after a year or more of consistent use. Consequently, we really had no definitive way of knowing how long the finish would truly hold up under the pressures of daily kitchen activities.
The Countertop Painting Kit We Used
After extensive research and thorough review comparisons, this is the highly-rated countertop painting kit we ultimately decided to use for our project.
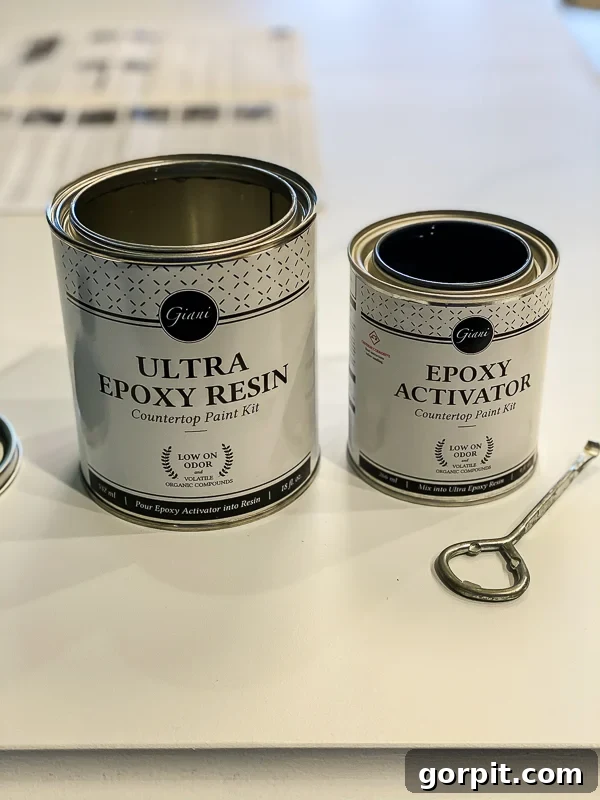
Upon completing the project, we were absolutely delighted with the aesthetic transformation. The faux marble finish completely elevated the look of our kitchen. Although we initially approached this as a temporary cosmetic fix until we could afford proper replacements, it represented a significant investment of both time and effort, costing approximately $300 for materials. Our internal benchmark was that if these painted counters could endure at least a year of wear, the effort and cost would be fully justified. Achieving two years of durability would have been an absolute thrill. Little did we know, they would far exceed these initial conservative hopes.
The Ultimate Question: How Long Did Our Painted Countertops Truly Last?
The most common and pressing question we receive is undoubtedly about the durability of our painted countertops and their actual lifespan. Providing a simple, straightforward answer can be challenging, but I will endeavor to give you the clearest explanation possible. Firstly, I must emphasize a critical point: we did not baby our countertops in any way. While we diligently adhered to the paint manufacturer’s instructions, particularly by never placing hot pots or pans directly on the surface, our daily usage was anything but gentle. With a household that rarely dines out and prepares approximately 95% of our meals at home, these painted countertops endured an exceptionally heavy and constant workload, experiencing the full rigors of a busy family kitchen.
Performance at the 18-Month Mark: Near Perfection
For a remarkable period of approximately 18 months, our painted counters performed beautifully, maintaining their pristine appearance with impressive resilience. During this initial phase, the only minor issue we encountered was a subtle yellowing of the caulk around the edges. We suspect this was either due to the specific type of caulk chosen or perhaps an application error on our part, rather than an issue with the countertop paint itself. I was genuinely very, very happy with their condition for a solid year and a half. Crucially, there was absolutely no chipping, peeling, or discoloration of the countertop paint finish during this time, a testament to the initial quality of the application and materials.

However, it was around this 18-month juncture that I began to re-evaluate a specific decision I had made during the initial painting process. To achieve a more realistic, honed marble appearance and reduce the very high sheen of the original epoxy resin that came with the kit, I had applied two coats of a satin finish Polycrylic topcoat. In hindsight, this decision introduced some unexpected vulnerabilities.
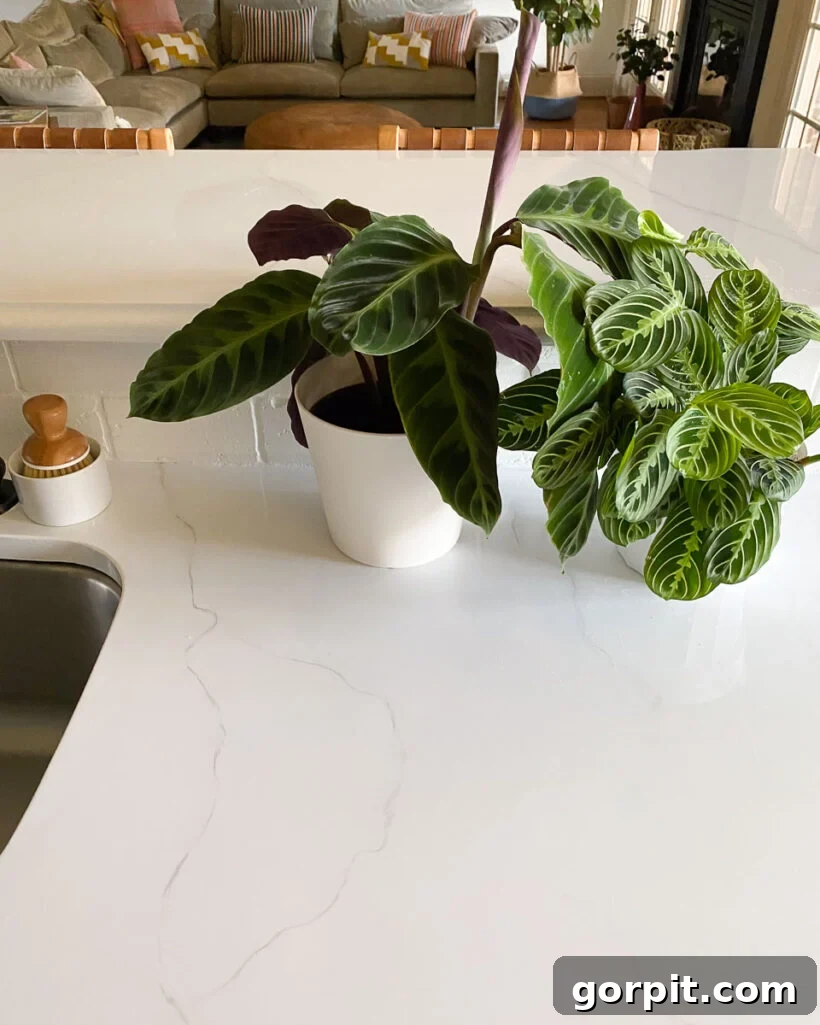
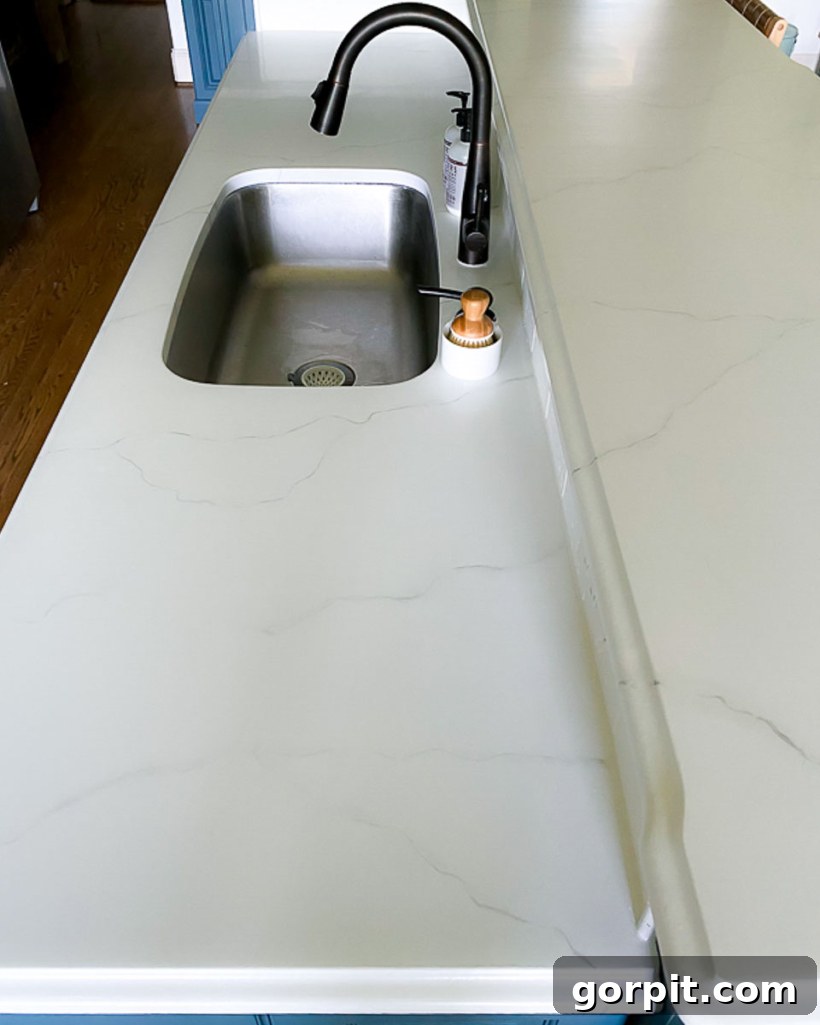
While the polycrylic didn’t yellow as many people had warned, it did unfortunately develop some surface stains. On one occasion, a few pieces of orange bell pepper were left on the counter for an extended period (a contribution from one of my daughters), resulting in a faint orange stain that, despite our best efforts, we were unable to fully remove. More concerning were several instances where a damp magazine was placed on the countertop, causing the ink and color from the paper to transfer and embed itself into the polycrylic surface. I am confident that neither of these staining incidents would have occurred if we had left the robust epoxy finish untouched and had not applied the additional polycrylic topcoat. This was a valuable lesson learned in the pursuit of a specific aesthetic.
At the 2-Year Mark: First Signs of Wear
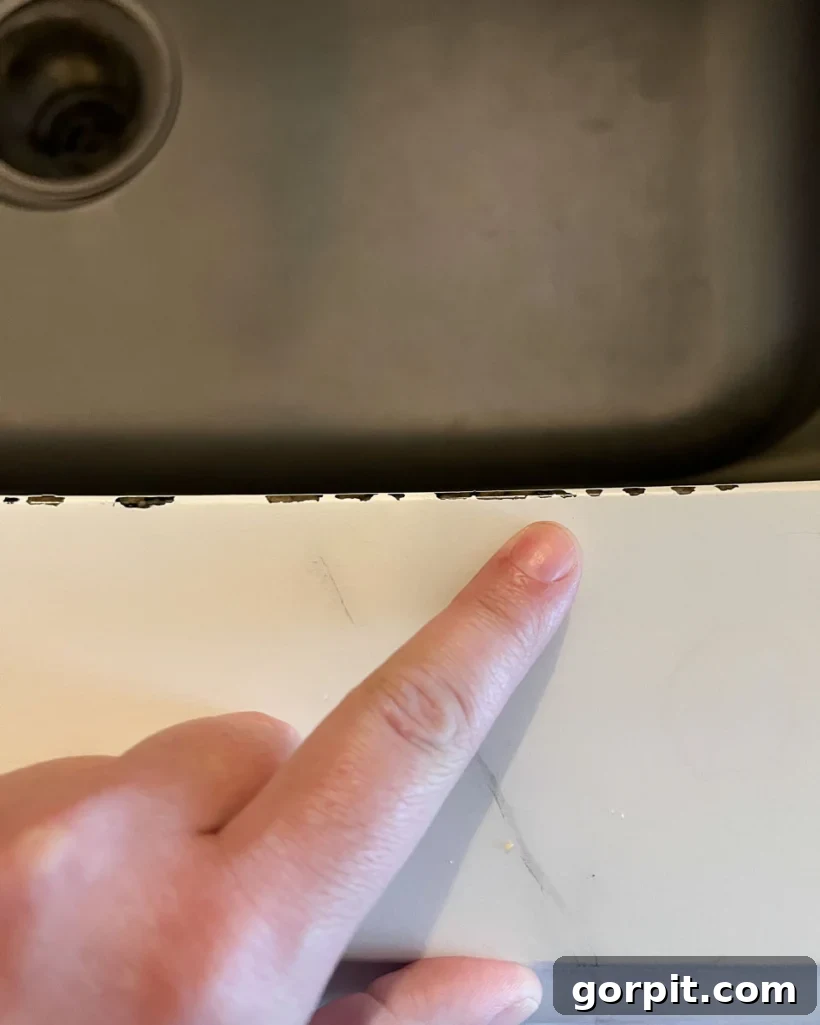
Roughly around the two-year mark, we began to observe the first significant signs of wear and tear: chipping around the edge of our under-mount sink. I believe the primary reason for this localized issue is the inherent difficulty in achieving a perfectly even and sufficiently thick coating of the protective epoxy resin along the intricate cutout edges of an under-mount sink. This area experiences constant moisture exposure and physical contact, making it a particularly vulnerable point. Had we installed a drop-in sink, I am confident this specific problem would have been largely circumvented. Nevertheless, the chips around the under-mount sink became increasingly noticeable over time, accumulating to a degree that began to bother me.
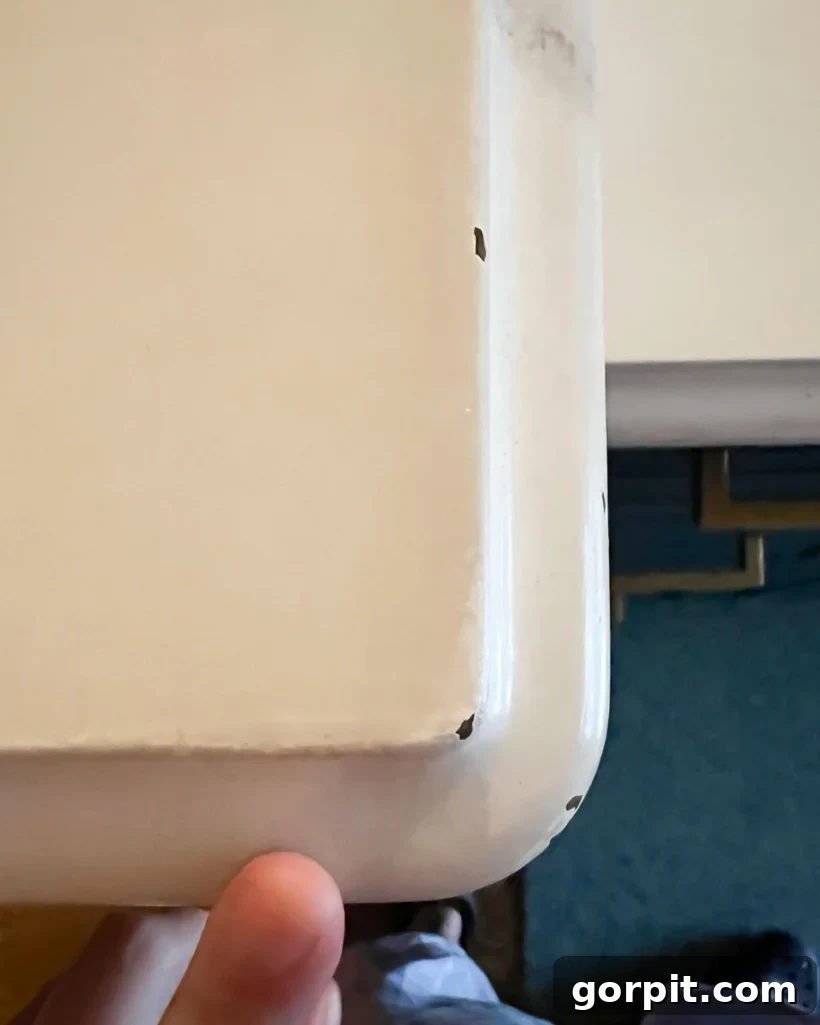
Concurrently, we also started to notice a few small, isolated chips along other countertop edges, particularly in areas that frequently experienced accidental bumps or dings from pots, pans, and other kitchen utensils. However, these were far less prominent than the sink issues. If you were to casually walk into our kitchen and glance around, you would genuinely have to actively search for these minor imperfections; they were not immediately obvious and did not significantly detract from the overall appearance of the counters.
The Final Verdict: After 3 Years and 5 Months
We continued to live with and utilize our painted countertops until August of 2024, which, for those keeping count, translates to an impressive 3 years and 5 months of heavy daily use. Ultimately, our decision to part ways with them wasn’t due to a complete failure of the painted finish, but rather part of a larger strategic plan. We embarked on a full gut renovation of our kitchen, a project that went far beyond merely replacing the countertops, allowing us to completely redesign and update the entire space.
The video below offers an authentic, unfiltered look at how our painted countertops appeared after nearly 3 1/2 years of consistent, heavy use. It provides a visual testament to their real-world durability.
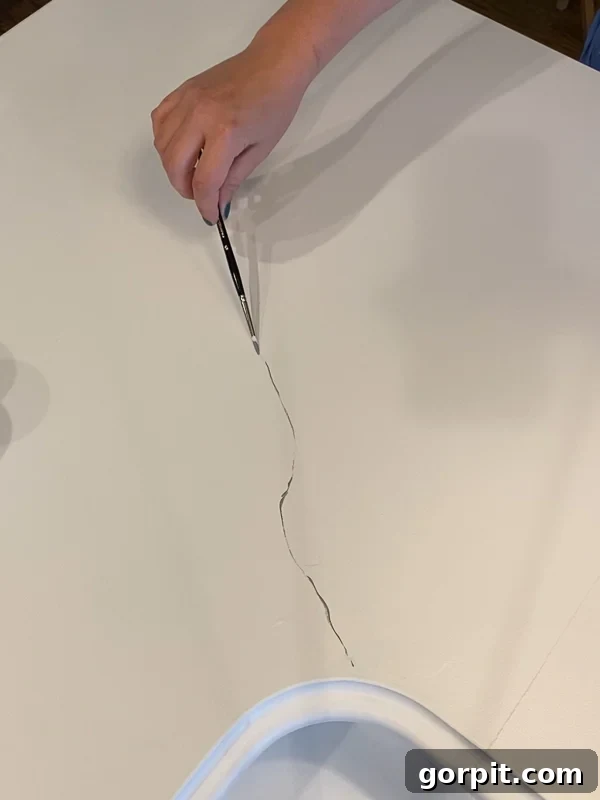
The photograph below captures the extent of the chips around the under-mount sink, taken just one day before our kitchen demolition in August 2024. While there were certainly fewer chips at the 2-year mark, they remained visible and concentrated in this high-stress area, highlighting its particular vulnerability.
Furthermore, you can observe a few small chips along the exposed edges of our painted counters in the image provided below. Again, this photo was taken in August 2024, representing the condition of the surfaces after 3 years and 5 months since they were first painted. These were less problematic but serve as a transparent look at the wear over time.
The Big Question: Would I Embark on This Countertop Painting Journey Again?
Without a shadow of a doubt, my answer is a resounding “Yes!” As I’ve stated throughout this review, our expectations for painted kitchen counters were never that they would provide a permanent, flawless surface for decades. However, we were exceptionally pleased with their performance and durability, especially when considering the remarkably affordable cost of this transformation.
The success and satisfaction we experienced with our kitchen counters led us to confidently apply the same painting technique to other areas of our home. We subsequently painted the countertops in our laundry room and both of our daughters’ bathrooms, achieving equally pleasing and durable results. This expansion of the project speaks volumes about our overall positive experience and trust in the method.
Who Should Consider Painting Their Kitchen Counters? And Who Shouldn’t?
It’s important to understand if this DIY approach aligns with your specific needs and expectations. If your primary goal is to achieve absolutely flawless, factory-perfect kitchen counters that will remain immaculate for two years or more without any visible imperfections, then painting your existing countertops might not be the ideal solution for you. In such a scenario, regardless of the products, kits, or systems you choose, it’s highly improbable that you will avoid eventual minor chips or imperfections in a heavily used kitchen. Your best and most reliable option for enduring perfection would likely involve investing in new, high-quality replacement countertops.
However, if you are searching for a highly budget-friendly yet remarkably effective way to completely revitalize the aesthetic of your countertops for a period of several years – perhaps while you save up for a more permanent, high-end solution, or simply to update a dated look – then I wholeheartedly recommend considering the painting method. It offers an incredible bang for your buck, delivering significant visual impact at a fraction of the cost of new installations.
Moreover, I genuinely believe that painting your counters could even serve as a permanent fix, provided you are willing to periodically refresh the surface every couple of years. For instance, if we hadn’t planned for a full kitchen renovation and had started noticing the chips around the 2-year mark, I would have readily purchased another countertop paint kit. I would then have repeated the application process to restore them to their original beautiful and brand-new condition. Since we knew our entire kitchen was slated for demolition, repainting and recoating them again didn’t make practical sense.
Lessons Learned: What Would I Do Differently Next Time?
I touched upon this earlier, but I want to elaborate on a crucial learning point from our experience. I would absolutely choose and utilize the same countertop painting kit again without hesitation. However, one significant modification I would make is to refrain from applying a satin polycrylic topcoat over the epoxy resin. While I initially loved how the polycrylic successfully dulled the very shiny surface of the epoxy, achieving a more realistic, honed marble finish, it unfortunately introduced vulnerabilities that I believe we would not have encountered with the epoxy resin topcoat left on its own (as detailed in the “At the 18-Month Mark” section above).
Instead of the polycrylic, my revised approach would involve applying an additional, perhaps even slightly thicker, coat of the epoxy resin itself. Once fully cured, I would then carefully and lightly sand the epoxy to achieve the desired honed marble finish. This technique would involve using very fine-grit sandpaper, followed by polishing, to create a subtle matte or satin sheen without compromising the integrity or thickness of the protective epoxy resin. In fact, by applying an extra coat of epoxy, we would have an even greater margin of safety during the sanding process. Therefore, if you, like me, are not fond of the high-gloss, shiny finish of the epoxy resin, I strongly recommend you consider this method – applying an extra layer of epoxy and then delicately sanding it to your preferred sheen – and bypass the satin polycrylic altogether. This approach leverages the inherent durability of the epoxy while still allowing for aesthetic customization.
I genuinely hope this in-depth update has provided valuable insights and clarity for anyone contemplating painting their kitchen counters. While it may not be the perfect, permanent solution for every single homeowner, it proved to be an incredibly effective and awesome option for us, dramatically updating the look of our counters and breathing new life into our kitchen before we embarked on a larger renovation. Given the opportunity, I would undertake this project again in a heartbeat!
More Paint Posts
SEE ALL PAINT POSTS
-
9 Life-Changing Painting Hacks Everyone Should Know
-
How Durable are DIY Painted Kitchen Cabinets?
-
How to Paint Kitchen Cabinets (From a DIYer Who Has Done it 3 Times)
-
How Have Our Painted Countertops Held Up?
-
How to Paint IKEA Furniture and Mistakes to Avoid
-
How Much Paint Do I Need for My Room?
Are you curious about my systematic approach to transforming rooms and spaces within our home? Explore Designer in a Binder® – a simple yet effective guide to decorating your home with confidence.
For exclusive content, behind-the-scenes glimpses, and the latest DIY tips straight to your inbox, be sure to subscribe before you leave!
Sign up for our newsletter to get exclusive content and DIY tips!