Unleash Your Creativity: Mastering Cricut SportFlex Iron On for Stretchy Fabrics
For too long, crafters have faced limitations when trying to personalize stretchy garments with heat transfer vinyl. Traditional iron-on materials simply couldn’t keep up with the demands of activewear, often resulting in cracked, puckered, or peeling designs. Imagine being able to customize your workout clothes, design unique swimwear, or add a personal touch to yoga pants and leggings without compromising on flexibility or durability. The good news is, that era of limitation is over! Thanks to Cricut SportFlex Iron On™, a revolutionary heat transfer vinyl, you can now personalize virtually any stretchy fabric with confidence and style. This detailed guide will walk you through everything you need to know about using Cricut SportFlex Iron On™ to create stunning, long-lasting designs that move and stretch with your fabric.
If you’re an avid fan of heat transfer vinyl (HTV) and the endless possibilities it offers, you’re undoubtedly familiar with the frustration of applying it to highly flexible materials. Regular Cricut iron-on vinyl, while fantastic for cotton and rigid blends, lacks the elasticity required for performance fabrics. The result? A beautiful design that quickly becomes distorted or damaged as the fabric stretches and recovers. This problem made it challenging to apply custom graphics to items like gym apparel, bathing suits, and other form-fitting garments that demand high levels of stretch and movement.
Cricut addressed this common challenge head-on with the introduction of SportFlex Iron On™, and it has quickly become a game-changer in the crafting community. Having recently experienced its capabilities firsthand, I can confidently say that the excitement surrounding this product is entirely justified. In this comprehensive post, I’ll share all the essential details and practical steps for effectively using Cricut SportFlex Iron On™ on your favorite stretchy fabrics.
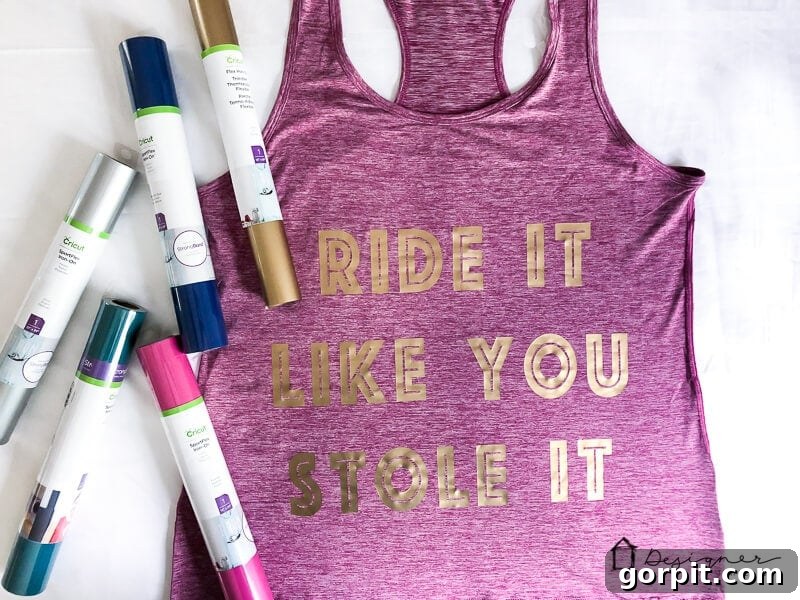
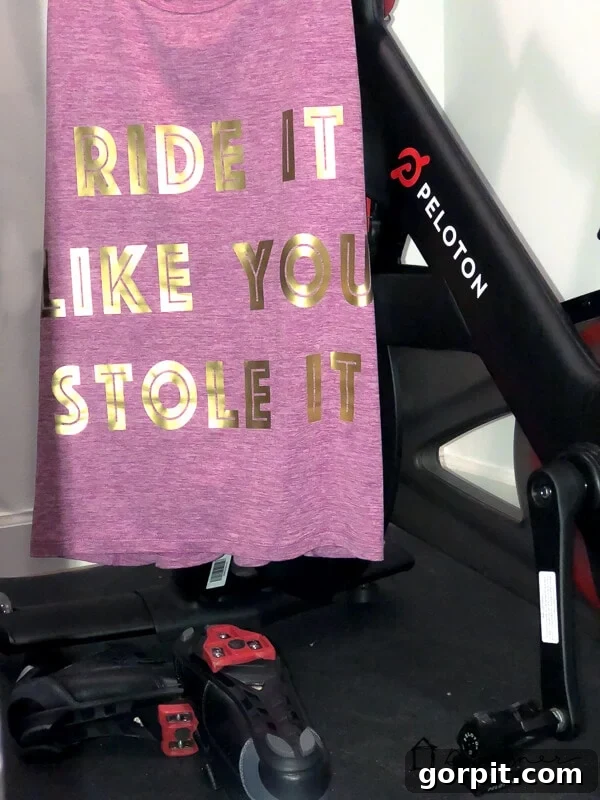
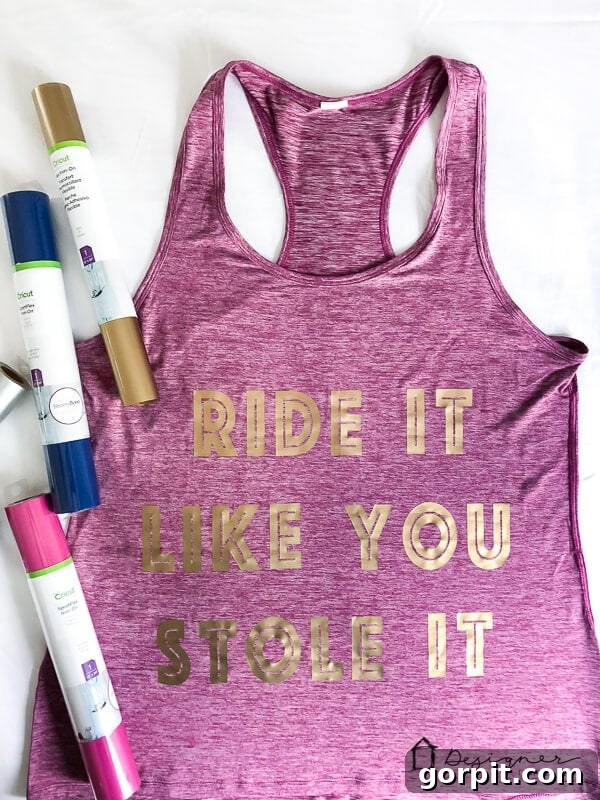
As a personal example, I recently embraced the Peloton lifestyle – and yes, I’m absolutely loving the fitness journey it provides! My renewed passion for working out inspired me to create a fun, custom shirt to wear during my spinning sessions. This project perfectly demonstrated the incredible versatility and performance of SportFlex Iron On™. Get ready to discover how you can bring your own activewear visions to life!
Thank you to Cricut for sponsoring this exciting project! This post contains some affiliate links for your convenience (which means if you make a purchase after clicking a link, I will earn a small commission but it won’t cost you a penny more)! Click here to read my full disclosure policy.
Mastering SportFlex Iron On: A Comprehensive Guide for Stretchy Fabrics
Essential Materials Needed for Your SportFlex Project:
Before diving into your creative endeavor, gathering the correct tools and materials is crucial for a smooth and successful application of Cricut SportFlex Iron On. Using the right products ensures your designs adhere perfectly and withstand the wear and tear of active lifestyles.
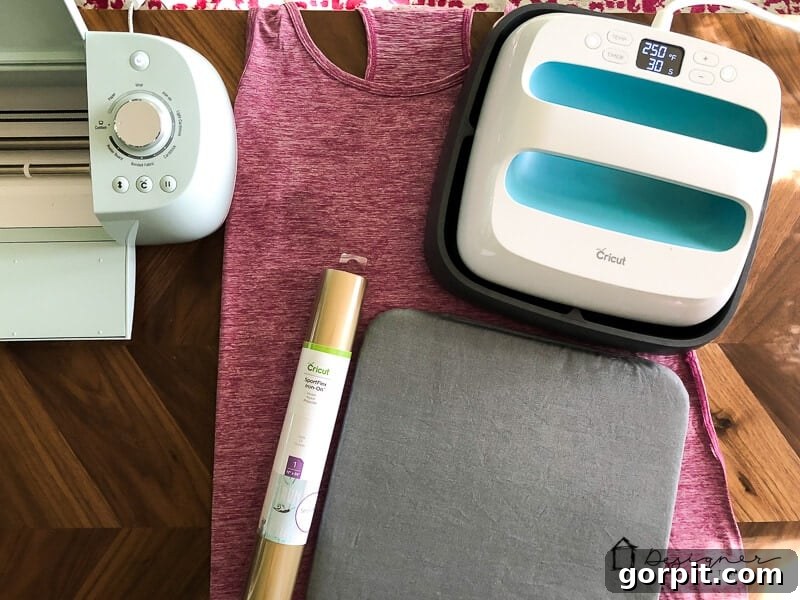
- Cricut SportFlex Iron On™ (I chose a vibrant gold for my project)
- This is the star of the show and an absolute non-negotiable for stretchy fabrics. Unlike standard heat transfer vinyl, SportFlex Iron-On is specifically engineered to flex and move with your garment without cracking, peeling, or wrinkling. It’s ideal for high-performance materials like polyester, nylon, and spandex blends commonly found in workout shirts, leggings, and swimwear. With Cricut’s StrongBond™ Guarantee*, you can trust that your designs will last through countless washes and workouts when applied as directed. Its unique flexible and stretchable properties are what make it perfect for activewear, ensuring your custom creations remain pristine and comfortable.
- High-Performance Tank Top or your chosen stretchy garment (e.g., yoga pants, swimsuit, leggings)
- Select a clean, pre-washed garment made from a synthetic blend for best results.
- Cricut Cutting Machine
- I utilized my trusty Cricut Explore Air 2 for this project, but any Cricut cutting machine, including the Cricut Maker or Cricut Joy, can handle SportFlex Iron-On. If you’re wondering which machine is right for your crafting needs, you can explore detailed comparisons like my review comparing Cricut vs. Silhouette machines.
- Cricut EasyPress
- While a household iron can be used, the Cricut EasyPress is highly recommended for its precise temperature control and even heat distribution, which are critical for optimal SportFlex Iron-On application and durability.
- Cricut EasyPress Mat or a firm, protected surface
- A dedicated EasyPress Mat provides the ideal pressing surface, absorbing moisture and directing heat back into your project. Avoid using a standard ironing board, as its soft, uneven surface can lead to inconsistent adhesion. A thick towel placed on a sturdy table or countertop can serve as an alternative.
- Weeding Tool
- An essential tool for removing excess vinyl from your cut design with precision.
- Cricut Iron-On Protective Sheet or a thin cotton towel
- This protective layer shields your SportFlex Iron-On from direct heat and prevents it from sticking to your EasyPress plate.
Step-by-Step Guide: Applying Cricut SportFlex Iron On to Stretchy Fabrics
Follow these detailed steps to ensure a flawless application of your SportFlex Iron On design, resulting in a durable and flexible custom garment.
1) Design Your Vision in Cricut Design Space:
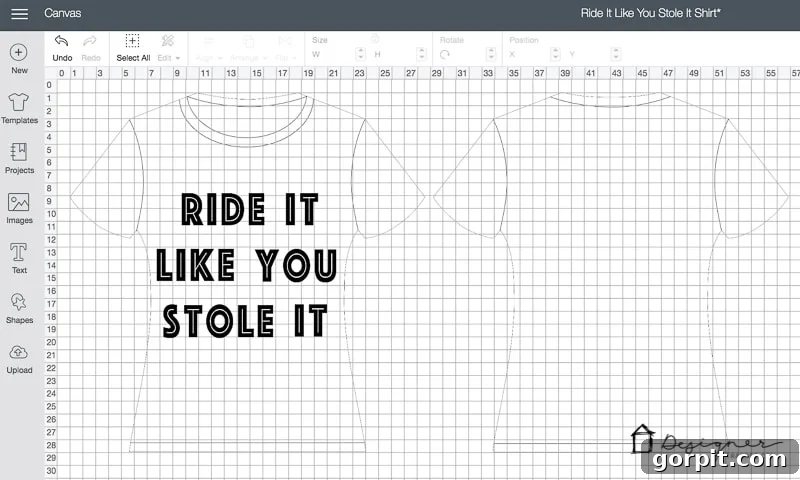
Begin by opening Cricut Design Space and bringing your creative idea to life. If you’d like to replicate my design, you can access it here directly. To accurately gauge the ideal size for your design, I highly recommend utilizing the t-shirt templates available within Design Space. Simply click on “Templates” on the left-hand side of your screen and browse through the various garment options until you find one that closely resembles your chosen item. These templates serve as an excellent visual guide, helping you visualize how your design will appear on the actual fabric. For instance, I selected the “scoop neck t-shirt” template, which provided a helpful framework even though my actual garment was a tank top. Remember to measure your physical garment (e.g., a size large tank top) and adjust the design size accordingly within Design Space by clicking and dragging the corner of your design until it achieves the perfect proportions. This step is crucial for ensuring your finished product looks professionally made and perfectly scaled to your chosen garment.
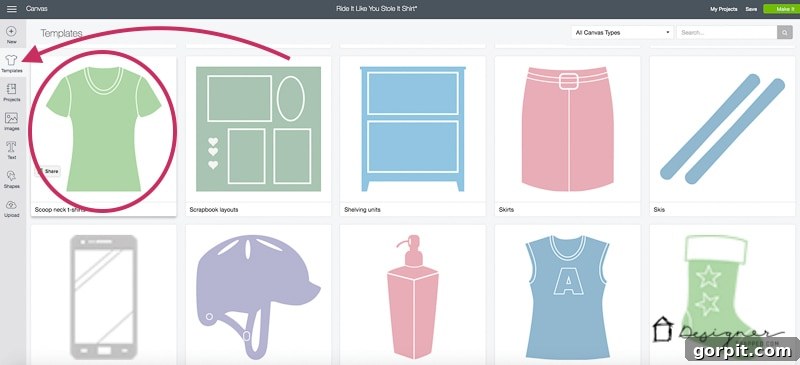
As illustrated, the scoop neck t-shirt template provided a valuable visual aid for placement and sizing. My tank top is a size large, so for smaller or larger garments, you’ll want to fine-tune your design’s dimensions to ensure a harmonious fit. A measuring tape is your best friend here if you’re unsure. You can effortlessly resize your design by selecting it and dragging the corner inward or outward until it meets your requirements.
2) Prepare Your SportFlex Iron On Material for Cutting:
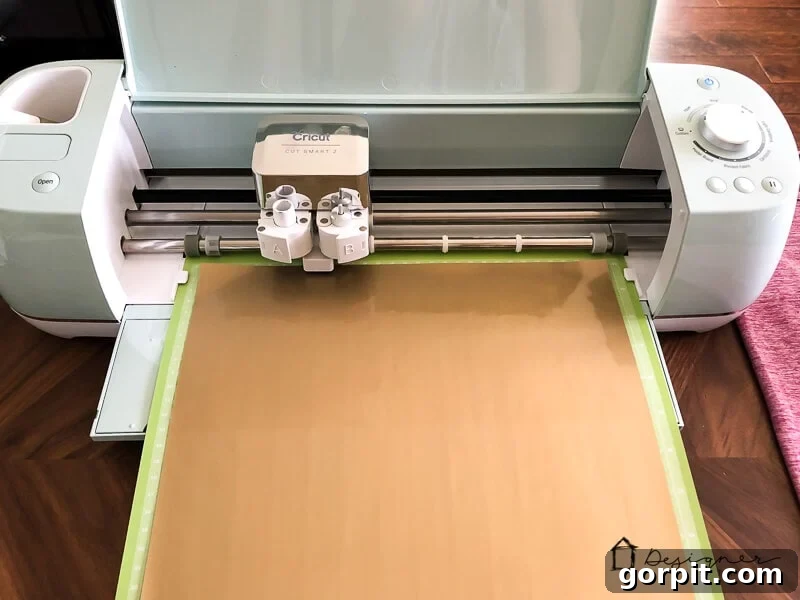
A critical step, especially if you’re new to working with Cricut iron-on vinyl, is understanding that it’s applied differently than traditional adhesive vinyl. For iron-on materials, you always cut the reverse (bottom) side of the material. This means when you place the SportFlex Iron On onto your cutting mat, the shiny side (which is the clear carrier sheet) must face DOWN, and the less shiny, matte side (the actual vinyl material) must face UP. This orientation ensures that your Cricut machine cuts into the vinyl while leaving the protective carrier sheet intact, which is essential for transferring your design later.
3) Mirror Your Design for Iron-On Success:
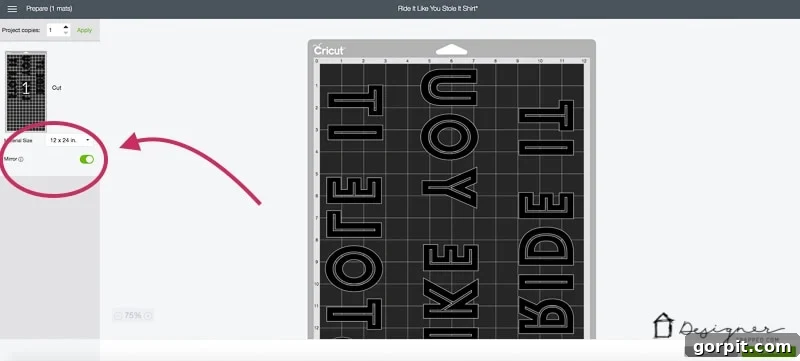
With your design finalized and your SportFlex Iron On correctly placed on the mat, it’s time to prepare for cutting. Click the “Make It” button in the bottom right corner of Design Space. This will take you to the preview screen. On this screen, it is absolutely essential to mirror your image. For all iron-on projects, designs must be mirrored because you are cutting the back of the material, and it will be flipped when applied to your garment. Simply toggle the “Mirror” option to the “On” position for each mat that contains iron-on material. Failing to mirror your image will result in a reversed design on your finished item, which is particularly crucial for text or directional graphics.
Regarding machine settings: if you’re using a Cricut Explore Air machine like mine, set your dial to “Iron On.” For Cricut Maker users, you have the convenience of selecting “SportFlex Iron On” directly from the extensive list of materials within Design Space for optimized cut settings.
4) Cut Your Design with Precision:
Once your design is mirrored and your material setting is chosen, click the green “Continue” button in Design Space. Then, load your mat into your Cricut machine and press the flashing “Go” button on your machine to begin the cutting process. Ensure your blade is clean and sharp for the best results, especially with intricate SportFlex designs.
5) Weed Your Design Flawlessly:
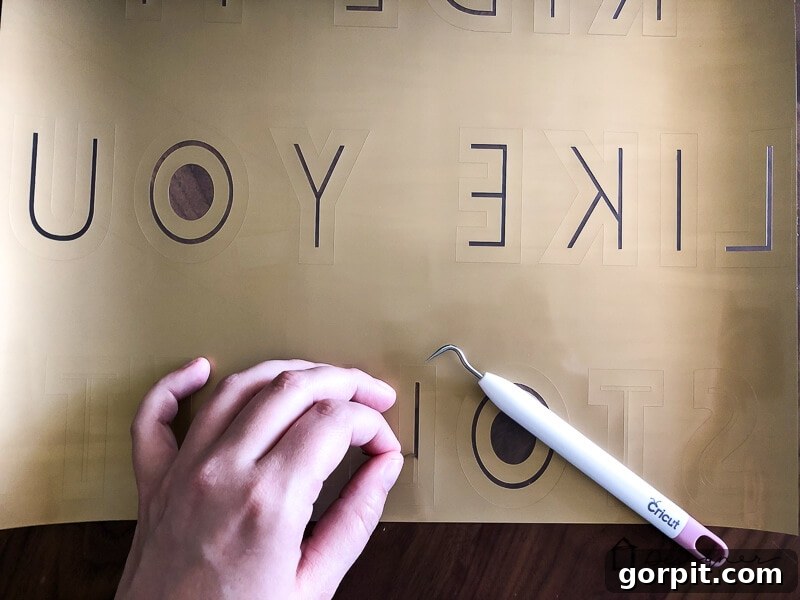
After your Cricut machine has finished cutting, unload the mat. This is where your weeding tool becomes indispensable. Carefully remove all the excess SportFlex Iron On vinyl that is not part of your desired design. Take your time, especially with small details and delicate lines, to ensure you are left with only the elements you intend to transfer onto your shirt. The carrier sheet will hold your design in place, making the weeding process straightforward.
6) Prepare Your Fabric and EasyPress:
With your design weeded, it’s time for application. Position your garment smoothly onto your Cricut EasyPress Mat or your chosen hard, protected surface. Next, power on your Cricut EasyPress and set the temperature to 305˚F (150˚C). Allow it to reach the set temperature, which it will indicate with an audible beep. Preheating your EasyPress to the correct temperature is vital for optimal adhesion.
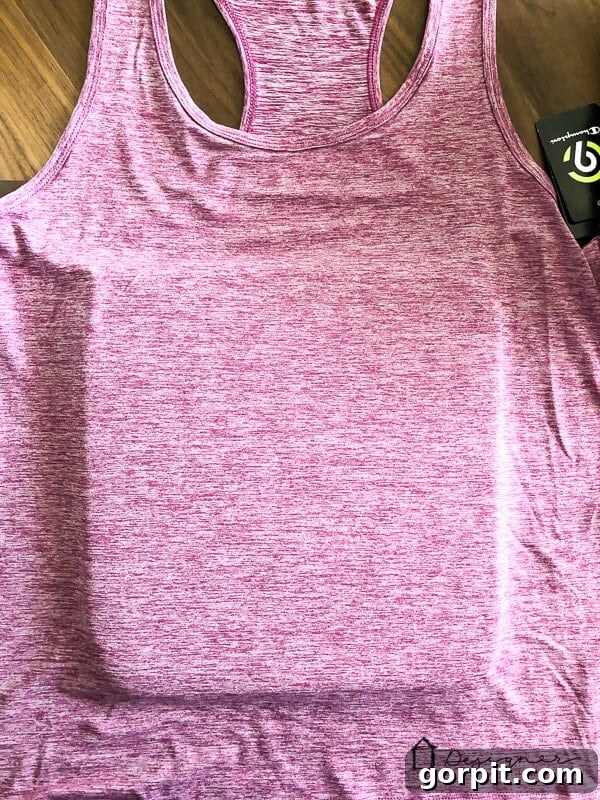
7) Apply Your SportFlex Design:
Before placing your vinyl, use your EasyPress to preheat the area of your shirt where the design will go for 15 seconds. This crucial preheat step removes moisture and wrinkles from the fabric, creating an ideal surface for the SportFlex to bond with. Immediately after preheating, carefully position your weeded design onto your shirt, ensuring it’s perfectly centered and straight. Then, place your Cricut Iron-On Protective Sheet or a thin cotton towel over the clear carrier film of your design. Apply your EasyPress with light pressure for 30 seconds. The built-in timer on the EasyPress is a fantastic feature that counts down for you, ensuring consistent application. If your design is larger than your EasyPress plate, as mine was, apply pressure to one section for 30 seconds, then lift and move the EasyPress to cover the adjacent section, pressing again for another 30 seconds, ensuring even heat and pressure across the entire design.
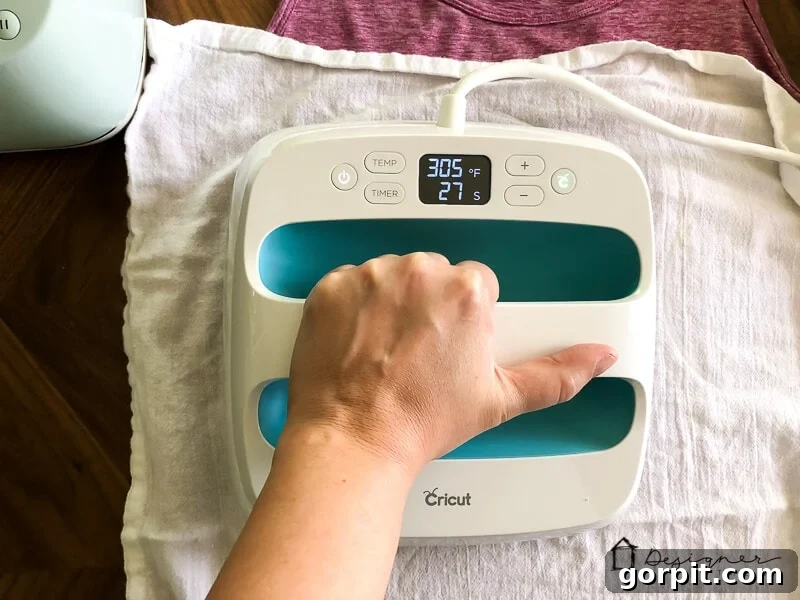
8) Final Press for Durability:
Once you’ve applied heat to the front of your design, turn your shirt inside-out. Apply your EasyPress to the back of the design area for an additional 30 seconds. This step is crucial for reinforcing the bond between the SportFlex Iron On and the fabric, ensuring maximum durability and washability, especially on stretchy materials that will undergo frequent movement.
9) The Reveal: Peeling Back to Perfection:
After the final press, resist the urge to peel the carrier sheet immediately. Allow the entire design to cool completely. SportFlex Iron On is a “cold peel” material, meaning the clear film should only be removed once it has reached room temperature. Once cool, gently and slowly peel away the clear carrier film at a 45-degree angle to reveal your fantastic new custom shirt! If any part of the design lifts, simply place the carrier sheet back down, cover with your protective sheet, and press again for 10-15 seconds before allowing to cool and trying the peel again.
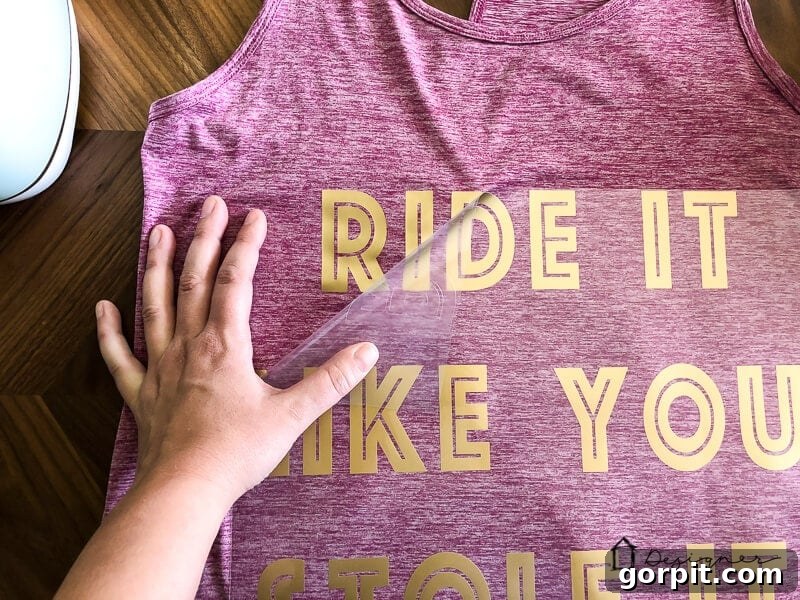
And there you have it – my amusing custom workout shirt, ready for action! Call me whimsical, but this design never fails to bring a smile to my face during my Peloton rides.
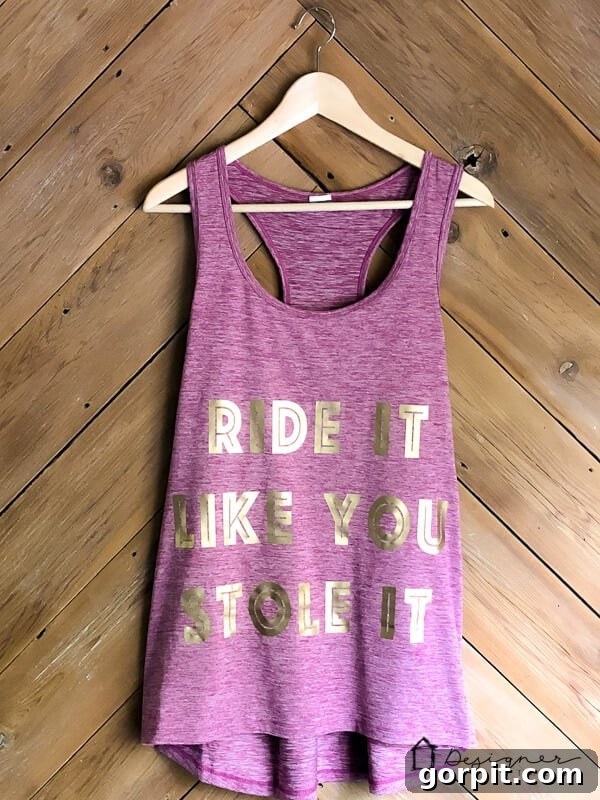
Caring for Your SportFlex Iron-On Creations
To ensure your custom SportFlex Iron On garments look fantastic and last for a long time, proper care is essential. Following these guidelines will help maintain the integrity of both your design and the fabric:
- Wait Before Washing: After applying SportFlex Iron On, wait at least 24 hours before the first wash. This allows the adhesive to fully cure and create a strong bond with the fabric.
- Wash Inside Out: Always turn your garment inside out before washing. This protects the vinyl design from abrasion caused by other clothes in the wash cycle.
- Use Cold Water: Wash in cold water on a gentle cycle. Hot water and harsh detergents can weaken the adhesive bond over time.
- Mild Detergent: Opt for a mild detergent. Avoid bleach, fabric softeners, and harsh stain removers, as these can degrade the vinyl.
- Avoid Tumble Drying: Air drying is highly recommended. Hang your garments to dry. If you must use a dryer, select the lowest heat setting and tumble dry inside out. High heat is detrimental to iron-on vinyl.
- Do Not Dry Clean: Dry cleaning chemicals can damage the vinyl.
- Ironing (if necessary): If the garment needs ironing, avoid direct contact with the vinyl design. Turn the garment inside out and iron on a low setting, or place a protective sheet over the design if ironing the right side.
Unleash Your Creativity: More Project Ideas with SportFlex Iron-On
The introduction of SportFlex Iron On has opened up a world of possibilities for customizing items that were previously off-limits for heat transfer vinyl. Beyond workout shirts, consider these inspiring project ideas:
- Swimwear: Create unique, personalized bathing suits for yourself, friends, or a swim team. Imagine adding a fun phrase like “eat my bubbles” (a personal favorite idea!) to a swimsuit for added personality.
- Yoga Pants & Leggings: Add motivational quotes, intricate patterns, or personalized logos to the ankles, thighs, or waistband of your yoga pants and leggings for a stylish touch during your practice or daily wear.
- Sports Bras: Customize the band or straps of sports bras with small, empowering messages or team identifiers.
- Headbands & Wristbands: Elevate your athletic accessories by adding custom graphics to stretchy headbands and wristbands, perfect for sports teams or individual flair.
- Dance & Gymnastics Leotards: Personalize performance wear with names, team numbers, or decorative elements that stretch and move seamlessly with every routine.
- Baby & Toddler Activewear: Create adorable and durable custom onesies or tiny athletic outfits for the littlest movers in your life.
- Compression Sleeves: Add branding or personal designs to compression sleeves for a unique athletic statement.
I’m genuinely thrilled about this stretch-friendly iron-on vinyl. I can’t wait to get creative with my twin girls’ swim team bathing suits. A cheeky “eat my bubbles” on the rear is definitely on my radar – feel free to judge my maturity; I embrace it!
Troubleshooting Common SportFlex Iron-On Issues
Even with the right materials and instructions, sometimes things don’t go perfectly. Here are some common issues you might encounter with SportFlex Iron On and how to fix them:
- Vinyl Not Sticking:
- Insufficient Heat/Pressure: Ensure your EasyPress is at the correct temperature (305°F) and you’re applying firm, even pressure. Make sure you pressed for the recommended time (30 seconds per section, plus the 30-second back press).
- Cold Peel Error: SportFlex is a cold peel vinyl. If you try to peel too soon, it won’t adhere properly. Wait until the carrier sheet is completely cool to the touch.
- Moisture in Fabric: Always preheat your fabric for 15 seconds to remove any moisture before applying the design.
- Uneven Surface: Make sure you are using a firm, flat surface like the EasyPress Mat, not an ironing board.
- Bubbling or Wrinkling:
- Overheating: Too much heat can sometimes cause bubbling, especially on delicate synthetic fabrics. Ensure your EasyPress temperature is accurate.
- Improper Pre-wash: Always pre-wash your garment without fabric softener to remove any sizing or chemicals that could interfere with adhesion.
- Excessive Stretch During Application: Try to keep the fabric as flat and unstretched as possible during application.
- Design Peeling After Washing:
- Improper Curing: Make sure you waited the full 24 hours before washing after application.
- Harsh Washing Conditions: Review the care instructions above – cold water, gentle cycle, inside out, and air dry are key.
- Insufficient Pressing: Ensure you pressed both the front and back of the design for the full recommended time and temperature.
- Design Looks Dull or Textured:
- This is usually normal for SportFlex Iron On, which has a slightly more matte finish than glossy regular HTV. However, ensure you’re using a protective sheet to avoid direct contact with the heat plate, which could otherwise cause an unwanted texture.
Beyond the Project: Expanding Your Cricut Skills
The world of Cricut crafting is vast and exciting. If you’ve enjoyed this SportFlex Iron On project, consider exploring other aspects of your machine and creative potential:
- Epic Craft Room Storage Ideas
- Which Cricut Machine Is Right for You?
- Cricut vs. Silhouette: My Unbiased Review
- Make ALL THE THINGS With the Cricut Maker
- How to Make Stickers and Labels with a Cricut Machine
- Personalized Christmas Ideas With Cricut
Curious about how I approach transforming rooms and spaces in our home? Be sure to check out my exclusive guide, Designer in a Binder®. It’s packed with affordable and simple ways to decorate your home with confidence.
And if you crave exclusive content, behind-the-scenes sneak peeks, and fresh inspiration delivered straight to your inbox, be sure to subscribe to my newsletter before you go! Join our community of creative enthusiasts and never miss out on new projects and tips.