
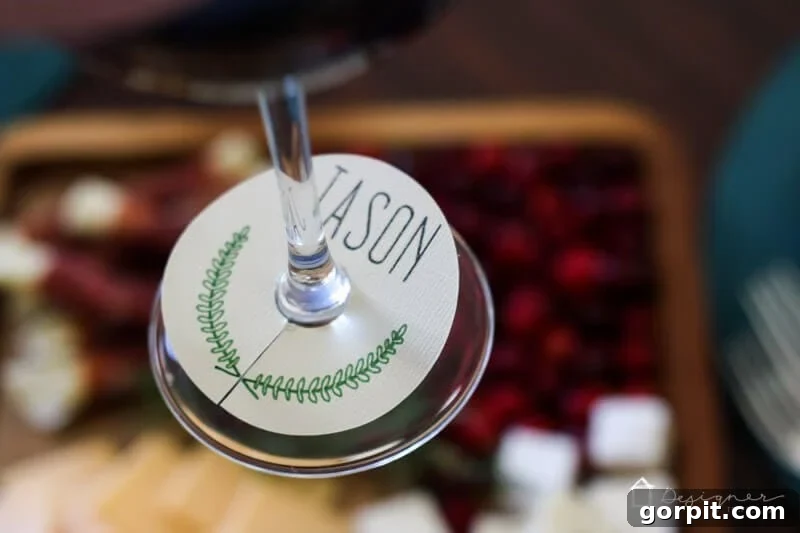
Elevate Your Gatherings with Charming DIY Wine Glass Tags: Practical & Pretty!
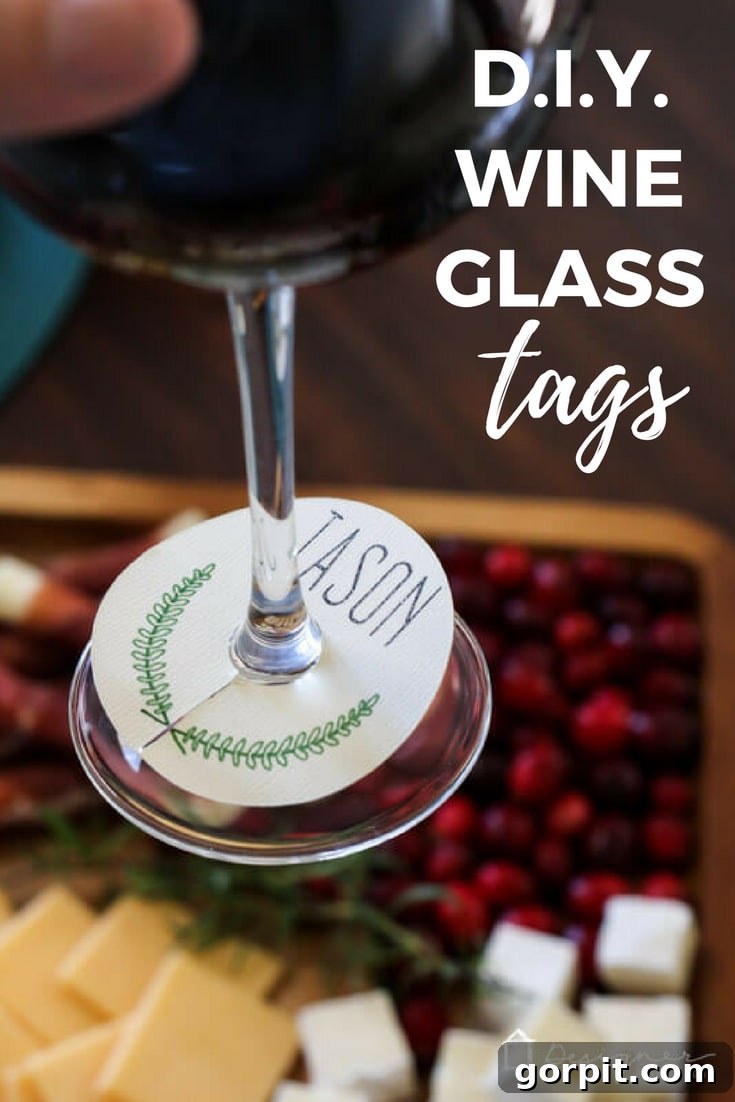
This insightful guide to crafting custom wine glass charms is proudly sponsored by Cricut.
There’s a subtle frustration many hosts know well: the endless cycle of mistaken identities at social gatherings. You set down your glass for a moment, turn to chat with a friend, and upon returning, find yourself wondering, “Which one was mine?” This common conundrum, often leading to awkward sips from someone else’s drink (or worse, wasted wine!), is precisely what inspired me to finally jump on the wine glass charm bandwagon this year. As I prepped for our annual Friendsgiving celebration, I realized it was high time to introduce a simple, yet elegant, solution that would prevent this mixing-up madness once and for all.
Enter the DIY wine glass charm. These charming little accessories are not just a decorative touch; they are a practical necessity for any host looking to add an element of sophistication and organization to their get-togethers. The best part? They are incredibly easy and quick to make. Seriously, I was almost upset I hadn’t thought of them sooner! With just a few materials and a short amount of time, you can craft a set of these personalized identifiers, ensuring every guest can easily spot their glass. Whether you’re planning for the upcoming Thanksgiving feast, festive Christmas parties, New Year’s Eve countdowns, or even a casual backyard barbecue, these DIY charms are the perfect, thoughtful detail that your guests will appreciate.
This post contains some affiliate links for your convenience (which means if you make a purchase after clicking a link I will earn a small commission which helps keep my blog up and running but it won’t cost you a penny more)! Click here to read my full disclosure policy.
Craft Your Own Distinctive Wine Glass Charms
Why DIY Wine Glass Charms Are a Must-Have for Every Host
Beyond the simple practicality of identifying drinks, DIY wine glass charms offer a wealth of benefits that enhance the overall guest experience and add a personal touch to your hosting style. They transform a common inconvenience into an opportunity for creativity and thoughtful hospitality.
- Personalization at Its Best: Store-bought charms often lack the unique flair you might desire. By creating your own, you have complete control over the design, allowing you to perfectly match your party’s theme, color scheme, or even incorporate elements that reflect your personal style. You can design specific charms for different holidays, seasons, or special occasions, making each gathering truly unique.
- Budget-Friendly Elegance: Crafting your own charms is often significantly more cost-effective than purchasing pre-made sets, especially if you host frequently or need a large quantity. You can utilize existing craft supplies or invest in versatile materials that can be used for multiple projects, maximizing your creative budget.
- A Fun Creative Outlet: For those who enjoy crafting, making wine glass charms is a satisfying and relatively quick project. It offers a chance to experiment with different materials, colors, and designs, resulting in beautiful, functional pieces you can proudly display.
- Spark Conversation: Unique, custom charms can serve as delightful conversation starters among your guests. Imagine guests admiring each other’s charms, or asking about the story behind your personalized creations. They add an interactive element to your entertaining.
- Promote Hygiene: In today’s world, preventing the accidental sharing of drinks is more important than ever. Clearly marked glasses help maintain better hygiene among guests, offering peace of mind to everyone.
- Thoughtful Party Favors or Gifts: A beautifully crafted set of wine glass charms makes an excellent hostess gift or a memorable party favor. Guests can take them home as a lovely keepsake from your event, extending the joy of your gathering.
Materials You’ll Need to Begin Your Charm Project:
Gathering the right materials is the first step to crafting beautiful and durable wine glass charms. Here’s what you’ll need, with some considerations for each item:
- Cardstock: This is the foundation of your charms. Opt for medium to heavy-weight cardstock (65-110 lb) for durability. Consider different finishes like glitter, metallic, or textured cardstock to add a festive touch. A variety of colors will allow for diverse designs suitable for any occasion.
- Cricut or a Similar Electronic Cutting Machine: While these charms can be cut by hand, a cutting machine like a Cricut significantly streamlines the process, ensuring precision and allowing for intricate designs. These machines are incredibly versatile, capable of cutting various materials and performing tasks like drawing, scoring, and foiling.
- If you’re new to cutting machines or considering an upgrade, you might find these resources helpful: compare Cricut vs. Silhouette machines here, or read an in-depth review of the powerful Cricut Maker here. Investing in a cutting machine opens up a world of DIY possibilities far beyond just wine glass charms.
- No Machine? No Problem! If you don’t have a cutting machine, don’t despair! You can still make these charms. You’ll need a good pair of small, sharp scissors, a craft knife, and perhaps some decorative hole punches for the main shape and a smaller one for the attachment point. This method requires a bit more patience but yields equally charming results.
- Pens Compatible with Your Cutting Machine: If your design includes drawn elements or text, you’ll need pens that fit your machine. Cricut offers a fantastic range of pens in various tip sizes and ink types.
- For this particular project, I used Cricut pens, specifically the Gel Tip 0.8 in Glitter Black for a touch of sparkle and the 0.4 Tip in Sour Apple for crisp, fine lines. Experiment with metallic, glitter, or neon pens to match the vibe of your event.
- Small Jump Rings: These are crucial for attaching the charms to your wine glass stems. Opt for 6-8mm jump rings. You can find them in various finishes like silver, gold, or antique bronze to complement your charm designs.
- Small Pliers (Jewelry Pliers): To easily open and close the jump rings without damaging them or your fingers, a pair of jewelry pliers (flat-nose and round-nose) is highly recommended.
Step-by-Step Guide: Crafting Your Personalized Wine Glass Charms
This tutorial is primarily based on using a Cricut machine and Cricut Design Space, which offers unparalleled precision and ease. However, the core principles can be adapted for other cutting machines or even manual crafting.
1. Design Your Charm in Cricut Design Space
The beauty of DIY charms lies in their customizable nature. You can choose from countless designs to perfectly suit your occasion.
- Select a Base Design: To get started with the exact elegant design I created, featuring a lovely winter laurel graphic, you can click here to download the free winter laurel graphic. This versatile design can be adapted for various seasons by simply changing the colors of the cardstock or the pens used.
- Utilize the Template: For a streamlined process, I’ve already prepared a template in Cricut Design Space. Click here to access this pre-designed template. Once opened, you can easily duplicate the charms to create as many as you need for your gathering.
- Customize and Personalize: In Design Space, you have the flexibility to resize the charms, change the text (perhaps add initials, guest names, or festive greetings), and even swap out the graphic for something else from Cricut’s extensive image library. Remember to “attach” any draw layers to your cut layers so they execute in the correct position.
- Add the Hole for Attachment: Ensure each charm has a small hole (typically 1/8 inch or 3mm in diameter) for attaching the jump ring. This is crucial for hanging the charm on the wine glass stem.
2. Prepare Your Machine and Materials for Cutting and Drawing
Once your design is finalized in Design Space, it’s time to bring it to life:
- Send to Make It: Click “Make It” in Design Space. The software will arrange your designs on a virtual cutting mat. Review the placement to ensure everything looks correct.
- Select Material Settings: Choose the appropriate material setting for your cardstock. This ensures the machine applies the correct pressure for a clean cut.
- Load Pens: If your design includes drawing, insert the chosen Cricut pens into Clamp A of your machine. Make sure they are clicked into place securely.
- Load Cardstock: Place your cardstock onto a light-grip or standard-grip cutting mat, ensuring it’s properly adhered to prevent shifting during the cut. Load the mat into your Cricut machine.
3. Execute the Project
Watch as your Cricut machine works its magic:
- Start Cutting/Drawing: Press the “Go” button (often a blinking Cricut logo) on your machine. The Cricut will first draw any design elements with the pens, then proceed to cut out the charm shapes.
- Visual Guidance: For a comprehensive visual walkthrough of these steps and to see the entire process in action, including valuable tips on using Cricut machines, make sure to watch the video embedded below. It covers everything from design space to the final cut, making it super easy to follow along.
If you’re eager to see these charms created from start to finish and learn more about the extensive capabilities of Cricut machines, I highly recommend watching my full Facebook live session. You can click here to view the Facebook live video, where I delve into the versatility of Cricut for a wide range of crafting projects.
4. Assembly: From Mat to Glass
Once your machine has finished its work, the final steps are simple:
- Carefully Remove Charms: Gently peel the cutting mat away from the cardstock (rather than pulling the cardstock off the mat) to prevent curling or tearing your delicate charms.
- Attach Jump Rings: Using your jewelry pliers, carefully open a jump ring. Thread one end through the small hole on your charm and then secure it by closing the jump ring. Ensure it’s fully closed so the charm won’t slip off.
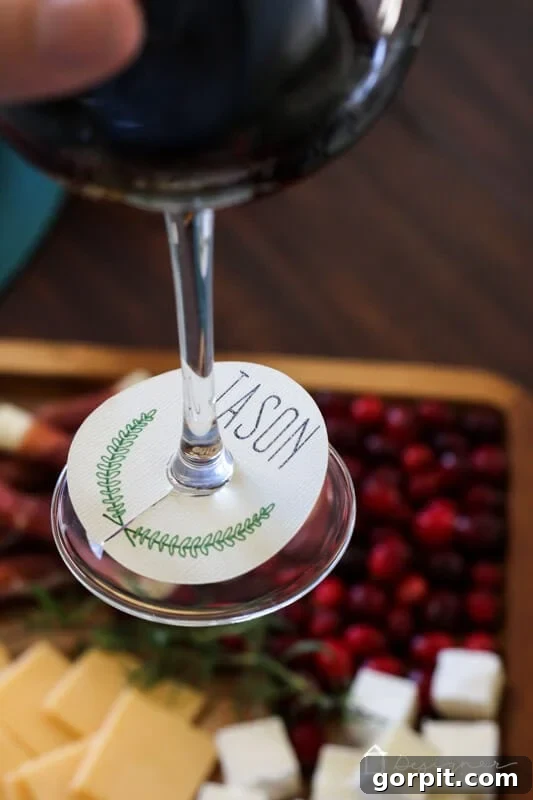
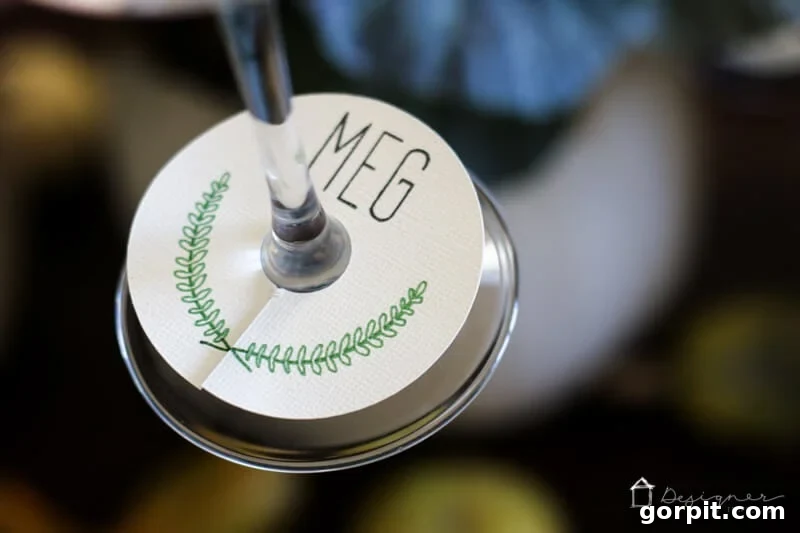
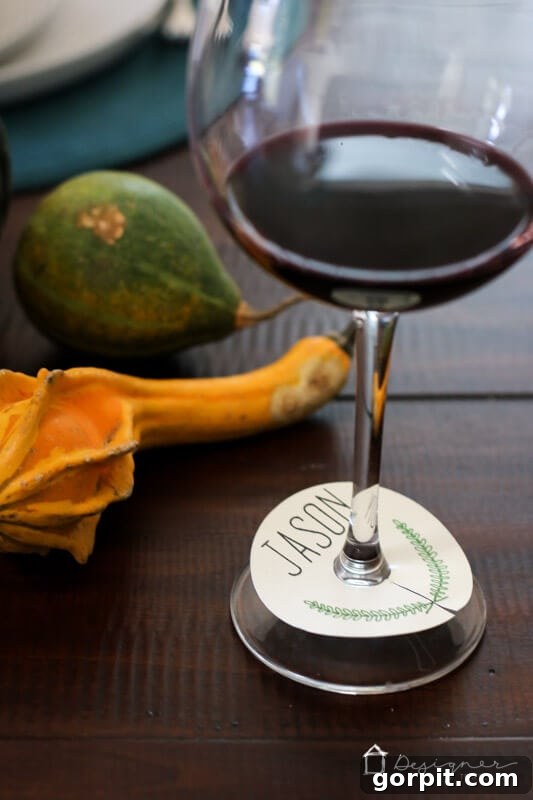
- Adorn Your Glasses: Now your beautiful, personalized wine glass charms are ready! Simply slip them onto the stem of your wine glasses, and you are all set for your gathering. I absolutely adore how these turned out—they add such a sophisticated and thoughtful touch. Take a look at the finished product below.
Tips for Customization and Beyond
The versatility of DIY wine glass charms extends far beyond the initial design. Here are some ideas to inspire your creativity and expand their use:
- Seasonal and Holiday Themes:
- Fall/Thanksgiving: Think small leaves, pumpkins, acorns, or turkeys in warm autumnal colors.
- Winter/Christmas: Snowflakes, mini stockings, reindeers, or festive ornaments in silver, gold, red, and green.
- Spring/Easter: Butterflies, flowers, small eggs, or bunnies in pastel shades.
- Summer/Patriotic: Stars, flags, suns, or beach-themed icons.
- Personalized Touches: Instead of general designs, consider individualizing each charm. You could add guests’ initials, their full names, or even small inside jokes if you know your audience well. This makes each charm a unique identifier and a special take-home gift.
- Material Experimentation: While cardstock is excellent for ease and vibrance, explore other materials if your cutting machine allows. Thin acrylic sheets can be engraved or cut, offering a more durable and reusable option. Shrink plastic creates fun, tiny, sturdy charms. Even thin leather or faux leather can lend a rustic or sophisticated feel.
- Gift Giving: Package a set of these charms with a nice bottle of wine for the perfect hostess gift, housewarming present, or a thoughtful addition to a holiday basket.
- Alternative Uses:
- Cocktail & Drink Markers: These charms aren’t just for wine! Use them on champagne flutes, martini glasses, water goblets, or even children’s party cups to help everyone keep track of their drinks.
- Napkin Rings/Place Cards: Create slightly larger charms and use them as decorative napkin rings or attach them to place cards for a unique seating arrangement.
- Mini Gift Tags: Attach them to small gifts or party favors.
- Storage Solutions: To keep your beautiful charms safe and organized, consider storing them in a small jewelry box, a divided craft container, or on a decorative hook stand. This prevents them from getting bent or lost between gatherings.
Final Toast to Effortless Entertaining!
There you have it! A simple, creative, and highly effective way to elevate your hosting game. No more confused sips or misplaced glasses. With your custom DIY wine glass charms, every guest will feel special, and every drink will find its rightful owner. So go forth, get crafty, and enjoy your time with friends and family, knowing that your thoughtful details are making all the difference.
This is a sponsored conversation written by me on behalf of Cricut. The opinions and text are all mine, reflecting my genuine experience and enthusiasm for their products.