9 Life-Changing Painting Hacks to Transform Your Home Like a Pro
Paint is arguably the most powerful and affordable tool in a homeowner’s arsenal. It possesses the incredible ability to refresh, revitalize, and completely transform any space without requiring a massive budget. With over two decades of hands-on experience as a dedicated DIY enthusiast, I’ve spent countless hours—hundreds, if not thousands—wielding a paintbrush across every conceivable surface imaginable. From standard walls and ceilings to intricate cabinets, furniture pieces, rugged countertops, and even resilient floors and rugs, I’ve painted it all!
Along this extensive journey, I’ve stumbled upon a treasure trove of game-changing painting hacks. These aren’t just minor tips; they are revolutionary techniques that have entirely transformed my approach to painting, making every project significantly easier, remarkably faster, and considerably less stressful. These aren’t just theories either; some of these very tips even garnered enough attention to land me a spot on The Rachael Ray Show, where I proudly showcased the impressive transformation of our painted vinyl laundry room floors!
Today, I’m thrilled to pull back the curtain and share my **top 9 life-changing painting hacks** with you. Whether you’re a first-time homeowner nervously approaching your inaugural painting project or a seasoned DIY warrior looking for smarter, more efficient techniques, these insider secrets will empower you. My goal is to equip you with the knowledge and confidence to tackle your next painting endeavor with the precision and professionalism of a seasoned expert.
1. How to Paint Around a Toilet Without Losing Your Mind
Painting a bathroom presents a unique set of challenges, and none is quite as universally dreaded as navigating around the toilet. Many DIY enthusiasts mistakenly believe that the only way to achieve a clean paint job in this tight space is to completely remove the toilet, a task that quickly transforms a simple painting project into a far more complicated plumbing ordeal. However, I’m here to reveal a brilliant, straightforward hack that will save you immense time, effort, and prevent you from having to tackle any unnecessary plumbing.
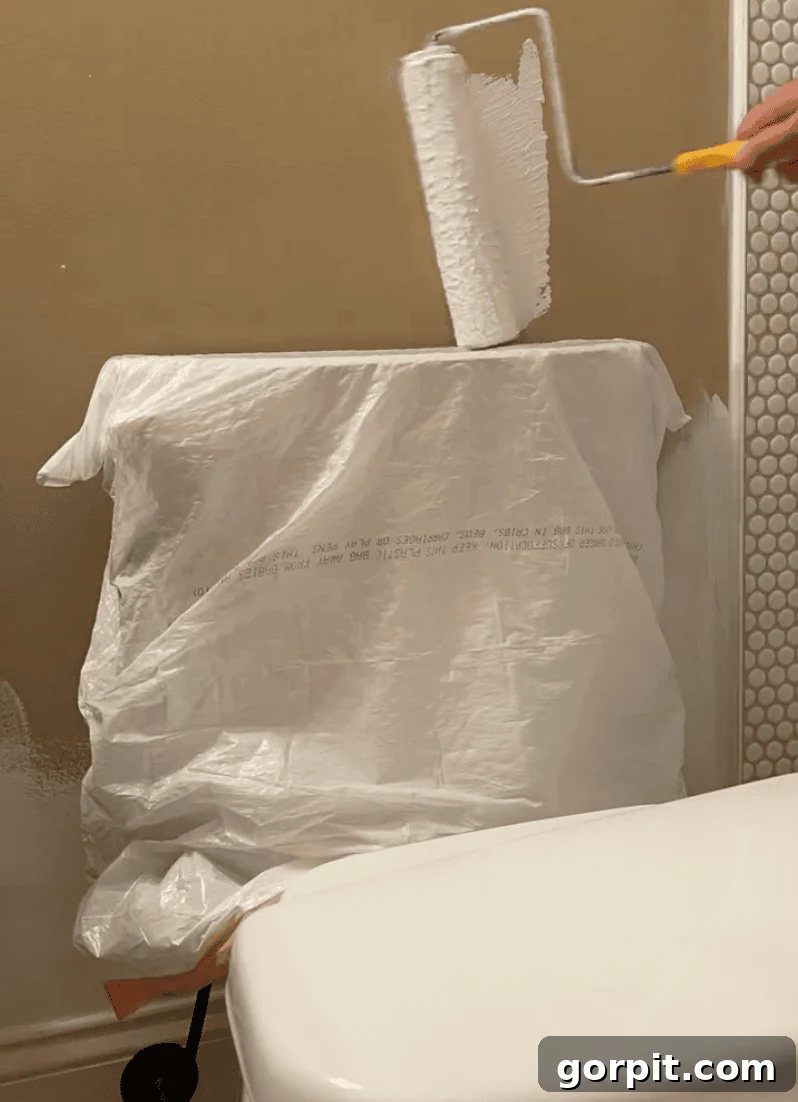
The secret lies in creating an effective protective barrier without any heavy lifting. Begin by simply removing the toilet tank lid and setting it safely aside. Next, grab a standard plastic trash bag – surprisingly, the typical kitchen trash bags are often the perfect size for this purpose. Carefully drape this bag over the entire toilet tank, ensuring it covers all sides and provides a robust shield against any accidental paint splatters. This remarkably simple step ensures your ceramic fixture remains pristine throughout the painting process.
Once your toilet tank is thoroughly protected, you can proceed with your painting. Use a standard paint roller to cover as much of the wall space as possible, getting as close to the shielded tank as you comfortably can. For the more intricate, hard-to-reach areas around the base, behind the toilet, and along any piping, switch to a high-quality angled paintbrush. The unique design of an angled brush allows for precise maneuvering into those awkward, narrow spaces, ensuring complete paint coverage without making a mess. This meticulous approach guarantees a professional-looking finish even in the most challenging nooks and crannies.
This hack is not only incredibly simple to execute but also remarkably effective in practice! Once your paint has dried completely and thoroughly, gently pull off the protective trash bag. You will be left with perfectly painted walls and a wonderfully paint-free toilet, as if no painting had even occurred. It’s a true game-changer for anyone embarking on a bathroom refresh or a small powder room update.
2. The Secret to Perfect Paint Lines Where Two Colors Meet or Transition
Achieving crisp, flawless paint lines where two distinct colors meet is often the defining characteristic of a truly professional-looking paint job. It’s a detail that can dramatically elevate or unfortunately detract from the aesthetic of your entire space. How many times have you painstakingly applied painter’s tape, full of hope, only to peel it off and discover frustrating bleed-through, jagged edges, or fuzzy transitions? It’s a common DIY woe that can lead to immense frustration and wasted effort. But fear not! I’ve discovered a surefire technique that consistently delivers razor-sharp lines every single time, transforming complex multi-color projects into satisfying successes. This hack is particularly indispensable for accent walls, geometric patterns, stripes, or any area where precise color transitions are desired.
Here’s the step-by-step breakdown of this game-changing method, ensuring impeccable results:
- **Initial Paint Application (First Color):** Begin by applying your primary wall color. However, when you approach the area where you intend the two colors to meet, stop painting approximately an inch (2-3 cm) away from that exact spot. Don’t worry about creating perfect edges at this initial stage; the main objective is simply to get your base color evenly applied to the wall. Allow this coat to dry completely.
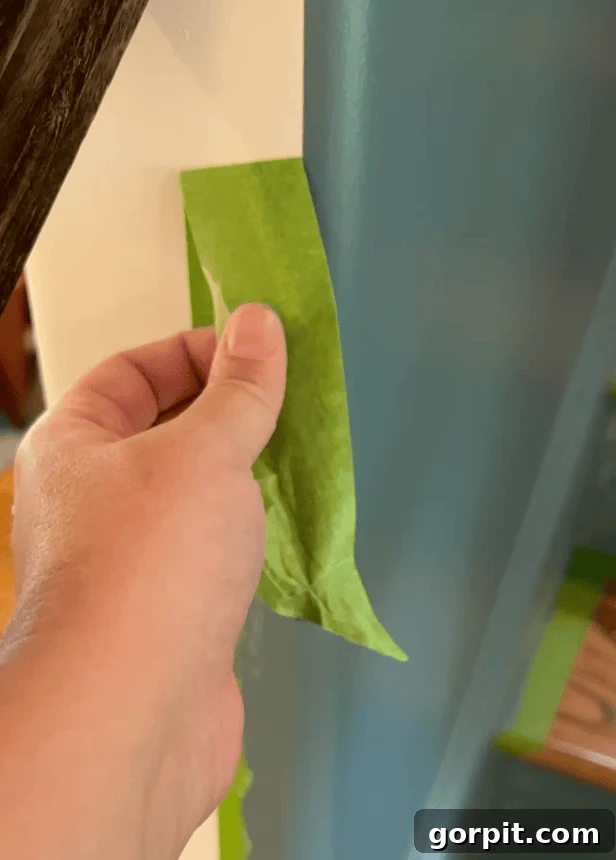
- **Precise Painter’s Tape Application:** Once the first coat of paint is dry to the touch, carefully apply high-quality painter’s tape directly along the precise line where you want your two colors to transition. Take your time to ensure the tape is perfectly straight, level, and firmly pressed down, leaving no gaps or air bubbles. In the accompanying photo below, you can clearly observe how I stopped painting the blue base color about an inch from the corner, then meticulously applied painter’s tape in a perfectly straight line exactly where I envisioned the two paint colors converging.
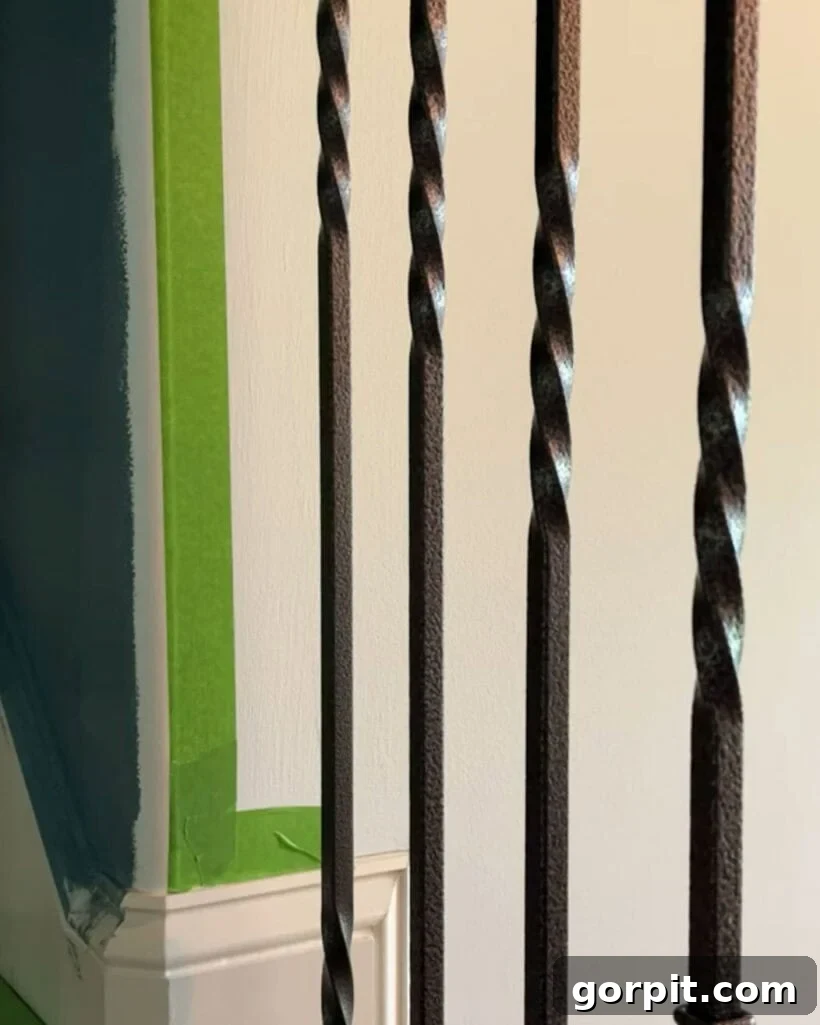
- **Seal the Tape Edge with Existing Color (The Crucial Step):** This is the absolute secret ingredient that truly sets this technique apart! Despite claims, even the “best” painter’s tape can experience some degree of bleed-through, leading to frustrating fuzzy lines. To ingeniously counteract this, once your tape is firmly in place, lightly paint a thin coat over the very edge of the painter’s tape with your *existing* wall color (the color already applied to the wall, immediately adjacent to the tape). This effectively “seals” the tape’s edge. Any minimal paint bleed that might occur under the tape will now be the same existing color, rendering it completely invisible and ensuring a perfect seal. For my particular project, this involved painting a thin layer of Sherwin Williams Pure White over the tape’s edge.
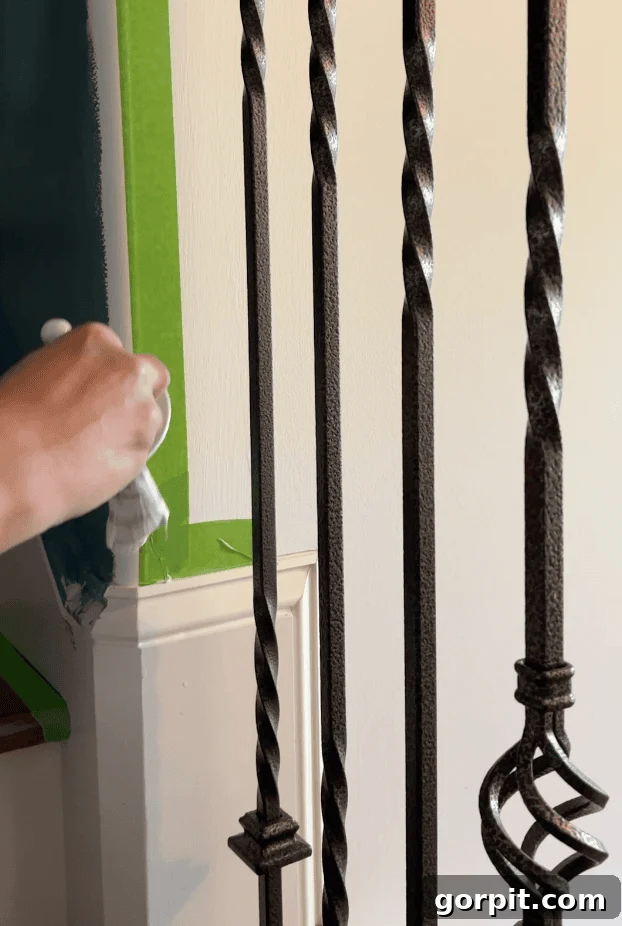
- **Apply Your Second Color:** Once the “sealant” paint has dried completely to the touch (typically within an hour for most latex paints), you can confidently apply your second, contrasting color. Paint it directly over the edge of the painter’s tape, ensuring full and even coverage right up to the taped line.
The gratifying result of consistently applying this technique? Consistently crisp, immaculately clean lines that boast a truly professional finish, every single time. This is, without a doubt, one of my most cherished and frequently used painting hacks, transforming even the most intricate multi-color painting projects into satisfyingly perfect outcomes.
This post contains affiliate links for your convenience. Click here for my full disclosure policy.
3. Quick & Easy Paint Touch-Ups (Without Hauling Out the Paint Can)
Let’s be honest with ourselves: very few people genuinely enjoy the chore of doing paint touch-ups. The mere thought of retrieving a heavy, often difficult-to-open paint can, searching for a stirrer, dirtying a fresh paintbrush, applying the paint, and then enduring the inevitable cleanup process afterward often leads to minor scuffs, chips, and marks being ignored for far too long. I used to be firmly in that camp, but I’ve since discovered a couple of ingenious solutions that have completely changed my tune. If the mere idea of touching up wall paint fills you with overwhelming dread, these next two hacks are absolutely tailor-made for you, making how to touch up wall paint an effortless and stress-free task!
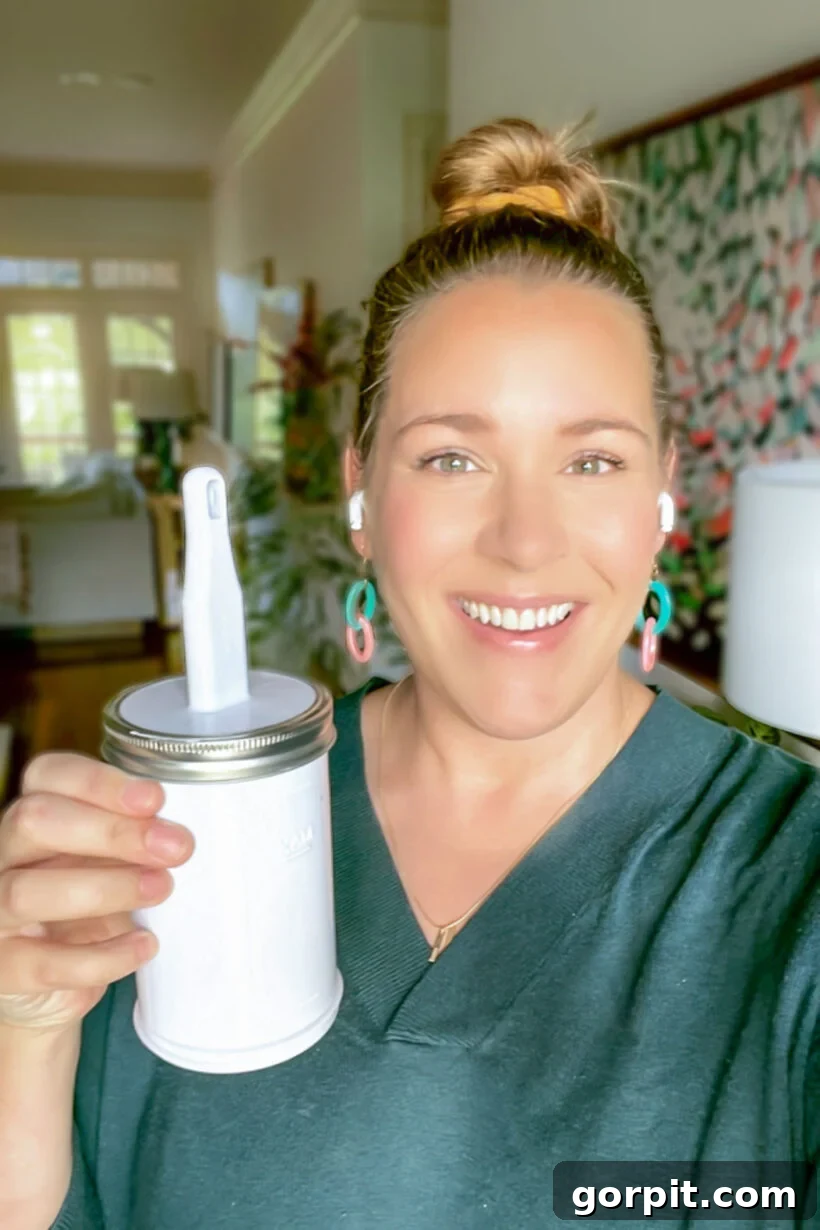
Use Touch-Up Paint Containers With Built-in Brushes
These innovative all-in-one paint touch-up containers are nothing short of revolutionary for home maintenance. Designed for ultimate convenience and long-term storage, they are completely airtight, which is crucial for preventing your precious paint from drying out or spoiling. Even better, they come thoughtfully equipped with a built-in paintbrush and small mixing balls already inside. Before each use, all you need to do is gently swirl the container around to remix the paint, ensuring consistent color. Then, simply unscrew the lid, which has the paintbrush conveniently attached, and you’re immediately ready to tackle any small imperfection! The true magic lies in the brush remaining submerged in the paint when not in use, completely eliminating the need for any messy cleanup after you’re done. Just screw the lid back on, and it’s perfectly sealed and ready for the next time a touch-up is needed.
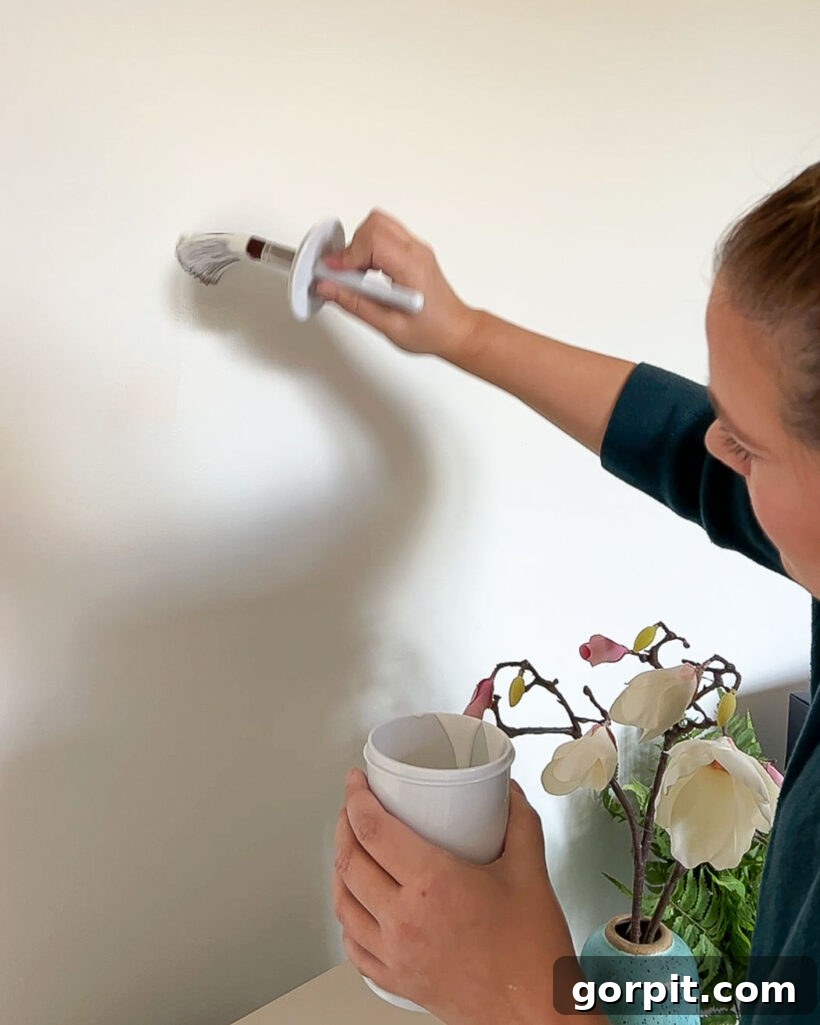
I’ve personally had various paints stored in these exact containers for many years now, and I can attest that the paint remains perfectly usable and fresh. The only instance I’ve ever found myself needing to clean the integrated brushes is when the paint level drops significantly low enough to warrant a refill. While we consistently store ours indoors in a climate-controlled environment, I can confidently say that for indoor storage, they maintain paint quality remarkably well over extended periods. It’s truly a long-term, hassle-free solution for maintaining your home’s fresh paint finish.
Use Touch-Up Paint Pens for Small Fixes
For even smaller, more precise, and highly localized touch-ups—especially on surfaces beyond just expansive walls—inexpensive touch-up paint pens are an absolute lifesaver. Think of them as tiny, pre-loaded paintbrushes that offer unparalleled control and convenience for intricate details. I diligently keep mine filled with my most frequently used paint colors, ensuring they are always loaded and ready for those inevitable minor scuffs, tiny chips, or small imperfections that seem to magically appear around the house. While you *can* certainly use them for minute wall paint touch-ups, their limited capacity and fine brush make them ideally suited for touching up painted cabinets, furniture, or intricate trim details where precision is key.
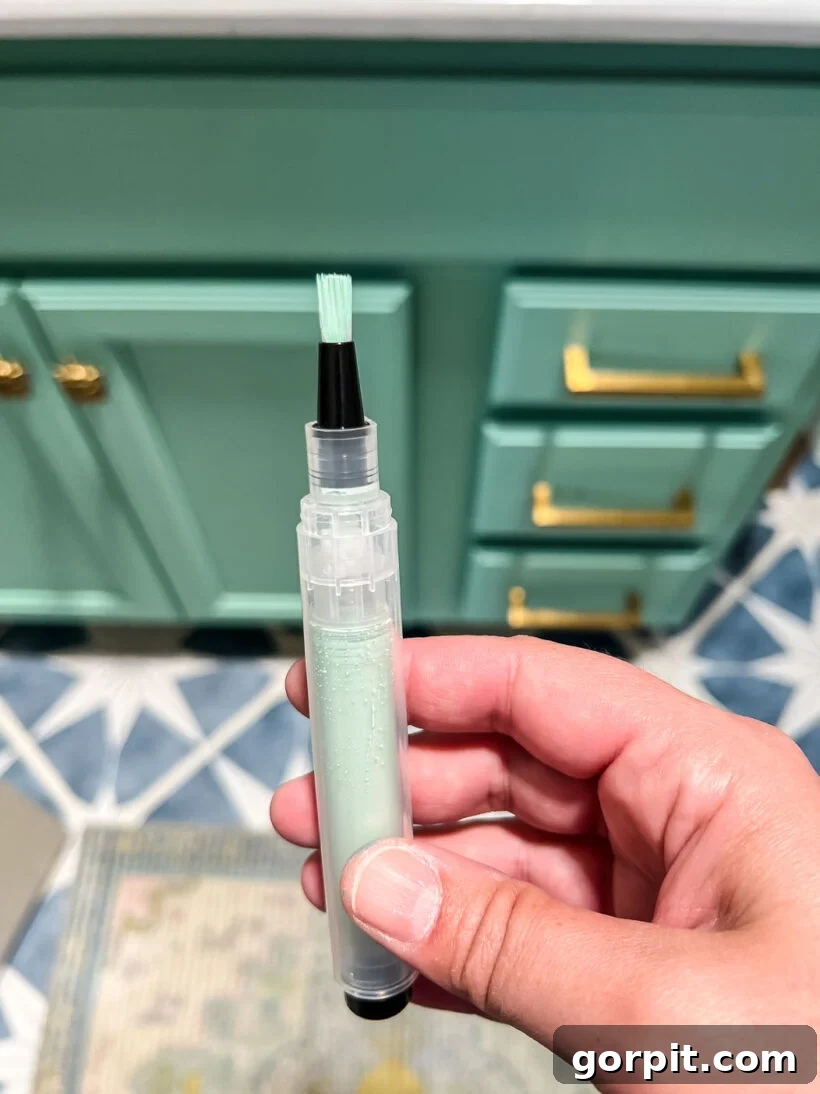
These pens offer unparalleled convenience for quick, on-the-spot fixes, allowing you to address small blemishes instantly without the fuss, mess, or extensive preparation associated with traditional painting tools. It’s a truly essential item for effortlessly maintaining the pristine and polished look of all your painted surfaces.
4. The No-Tape Hack for Painting Baseboards and Trim
Painting baseboards or any type of trim where they meet your flooring is a task notoriously fraught with frustration. The ever-present fear of getting unsightly paint drips or splatters on your pristine carpet or beautiful hardwood floors often compels DIYers to spend agonizing hours meticulously applying painter’s tape along every edge. Yet, despite all that effort, it’s not uncommon to peel off the tape only to find it hasn’t fully protected the surface, leaving behind disappointing marks. If you, like me, find the traditional taping process tedious, time-consuming, and often ultimately disappointing, you’ll be absolutely delighted by this incredibly simple yet highly effective alternative.
I personally employed this exact hack when we undertook the project of installing the easiest DIY board and batten in our hallway, which involved painting trim right up against the floor. I can confidently declare that after experiencing its efficiency and effectiveness, I will never revert to traditional taping methods for trim painting again!
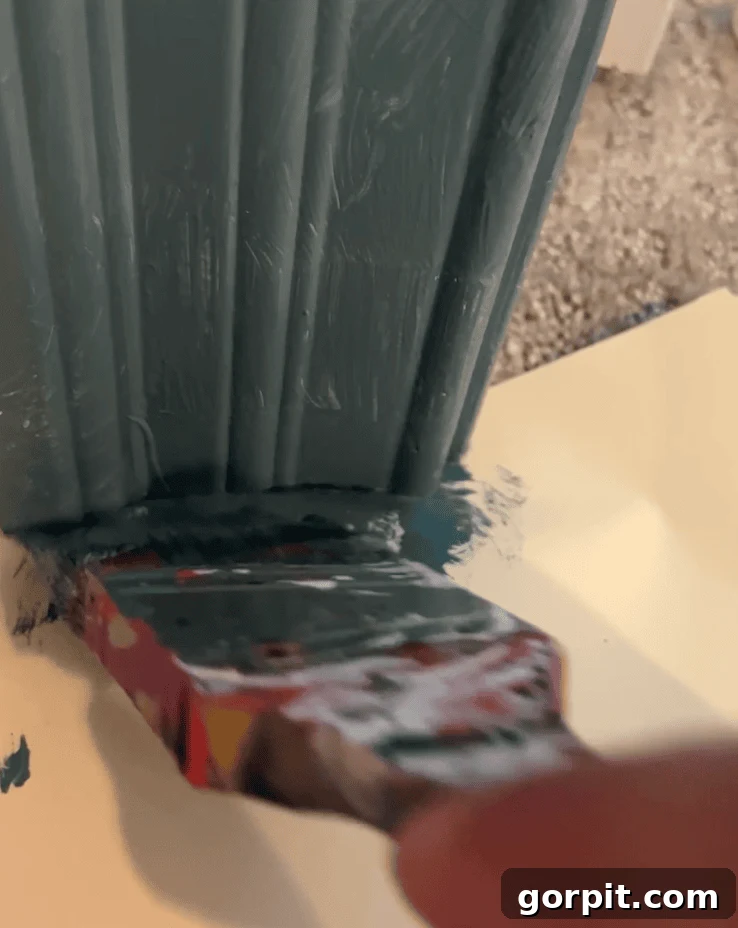
The ingenious solution? A common file folder! Yes, you read that correctly. Even the most basic, inexpensive manila file folder will do the trick. As you begin painting your baseboards or trim, simply slide the sturdy edge of the file folder underneath the trim, pressing it firmly against the floor. The folder acts as a movable, flexible, and impenetrable shield, completely preventing any paint from reaching your delicate flooring. As you complete a section, simply slide the folder along to the next unpainted area. This revolutionary method is dramatically faster and significantly less painstaking than painstakingly taping off your entire floor, and it guarantees that your floors remain completely spotless. It’s an absolute game-changer for achieving clean, stress-free trim painting results with minimal effort.
5. Why Using the Right Painter’s Tape Matters (Yes, It Matters!)
Many novice and even some experienced DIY painters often make the mistake of grabbing any available roll of painter’s tape, operating under the assumption that they are all essentially the same. However, this common oversight can frequently lead to frustrating paint bleeds, accidental damage to freshly painted surfaces, or annoying sticky residue left behind. What a significant number of people don’t fully realize is that there is a wide variety of painter’s tapes available on the market for a very good reason: each is specifically designed for distinct applications and different surface types. While the brand of the tape might not always be the most critical factor, understanding and choosing the correct *type* of tape is absolutely essential for consistently achieving clean, professional-looking results.
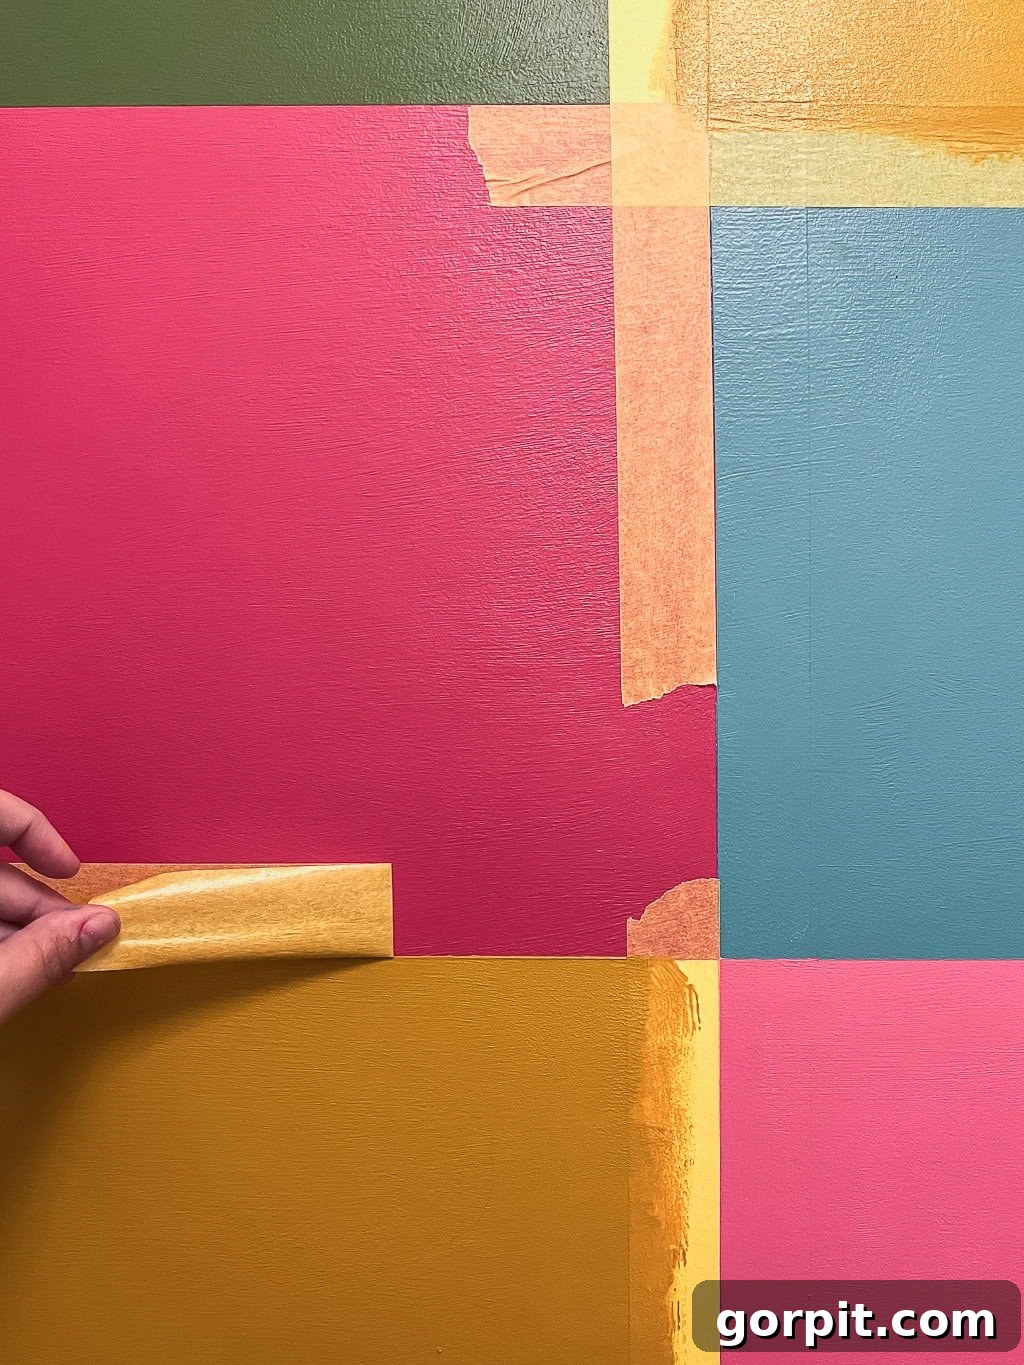
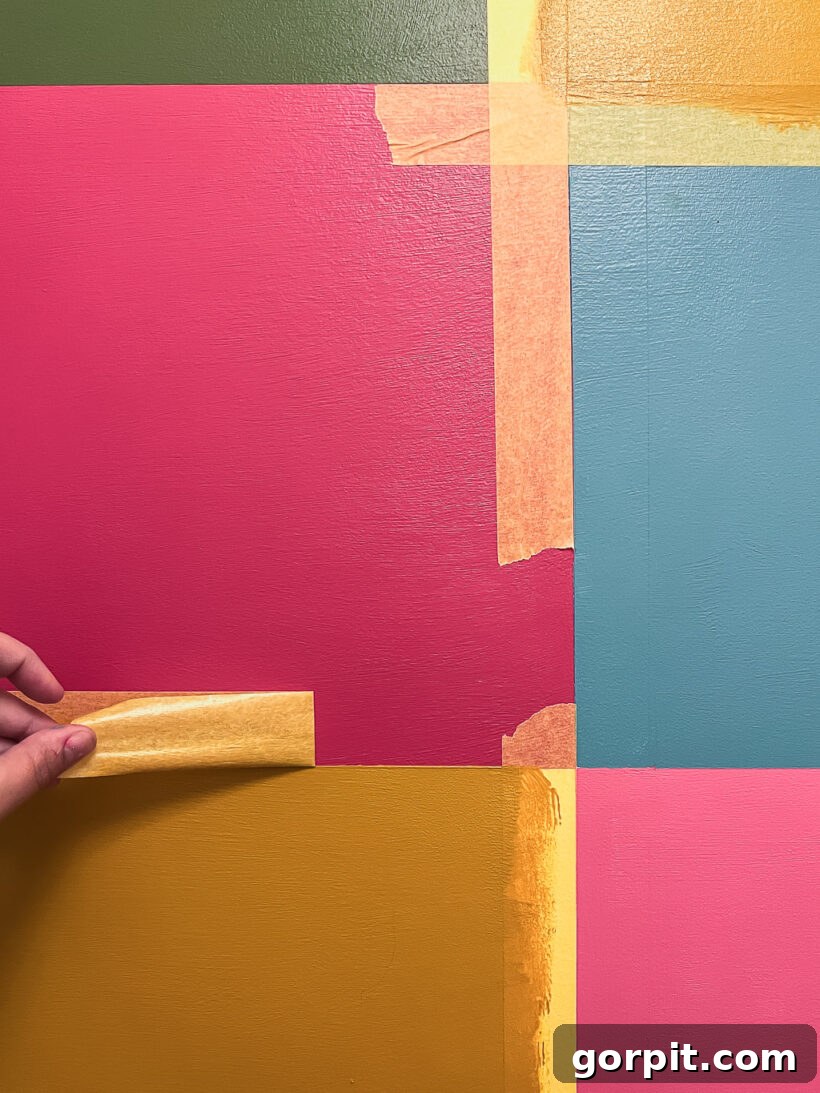
A prime example where selecting the right tape type is paramount is when you find yourself needing to tape directly over freshly painted surfaces. If your underlying paint coat is less than two weeks old, you should *always* opt for delicate surface painter’s tape. Standard or multi-surface painter’s tape can have an adhesive that is simply too strong, significantly increasing the risk of the fresh, not-yet-fully-cured paint peeling off along with the tape when it’s removed. This consideration is particularly crucial for intricate projects like creating complex wall murals or multi-color accent walls, where you frequently need to layer new colors and apply tape directly over recently applied paint without causing any damage or unsightly tears.
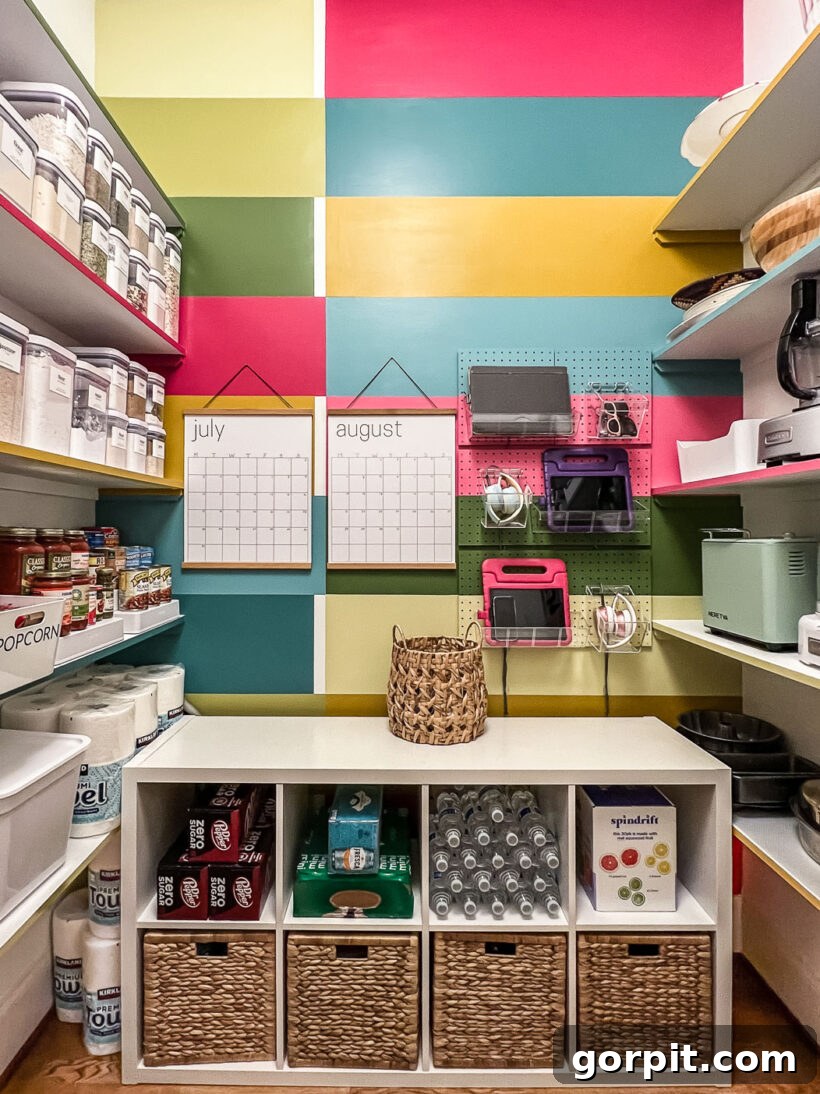
When I embarked on painting the vibrant, colorful wall mural as a central part of our budget-friendly pantry makeover, I specifically and intentionally chose this delicate surface painter’s tape. My objective was to create exceptionally sharp, clean lines between the different color blocks without inadvertently peeling away any of the underlying fresh paint that had just been applied. It performed flawlessly, holding strong without causing any damage. This experience powerfully illustrates that investing a little bit of thought and choosing the correct tape for your specific project needs can make all the difference, separating a successful, satisfying project from a frustrating and costly re-do. Always match your tape to your project’s unique demands!
6. Timing Matters When Removing Painter’s Tape
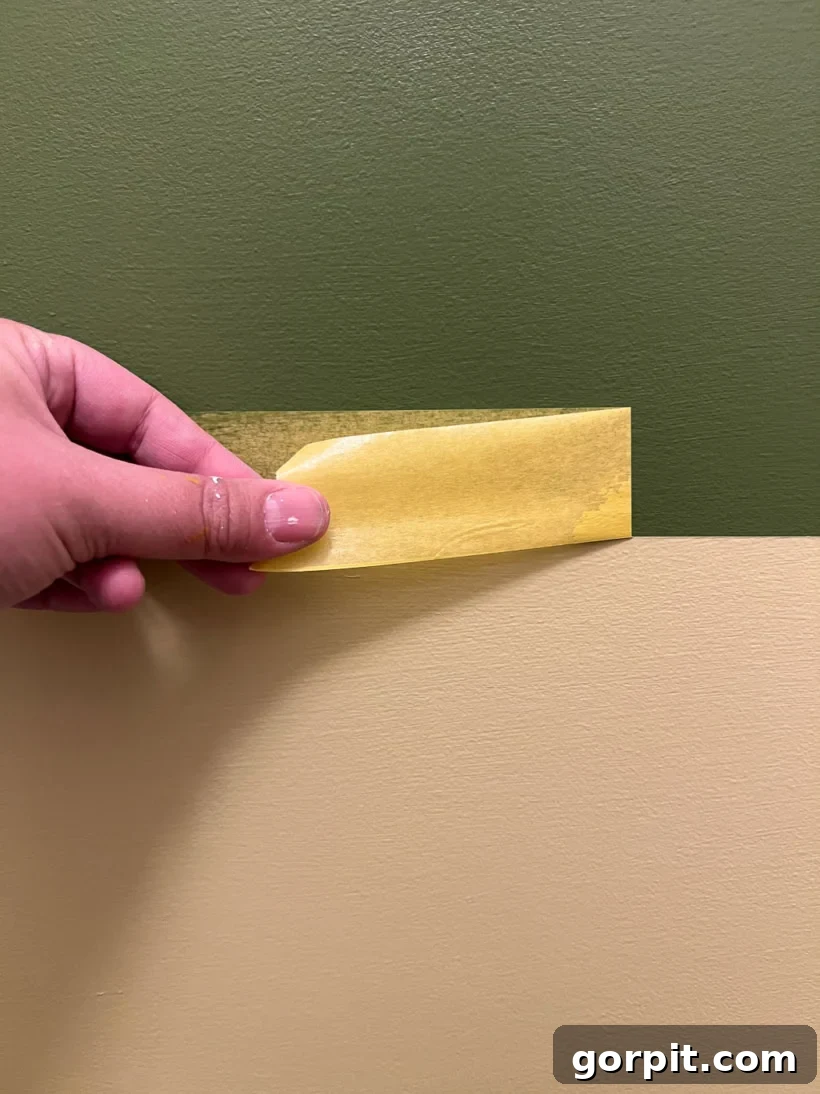
One of the most common and easily avoidable mistakes DIY painters make is waiting too long to remove painter’s tape. This seemingly minor oversight can result in a host of frustrating issues, including jagged or torn paint lines, unsightly sticky residue left behind, or even significant chunks of fresh paint pulling away from the wall. The timing of tape removal is far more critical than many people realize, and getting it right can profoundly impact the final, crisp appearance and overall success of your paint job. You should not wait until the paint is fully cured and hardened; instead, you need to aim for that perfect sweet spot when the last coat of paint feels dry to the touch, but is not yet rock-hard or completely cured.
For the vast majority of water-based latex paints, this ideal removal window usually falls within a relatively short timeframe – typically within an hour, or sometimes up to a few hours, after applying your final coat. If you delay much longer than this, the paint can fully adhere and bond with the tape, causing it to tear or pull away unsightly chunks of your freshly applied paint when you attempt removal. Furthermore, the paint becomes stiffer and less pliable once fully dry, making it significantly harder to peel the tape off smoothly and cleanly without damaging the edges. The ultimate goal is for the tape to release easily and cleanly, leaving behind a perfectly crisp, untouched edge.
However, if you do find yourself in that unfortunate situation where the paint has dried extensively and the tape is stubbornly stuck or tearing, don’t despair! There’s a clever, simple trick that can often rescue your hard work. Grab a standard hair dryer and gently apply heat to the painter’s tape as you slowly and carefully peel it back. The warmth emanating from the hair dryer will effectively soften the adhesive on the tape, making it much more pliable and easier to remove without damaging your beautifully freshly painted surface. This invaluable little tip can often save a project from major setbacks and ensure that those perfectly painted lines remain impeccably intact.
7. Keep Your Paint Can Clean (and Lids Easy to Open)
There are few things more universally frustrating in a DIY project than struggling tirelessly with a paint can lid that’s seemingly been super-glued shut. You pry, you twist, you chip away at layers of dried paint with screwdrivers and other tools, and sometimes you even bend the lid beyond repair just to get a peek inside. This incredibly common predicament is almost invariably due to wet paint accumulating in the can’s grooved rim when the lid is replaced. As that paint subsequently dries and hardens in place, it creates an impenetrable, vise-like seal, making future access a frustrating and often messy nightmare.
Thankfully, there’s an incredibly simple, remarkably cheap, and highly effective way to completely prevent this nuisance and ensure that your paint cans remain effortlessly easy to open, project after project. All you truly need for this ingenious hack is a common household item: a sturdy rubber band.
Before you even begin dipping your brush into the paint, take a strong rubber band and stretch it securely across the top of your open paint can, ensuring it runs directly over the center of the opening. Now, as you load your paintbrush with paint and need to wipe off any excess, instead of wiping it on the can’s messy, grooved rim (which is precisely what causes the frustrating buildup), simply wipe your brush on the taut rubber band instead. This clever yet simple trick ensures that all the excess paint drips neatly back into the can, and crucially, stays completely out of the lid groove. It effectively prevents any messy buildup on the rim, allowing the lid to be replaced cleanly and easily every time. This guarantees that your stored paint is always readily accessible for your next project, without the usual battle to open the can.
8. You Can Paint Almost Anything with the Right Products
This isn’t merely a painting hack; it’s a fundamental shift in mindset that can revolutionize your approach to home improvement. Many individuals limit their painting projects exclusively to walls and ceilings, remaining largely unaware of the vast potential for dramatic transformation that lies dormant in other surfaces throughout their home. With the correct preparation techniques, the application of specialized primers, and the use of high-quality, appropriate paints, you can dramatically refresh and update almost any item or area in your home, often for a fraction of the cost of replacement. This innovative approach opens up a world of budget-friendly DIY possibilities, allowing you to achieve high-end, customized looks without the need for expensive new purchases. Here are some of my favorite “unconventional” surfaces to paint, demonstrating just how incredibly versatile and powerful paint can be as a transformative tool:
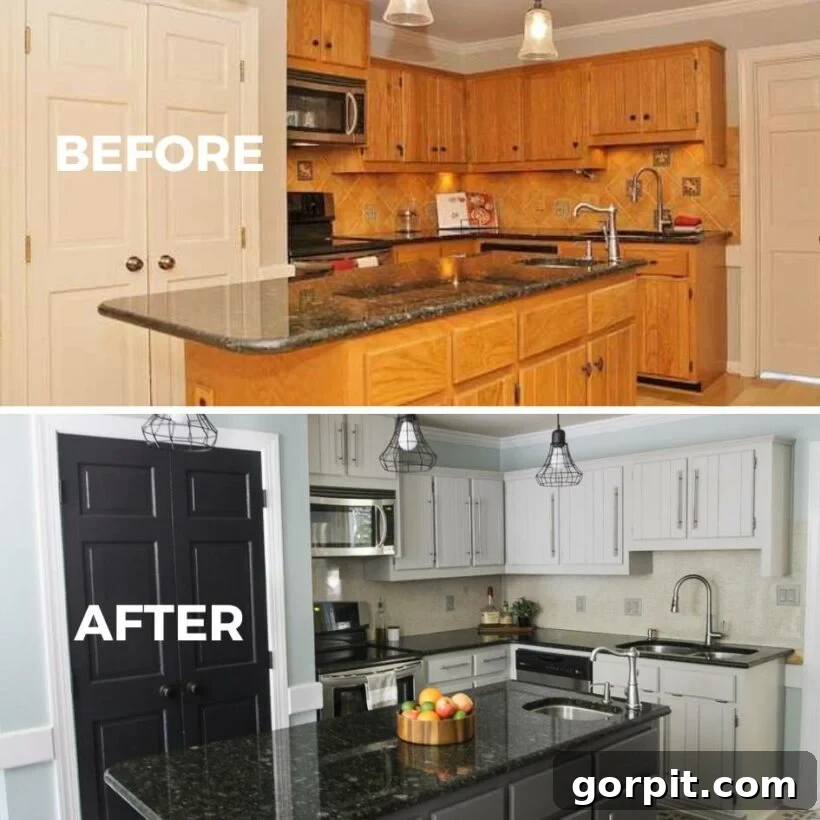
Painting Cabinets for a Stunning Transformation
Are you feeling hesitant or intimidated by the prospect of painting your kitchen or bathroom cabinets? Don’t be! It’s an absolutely achievable and incredibly rewarding DIY project, and the results can be both stunning and surprisingly durable. Over the years, I’ve successfully painted our kitchen and bathroom cabinets multiple times, and each time, they’ve consistently held up beautifully, maintaining their fresh appearance and integrity even after years of daily use and inevitable wear and tear. The secret to this lasting success lies in a meticulous approach: employing the right primer to ensure superior adhesion, carefully selecting a high-quality, durable paint specifically formulated for cabinetry, and diligently following a proven, step-by-step process. I’ve detailed all my insights, recommended products, and comprehensive instructions in a dedicated post about the best paint for kitchen cabinets, guiding you toward achieving truly professional-level results that stand the test of time.
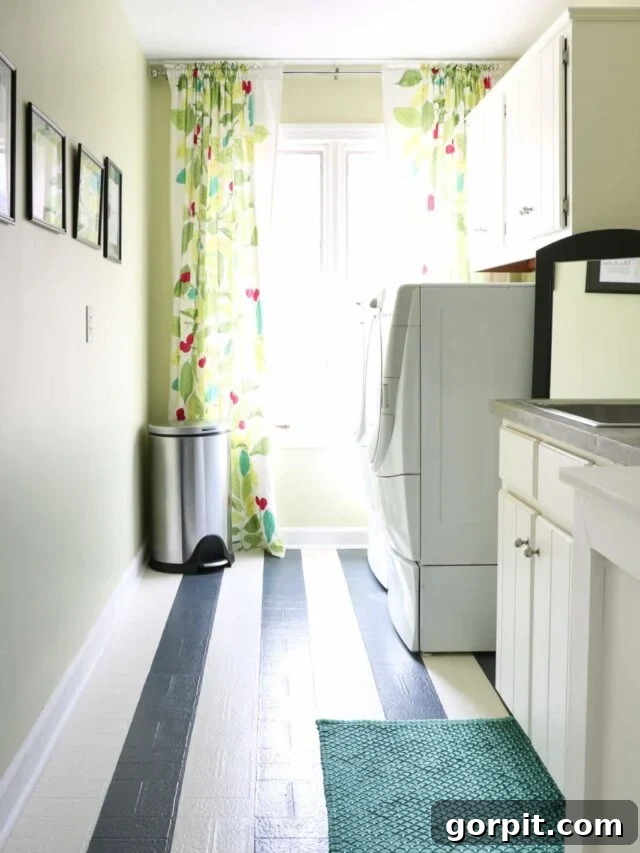
Transforming Floors with Durable Paint
Yes, you can absolutely paint floors! This might sound unconventional or even daring to some, but I’ve successfully transformed everything from tired, worn vinyl floors to sturdy bamboo kitchen floors with nothing more than a few cans of specialized paint. The critical element to ensure success and longevity here is to exclusively use a high-quality porch and floor paint. These paints are specifically engineered and designed to withstand heavy foot traffic, everyday wear, and the rigors of floor use, providing truly lasting results without the need for an additional, often expensive, topcoat. My painted vinyl floors project was so remarkably successful and visually striking that it even caught the attention of The Rachael Ray Show, where I proudly demonstrated its impressive durability and undeniable aesthetic appeal. You can watch my segment and witness the incredible transformation for yourself right here!
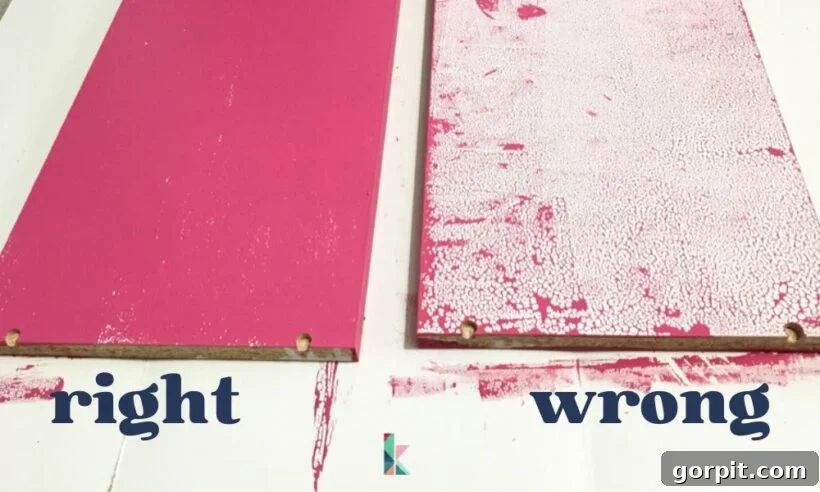
Painting Laminate Furniture or Cabinets Effectively
Painting laminate surfaces, particularly those ubiquitous IKEA furniture pieces or laminate cabinets, can often seem like an incredibly daunting and even impossible task. I distinctly remember my first attempt years ago: I watched in dismay as the paint immediately beaded up and separated on the slick, non-porous surface. It looked utterly impossible to achieve any adhesion! However, through persistence and dedicated experimentation, I finally cracked the code to making paint adhere beautifully and durably to everything from those famous IKEA Billy bookcases to our practical laminate bathroom cabinets. The key insight is understanding that standard, everyday paint simply won’t suffice on these challenging surfaces.
The absolute crucial, non-negotiable step for success is to use a high-quality, shellac-based primer, such as the highly recommended Zinsser B.I.N. Primer. This particular type of primer is engineered to create an exceptional bonding surface, allowing the subsequent layers of paint to adhere incredibly well and last for years without chipping, peeling, or flaking. Once your laminate surface is properly primed, you can then confidently apply your chosen high-quality topcoat paint. For comprehensive guidance on achieving these long-lasting, professional-grade results, I encourage you to refer to my detailed tutorial on how to paint laminate furniture and my essential post on the best paint for furniture of every type, where all the intricate details and tips are shared.
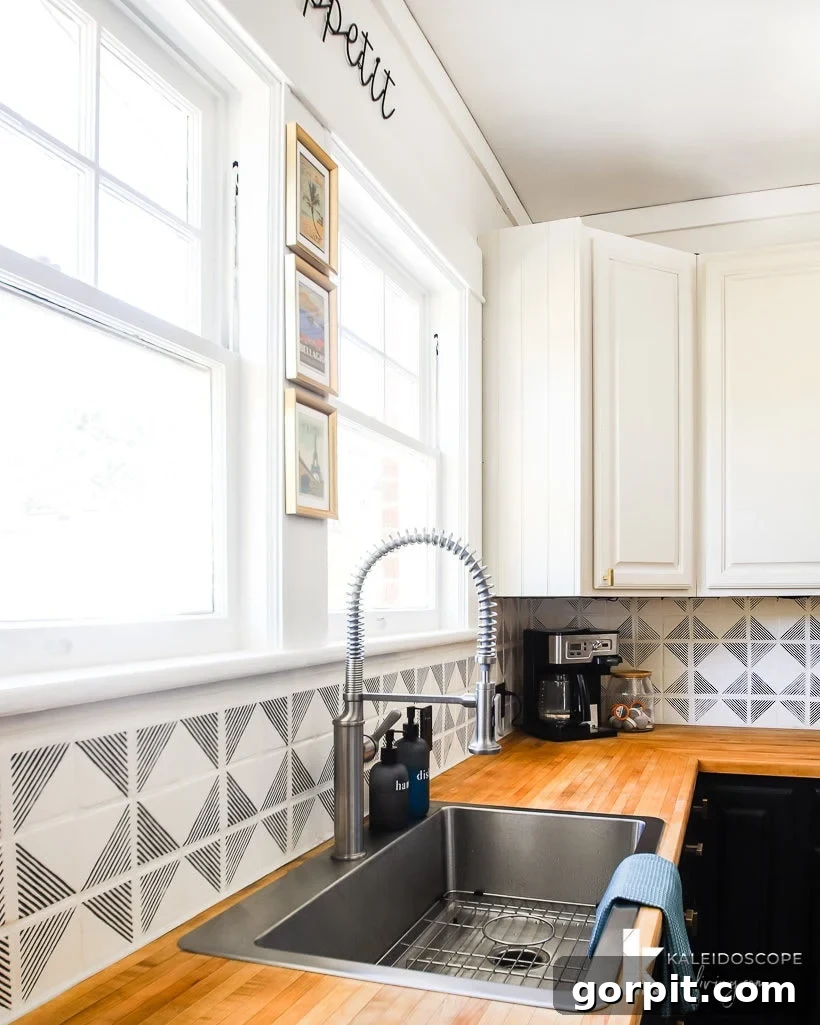
Revitalizing Tile Surfaces with Paint
Don’t allow outdated, uninspiring tile to hold your home’s aesthetic hostage any longer! Painting tile is a truly fantastic, budget-friendly alternative to the disruptive and costly process of full replacement. I’ve personally and successfully painted a tile backsplash three times now in different homes, and each time, the results have been not only visually beautiful but also incredibly durable and long-lasting. It’s a genuine opportunity for a complete and customized transformation, and you can even unleash your creativity by stenciling an intricate pattern onto your painted tile, as I elegantly demonstrated in the charming black and white kitchen photo below.
Beyond simple backsplashes, the possibilities for painting tile extend even further, into areas you might not expect. With the correct specialized products and meticulous preparation, you can even paint shower tiles, completely revamping your bathroom’s look and feel without embarking on a major, expensive, and messy renovation. The key to ensuring resounding success and enduring results lies in proper surface preparation and diligently using epoxy-based or other tile-specific paints that are specifically designed for high-moisture environments and capable of withstanding significant wear. It’s a truly impactful DIY project that delivers stunning visual upgrades and adds immense value to your home.
Giving Countertops a Cost-Effective Makeover with Paint
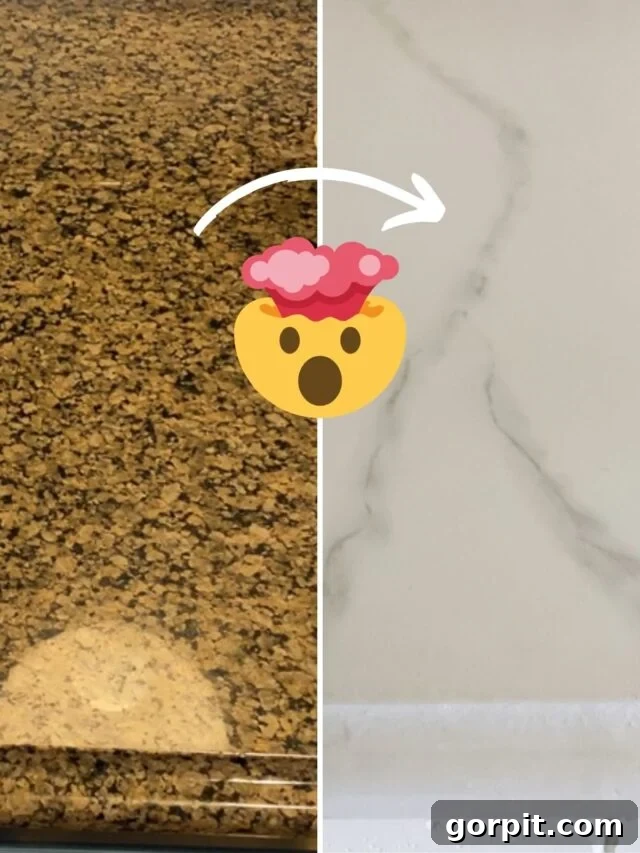
If you’re dreaming of luxurious new countertops but your budget simply doesn’t agree with the hefty price tag, then I urge you to seriously consider painting them! Modern, high-quality epoxy-based countertop painting kits are an absolute game-changer in the world of DIY home renovation. They allow you to achieve incredibly high-end, sophisticated looks, such as realistic marble or granite finishes, for a mere fraction of the cost of traditional countertop replacement. I personally utilized one of these fantastic kits to transform our old, tired brown granite countertops to mimic the elegant appearance of luxurious marble.
The visual transformation was nothing short of dramatic and incredibly impressive. What’s more, I’m absolutely thrilled to report that our painted countertops held up beautifully and durably for over three years of heavy daily use. They consistently endured spills, heat, and constant kitchen activity, maintaining their stunning appearance right up until we undertook a complete kitchen renovation and ultimately replaced them with new, permanent surfaces. This painting hack is a powerful testament to the incredible potential of specialized painting products. It offers an accessible, durable, and incredibly cost-effective way to refresh and elevate your kitchen or bathroom, definitively proving that paint can truly transform and uplift almost every surface in your home.
Whether you’re a first-time DIYer nervously approaching your inaugural painting project or a seasoned weekend warrior constantly seeking smarter, more efficient techniques, I genuinely hope these comprehensive painting hacks prove to be immensely valuable. My ultimate aim is to equip you with the essential knowledge and proven strategies to confidently bypass common frustrations—such as achieving messy lines, battling stuck paint lids, or navigating tricky corners—that often make so many people dread the act of painting. With just a little thoughtful preparation, the right selection of tools, and these tried-and-true tips cultivated over years of extensive experience, I promise you’ll save yourself considerable time, significant effort, and much-needed stress, transforming your home with unparalleled confidence and surprising ease.
More Paint Posts
SEE ALL PAINT POSTS
-
9 Life-Changing Painting Hacks Everyone Should Know
-
How Durable are DIY Painted Kitchen Cabinets?
-
How to Paint Kitchen Cabinets (From a DIYer Who Has Done it 3 Times)
-
How Have Our Painted Countertops Held Up?
-
How to Paint IKEA Furniture and Mistakes to Avoid
-
How Much Paint Do I Need for My Room?
Curious about my holistic approach to transforming rooms and spaces within our home, beyond just painting? Dive into Designer in a Binder® – my comprehensive, easy-to-follow guide to affordable and stylish home decoration. It’s packed with strategies to help you design and decorate with confidence.
And for exclusive content, behind-the-scenes sneak peeks into my latest DIY projects, and the freshest home decor inspirations delivered directly to your inbox, don’t forget to subscribe to my newsletter before you head out! Stay connected and keep your home transformation journey vibrant!