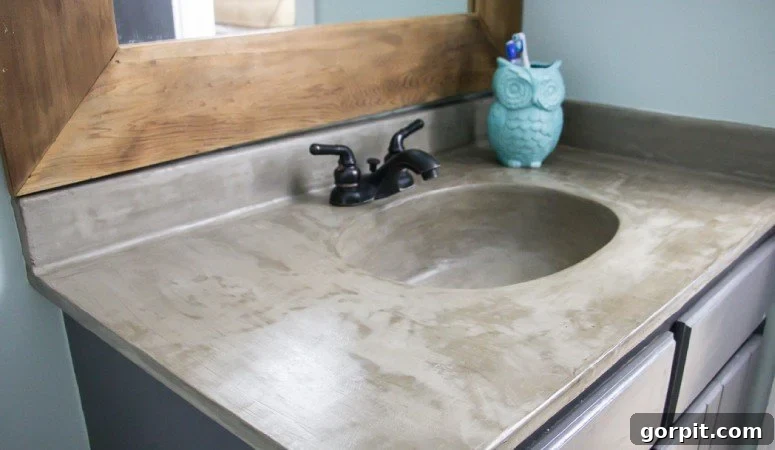
The Ultimate Update: How Our DIY Concrete Vanity Has Held Up & A Simple Fix for Lasting Beauty
Hello, fellow DIY enthusiasts! It’s fantastic to connect with you all. A question I receive with remarkable frequency centers around the longevity and performance of our various DIY home decor projects. You invest your time and effort, and naturally, you want to know if these creative endeavors truly stand the test of time. To answer this burning question, I’m thrilled to kick off a brand new series on the blog called “How’s It Holding Up?”. We’ll revisit some of our most popular projects, providing honest, in-depth reviews of their durability, maintenance, and overall satisfaction years after completion.
For our inaugural post in this exciting series, we’re diving deep into one of our most talked-about transformations: our DIY concrete vanity. This ambitious project was a cornerstone of our complete powder room overhaul, and it’s been a functional and aesthetic staple in our home since its completion in August 2014. That’s a solid 18 months of daily use, countless hand washes, and constant admiration. Today, we’re going to share every detail about how this DIY marvel has performed, along with a crucial minor adjustment we made to ensure its enduring perfection.
To truly appreciate the transformation, let’s take a quick trip down memory lane. This is what we started with in our old powder room:
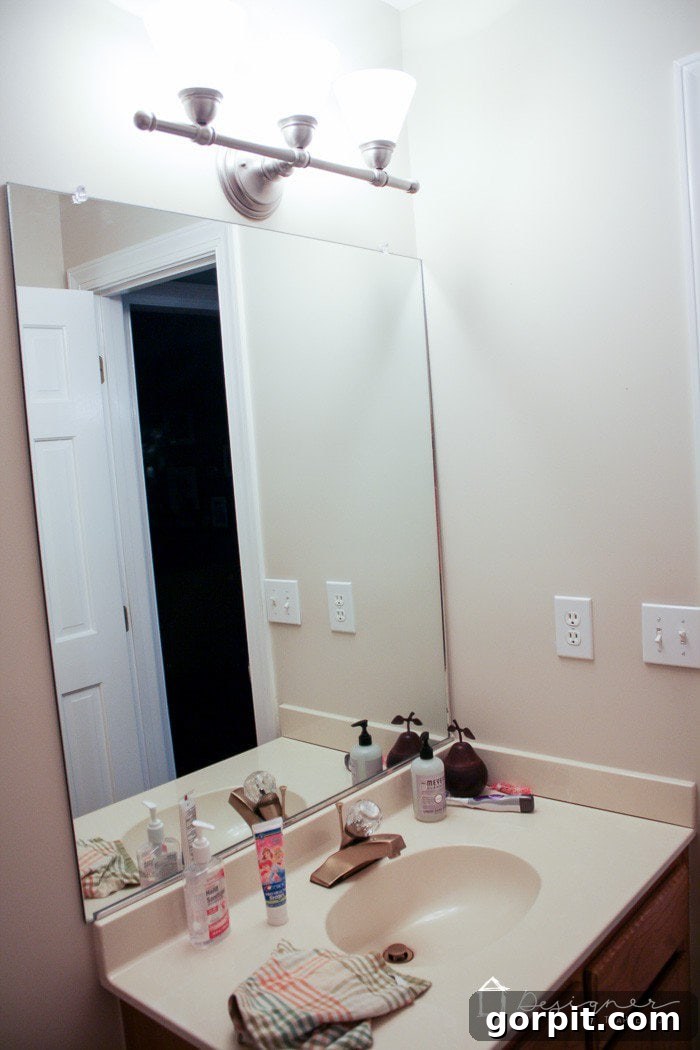
Oh, the nostalgia! Take a moment to behold that exquisitely *un*-sexy cultured marble vanity, complete with a generic builder-grade mirror. And let’s not forget the unmistakably orange-toned oak cabinet base that screamed “early 2000s.” When we embarked on our powder room renovation, our budget was incredibly tight. We needed a remarkably economical yet impactful solution to revitalize this dated vanity without resorting to a full, expensive replacement. Having experienced tremendous success with our DIY concrete fireplace – a project that proved both beautiful and incredibly cost-effective – we decided to apply a similar concrete overlay technique to our vanity. Our love for the raw, industrial charm and versatility of concrete was growing, but I admit, the idea of smearing concrete directly over a sink felt a little audacious. “Who smears concrete all over their sink?” I wondered. Well, as it turns out, this DIY-loving girl does!
And guess what? It didn’t just work; it worked brilliantly. The transformation was truly astounding. This is the stunning result we achieved:
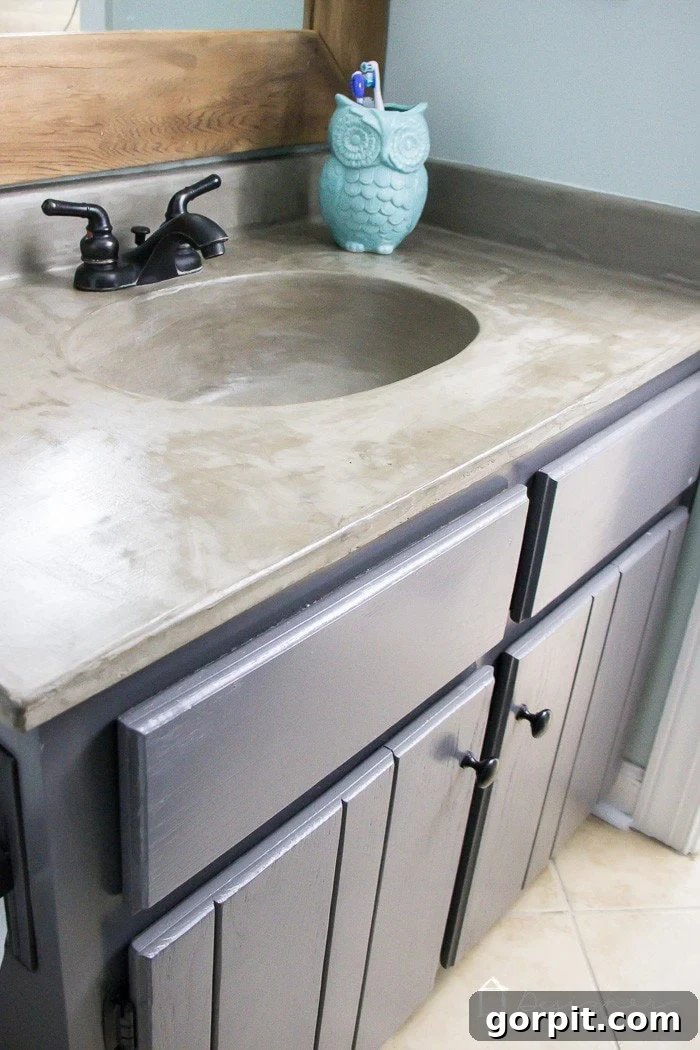
It’s genuinely hard to believe that’s the same powder room, isn’t it? The difference is night and day. The custom concrete finish elevated the entire space, giving it a modern, minimalist, and incredibly chic vibe that looked far more expensive than it actually was. This project truly showcased how a little creativity and elbow grease can lead to monumental improvements, even on the tightest of budgets. The complete vanity update, including a new faucet, came in at an astonishingly low cost of around $50, making it one of our most impactful budget renovations to date.
***** Ready to create your own stunning concrete vanity? For the full, detailed tutorial on our original DIY concrete vanity overlay project, click HERE. *****
DIY Concrete Vanity: An 18-Month Performance Review and Crucial Tweak
So, after 18 months of continuous use, how has our DIY concrete vanity truly held up? In short, it has performed phenomenally well! We are absolutely thrilled with its durability, its aesthetic appeal, and its overall resilience. The concrete surface has proven to be incredibly robust, resisting scratches and general wear surprisingly well for a high-traffic area. The smooth, sealed finish is a breeze to clean, and its unique texture continues to draw compliments from every guest who uses our powder room. The joy of having a custom, high-end look for such a minimal investment is truly unparalleled.
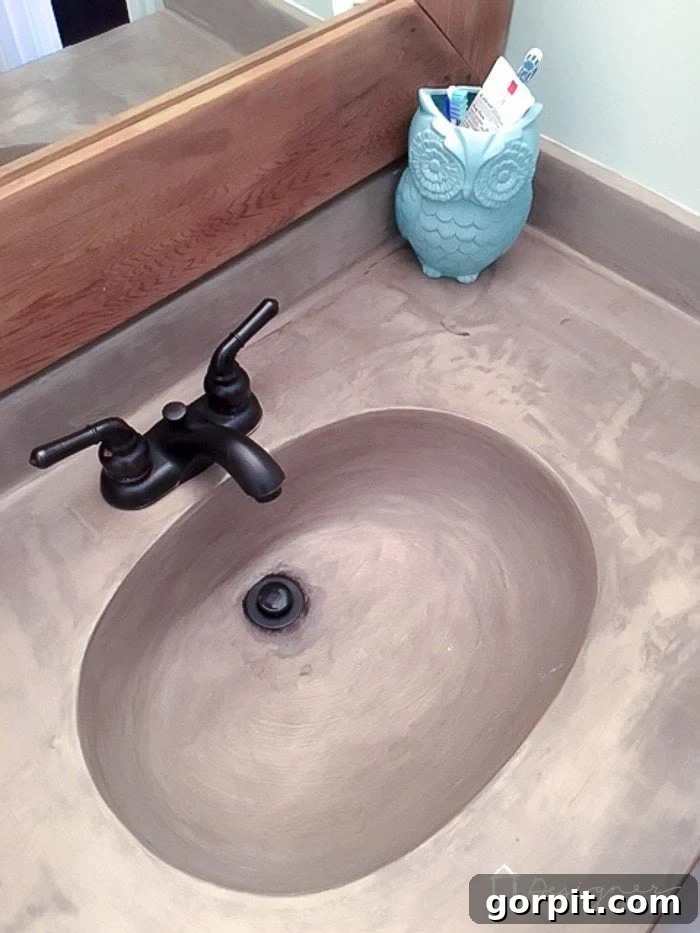
However, in the spirit of complete transparency and practical advice, there is one small but significant tweak we needed to make, and it’s a detail I absolutely must share with you. If we were to undertake this project again from scratch, our primary adjustment would be to leave the existing drain *in place* during the initial concrete application, carefully working the concrete around its perimeter. Why this change of heart? Because over time, we observed some minor discoloration around the drain area. We concluded this was likely due to tiny amounts of water inevitably seeping *under* the drain’s rim and gradually darkening the concrete beneath. While not a structural issue, it was a subtle aesthetic imperfection we wanted to address.
You can clearly see what I mean by looking closely around the drain in the following photo. Please forgive the less-than-ideal photo quality; this and some of the original tutorial photos were captured at night with a phone camera, before we fully invested in proper photography equipment!
The excellent news is that even if you’ve already completed your DIY concrete vanity and are experiencing a similar issue, this is a remarkably easy and straightforward fix! You won’t need to re-do the entire vanity; just a few simple steps will restore its pristine appearance. Follow the detailed instructions below to correct any darkening around the drain of your DIY concrete sink overlay.
Step-by-Step Guide: Correcting Discoloration Around Your DIY Concrete Sink Drain
This simple repair will ensure your DIY concrete vanity maintains its flawless finish for years to come. Gather your utility knife, Ardex Feather Finish, and Quickcrete sealer, and let’s get started.
1) Precisely Score the Concrete Overlay: Using a sharp utility knife, carefully score the concrete overlay around the outer rim of your drain. This initial scoring creates a clean line and helps prevent cracking in unintended areas as you begin to remove the concrete. Take your time to make this circle as neat as possible, as it will guide your subsequent steps.
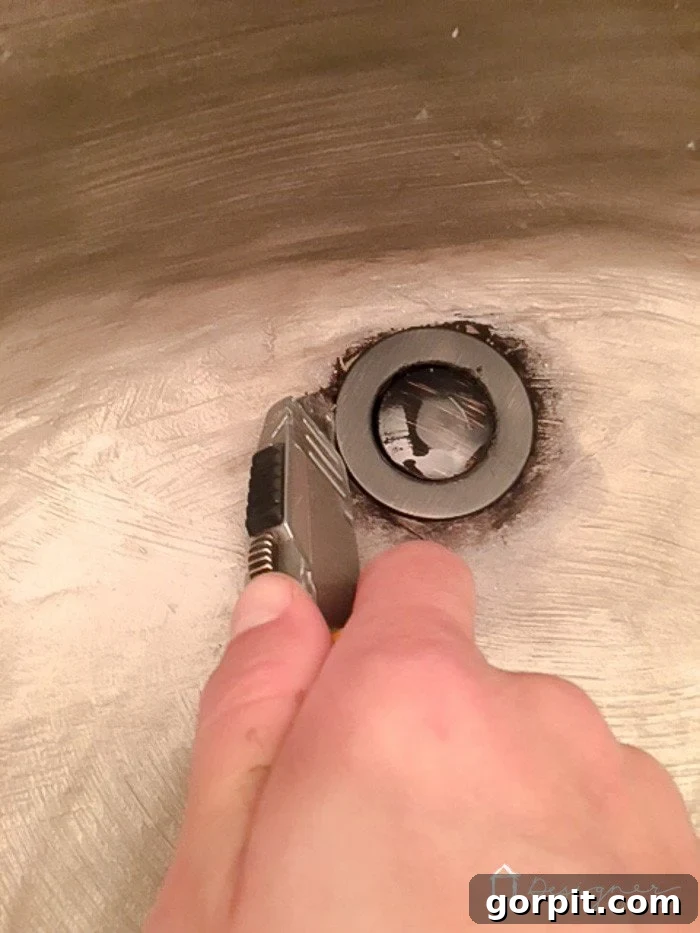
2) Remove the Drain and Underlying Concrete: First, remove the drain from the sink basin. Once the drain is out, continue carefully scoring along the circular line you created in step one with your utility knife. Apply gentle, consistent pressure. The goal is to weaken and eventually break away the concrete that was originally sitting directly *under* your drain. Don’t stress too much about achieving a perfectly precise circle at this stage, but ensure the cleared area is slightly larger than the drain itself. This extra space will allow for proper resealing and concrete application in the following steps.
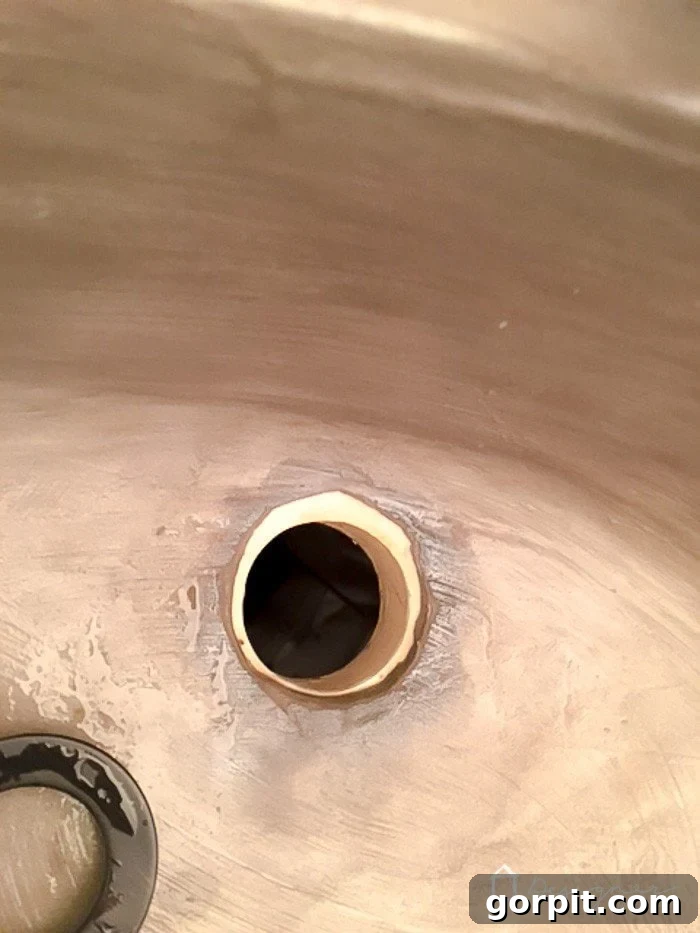
3) Re-install Your Drain: With the old, discolored concrete successfully removed from around the drain opening, it’s time to re-install your drain. Ensure it’s properly seated and secured according to its manufacturer’s instructions. This time, the concrete will be applied *around* the drain, creating a seamless and watertight seal.
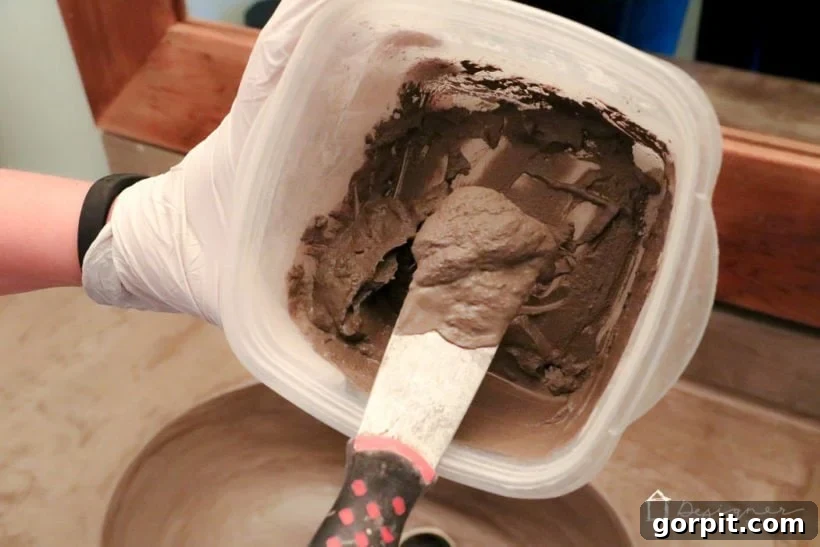
4) Prepare Your Concrete Mixture: Mix a fresh batch of Ardex Feather Finish. For this application, you want a consistency akin to thick pudding – smooth, pliable, and easy to work with. Avoid overly watery mixtures, as they can be difficult to control and may not adhere properly.
5) Apply Concrete Around the Drain: Using your finger, carefully apply the freshly mixed concrete around the newly re-installed drain. Be sure to slightly overlap the concrete onto the surface of the drain’s rim. Don’t worry if it looks a little messy initially; concrete is surprisingly forgiving. Any excess on the drain itself can be easily wiped away later.
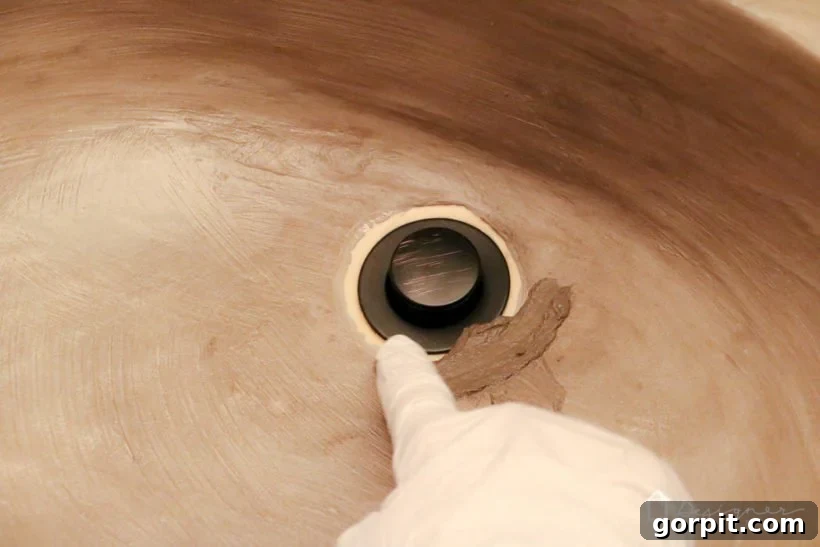
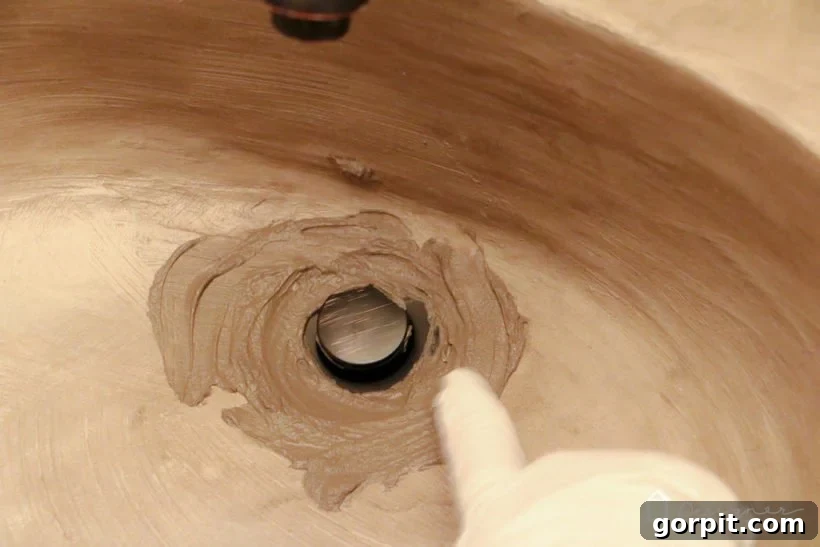
6) Smooth and Refine the Concrete: Immediately after applying, use a damp paper towel to gently remove any excess concrete from the drain itself. Simultaneously, use the damp towel and your finger to smooth out the newly applied concrete, ensuring the “circle” around the drain is as even and seamless as possible. This step is crucial for a professional-looking finish.
7) Even Out Color Differences: To achieve a uniform appearance across the entire sink basin and blend the new concrete with the old, wipe a very small, thin amount of fresh concrete all over the sink basin surface. This subtle layer will help even out any slight color variations that might arise from adding new material to the existing overlay.
8) Allow to Dry & Repeat Layers: Let the applied concrete dry thoroughly, ideally overnight, to ensure complete curing. For optimal durability and a smooth finish, repeat steps 5-7 at least once more. You want to build up enough concrete around the drain – this might require 2 or 3 very thin layers, each allowed to dry completely before the next. Patience here will pay off. Allow the final coat to dry overnight for maximum strength.
9) Apply Quickcrete Sealer: This is a critical step for protecting your newly repaired and blended concrete surface. For us, this was the FIRST time we needed to re-seal the vanity since its original installation, and we focused specifically on the sink basin area. Always follow the directions on your Quickcrete sealer package for the best results. We applied three generous coats of sealer, paying particular attention to achieving excellent coverage around the drain to prevent any future water ingress and discoloration. Proper sealing is paramount for the longevity and low-maintenance nature of your concrete vanity.
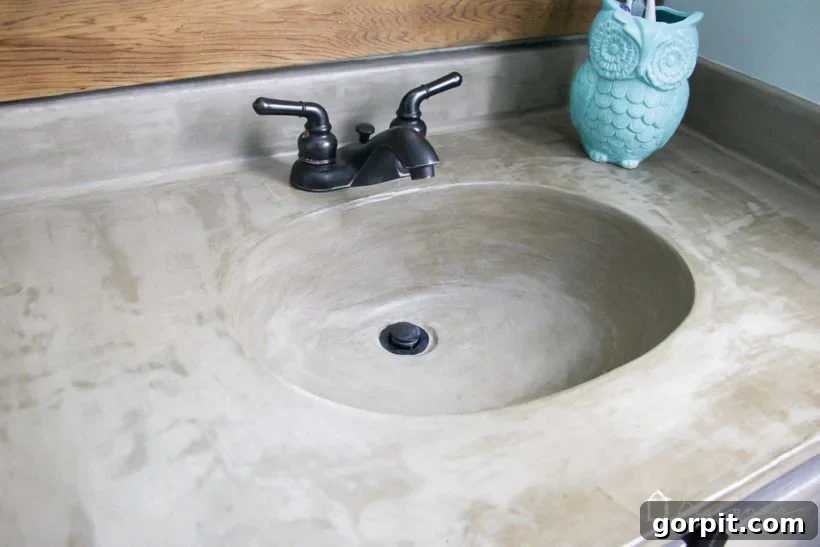
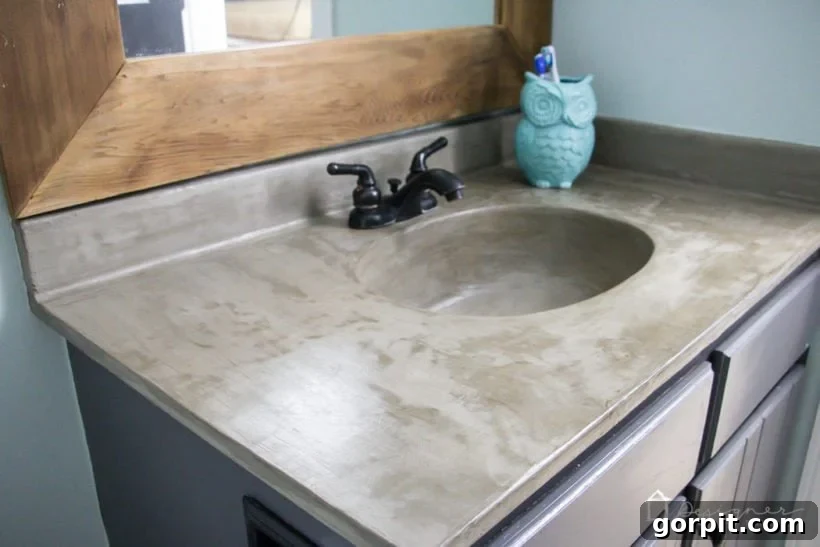
And that’s it! We implemented this “tweak” about two months ago, and the results have been absolutely perfect. The discoloration around the drain is completely gone, replaced by a uniform, pristine concrete surface. Woo hoo! This simple repair truly restored our vanity to its original, flawless glory. Here’s a look at our DIY concrete vanity as it stands today, looking absolutely fantastic after addressing the drain issue:
Would We Undertake This DIY Concrete Vanity Project Again?
A million, zillion times YES! Without a shadow of a doubt, we would absolutely do this project again. This incredibly rewarding DIY cost us approximately $20 for the concrete overlay materials, delivering an unparalleled return on investment in terms of aesthetic appeal and functional durability. Even if we hadn’t made the small adjustment around the drain, the minor discoloration would not have deterred me from recommending or undertaking this project again. The sheer transformation and value it added to our powder room far outweighed that tiny flaw. But now, with the easy and effective tweak, our concrete vanity is 100% perfect, flawless, and everything we hoped it would be. We are so, so happy with this project, and it continues to be one of our favorite DIY accomplishments!
For those curious about the practicalities of living with a concrete vanity, I’ve prepared a video that answers one of the most popular questions we receive: “How do you clean it?” This video provides a comprehensive guide to maintaining your concrete surface, ensuring it remains beautiful and hygienic with minimal effort. While the video player itself uses dynamic content, the core information it provides is essential for anyone considering or owning a concrete vanity. Rest assured, cleaning is surprisingly simple and requires no harsh chemicals or specialized tools.
Other inspirational and budget-friendly DIY posts you may enjoy:
- How to Paint Countertops to Look Like Marble: A Detailed Guide
- The Easy Way to Update Bathroom Tile Without Replacing It! Discover our secrets.
- Gorgeous But Cheap Flooring Ideas: Transform your floors on a budget.
- DIY Concrete Fireplace For Less than $100! Achieve a modern look economically.
- 15 Affordable DIY Countertops That Will Blow Your Mind: Innovative and budget-friendly ideas.
- 18+ Budget Friendly DIY Backsplash Ideas: Elevate your kitchen or bathroom without breaking the bank.
- Affordable Master Bathroom Remodel REVEAL: See our complete budget-friendly transformation!
Are you inspired to tackle your own home transformation projects but unsure where to begin? Discover my proven approach to beautifully transforming rooms and spaces in our home. Check out Designer in a Binder® – your ultimate guide to decorating with confidence and achieving stunning results without the stress or exorbitant costs of hiring a professional designer.
For exclusive content, behind-the-scenes sneak peeks into our latest DIY adventures, and valuable decorating tips delivered straight to your inbox, be sure to subscribe to our newsletter before you leave! Join our growing community of DIY enthusiasts and never miss an update that can inspire your next home project.
Thank you for joining us on this journey to revisit our beloved DIY concrete vanity. May your own DIY endeavors be equally rewarding and long-lasting!