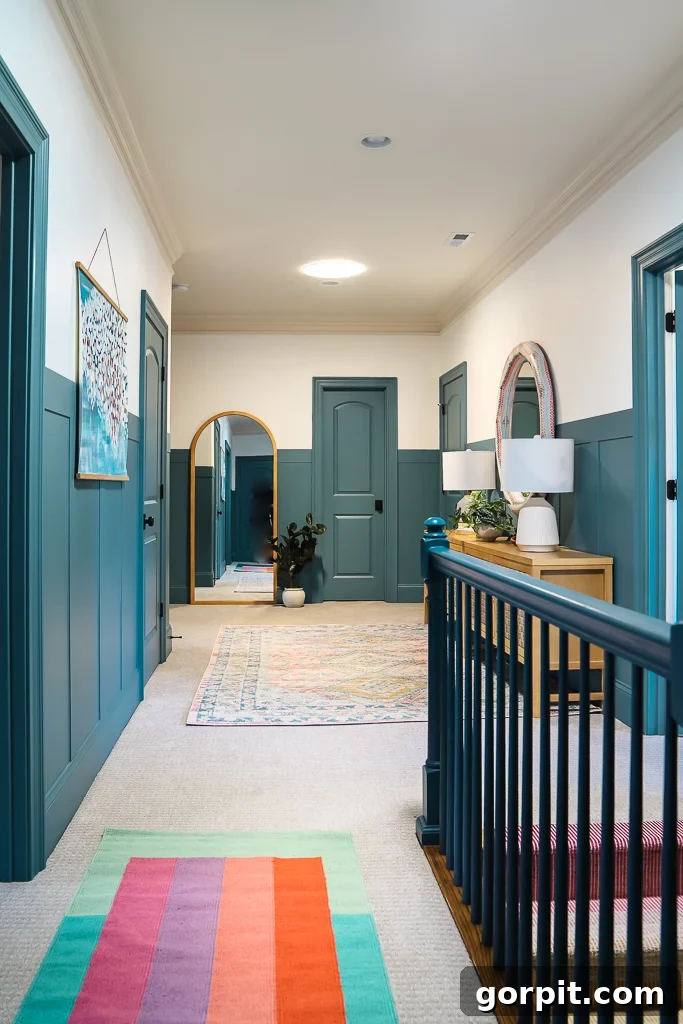
Illuminate Your Home: Unveiling the Magic of Velux Sun Tunnels for Natural Light
A huge thank you to Velux for partnering with us on this project. As always, all opinions are 100% my own. We only recommend products and companies we genuinely love and trust.
We recently embarked on a significant home renovation, focusing on revitalizing our staircase and upstairs hallway. This extensive makeover included the installation of a stylish board and batten accent wall, a cozy stair runner, updated stair railings, and fresh paint throughout. While all these changes contributed to a beautiful aesthetic transformation, the single most impactful upgrade was undoubtedly the installation of four Velux Sun Tunnels. It may sound dramatic, but these incredible daylighting solutions have completely revolutionized the upstairs ambiance of our home. More profoundly, introducing abundant natural light has positively altered our emotional connection to the second floor. Before delving into our personal journey with Velux Sun Tunnels and showcasing the dramatic difference they’ve made, let’s explore the fundamental aspects of these innovative light tubes.
Table of Contents
What are Sun Tunnels? An Introduction to Daylighting Solutions
A sun tunnel, often referred to as a tubular skylight, solar tube, or light tunnel, is an innovative and highly effective system designed to channel natural light from your roof into the interior spaces of your home. It typically consists of an acrylic dome mounted on your roof, which captures sunlight. This light then travels down a highly reflective aluminum tunnel, delivering it into a room or area below through a diffuser installed in the ceiling. This ingenious design means that even rooms without traditional windows or direct access to exterior walls can be bathed in brilliant, natural daylight.
The primary purpose of a sun tunnel is to illuminate dimly lit or windowless rooms such as hallways, bathrooms, utility rooms, closets, or even interior kitchens. By reducing the reliance on artificial lighting during the day, sun tunnels not only enhance the aesthetic appeal and functionality of these spaces but also contribute to significant energy savings and a more comfortable living environment. They effectively banish the “cave-like” feeling that often plagues interior areas, replacing it with a bright and airy atmosphere.
Sun Tunnels vs. Skylights: Understanding the Key Differences
While both sun tunnels and traditional skylights are excellent solutions for bringing natural light into a home, they serve different purposes and offer distinct advantages. Understanding these differences is crucial when deciding which option is best suited for your specific needs and architectural constraints.
The Appeal of Traditional Skylights
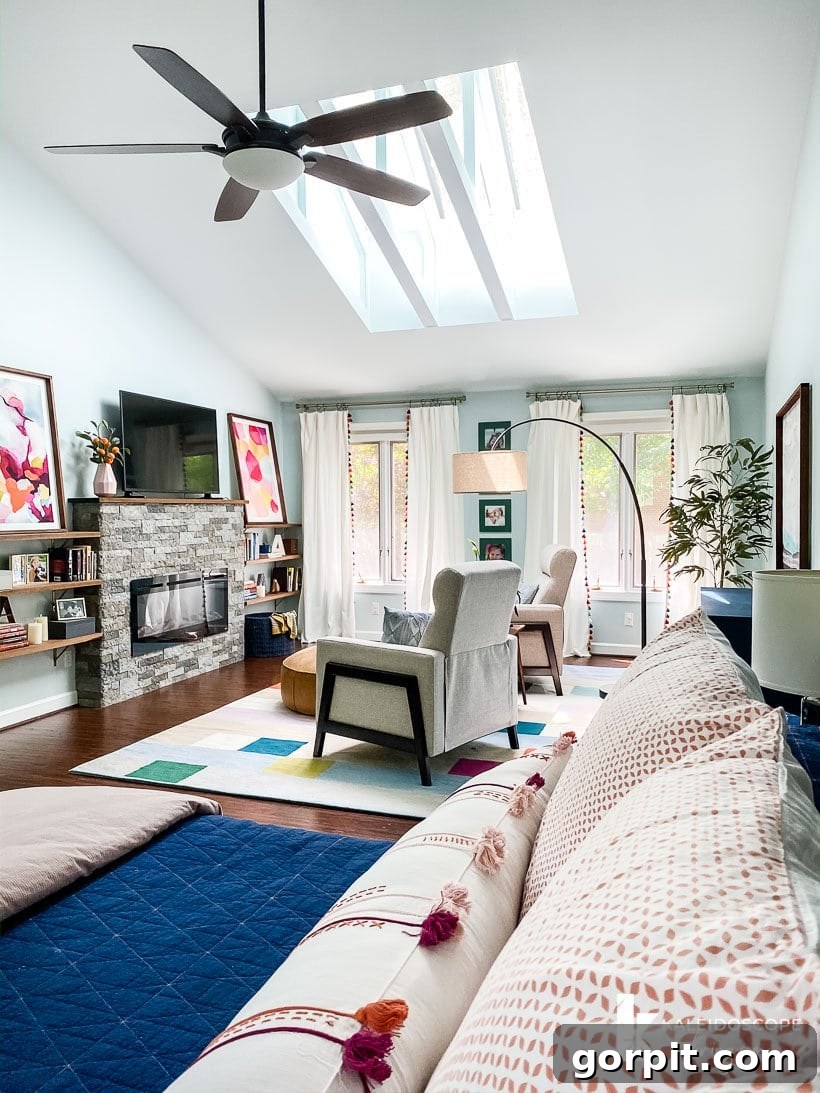
Imagine a window installed directly into your roof – that’s essentially a skylight. Skylights are renowned for allowing a vast amount of natural light to flood a room, often creating a dramatic visual impact. Beyond just illumination, they provide a direct view of the sky, clouds, and even stars, offering a unique connection to the outdoors. Many modern skylights come with advanced features, including the ability to open and close for ventilation, and options for remote-controlled blinds to manage light and privacy. Architecturally, a well-placed skylight can become a focal point, adding elegance and a sense of grandeur to your home’s ceiling design. In our previous home, we had Velux skylights installed, and they were truly magical. We adored them, and they proved to be a significant selling point when we listed our old house for sale. The image below showcases the stunning Velux skylights we enjoyed in our former primary bedroom.
The Versatility of Velux Sun Tunnels
In contrast, Velux Sun Tunnels are designed for flexibility and efficiency, particularly in challenging spaces. Instead of a direct window, they use an acrylic dome on the roof to capture daylight. This light is then magnified and directed through a highly reflective tube that extends from the roof to the ceiling diffuser in the room below. The key advantage of sun tunnels lies in their ability to fit into smaller areas and maneuver around attic obstructions, thanks to their flexible tubing options. This adaptability makes them far more versatile in terms of installation locations compared to rigid skylights, allowing them to bring light to virtually any interior room.
While sun tunnels excel at letting in abundant natural light, they differ from skylights in several ways. You won’t get a direct view of the blue sky through a sun tunnel, nor do they offer ventilation or options for blinds. They also don’t typically add the same architectural statement to a ceiling as a large skylight. However, their primary strength lies in their exceptional cost-effectiveness and efficiency in illuminating dark, interior spaces. Furthermore, the installation process for a sun tunnel is remarkably quick. A single sun tunnel can often be installed within a single afternoon, making it one of the fastest and most budget-friendly ways to transform your home with natural daylight. We had four sun tunnels installed over a period of just 1.5 days, a testament to their efficient setup.
Investing in Natural Light: The Cost of Sun Tunnel Installation
The cost of having a sun tunnel installed can vary based on several factors, including the length and type of reflective tubing required (e.g., rigid for straighter runs, flexible for navigating obstructions), and the specific model you choose (e.g., low-profile or flat glass roof components). Generally, you can expect the investment for an installed sun tunnel to range between $650 and $2,150. This figure typically includes both the material cost of the sun tunnel and the professional installation fees.
It’s important to note that this cost is significantly lower than that of installing traditional skylights, especially if you’re considering advanced Velux skylight models that offer features like remote operation, opening and closing capabilities for ventilation, and integrated blinds. Sun tunnels provide a more economical entry point into the world of natural daylighting without compromising on performance.
To help you explore your options and plan your project, VELUX offers a complimentary virtual consultation service. You can connect with a daylight design consultant via phone or video conference to ask any questions you have about skylights or sun tunnels and discuss the best solutions for your home. If you’re ready to proceed or simply want to explore professional installation, you can also easily locate an installer in your area who specializes in Velux products.
Are Sun Tunnels Leak-Proof? Addressing Common Concerns
When we first shared our plans to install sun tunnels on Instagram, many followers expressed concerns about potential leaks. It seems the old reputation of skylights leaking still persists in people’s minds. However, we have absolutely no concerns about leakage with our Velux Sun Tunnels, and here’s why.
Firstly, sun tunnels inherently carry a lower risk of leaking compared to traditional skylights due to their smaller, more streamlined dome design. This allows rainwater to drain efficiently around them, minimizing pooling. More importantly, Velux is renowned for its “No Leak Skylights,” a technology that extends to their sun tunnel range, featuring three robust layers of water protection. This advanced engineering provides exceptional peace of mind.
However, it cannot be stressed enough: **proper installation is absolutely critical**. Even with the highest quality Velux products, incorrect installation by inexperienced or sub-par contractors can lead to leaks and other issues. A Velux Sun Tunnel is designed for a weather-tight installation, a process that involves meticulous steps:
- The installer uses highly adhesive mastic to securely fasten the flashing piece to the roof deck.
- The flashing piece is further secured with screws, and both the screws and the top portion of the flashing are meticulously sealed.
- An all-weather underlayment is then installed over the flashing to ensure optimal drainage of rainwater.
- Finally, the roofing material is carefully reinstalled over the flashing and around the Sun Tunnel unit.
To guarantee a flawless, leak-proof installation, always opt for a VELUX-certified installer. These professionals have undergone specific training and adhere to Velux’s rigorous standards. In North Carolina, we wholeheartedly recommend VELUX Signature Skylight Specialist Natural Home Lite. They installed our current sun tunnels (and the skylights in our old home) with exceptional expertise, making them a dream to work with, and we trust their workmanship implicitly.
Why Velux Sun Tunnels Were the Perfect Fit for Our Home.
Our appreciation for Velux natural light solutions began in our previous home, where we fell completely in love with the skylights. Naturally, when planning renovations for our current home, skylights were our initial preference for brightening the upstairs. We reached out to Velux with this in mind, but unfortunately, the specific attic depth and structural limitations of our current house made traditional skylight installation impractical for the locations we desired.
It was during this discussion that we learned about Velux Sun Tunnels, and it quickly became clear that these tubular skylights would almost certainly work where traditional skylights could not. We promptly scheduled a site visit with
Navigating Homeowners Association (HOA) regulations presented a minor hurdle. Our initial plan, which included two flat glass sun tunnels on our front roofline, was rejected. However,
The video below offers a detailed explanation and visual walkthrough of how incredibly dark our hallway was before this renovation. Watching it will give you a full understanding of the challenge we faced and the reasons behind our choice of Velux Sun Tunnels.
[Video demonstrating the darkness of the upstairs hallway before sun tunnel installation and explaining the decision-making process for choosing Velux Sun Tunnels.]
A Glimpse into the Dark: Before Velux Sun Tunnels.
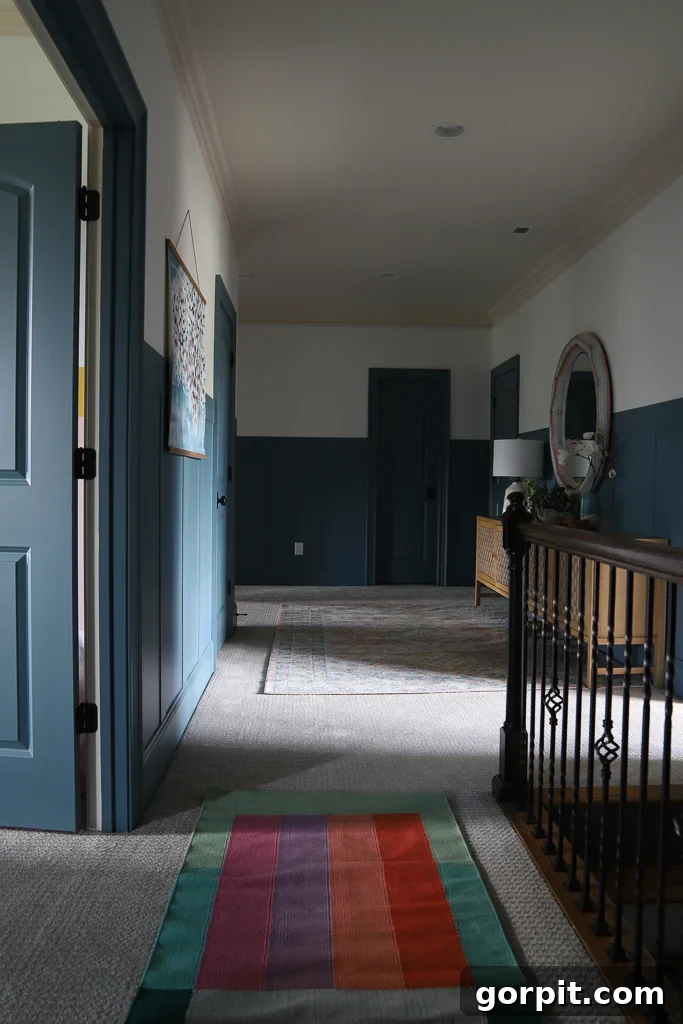
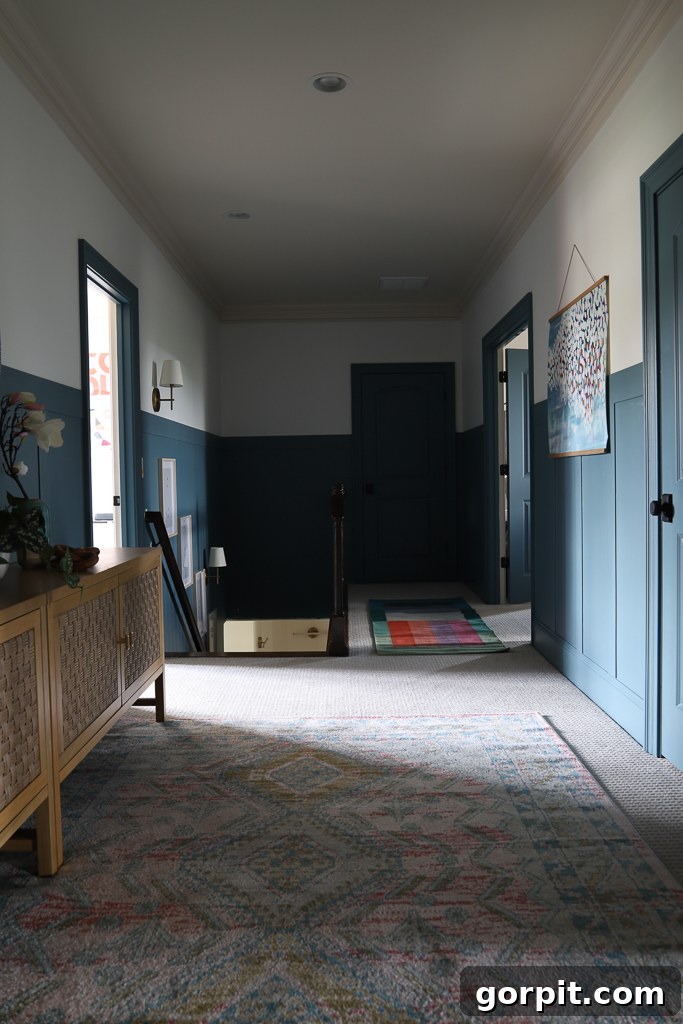
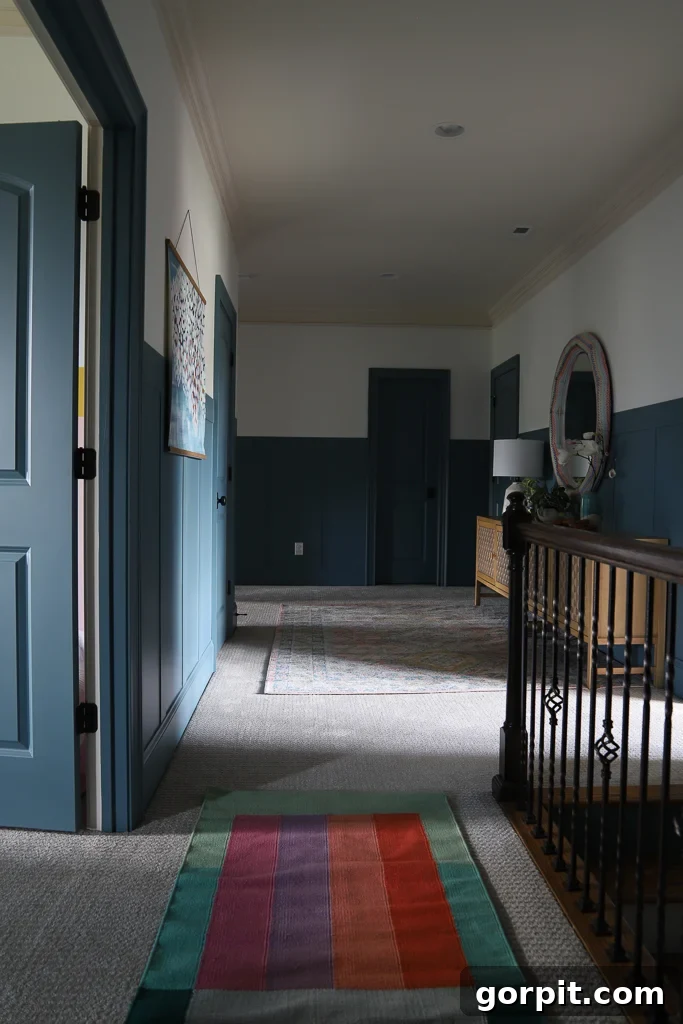
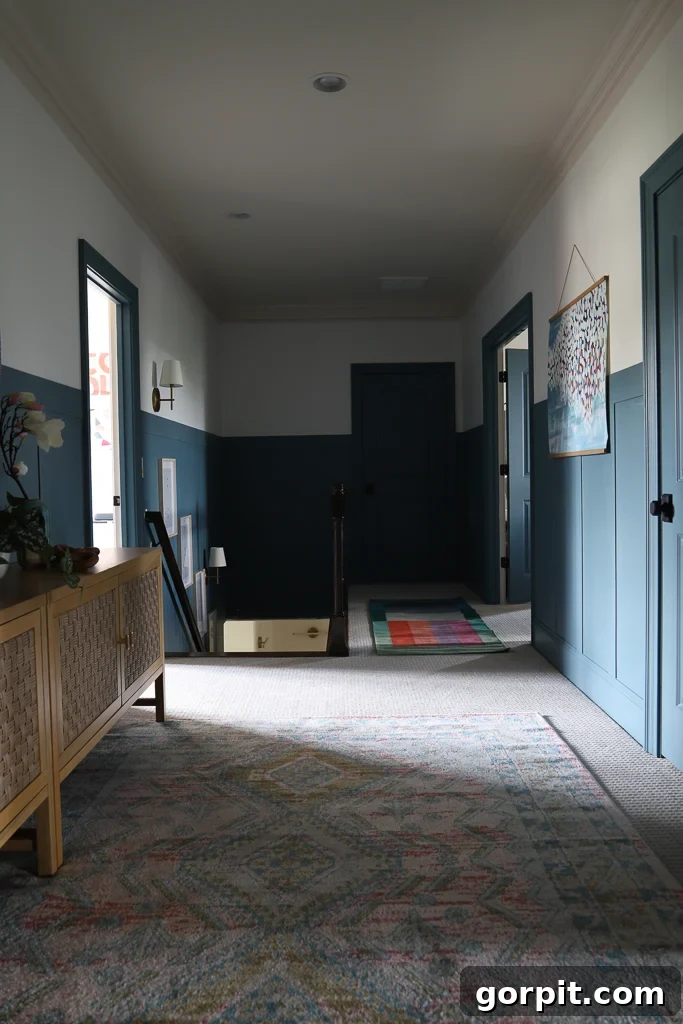
When we purchased this home nearly two years ago, the lack of natural light on the second floor was almost a deal-breaker. So many upstairs areas felt perpetually dark and cave-like. Our upstairs hallway, despite its generous size, was completely devoid of any windows or direct natural light sources. The only way it received even a glimmer of daylight was if the doors to the adjacent rooms were left wide open. The reality, however, is that these doors are often closed. With the doors shut, navigating the hallway required turning on a light, even in the middle of the day – a vivid illustration of this can be seen in the video shared earlier in this post.
The images below starkly illustrate just how dim the hallway was, even with the doors to the upstairs rooms open. It’s hard to believe how little light permeated these spaces.
Similarly, both Avery’s bathroom and Attley’s bathroom suffered from a complete absence of direct natural light. Without artificial lights on, these spaces were consistently gloomy and unwelcoming. The “before” photos below perfectly capture this lack of illumination.
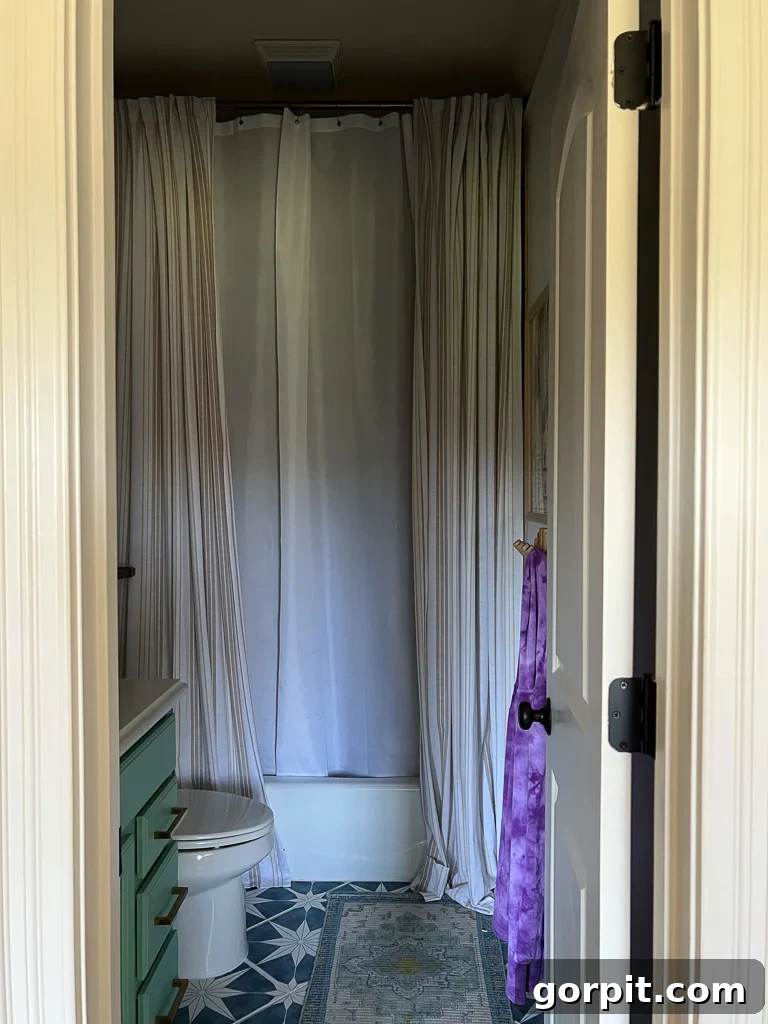
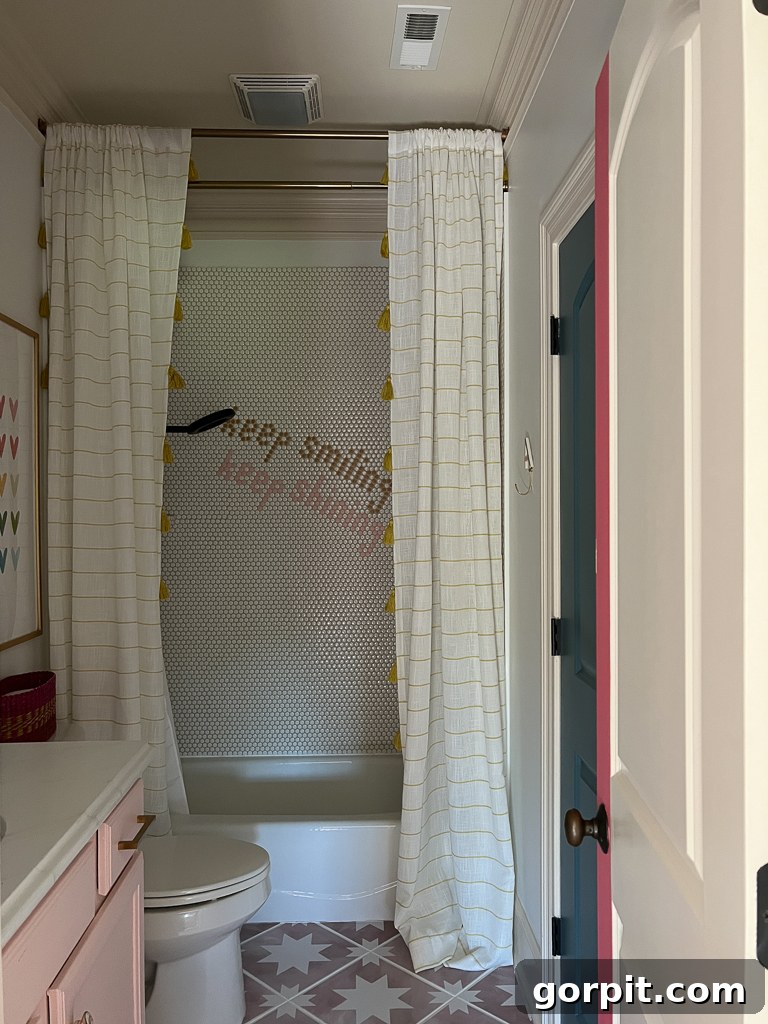
These visuals clearly demonstrate our strong motivation to introduce natural light into our upstairs hallway and both bathrooms. The transformation was not just desired; it was essential for improving the overall livability and mood of these spaces.
The Power of Reflection: How Much Light Do Sun Tunnels Provide?
As previously mentioned, the installation of all four Velux Sun Tunnels was a remarkably swift process, completed within 1.5 days. The entire experience was seamless and minimally disruptive to our daily routine. During most of the first day, the skilled installers from
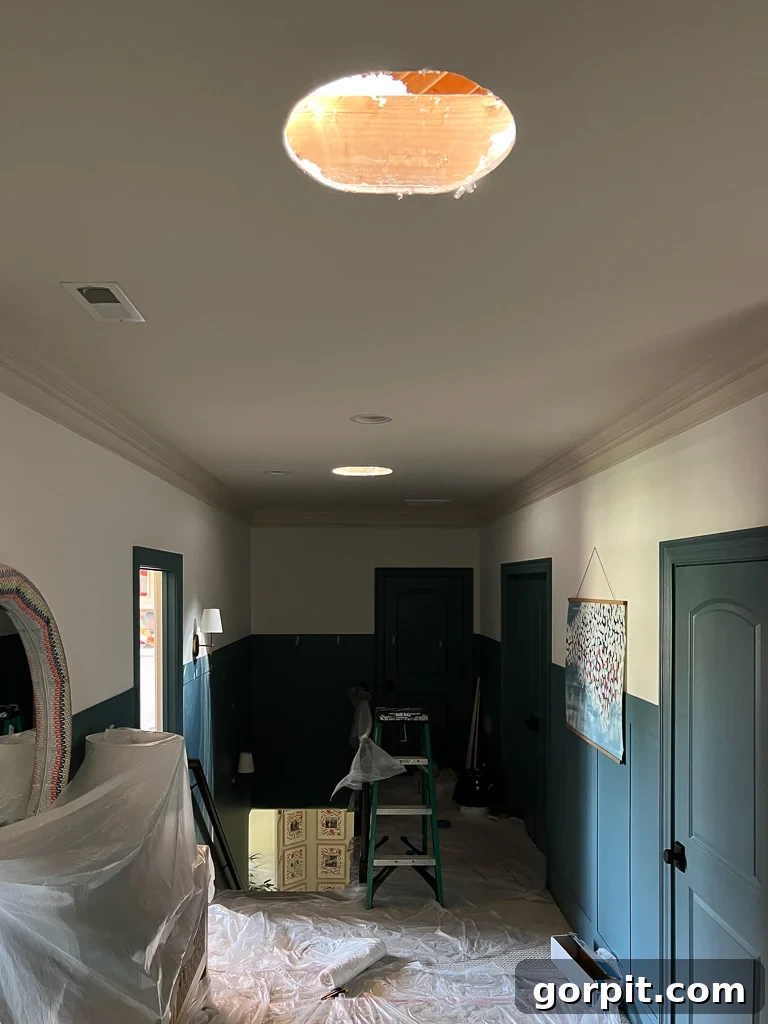
But wait… the real revelation came once the reflective tubes were attached. Y’all, I was genuinely shocked by the sheer volume of light that suddenly flooded our hallway. It was an absolutely astonishing transformation! The highly reflective interior of the tunnel efficiently captures and magnifies the daylight, channeling it with incredible intensity into the interior space. This photo, also unedited and taken directly from my phone, captures that “aha!” moment of profound brightness. The difference is truly remarkable, instantly brightening the entire area.
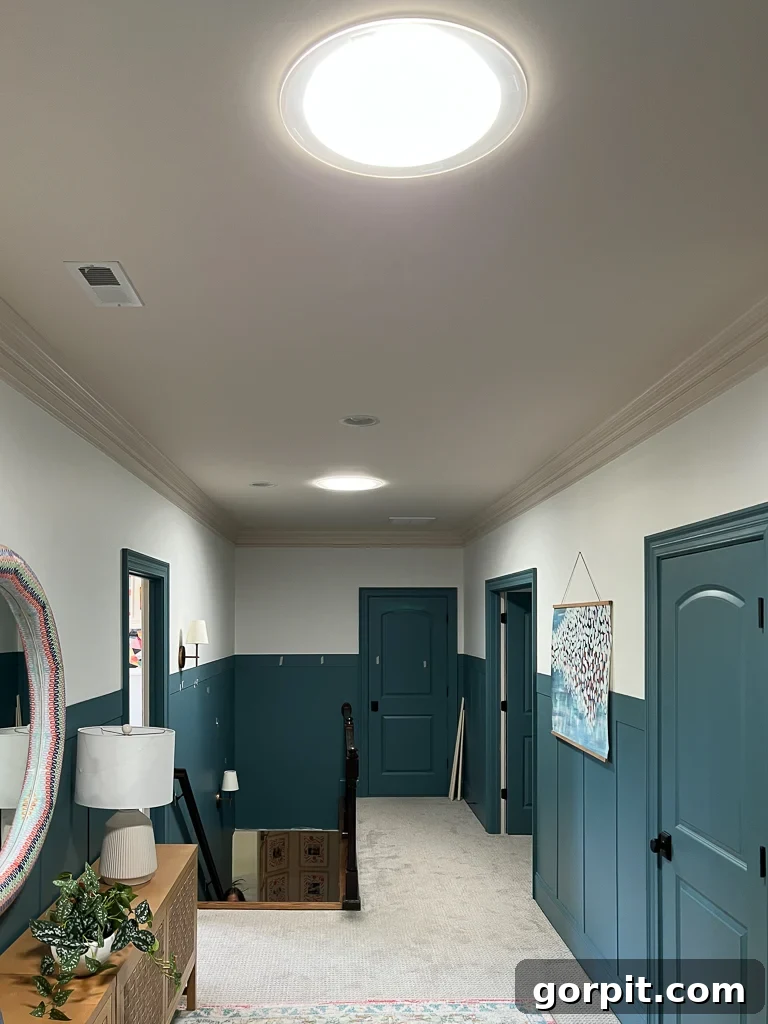
Dramatic Transformation: Before and After with Velux Sun Tunnels
Now for the moment you’ve been waiting for – a detailed look at how our upstairs hallway and bathrooms have been utterly transformed with our newly installed Velux Sun Tunnels! The video below offers a dynamic view of these amazing changes, but for those who prefer still images, I’ve also included a comprehensive collection of before-and-after photos.
[Video showcasing the dramatic before-and-after transformation of the upstairs spaces with Velux Sun Tunnels.]
To provide a truly objective comparison for the hallway, I’ve presented side-by-side shots taken with the exact same camera settings. This means the shutter speed, aperture, and ISO were identical in both the “before” and “after” photographs. The only variable changed was the installation of the sun tunnels. As you’ll quickly notice, the “after” photos are significantly *overexposed* with these identical settings. This overexposure isn’t a photography mistake; it’s tangible proof of the immense increase in natural light. The difference is truly astounding, isn’t it?
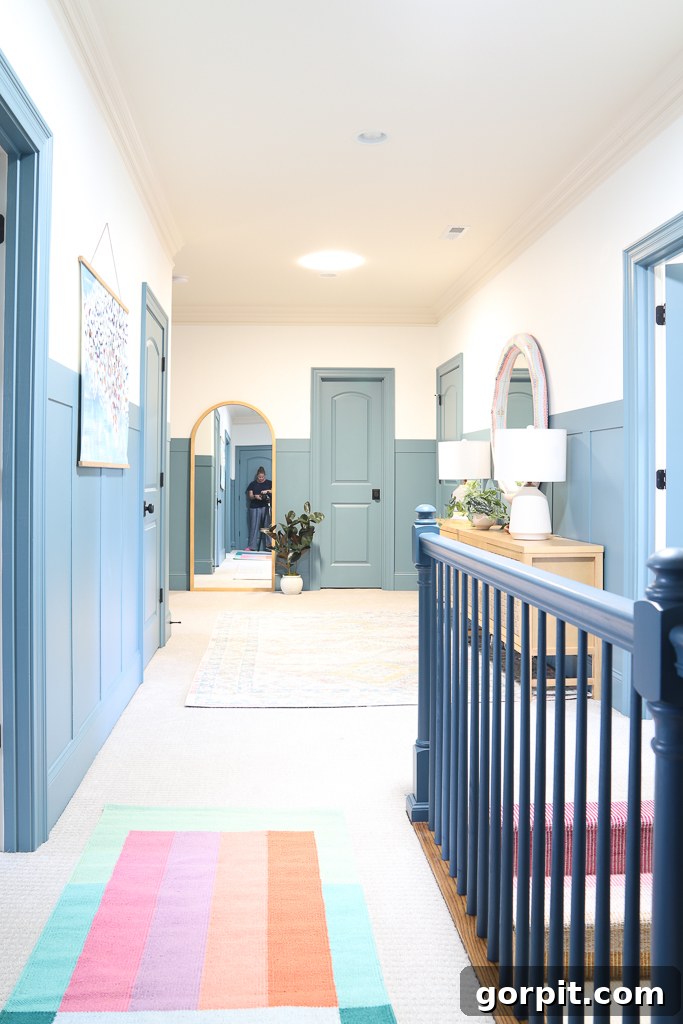
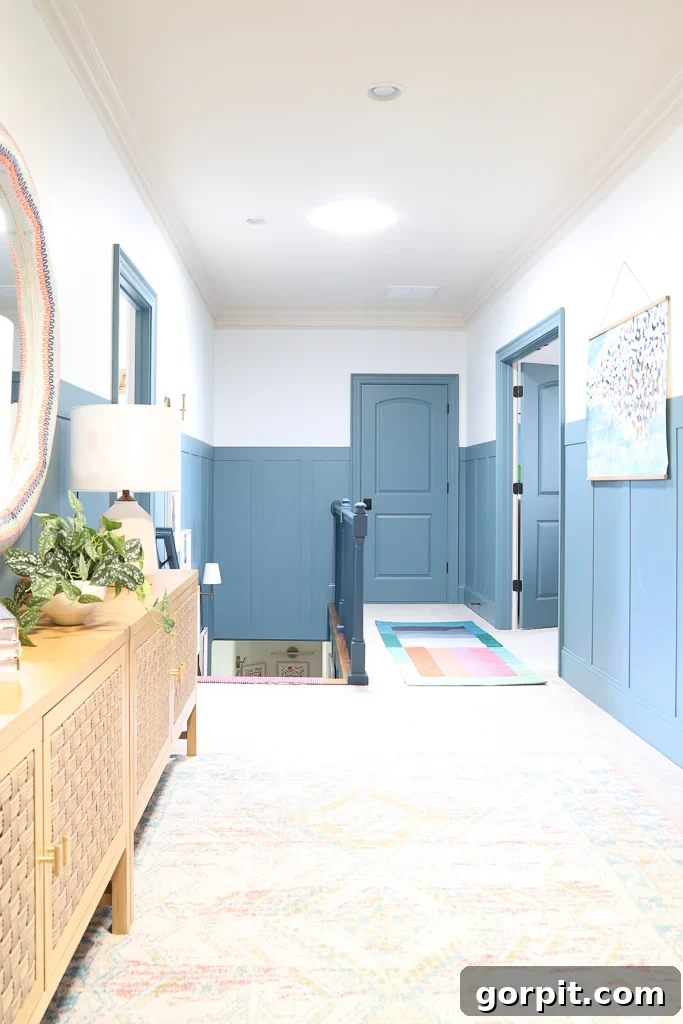
And now, for a more aesthetically balanced view, here are some photos of the hallway with the exposure and other camera settings adjusted to properly accommodate all the glorious natural light that now floods into our hallway! These images truly capture the bright, inviting atmosphere that has replaced the former gloom.
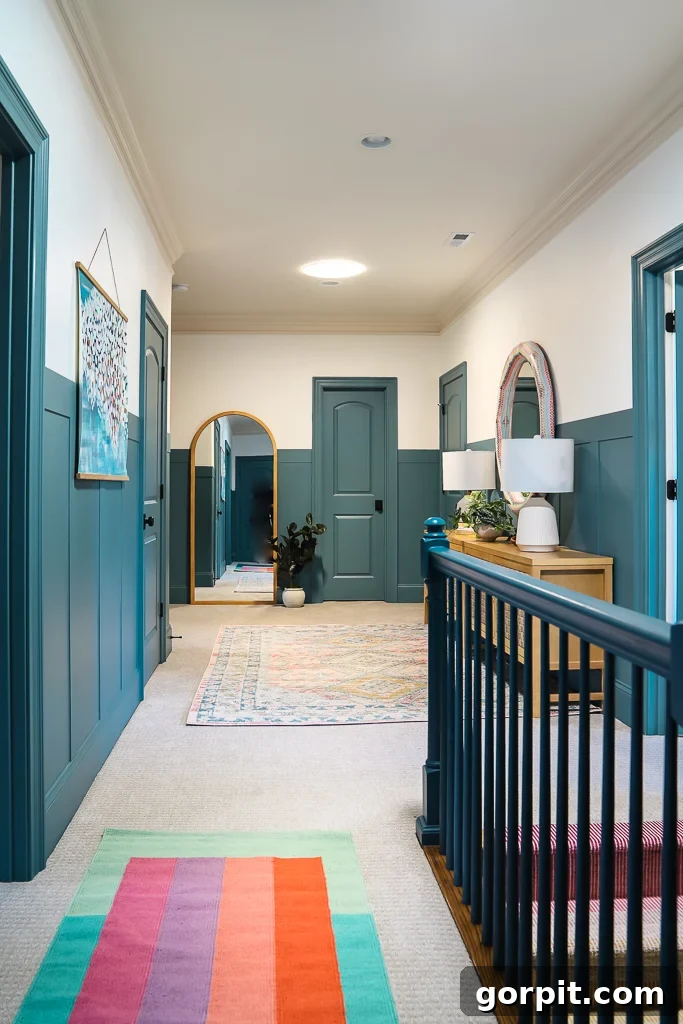
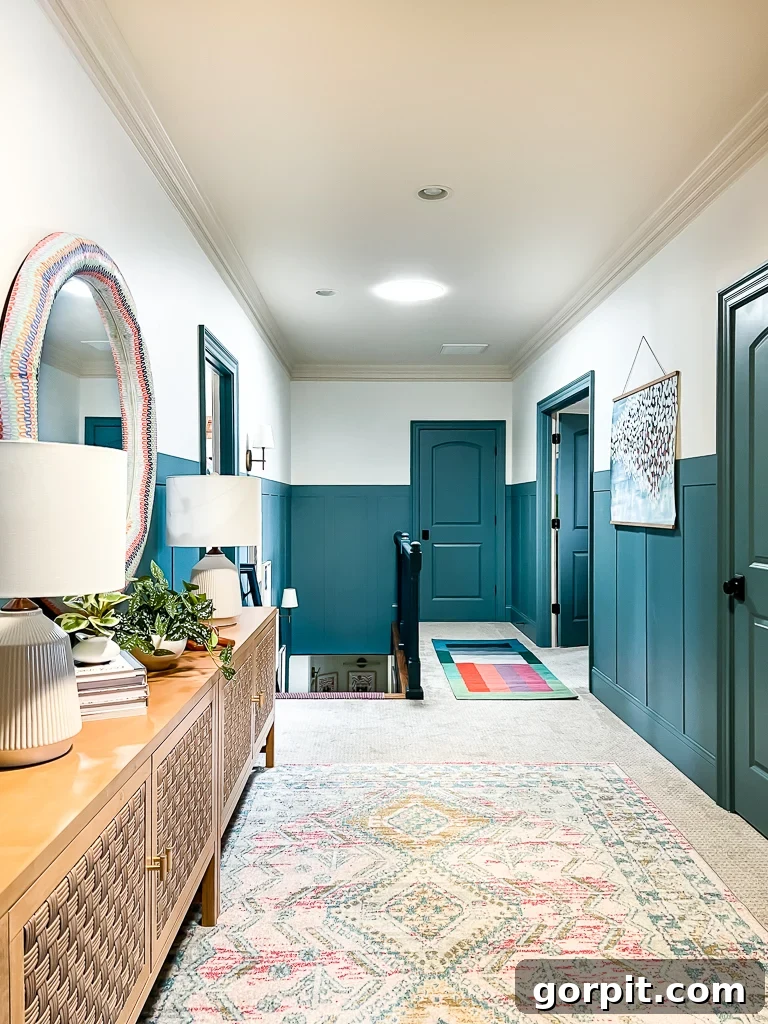
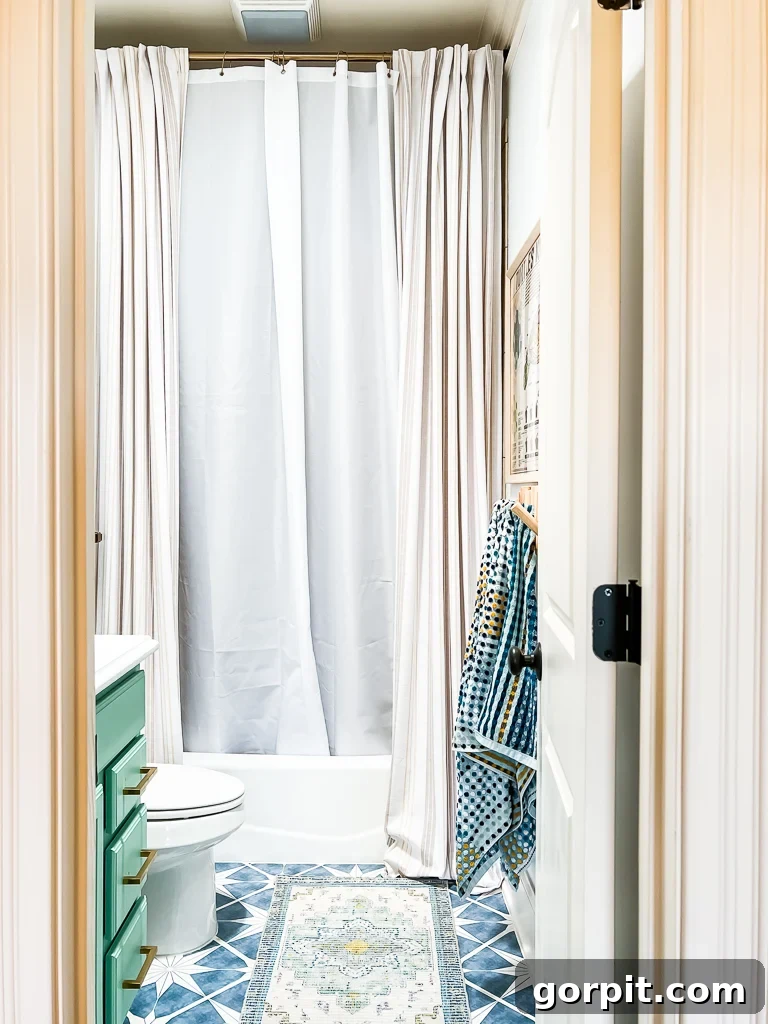
For the before-and-after photos of Avery’s bathroom and Attley’s bathroom, I used my phone, which automatically adjusts exposure and other settings. Therefore, these aren’t a “controlled comparison” like the hallway photos. However, the visual impact is still undeniably clear: their bathrooms are dramatically brighter and more inviting with the sun tunnels installed. We’ve had them for nearly a month now, and I still occasionally get startled, thinking someone left the lights on! The truth is, we never need to switch on the artificial lights in their bathrooms during the day anymore. The 10-inch sun tunnels provide more than sufficient illumination, creating a cheerful and natural atmosphere.
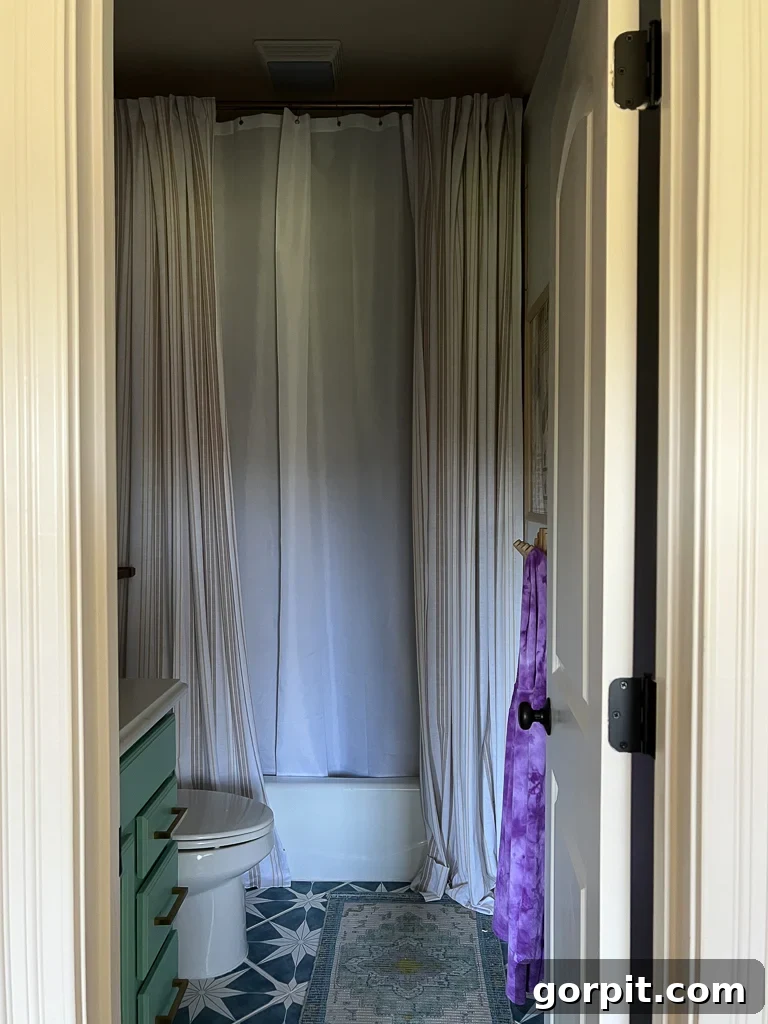
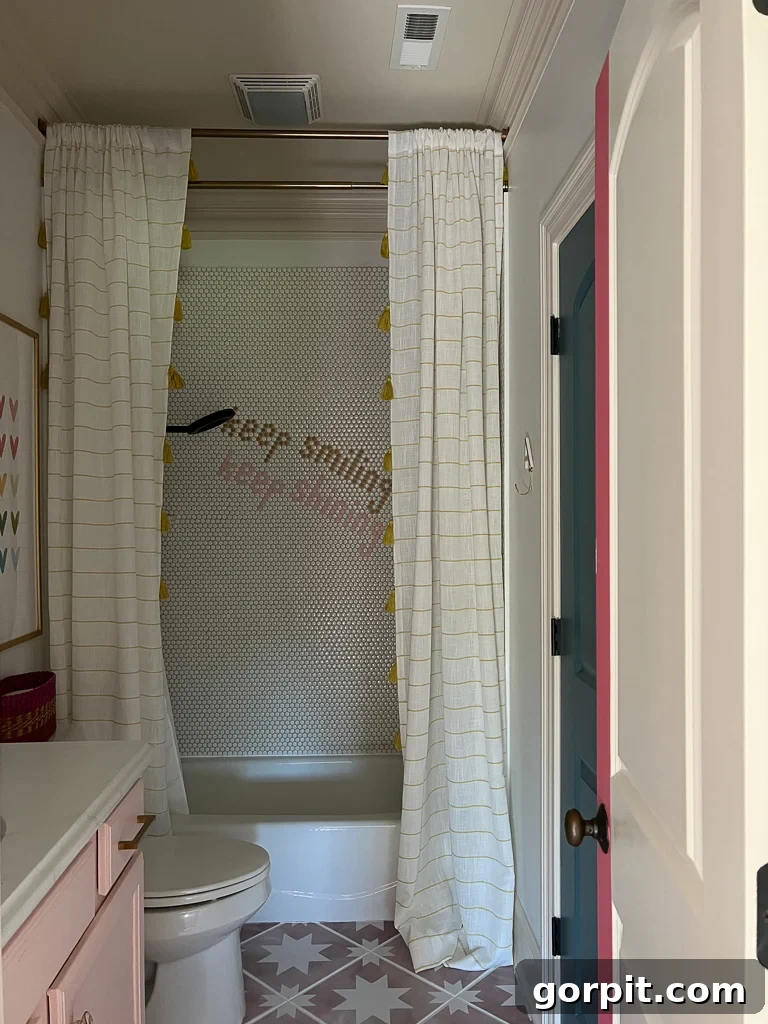

Unexpected Benefits: Surprising Perks of Velux Sun Tunnels
Beyond the primary goal of introducing natural light, our Velux Sun Tunnels came with a couple of delightful surprises that further enhanced their value and functionality. These added perks truly elevate the user experience and offer practical advantages for homeowners.
Firstly, the option to integrate a solar night light into each sun tunnel is incredibly ingenious and beneficial. This discrete accessory captures ambient sunlight throughout the day to charge its concealed battery. Once dusk settles, the battery powers small LED bulbs, providing a soft, ambient glow that illuminates the space without requiring any electricity from your home’s grid. The best part? The unit is hidden within the sun tunnel, so you don’t even see it during the day. We’ve installed one in each of our sun tunnels, and they emit the perfect soft light at night, allowing us to navigate the upstairs without having to switch on bright overhead lights. As an added bonus, the inclusion of a solar night light makes the sun tunnel eligible for a “Solar Electric Property” Federal tax credit, offering a financial incentive for this eco-friendly feature.
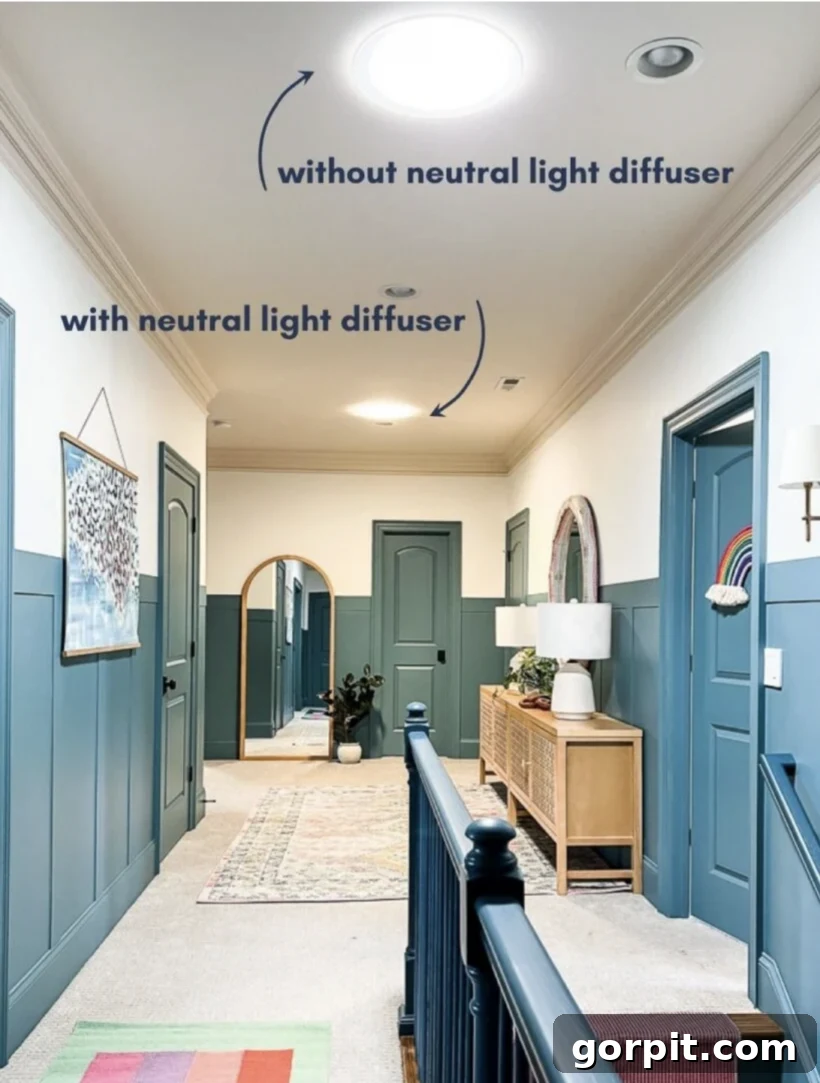
Secondly, Velux offers various diffusers for sun tunnels, providing homeowners with a degree of control over both the aesthetic appearance of the ceiling fixture and the quality or temperature of the light entering the room. The natural daylight captured by sun tunnels can sometimes appear quite cool, with a bluish hue. While this might be ideal for some preferences or spaces, I personally found the light in our home to be a bit too cool for my liking. To remedy this, we opted to add a neutral light diffuser, which gently warms up the light temperature, creating a softer and more inviting glow. The image below illustrates the subtle but noticeable difference these diffusers can make. I’m still debating which I prefer on a daily basis, as the light quality shifts throughout the day with the changing angle of the sun. Ultimately, it boils down to personal preference, but having these options to customize your indoor lighting environment is a significant advantage.
Is a Velux Sun Tunnel the Right Daylighting Solution for You? Our Final Thoughts.
If your home suffers from dark interior spaces that desperately need a boost of natural light, then Velux Sun Tunnels are an absolute must-consider. They stand out as an incredibly effective and budget-friendly alternative to traditional skylights, capable of channeling a tremendous amount of daylight into virtually any room. Their versatile design allows for installation in areas where conventional skylights might not be feasible due to attic obstructions or limited space. Furthermore, the installation process is remarkably faster, minimizing disruption to your home life.
Our personal experience with Velux Sun Tunnels has been nothing short of transformative. We literally could not be happier with the results. The upstairs of our home, which once felt dark, gloomy, and somewhat depressing, has been utterly revitalized. It now radiates a bright, airy, and happy atmosphere that has completely changed how we feel about and interact with our second floor. This investment in natural light has paid dividends in terms of mood, energy savings, and overall home comfort.
For those interested in exploring the larger-scale impact of Velux skylights and who have the necessary space and budget, we highly recommend reading this post about the Velux skylights we installed in our previous home. They were a beloved feature that we still fondly recall.
Other posts you may enjoy for further home inspiration:
- DIY Board and Batten Accent Wall: An Easy Method
- How to Install a Stair Runner for Instant Elegance
- Stunning Board and Batten Wall Ideas to Elevate Your Interiors
- Interior Trim Color Ideas that Aren’t White: A Bold Guide
- 8 Interior Design Mistakes You Don’t Even Know You are Making (and How to Fix Them)
- How to Choose Paint Colors for Your Home: 6 Simple Tips to Follow
Curious about my personal strategy for transforming rooms and spaces within our home? Explore Designer in a Binder®, an affordable and straightforward method for decorating your living spaces.
For exclusive content, behind-the-scenes glimpses, and the latest updates, be sure to subscribe to our newsletter before you go!