Are you dreaming of a fresh, modern look for your kitchen or bathroom but dreading the mess and expense of ripping out old tiles? The good news is, sometimes, you can achieve that stunning transformation by tiling right over your existing surfaces! This guide will walk you through everything you need to know about tiling over existing tile – from determining if it’s the right solution for your space to a detailed, step-by-step tutorial that ensures a beautiful, lasting finish. While it’s not always the recommended path, in specific scenarios, it can be a true game-changer for your DIY home refresh.
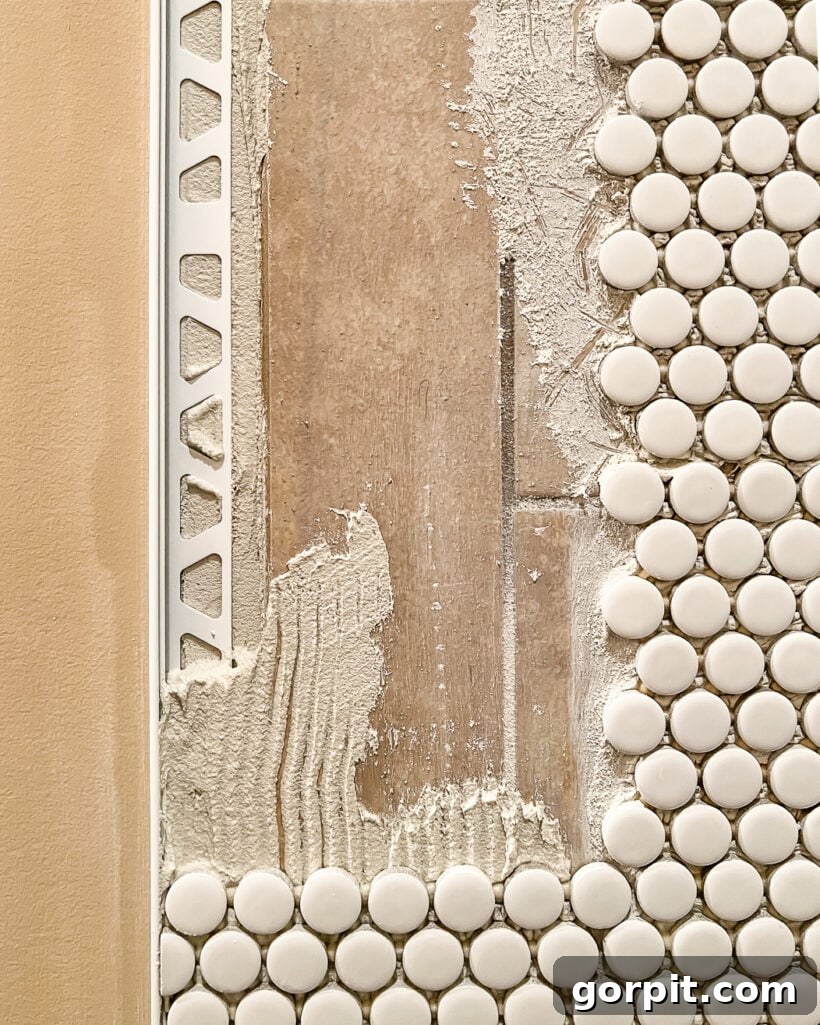
Table of Contents
When my daughter, Attley, wanted a budget-friendly bathroom makeover, I remembered a friend’s successful project. Bre from Brepurposed had tiled over existing tile in one of her bathrooms, guided by her father-in-law, a tile expert. While her project wasn’t for a shower, it sparked the idea for us. After extensive research, I’m thrilled to share all the insights and steps we learned to help you decide if this method is right for your home.
Can You Tile Over Existing Tile? Absolutely, But With Important Caveats!
Yes, it is indeed possible to tile over existing tiles. We’ve successfully done it, and the results have been fantastic. However, it’s crucial to understand that this method isn’t universally applicable. Tiling over existing tile is only a viable and wise option if your current tiles meet very specific criteria. Skipping these critical assessments can lead to costly and frustrating failures down the line. Before you even think about laying that first new tile, meticulously evaluate your existing surface:
- Firmly Attached Tiles: The foundation is everything. Your existing tiles must be completely and firmly bonded to the underlying surface. To test this, gently tap each tile with a rubber mallet or the handle of a screwdriver. Listen carefully for any hollow sounds. A hollow sound indicates a loose or poorly bonded tile. If you find any loose tiles, tiling over them is a definite NO. Any instability in the old layer will compromise the adhesion and longevity of your new tiles.
- Perfectly Level Surface: Precision is key in tiling. Your existing tile surface must be perfectly level. Use a long level across various sections of your tiled area. If the level rocks even slightly, or if there are noticeable dips, humps, or uneven grout lines, you should not tile over it. Any imperfections will be magnified with the new layer, leading to an uneven and unsightly finish.
- No Damage or Instability: Inspect your tiles thoroughly for cracks, chips, or any signs of movement. Tiling over damaged or unstable tiles is an invitation for future problems, including new cracks appearing in your freshly laid tile.
- Absence of Leaks or Moisture Issues: This is perhaps the most critical point, especially in bathrooms and kitchens. You must have absolutely no current or past leaks, nor any suspicion of moisture trapped behind your existing tiles. Even historical moisture issues can compromise the substrate and lead to mold, rot, and structural damage that will be exacerbated by covering it. We strongly recommend using a moisture meter to check for any hidden dampness. If moisture is detected, removing the old tiles and addressing the underlying issue is the only safe and responsible approach.
- Height Considerations: Be aware that adding a new layer of tile will increase the height of your floor or wall. For floors, this can create an awkward transition with adjoining rooms and may require adjustments to doors that swing over the tiled area. For walls, it can affect trim, window sills, and fixtures. Always confirm that the increased thickness won’t create functional or aesthetic problems for your space.
Remember, tiling is a skill that requires attention to detail. If you’re not confident in your ability to perform these checks or execute the tiling process correctly, it’s always best to consult or hire a professional. DIY can save money, but improper execution can end up costing far more in repairs.
Is Tiling Over Existing Tile a Good Idea? When to Say Yes (or No)
Now that you know it’s *possible* to tile over existing tile, the more pressing question for most homeowners is, *should* you? In most cases, my answer leans towards “no,” primarily because very few existing tile surfaces are truly optimal candidates for an overlay. The stringent requirements we discussed above are often not met, making removal the safer and more reliable option.
Tiling over tile should only be considered if your project flawlessly meets *all* the aforementioned conditions. It’s incredibly tempting to view tiling over problematic existing tiles as a “quick fix” – perhaps to prepare a house for sale or to temporarily refresh a space. However, covering cracked, unstable, or moisture-affected tiles is not just a bad idea; it’s a recipe for disaster. Such issues will inevitably resurface, often magnified, leading to premature failure of your new tile installation, potential structural damage, and a far more expensive repair job down the line.
However, when your existing tile is in pristine condition – firmly bonded, perfectly level, and completely dry – then tiling over it can be an excellent, cost-effective way to update and modernize a space. This method bypasses the immense hassle, dust, and demolition waste associated with tile removal, making your project much quicker and cleaner. I particularly advocate for tiling over tile in applications such as:
- Tile Backsplashes: Often a small area, backsplashes are ideal candidates as they typically experience minimal structural stress and are usually installed on stable vertical surfaces.
- Fireplace Surrounds: Similar to backsplashes, fireplace surrounds are generally decorative and static, making them suitable for an overlay if the existing tile is sound.
- Bathroom Walls (outside shower/tub): Walls that don’t directly face water exposure can be good candidates.
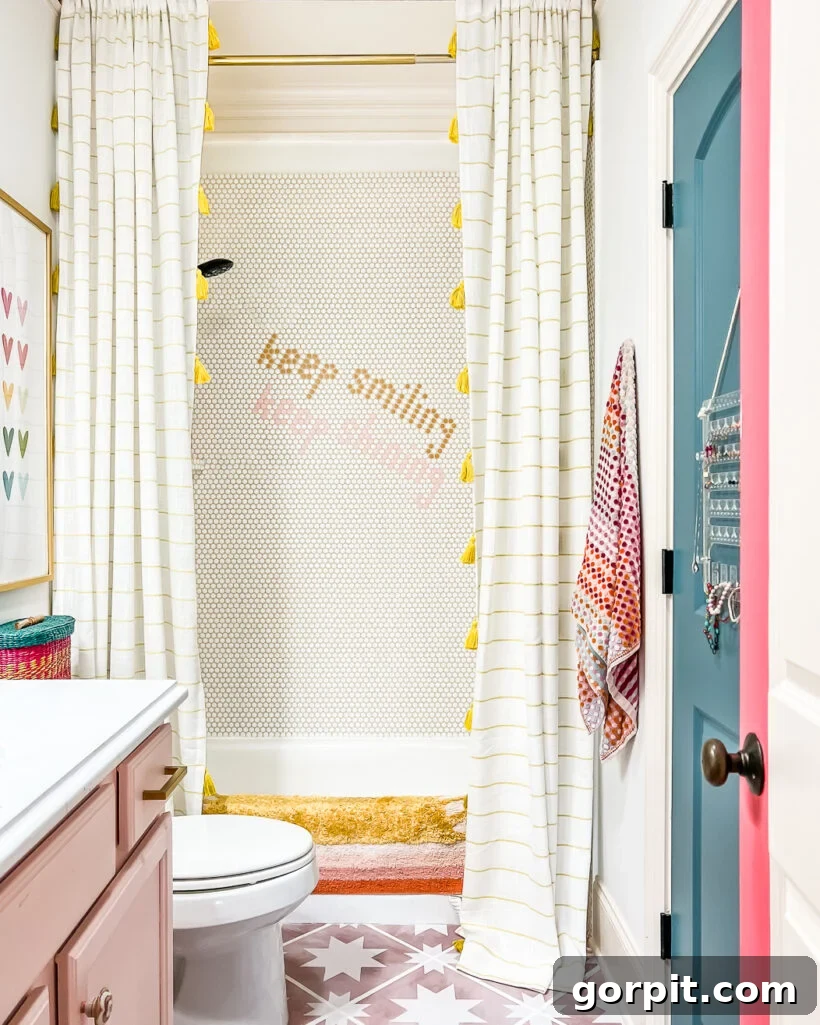
- Shower/Tub Walls (with extreme caution): As we did in our daughter’s bathroom, this can work, but only if you are 100% confident about the integrity and dryness of the existing substrate. We waited nearly two years to publish our results precisely to confirm long-term success in a high-moisture environment.
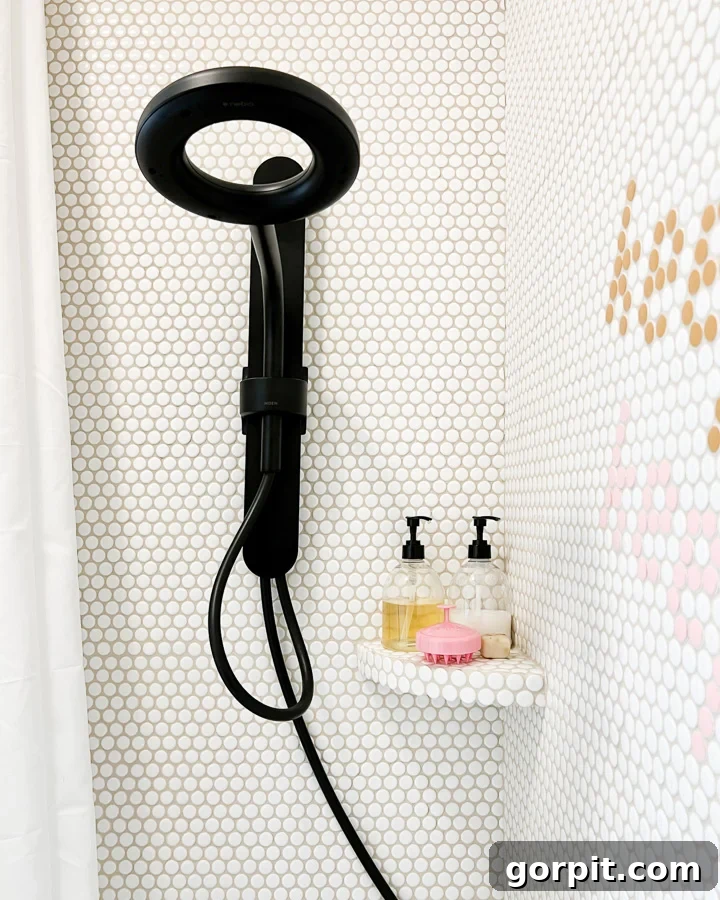
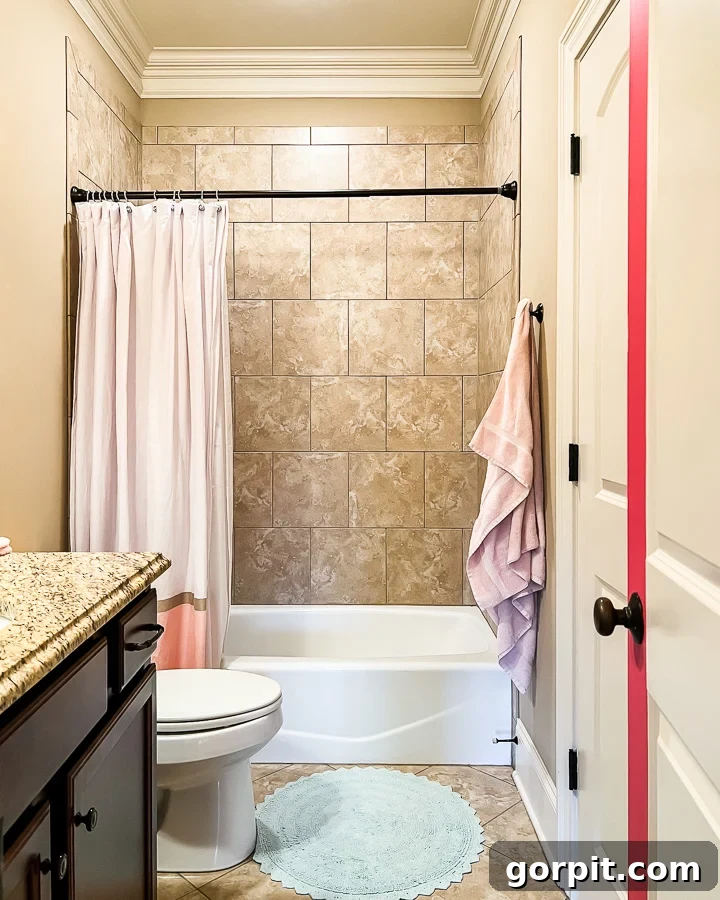
We successfully installed new penny tiles over the outdated wall tiles in our daughter’s tub/shower combo almost two years ago, and we’re delighted with the results. It was a perfect scenario because her existing tiles were perfectly sound and level. Conversely, I would never consider this method for our primary bathroom because the existing tiles there have slight unevennesses, which would compromise any new installation.
When it comes to **floor tiles**, I generally advise against tiling over existing tile due to the practical challenges of increased thickness. Doubling the floor height creates awkward transitions with adjoining rooms, often requiring significant adjustments to doors and thresholds. While we successfully installed a floating vinyl tile floor over ceramic tile in our laundry room, the nature of floating vinyl (and the use of a robust threshold) made managing the height difference much easier than traditional tile. For updating tiled floors, there are many other budget-friendly flooring alternatives I’d recommend first. For instance, in both of our daughters’ bathrooms, we achieved amazing transformations by simply using decorative tile stickers on the floors!
Potential Drawbacks: What Are the Cons of Tiling Over Existing Tile?
While the allure of saving time and effort by tiling over existing tiles is strong, it’s essential to be fully aware of the potential drawbacks. A well-informed decision means weighing both the pros and cons meticulously.
- Risk of Adhesion Failure: The most significant risk lies in improper adhesion. If your existing tiles are not perfectly stable, or if the surface isn’t meticulously prepared and primed with the correct bonding agent, your new tiles simply won’t stick properly. This can lead to tiles lifting, cracking, or becoming loose over time, negating any initial savings and requiring a complete re-do.
- Increased Thickness and Adjustments: Adding a new layer of tile inevitably increases the overall thickness of the surface. On floors, this can create noticeable, and sometimes hazardous, height differences at transitions to other rooms, often necessitating adjustments to door bottoms, door frames, and thresholds. On walls, it can affect the flushness of trim, window sills, electrical outlets, and plumbing fixtures, sometimes requiring extensions or custom solutions.
- Future Demolition Complications: While you’re avoiding demolition now, if you or a future homeowner ever decide to completely remove the tile and start from scratch, you’ll be faced with demolishing *two* layers of tile. This doubles the effort, mess, and disposal costs, potentially making a future renovation more complex and expensive.
- Weight Considerations: Adding a second layer of tile adds significant weight to the structure. While most residential structures can handle the extra load on walls and small floor areas, it’s a factor to consider, especially for larger floor spans or older homes. Ensure your floor joists can adequately support the additional dead load.
- Magnified Imperfections: Any slight unevenness or lack of flatness in the existing tile will be transferred, and often exaggerated, to the new tile layer. It’s incredibly difficult to correct underlying surface imperfections when tiling over existing material, leading to a less-than-perfect finish.
- Compromised Waterproofing (for wet areas): If you’re tiling over existing tile in a shower or other wet area, the underlying waterproofing (or lack thereof) cannot be easily assessed or remedied. Relying solely on the existing, potentially compromised, waterproofing is a major risk for moisture intrusion and mold growth. This is why thorough moisture detection is paramount.
Our Successful Project & Long-Term Results
We took the plunge and tiled over the existing shower tiles in our daughter’s bathroom, and we couldn’t be more thrilled with the outcome. The project was completed on November 21, 2021, and as of today, July 13, 2023, everything is holding up perfectly. We’ve encountered absolutely no issues – no loose tiles, no cracks, and no signs of moisture or compromised adhesion.
I deliberately waited a significant amount of time before sharing this post. It was important to me to provide an honest, long-term review. Had the tiles started to fail after six months, I would have felt terrible encouraging others to follow suit. But with nearly two years of flawless performance in a high-traffic, high-moisture environment like a shower, I feel completely confident in our results and the method we employed, given the strict conditions were met.
Essential Materials Needed for Tiling Over Tile
If you’ve carefully assessed your existing tile and decided to proceed with tiling over it, you’ll need some specialized products in addition to your standard tiling tools and materials (mortar or thinset, trowels, grout, spacers, buckets, sponges, tile cutter, etc.). The key difference when tiling over existing tile is preparing the smooth, non-porous surface of the old tile to ensure proper adhesion for the new layer.
- ECO Prim Grip Multipurpose Bond-Promoting Primer: This product is absolutely critical. It’s specifically formulated to create a rough, grippy surface over smooth, difficult-to-bond-to substrates like existing ceramic or porcelain tiles. It acts as a bridge, allowing your new mortar to adhere securely. Without it, your new tiles will likely fail.
- Application Tools: A painter’s tray, a roller (we used a standard paint roller), and a disposable paintbrush are essential for applying the primer. Choose tools you don’t mind discarding afterward, as the primer is tenacious.
- Latex Gloves: Protect your hands from the primer and other tiling materials.
- TSP (Trisodium Phosphate) or Heavy-Duty Degreaser: For thorough cleaning and degreasing of the existing tile surface before priming.
- Moisture Meter: (As discussed earlier) An indispensable tool for verifying there’s no hidden moisture behind your existing tiles.
Beyond the primer, you’ll also need to carefully consider how you’ll finish the edges of your new tile installation, especially since it will be thicker than a single layer. This requires thoughtful planning for transitions:
Edge Trim or Threshold:
- If you’re tiling over an existing tile floor, you will need to find a specialized threshold that can accommodate the increased height and create a smooth, safe transition to the adjoining room. Standard thresholds may not be tall enough.
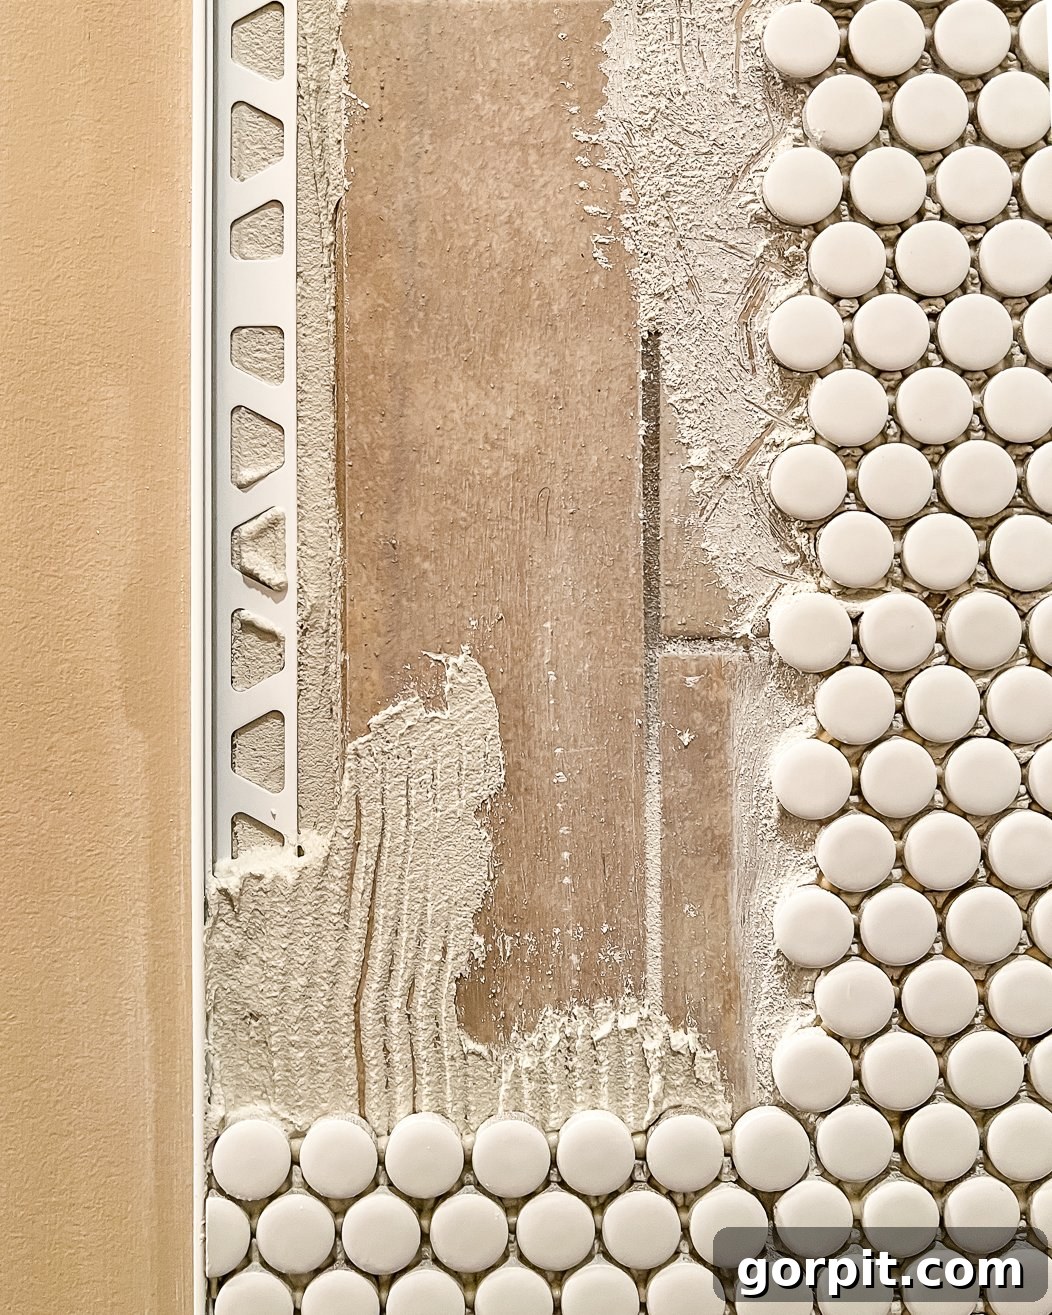
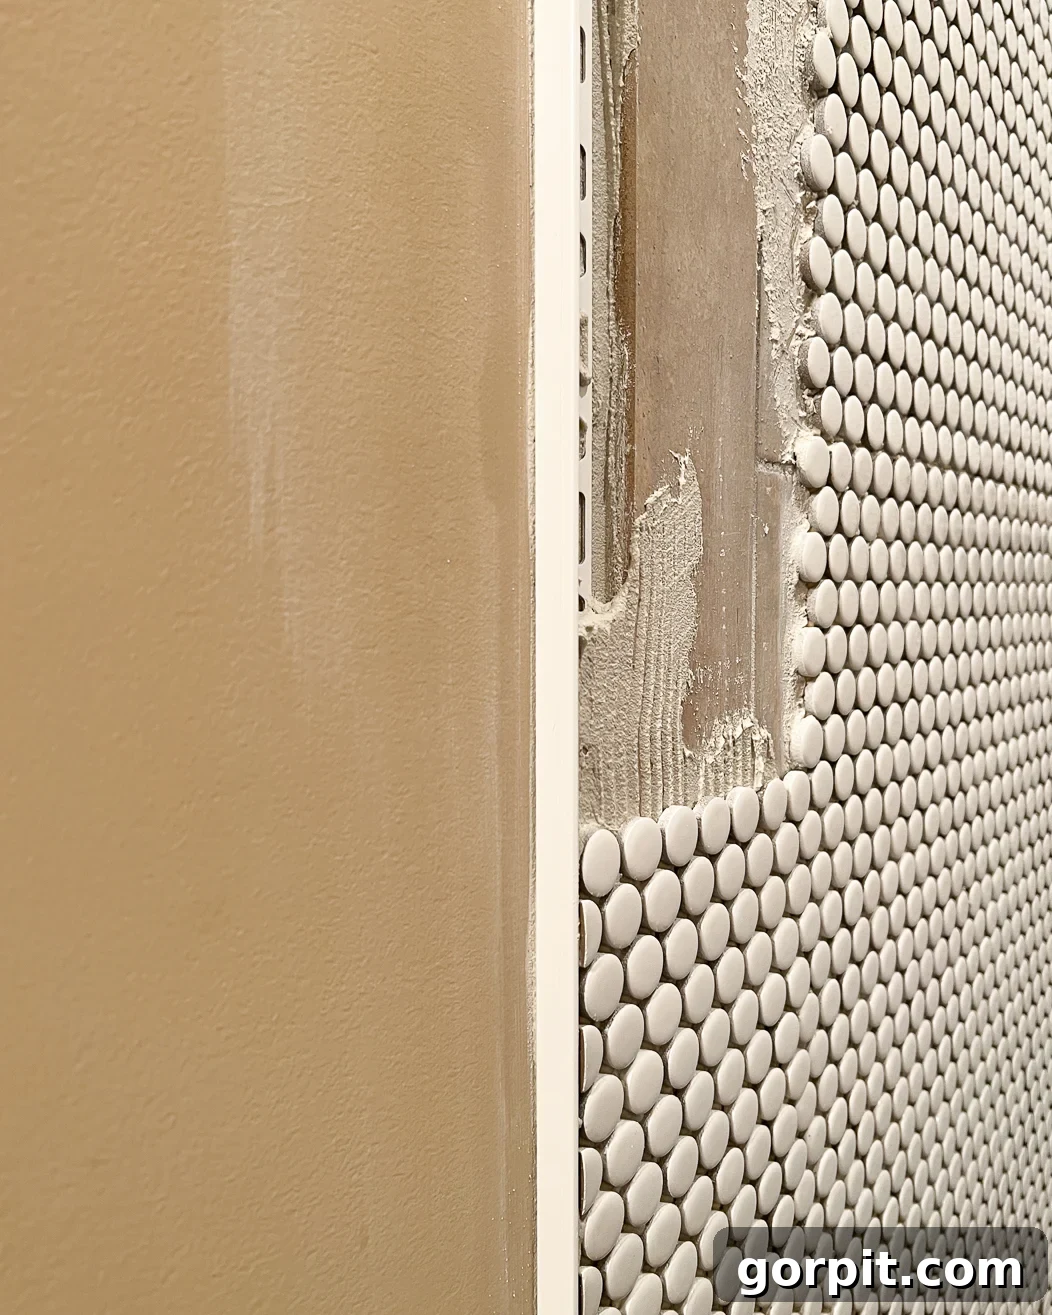
- For wall installations, especially in showers or along exposed edges, an edge trim is essential. This trim will cover the raw edge of your new and old tiles. You’ll need to select a size that precisely fits the combined thickness of your existing tile + approximately 1/8″ for mortar + the thickness of your new tile. For our project, a 1/2″ Schluter edge trim was perfect, but tile thicknesses vary, so measure carefully.
We used a Schluter 1/2-inch edge trim, which comes in a variety of colors and finishes. We opted for white to seamlessly blend with our new penny tile, creating a clean, professional look.
How to Tile Over Tile: A Step-by-Step Tutorial for a Lasting Finish
This tutorial focuses specifically on tiling over existing tile on shower and tub walls, mirroring our successful project. While the principles apply to other areas, wet environments demand extra diligence. This guide is based on our experience and extensive research, including insights from reputable contractors. For a visual overview, many online resources offer video tutorials on standard tiling techniques which can complement these steps.
Time Needed: Approximately 2 days (allowing for drying times).
A Note on Waterproofing Membranes: We generally followed this tutorial from a highly reputable contractor. However, we intentionally did *not* apply a separate waterproofing membrane, contrary to his suggestion. Our research indicated that a membrane might interfere with the crucial bond-promoting primer’s ability to adhere properly to the existing tile. The contractor suggests the membrane as a barrier against any moisture *behind* your existing tiles. Because we meticulously checked with a moisture meter and were 100% certain there was no moisture behind our old tiles, we omitted the membrane. If we had detected *any* moisture, we would have stopped the project, ripped out the old tiles, and addressed the underlying issue rather than simply tiling over it. This decision highlights the importance of the pre-assessment phase.
-
Step 1: Thoroughly Prepare the Existing Surface
Proper preparation is non-negotiable for successful adhesion. Begin by meticulously cleaning your existing tiles. We used TSP (Trisodium Phosphate), a powerful degreaser, to remove all soap scum, grime, oils, and residues. Ensure the tiles are sparkling clean and completely dry. Any lingering contaminants will prevent the bonding primer from adhering correctly. After cleaning, take the time to protect your surrounding areas. Cover your bathtub, shower pan, or floor with heavy-duty plastic sheeting and a plastic tarp to shield them from primer drips, mortar, and grout. Secure the sheeting with painter’s tape to create a watertight barrier.
-
Step 2: Apply the Specialty Bonding Primer
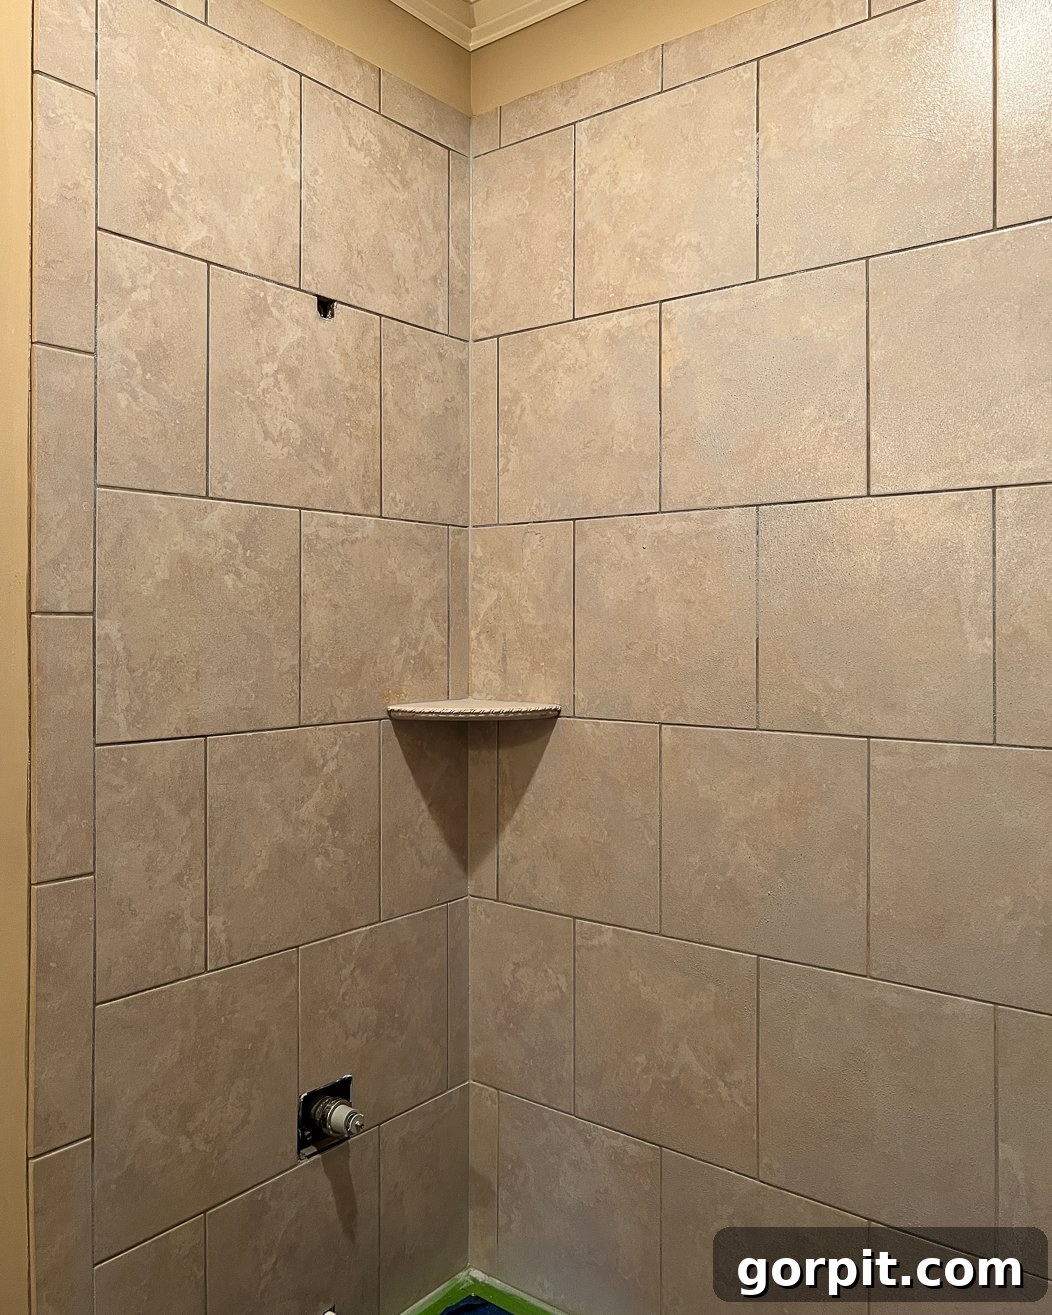
This is the most critical step for ensuring long-term success. Pour the ECO Prim Grip into a painter’s tray. Using a paint roller, apply a thin, even coat of the primer across your entire existing tile surface. For areas the roller can’t reach, such as corners, edges, and intricate details, use a paintbrush. Work carefully, as this product is quite runny and can drip. Ensure thorough coverage, but avoid thick puddles. The primer will appear somewhat translucent, adding a grayish haze to your tiles, which might make you think you haven’t applied enough. Don’t be fooled! Once it dries (check product instructions for specific drying times, usually a few hours), run your hand over the surface. You’ll notice a distinct, gritty texture – this is the microscopic aggregate that provides the necessary mechanical bond for your new mortar and tiles. It’s this “grit” that will allow your new tile to adhere securely and support the added weight.

The subtle grayish haze after applying ECO Prim Grip – don’t worry, the grit is there! -
Step 3: Measure, Cut, and Install Your Edge Trim
In most standard tiling scenarios, especially with straight-edge tiles, you would install your tile edge trim first and then tile *away* from it towards the corners. This ensures a clean, consistent starting point. However, because we were installing small, round penny tiles and wanted to achieve a specific aesthetic at the corners, we chose to work in the opposite direction – from the corner *towards* where the edge trim would eventually go. We installed the edge trim only when we were ready to tile up to it. Both approaches are valid, but if you’re using tiles with straight edges, the former method is generally easier for alignment. Measure the lengths needed for your edge trim pieces and cut them precisely using a hacksaw or an appropriate metal cutting tool. Secure the trim in place with thinset as you lay your adjacent tiles, ensuring it’s perfectly level and plumb.
A Schluter 1/2-inch edge trim provides a clean, professional finish. -
Step 4: Install Your New Tile and Grout
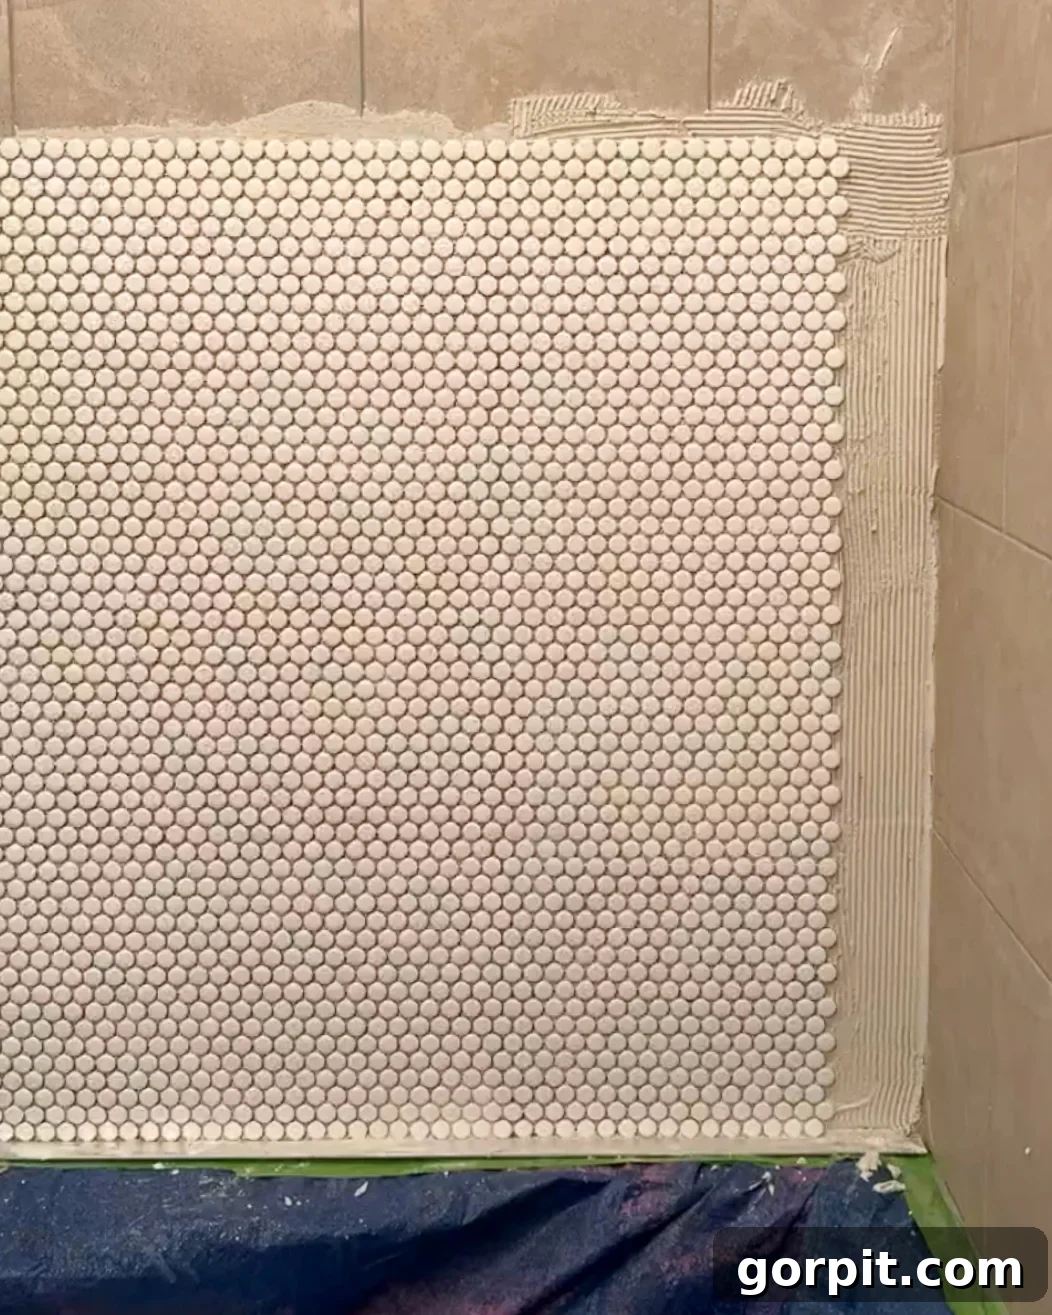
With the surface primed and edge trim considered, proceed with installing your new tile as you normally would. This isn’t a comprehensive tiling tutorial, but here are general pointers: plan your layout carefully, mix your thinset to a peanut butter consistency, use the appropriate trowel size for your tiles, apply thinset evenly, back-butter larger tiles for maximum adhesion, use tile spacers for consistent grout lines, and periodically check for level and plumb. Once all tiles are installed and the thinset has fully cured (typically 24-48 hours, check product instructions), prepare and apply your grout according to manufacturer instructions. Work in small sections, pressing the grout into the joints with a rubber float. Clean off excess grout with a damp sponge, rinsing frequently, until the tiles are clean. Allow the grout to cure fully before proceeding.
Carefully installing new penny tiles over the primed existing surface. -
Step 5: Finish with Caulk
After your tiling and grouting are complete and fully cured, the final essential step is caulking. Apply a bead of high-quality, mold-resistant silicone caulk along all seams, joints, and changes of plane where two different surfaces meet or where movement might occur. This includes where the tiled wall meets the bathtub, where the tile meets the ceiling, and around any fixtures. Caulk provides a flexible, waterproof seal, preventing moisture intrusion and accommodating any slight movement. If you need a refresher on the technique, you can find many online tutorials for how to caulk a bathtub effectively. We also applied a thin bead of caulk where the Schluter edge trim met the wall to ensure a clean, seamless finish.
There you have it! Tiling over existing tile, when done correctly and under the right conditions, is an excellent method to refresh your space without the significant undertaking of removing old tiles. This step-by-step guide aims to equip you with the knowledge to make an informed decision and confidently complete the job for a beautifully updated home. Enjoy your refreshed space!
More BATHROOM DESIGN IDEAS
SEE ALL BATHROOM POSTS
-
Tips for a Budget Bathroom Makeover + Attley’s Bathroom Reveal
-
Cute Bathroom Signs for Your Doors & Walls
-
25 Genius Powder Room Ideas
-
Tiling Over Existing Tile: What You NEED To Know
-
15+ DIY Bathroom Remodel Ideas to Save You Money
-
Everything You Need to Know About Tile Stickers
Curious about my unique approach to transforming rooms and spaces throughout our home? Be sure to explore Designer in a Binder®, my proven system for achieving stylish results on a budget.
For exclusive content, behind-the-scenes glimpses of new projects, and valuable home design tips delivered straight to your inbox, don’t forget to subscribe to our newsletter before you go!