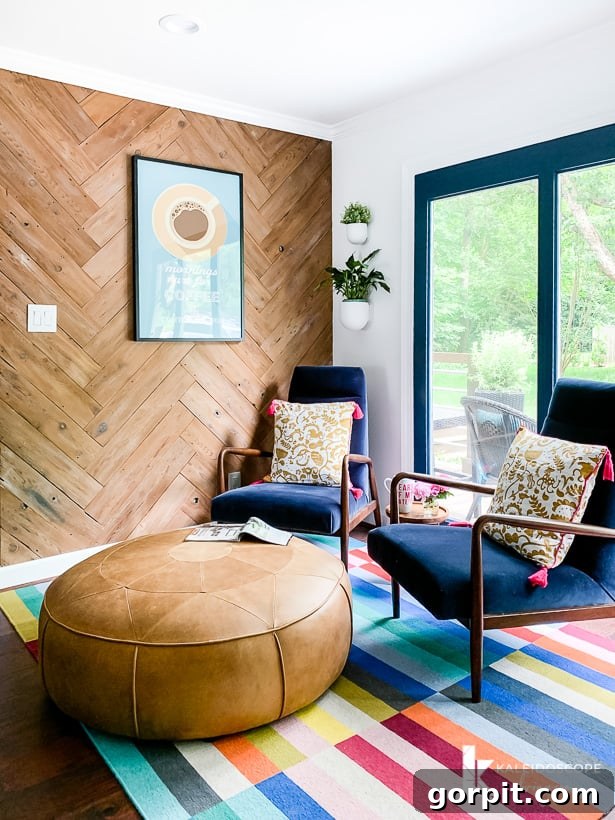
Transform Your Space: An Easy Guide to Creating a Stunning DIY Herringbone Reclaimed Wood Plank Wall
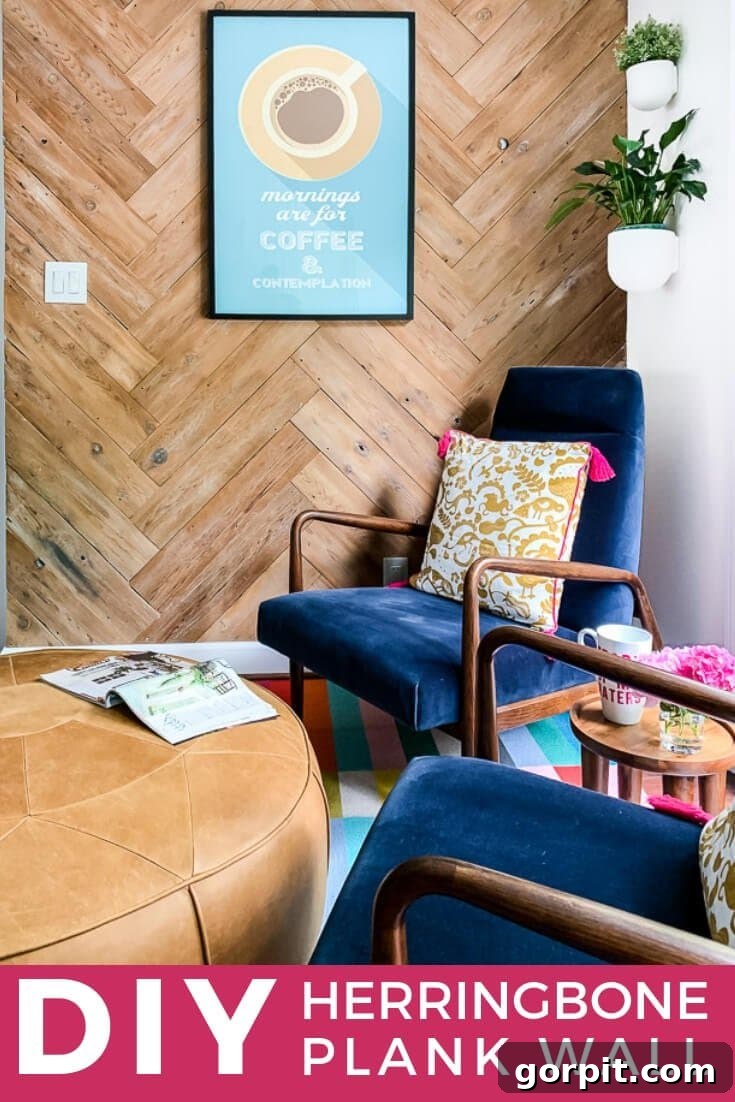
Hello, fellow DIY enthusiasts! We’re diving into one of our absolute favorite projects today: a spectacular reclaimed wood plank wall, meticulously arranged in an eye-catching herringbone pattern. This isn’t just a simple decor update; it’s a timeless statement piece that adds warmth, texture, and character to any room. While this particular project has been a cherished part of our home for years, evolving with our various renovations, its charm remains undiminished. We’ve refreshed this guide with updated insights, answering your most common questions, and showcasing new photos that highlight its enduring appeal.
You see, this herringbone plank wall is more than just a wall treatment; it’s a testament to the power of resourceful DIY. It all began back in 2014, when we embarked on a budget-friendly cosmetic makeover for our old kitchen. Our goal was to create a beautiful, functional space that we could enjoy while we meticulously saved for a complete kitchen overhaul. Little did we know, that ambitious renovation would take us a full six years to realize! The initial updates, costing less than $700, made the wait not only bearable but genuinely enjoyable, proving that significant transformations don’t always demand a hefty price tag.
This plank wall, born out of necessity and a creative spark, has since gracefully transitioned through our home’s evolution, finding its perfect niche in our newly renovated kitchen’s casual sitting area. Its journey through our home underscores its versatility and timeless design. If the unique allure of herringbone isn’t quite your style, we also recently installed the easiest DIY board and batten wall treatment ever in our new house, a fantastic alternative for creating a chic accent wall. But for those ready to embrace a project that truly stands out, let’s return to the star of the show.
Initially, I envisioned a classic, horizontally laid reclaimed wood plank wall. It was a solid plan, and I was genuinely excited about the rustic charm it would bring. Then, my incredibly insightful and resourceful husband and DIY partner casually posed a question that would elevate the entire concept: “Why don’t we try a herringbone plank wall?” My jaw practically hit the floor! I had anticipated needing to convince him to embrace a plank wall at all, so for him to suggest taking it to the next level was a delightful surprise. My answer, without a moment’s hesitation, was an emphatic YES! This spontaneous suggestion led us down a path of creative discovery, culminating in a feature wall that consistently garners compliments and continues to be a focal point in our home.
Sourcing the Perfect Reclaimed Wood for Your Plank Wall
Our DIY journey always begins with a crucial first step: material sourcing, especially when working on a tight budget. For our kitchen refresh, financial prudence was paramount. We initially brainstormed various avenues for obtaining reclaimed wood. Pallets were a consideration, offering a free or low-cost option, though often requiring extensive cleaning and de-nailing. We also scoured Craigslist and local online marketplaces for promising leads. While these options hold potential, we weren’t entirely thrilled with the quality or consistency of what we found.
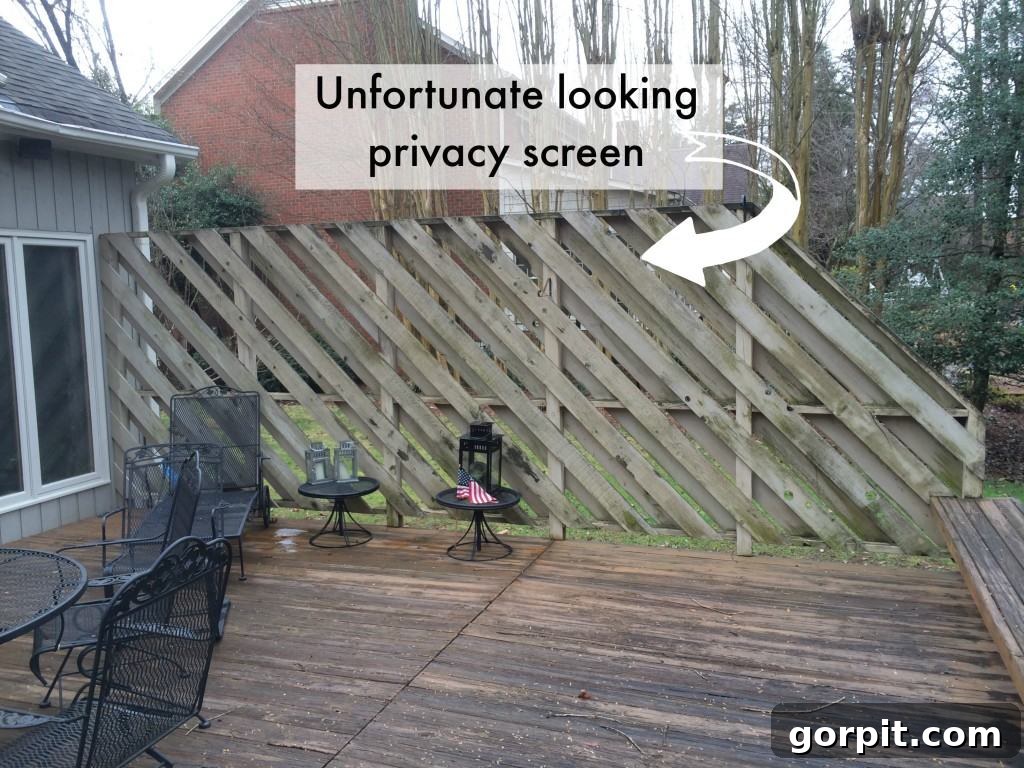
Then, another stroke of genius from my husband emerged: why not repurpose the dilapidated privacy fence on our deck? It was an absolute eyesore, practically begging to be torn down. This seemingly humble source turned out to be a goldmine! Not only was it free, but it was also solid, weathered wood, full of character and ready for a new life. This approach perfectly aligns with the principles of sustainable living and budget-friendly DIY, transforming waste into a beautiful asset.
When you’re embarking on your own reclaimed wood project, consider a variety of sources. Beyond old fences and pallets, look into local salvage yards, architectural antique stores, or even construction sites (always ask permission first!). Facebook Marketplace and neighborhood groups can also yield treasures. Each source comes with its own considerations regarding cost, quality, and the amount of preparation needed. Choosing wood that aligns with your desired aesthetic and budget is key to a successful project. For us, the old privacy fence provided a story, a unique patina, and the perfect foundation for our herringbone masterpiece.
From Grungy to Gorgeous: Preparing Your Reclaimed Wood
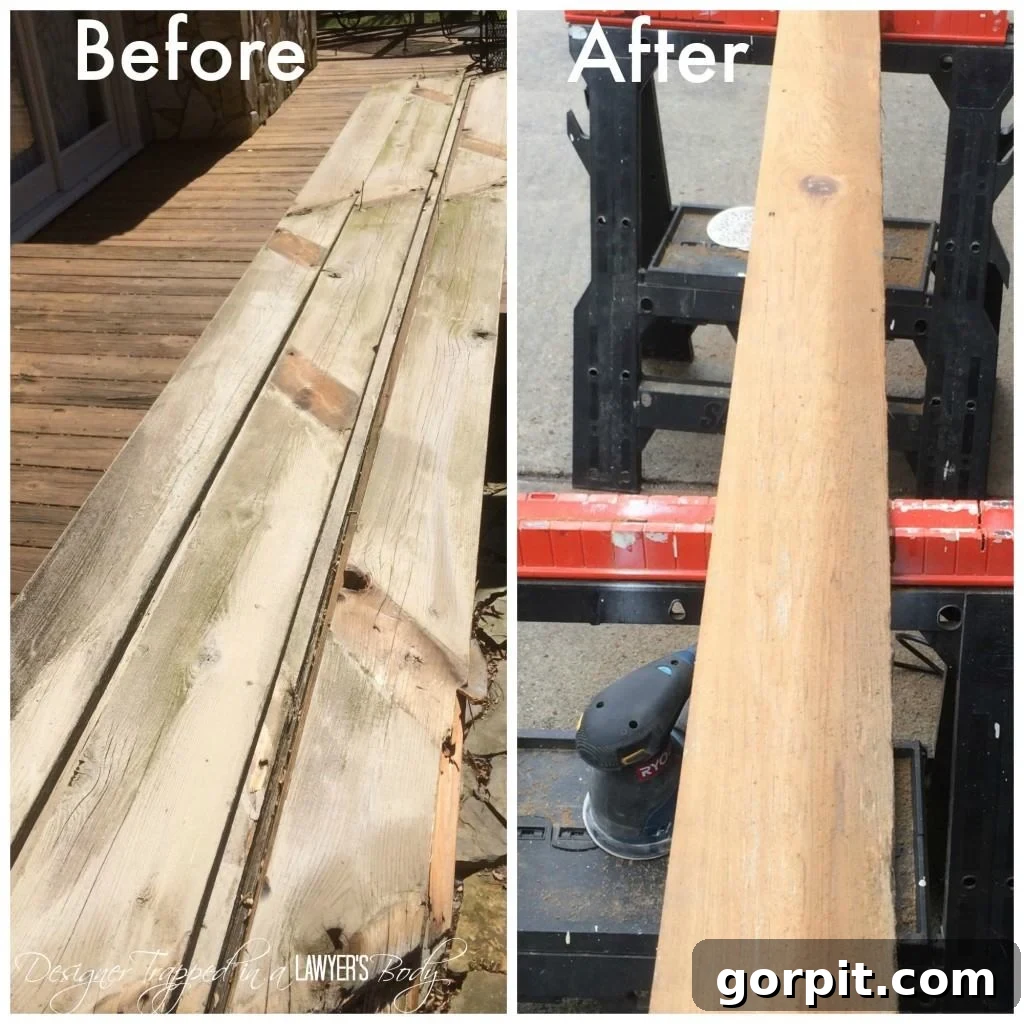
Once we had our precious haul of reclaimed fence planks, the real work began. My husband, Joe, meticulously set about removing each board and initiating the cleaning and sanding process. This stage, while undeniably messy, is absolutely crucial for transforming weathered, worn wood into something truly beautiful and suitable for an indoor setting. The initial appearance of the planks, obscured by years of old paint, dirt, and green algae, gave little hint of the stunning material hidden beneath.
After a thorough cleaning – often involving power washing or vigorous scrubbing to remove surface grime and loose particles – the boards were allowed to dry completely. Then came the sanding. Starting with a coarser grit sandpaper (around 60-80 grit) to remove stubborn paint and smooth out rough patches, we gradually moved to a finer grit (120-180 grit) for a smoother finish. The revelation was incredible: beneath the layers of neglect lay gorgeous, aromatic cedar, rich in natural tones and unique grain patterns. This transformation reinforced our belief that every piece of reclaimed wood holds untapped beauty, just waiting to be uncovered.
With the raw beauty of the cedar exposed, it was time to consider finishes. We experimented with various stains and sealants, testing them on scrap pieces to find the perfect look. Our goal was to enhance the natural character of the wood without overpowering it. We ultimately settled on a simple yet effective combination: a coat of tung oil for natural protection and a very, very light dry brushing of grey paint. Tung oil penetrates the wood, highlighting its grain and providing a subtle, satin finish, while the dry brushing of grey paint added a touch of modern farmhouse charm, softening the wood’s natural tones and lending a sophisticated, muted aesthetic. This process allowed us to achieve that coveted “perfectly imperfect” look, where the wood’s history is celebrated while being updated for a contemporary interior.
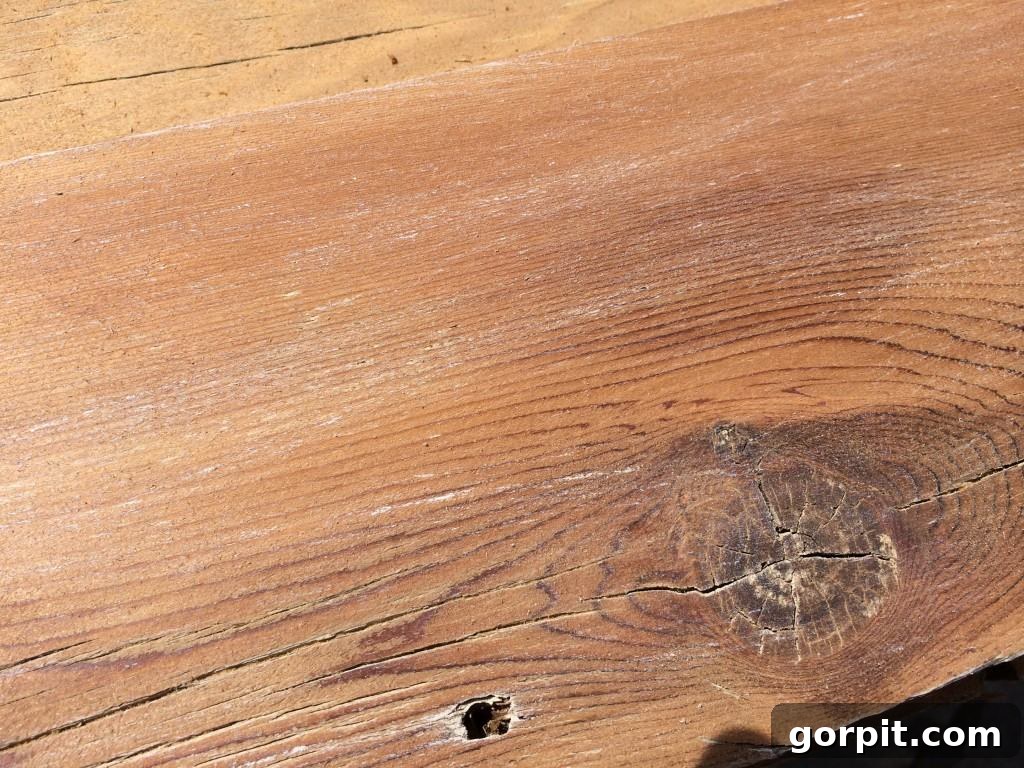
Once our wood planks were prepared to our satisfaction – each one boasting its unique character while contributing to a cohesive aesthetic – we shifted our focus to the installation. To be honest, figuring out the exact starting point and methodology for a herringbone pattern on a wall initially presented a bit of a puzzle. It required careful planning and a few moments of head-scratching. However, we persevered, learned through trial and error, and now you can reap the benefits of our experience to make your installation smooth and straightforward.
Decoding the Herringbone Pattern: Elegance in Simplicity
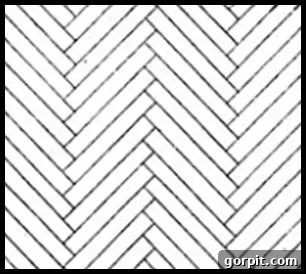
Before we dive into the nitty-gritty of installation, let’s briefly clarify what makes a herringbone pattern so distinctive and appealing. Often confused with a chevron pattern, herringbone stands apart with its unique construction. In a herringbone pattern, individual rectangular pieces are laid in a zig-zag configuration, with the end of one piece butting directly against the side of another, creating a crisp 90-degree angle. This results in a broken zig-zag effect, resembling the bones of a herring fish – hence the name. Unlike chevron, which requires pieces to be cut at an angle to meet perfectly at a point, herringbone cuts are primarily straight, making the process much more approachable for DIYers.
The beauty of the herringbone pattern lies in its dynamic visual appeal. It draws the eye, adds a sense of movement and sophistication to a space, and creates an illusion of greater depth and texture. While it might look complex and intricate, the fundamental cuts are surprisingly simple. Most of your wood pieces will be cut to the exact same length with straight ends. The only exceptions will be the pieces that meet the edges or corners of your wall, which will require precise cuts to fit perfectly. This pattern transforms a plain wall into a sophisticated focal point, perfect for adding a touch of classic elegance or rustic charm, depending on your wood choice and finish.
This post contains some affiliate links for your convenience. Your support through these links helps us continue to provide valuable content at no extra cost to you.
DIY Herringbone Reclaimed Wood Plank Wall: A Step-by-Step Tutorial
Essential Materials and Tools:
- Compound Miter Saw (or Circular Saw with a Speed Square): For making precise, repeatable straight cuts. A miter saw is highly recommended for speed and accuracy.
- Nail Gun (and Air Compressor if applicable): Expedites fastening boards securely to the wall. An invaluable tool for any large-scale DIY project.
- 24-Inch Level (or longer): Essential for ensuring your planks are perfectly straight and plumb, maintaining the integrity of the pattern.
- Speed Square: Crucial for verifying 90-degree angles and marking accurate cuts.
- Measuring Tape: For all your measuring needs, accuracy is paramount.
- Chalk Line (or long straightedge and marker): For creating precise, long lines on your wall.
- Stud Finder: To locate wall studs for secure fastening.
- Construction Adhesive (optional but recommended): Provides extra holding power and reduces reliance on nails.
- Safety Glasses and Gloves: Always protect your eyes and hands when working with tools and wood.
Installation Steps:
1) Prepare Your Wall and Establish Your Center Line: Before placing any wood, ensure your wall surface is clean and relatively smooth. While not strictly necessary, painting the wall a neutral color similar to your grout lines (if you were tiling) or a dark shade can help mask any small gaps. Next, precisely measure and find the true center of your wall both horizontally and vertically. Using your long level and a chalk line (or a straightedge and marker), draw a crisp vertical line straight down the center of your wall. This line will serve as your primary guide, ensuring your herringbone pattern is perfectly symmetrical and balanced from the outset. Repeat this process to find the horizontal center line as well, giving you a perfect crosshair to begin.
2) Cut Your Planks and Lay the Foundation: This is where the magic begins! Determine the length of your wood planks. For our project, we found that 28 inches long worked perfectly for the scale of our wall. The beauty of the herringbone pattern is that the vast majority of your planks will be cut to this exact same length with straight 90-degree ends. Cut a generous supply of these standard-length planks before you begin installation to minimize interruptions.
Grab your first two boards. These initial pieces are critical, as they set the tone for the entire wall. Butt the end of one board against the side of the other to form a precise 90-degree angle. Now, carefully align these two boards on your wall. The junction point of your 90-degree angle should align perfectly with the intersection of the vertical and horizontal center lines you marked. The center vertical line should visually bisect the angle formed by your planks.
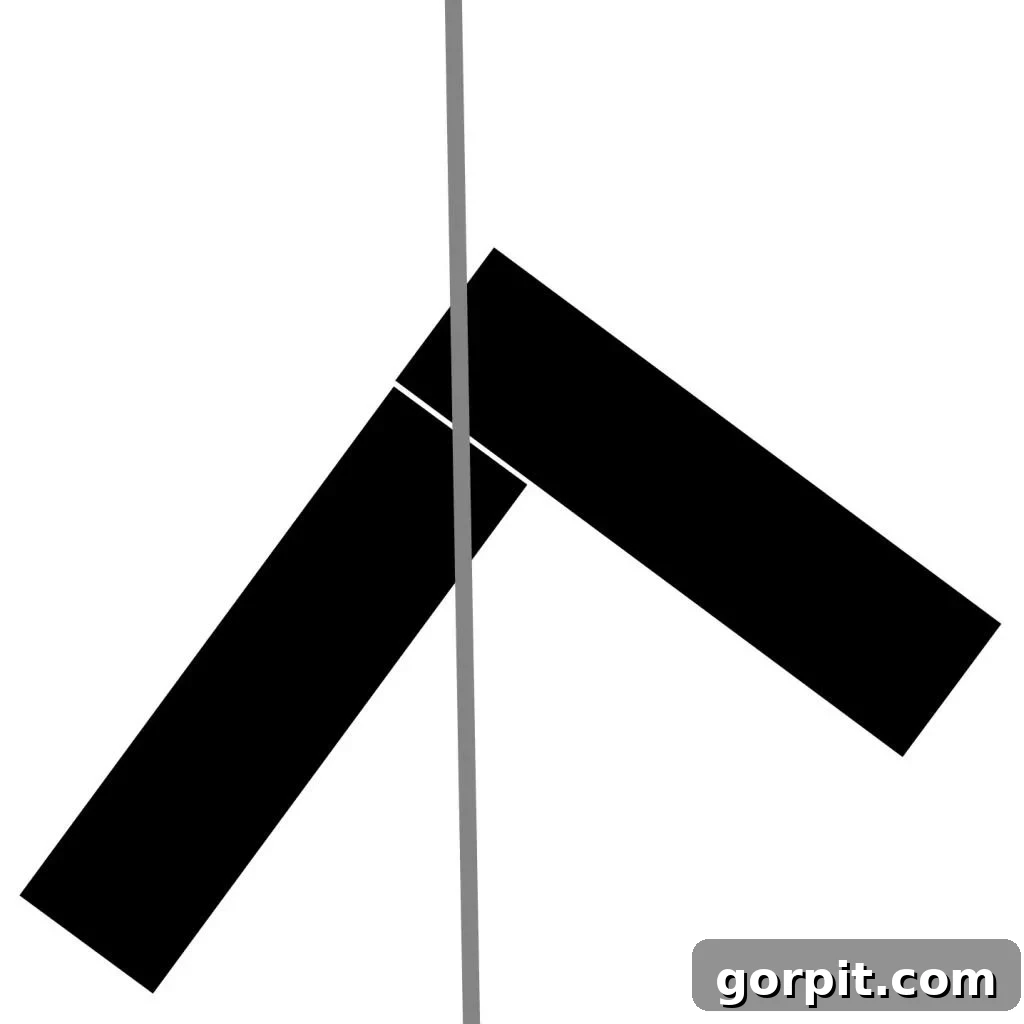
To confirm the accuracy of your 90-degree angle, place your speed square snugly into the corner created by the two boards. If it fits perfectly without any gaps or wobbling, your angle is spot on. If you’re using construction adhesive, apply a thin bead to the back of each board (keeping it away from the edges to prevent squeeze-out). Once satisfied with the alignment and angle, use your nail gun to fasten the boards securely to the wall. Aim to hit at least one stud per board to ensure maximum stability. If a nail gun isn’t available, you can certainly use a hammer and finish nails, being mindful to countersink the nail heads for a cleaner finish.
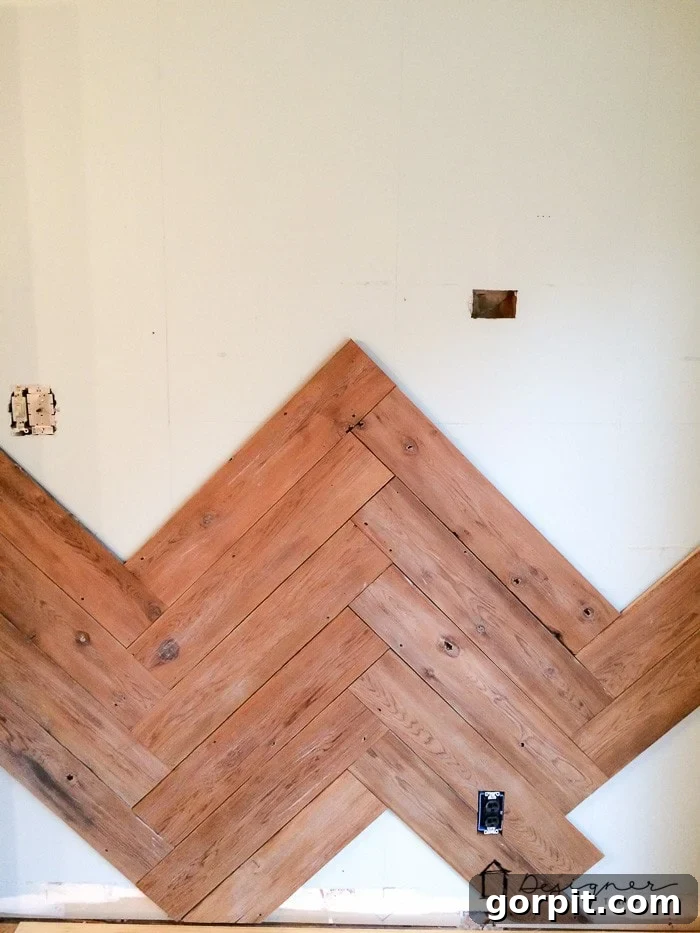
3) Continue Building Your Pattern: With your foundational planks in place, you can now systematically build out your herringbone pattern. Continue adding boards, always butting the end of a new plank against the side of an existing one to maintain that consistent 90-degree angle. Work your way outward from the center, ensuring each new pair of planks is level and the angles are correct before nailing them down. Regularly step back to assess your progress and make minor adjustments as needed. This iterative process moves surprisingly quickly once you get into a rhythm.
Working Around Obstacles: You’ll inevitably encounter obstacles like electrical outlets, light switches, windows, or door frames. For these areas, carefully measure the required cuts. Mark the dimensions precisely on your plank, then use a jigsaw or multi-tool to make the necessary cutouts. Remember to cut slightly smaller than the opening to allow for a clean fit, as switch and outlet covers will hide minor imperfections. Always turn off power to outlets before working near them. For edges and corners where planks meet the wall, you’ll need to make straight cuts to fit the remaining space. Measure each piece individually, as walls are rarely perfectly plumb or square.
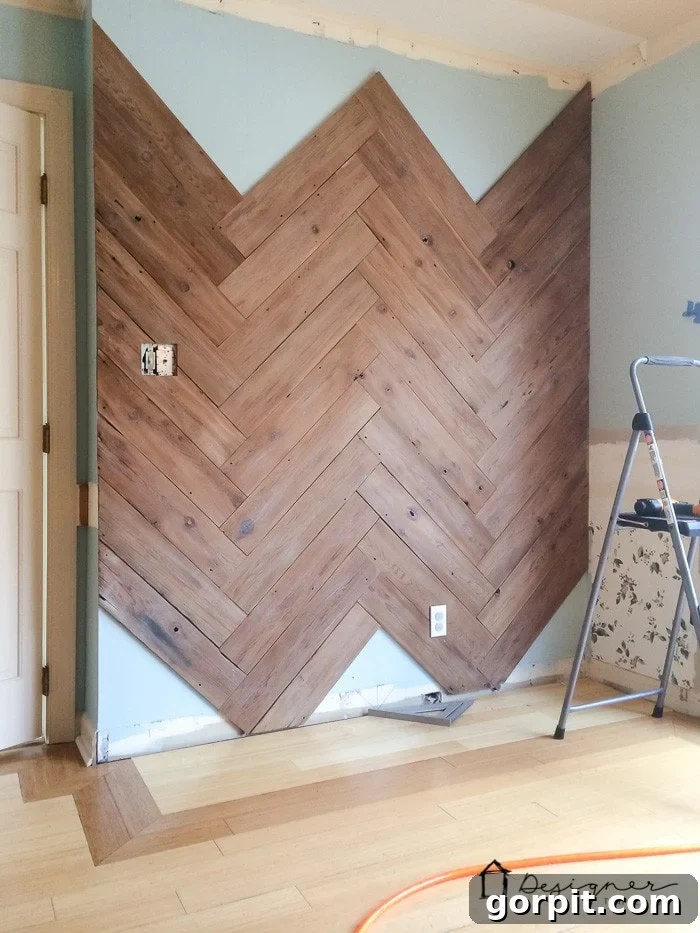
4) The Finishing Touches: Once all your planks are installed, take a moment to admire your handiwork! If desired, you can fill any visible nail holes with wood putty that matches your wood tone for a more refined look, or embrace the exposed nails for an authentic rustic aesthetic. Wipe down the entire wall to remove any dust or debris from the installation process. Consider adding trim pieces, such as quarter-round or a thin molding, along the baseboard and ceiling lines if you want a more polished transition. This also helps cover any small inconsistencies at the edges. Finally, give your stunning new plank wall a good clean, and get ready to enjoy the transformative power of your DIY efforts!
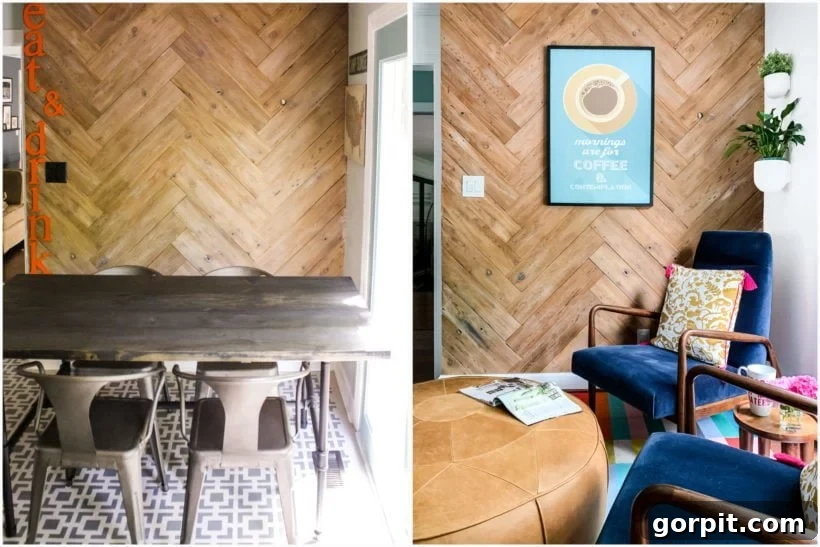
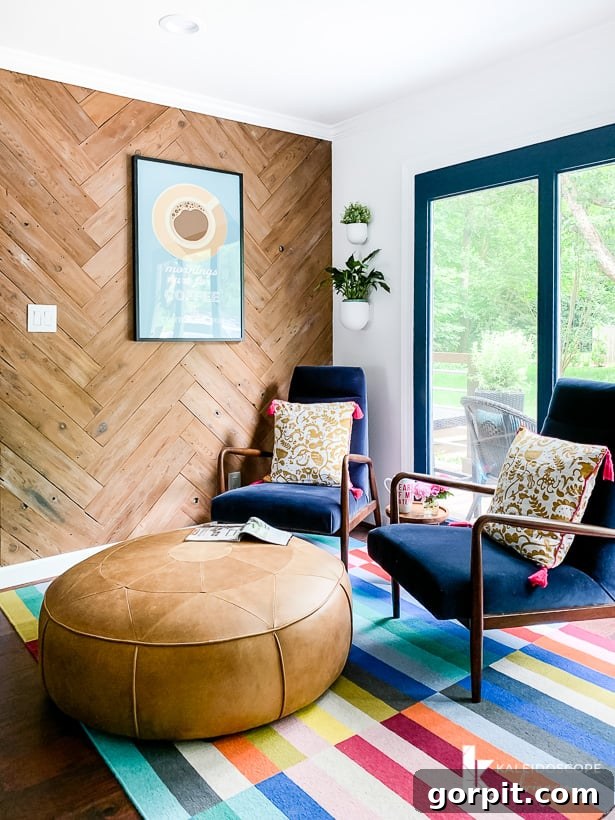
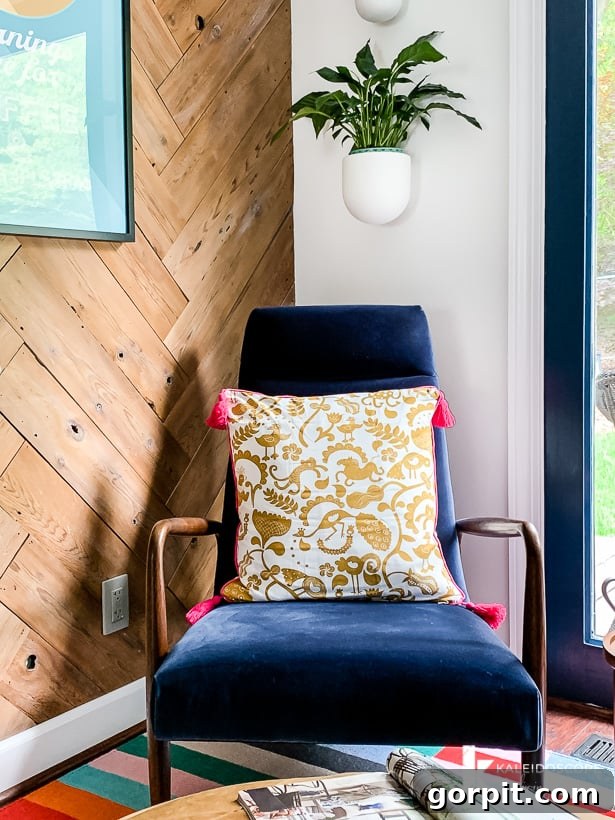
And here it is – the magnificent finished product! We truly LOVE IT! This gorgeous DIY reclaimed wood plank wall, with its captivating herringbone pattern, has not only transformed our space but has also served multiple roles in our home’s evolution. For years, it provided a stunning, warm backdrop for our kitchen table. Now, with our kitchen renovation complete and enhanced seating at our island, alongside an open flow into our dining room, this wall now beautifully anchors the casual sitting area in our new kitchen. Its enduring beauty and adaptability are a constant source of joy and a testament to thoughtful design.
This awesome herringbone wall is more than just a decorative feature; it’s an amazing focal point that injects character and style into any room. It remains one of my absolute favorite accent wall ideas we’ve ever implemented. The textural warmth of the reclaimed wood combined with the dynamic pattern creates an inviting and sophisticated atmosphere. Whether you’re looking to enhance a living room, bedroom, entryway, or even a home office, a herringbone plank wall offers unparalleled visual interest and a unique, custom feel. While this wall steals the show, remember that every element of your space contributes to the overall ambiance. Thoughtful design extends beyond just one feature.
Other inspiring posts you may enjoy for your next DIY adventure:
- The Easiest Board & Batten Accent Wall Tutorial
- DIY Wood Plank Wall
- Modern DIY Plank Wall Tutorial
- How to Paint Kitchen Cabinets Without Sanding or Priming!
- How to Choose Paint Colors for Your Home: 6 Simple Tips to Follow
- 8 Interior Design Mistakes You Don’t Even Know You are Making (and How to Fix Them)
Curious about how I approach transforming rooms and spaces in our home, from initial concept to stunning reality? Discover the systematic and budget-friendly methods within Designer in a Binder®. It’s your comprehensive guide to decorating with confidence and achieving a cohesive, beautiful home without the overwhelm.
And for those eager to receive exclusive content, behind-the-scenes sneak peeks, and our latest DIY inspirations directly to your inbox, be sure to subscribe to our newsletter before you go! Join our community of passionate DIYers and home decorators, and never miss out on our newest projects and design tips.