
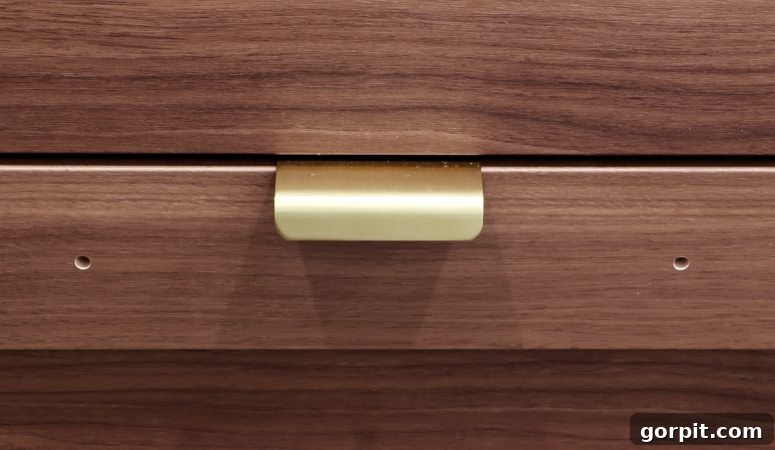

This post is sponsored by Mohawk Consumer Products. As always, all opinions are 100% mine from using Mohawk’s awesome products for myself.
For any DIY enthusiast or homeowner looking to personalize their space, the appeal of Ikea cabinets is undeniable. They offer fantastic value, a clean aesthetic, and a modular design that makes customization seem limitless. However, a common challenge arises when you fall in love with Ikea’s affordability but not with their pre-drilled holes, which typically limit you to their specific range of cabinet hardware. If you’ve ever dreamt of installing unique, stylish pulls or knobs from a different brand – perhaps something more luxurious like Rejuvenation – only to be met with incompatible hole placements, then you know the frustration. This is where a truly ingenious solution comes into play: an easy, effective Ikea cabinet door hack that liberates you from those pre-drilled constraints, allowing you to choose ANY cabinet hardware your heart desires. This game-changing method lets you seamlessly fill existing holes, transforming your Ikea cabinets into a blank canvas for your perfect design vision. Whether you’re upgrading a kitchen, designing a new bathroom vanity, or simply refreshing existing Ikea furniture, this guide will empower you to achieve a custom, high-end look without compromising on your hardware choices.
Like many design aficionados, I’m a huge proponent of Ikea cabinets. They’re a fantastic base for any renovation project, offering both functionality and a contemporary foundation. We experienced their quality firsthand when installing an entire Ikea kitchen in our previous home, and it was a decision we never regretted. So, naturally, when it came to our recently renovated twin girls’ bathroom (which you can explore here), Ikea cabinets were our top choice for the vanity. The quality and design suited our needs perfectly. The only snag? The pre-drilled holes on Ikea cabinet doors and drawers are specifically sized for Ikea hardware, which meant my dream hardware from Rejuvenation wouldn’t fit. I was determined not to let this minor detail dictate my design choices. Instead, I developed this simple yet incredibly effective hack for Ikea cabinet doors, and the results were beyond impressive. It’s an incredibly straightforward process that anyone can master, opening up a world of design possibilities. Ready to ditch the standard and embrace custom elegance? Read on for a full tutorial on how to hack your own Ikea cabinet doors and drawers!
This post contains some affiliate links for your convenience. Click here to read my full disclosure policy.
Transform Your Ikea Cabinets: The Ultimate Predrilled Hole Hack
One of the most impactful ways to elevate the look and feel of any cabinet is through its hardware. Knobs and pulls are the jewelry of your cabinetry, capable of transforming a basic unit into a statement piece. When you opt for Ikea cabinets, you’re making a smart choice for value and modern design. However, the pre-drilled holes can often feel like a creative straitjacket. You might find yourself compromising on aesthetics, choosing hardware you merely tolerate rather than truly love, simply because it fits the existing holes. This hack is not just about filling holes; it’s about reclaiming your design freedom. Imagine seamlessly integrating vintage-inspired pulls, minimalist bar handles, or bespoke ceramic knobs that perfectly complement your home’s unique style. This tutorial provides the tools and techniques to make those dreams a reality, ensuring your Ikea cabinets look truly custom and reflect your personal taste. It’s a small effort for a monumental impact on your overall interior design, especially crucial in spaces like kitchens and bathrooms where cabinet functionality and aesthetics are paramount.
Materials You’ll Need for a Seamless Cabinet Hardware Upgrade
Gathering the right materials is the first step toward a flawless finish. We’ll be using specialized products designed for wood repair and finishing, ensuring durability and a professional look. Choose colors that closely match your cabinet finish for the best results.
- Mohawk Epoxy Putty Stick: This is the star of our show. The epoxy putty stick is a two-part epoxy compound that you knead together to activate. It hardens quickly and provides a strong, durable fill for the pre-drilled holes. It comes in a variety of wood tones, so select one that is as close as possible to your cabinet’s existing color. Even if it’s not an exact match, our next steps will help blend it in perfectly. This robust filler ensures the repaired area is as solid as the original cabinet material.
- Mohawk Pro-Mark Wood Touch-up Marker: This marker is your secret weapon for fine-tuning the color match. If your epoxy putty is a little lighter than your cabinet, this marker allows you to subtly darken and blend the repaired area. The key is to start with light applications and build up the color gradually to avoid going too dark initially. It’s designed to mimic wood tones and dries quickly.
- Mohawk Brush Tip Graining Marker: For cabinets with a visible wood grain, this marker is essential for creating a truly invisible repair. It allows you to mimic the natural grain pattern of your cabinet, making the filled hole virtually disappear into the surrounding surface. Select a color that complements the darker lines of your cabinet’s grain, adding an authentic visual texture to the repair.
- A leveler card or old credit card: This simple tool is crucial for ensuring a perfectly flush repair. You’ll use it to scrape off any excess epoxy putty, leaving the surface smooth and even with the cabinet door. Its rigid edge provides the precision needed for a professional finish.
- A small dish of soapy water: Essential for preventing the epoxy putty from sticking to your fingers or the leveler card during application and smoothing. A few drops of liquid dish soap in a couple of ounces of water will do the trick. This acts as a lubricant, making the putty much easier to work with.
- A sharp knife: Used for cutting small, manageable pieces of the epoxy putty stick. A utility knife or craft knife works perfectly, ensuring clean cuts for precise measurements of the putty.
Step-by-Step Guide to Filling Predrilled Cabinet Holes
While the concept might seem daunting, the actual process is incredibly straightforward. Follow these detailed steps for a professional-looking repair that will make those pre-drilled holes vanish, paving the way for your chosen cabinet hardware.
Preparation is Key: Before you begin, ensure your cabinet doors and drawers are clean and free of dust or grease. A quick wipe-down with a damp cloth and then drying thoroughly will suffice. Set up your workspace in a well-lit area, and have all your materials within easy reach. The epoxy putty has a limited working time, so being organized will help ensure a smooth, stress-free process. Consider doing a test patch on an inconspicuous area if you’re new to working with epoxy.
- Prepare Your Soapy Water Mixture: Pour about 2 ounces of room-temperature water into a small dish and add a tiny amount of liquid dish soap – just a few drops are enough. Stir it gently to create a slightly sudsy solution. This mixture will be your invaluable aid in keeping the epoxy putty from sticking to your hands and tools, allowing for cleaner, more precise application. Having it ready from the start is crucial for efficient workflow.
- Activate and Knead the Epoxy Putty: Using your sharp knife, cut a small, manageable piece from your Mohawk Epoxy Putty Stick. The size should be sufficient to fill one or two holes without being excessive – remember, a little goes a long way, and you want to avoid waste given the working time. Now, with your fingers, begin to knead the putty vigorously. You’ll notice the two distinct colors blending together. Continue kneading until the color is completely uniform, meaning there are no streaks or separate shades visible. This uniform blending is critical for proper curing and strength. As you knead, you’ll feel the putty warming up – this indicates the epoxy is activating. If the putty starts to become sticky on your fingers, dip them briefly into your prepared soapy water and continue kneading. Remember, the working life of the epoxy is quite short – typically around 6 minutes after you start mixing – so work efficiently once it’s activated.
- Fill the Holes and Level the Surface: Once the epoxy putty is uniformly mixed and warm, firmly push a sufficient amount into each pre-drilled hole using your fingers. You want to slightly overfill the hole, ensuring there’s enough material to create a flush surface. Immediately after filling, take your leveler card or an old credit card. Hold it at a slight angle and firmly scrape across the filled hole, removing any epoxy that protrudes higher than the cabinet surface. Your goal is a perfectly smooth, level repair that is flush with the existing cabinet door. Pay close attention to achieving an even surface, as any bumps will be visible. If the epoxy begins to stick to your card, simply dip the edge of the card into your soapy water mixture and continue smoothing. Repeat this process for all holes, working quickly within the epoxy’s short working time to ensure consistency.
- Allow for Curing: After successfully filling and leveling all the holes, it’s crucial to allow the epoxy putty to cure completely. This hardening process ensures the repair is durable and ready for the next steps. Give the filled areas at least 20 minutes to set. For optimal strength and a long-lasting repair, it’s often beneficial to allow even more time, perhaps an hour or two, or even overnight, especially if you plan to drill new holes nearby. Resist the urge to touch or sand the area prematurely, as this can compromise the cure.
- Refine Color with a Touch-up Marker (Optional but Recommended): Once the epoxy is fully cured and hard, assess the color match. If the filled area appears slightly lighter or slightly off from your cabinet’s color, grab your Mohawk Pro-Mark Wood Touch-up Marker. Gently apply a small amount of the marker ink directly onto the repaired area. The trick here is to start light. Immediately after applying, use your finger to gently blend the ink into the epoxy and surrounding cabinet surface. You can always add more layers to deepen the color and achieve a better match, but removing excess is much harder once it dries. I personally went a little too dark on my first attempt, but even then, the repair was still incredibly discreet from a distance. Start subtly and build up the color until it seamlessly blends with your cabinet’s hue. If your epoxy putty was already a perfect match, you can skip this step entirely.
- Mimic Wood Grain with a Graining Marker (Optional): For cabinets with a distinct wood grain, this step is key to achieving an invisible repair. Select your Mohawk Brush Tip Graining Marker in a color that matches the natural grain lines of your cabinet. With a very light touch, draw fine lines across the filled area, mimicking the direction and pattern of the surrounding wood grain. The goal is to create subtle, natural-looking streaks. Immediately after applying a few lines, gently smudge or blend them with your finger to soften the edges and integrate them into the cabinet’s finish. This step adds incredible realism and makes the repaired area truly disappear to the naked eye, even upon closer inspection.
- Consider a Top Coat (Optional): For most applications, especially on cabinet doors, the filled area is small enough that a separate top coat isn’t strictly necessary for durability, as the epoxy itself is quite robust and designed to withstand normal wear and tear. However, if you desire extra protection, particularly for high-traffic areas like kitchen cabinets or if your cabinets have a high-gloss finish that you want to match, you certainly could apply a clear top coat over the repaired holes. Use a small artist’s brush for precision, applying a thin, even layer of a compatible clear sealant or polyurethane. Always test on an inconspicuous area first to ensure compatibility and desired finish. Allow it to dry thoroughly according to the product instructions.
The Incredible Transformation: Enjoy Your New Hardware Freedom!
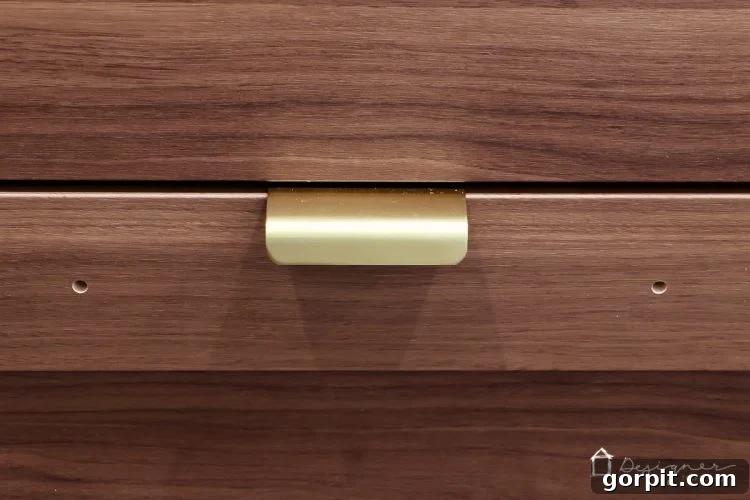
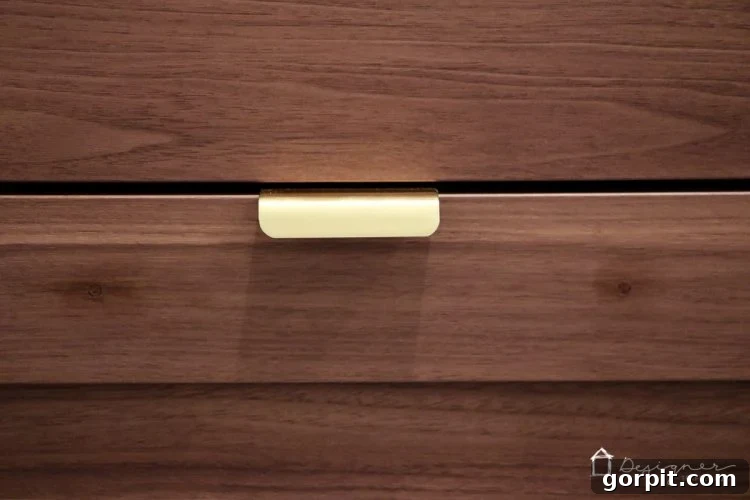
That’s all there is to it! You’ve successfully filled those restrictive pre-drilled holes, creating a smooth, unblemished surface ready for your chosen hardware. When you examine the repaired areas on the Ikea cabinet doors and drawers up close – especially in direct, harsh light designed to highlight them, as shown in the “after” pictures below – you might be able to detect the repair if you’re actively searching for it. However, step back even a little, and those previously limiting holes are GONE. This simple hack truly works wonders, giving you the freedom to install any cabinet hardware you desire, without being confined by Ikea’s standard offerings. Woo hoo! It’s an empowering feeling to achieve a completely customized look that truly reflects your personal style and design vision. No more compromises on hardware, just pure design freedom!
 |
 |
Here’s the stunning result when I capture the full perspective with my camera, showcasing the seamless integration of new hardware and the overall polished look of the renovated space.
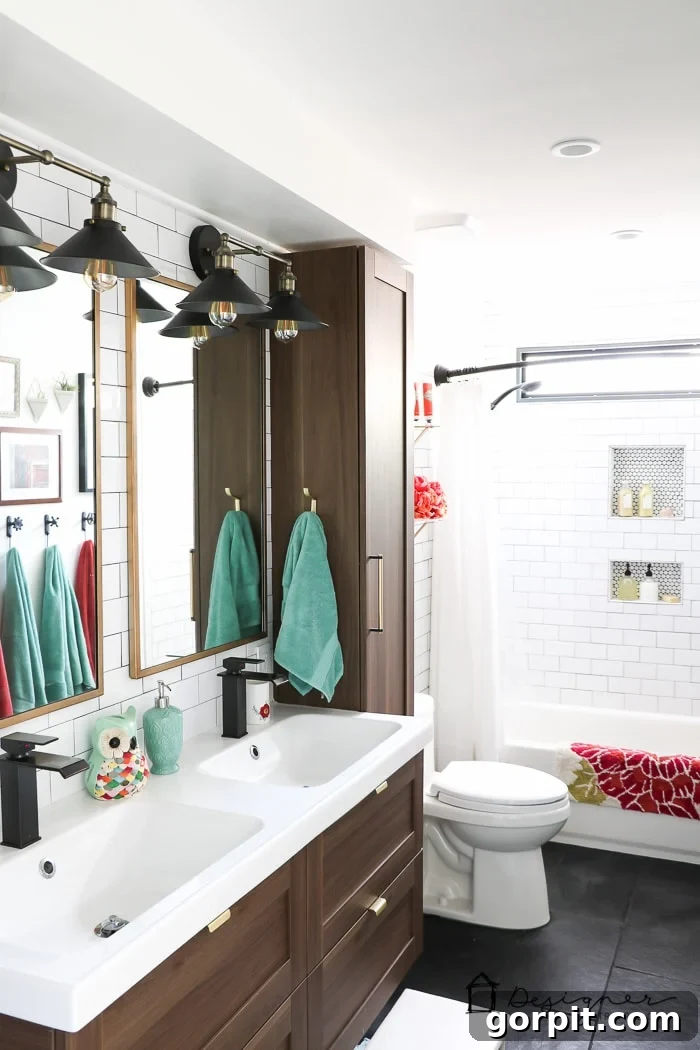
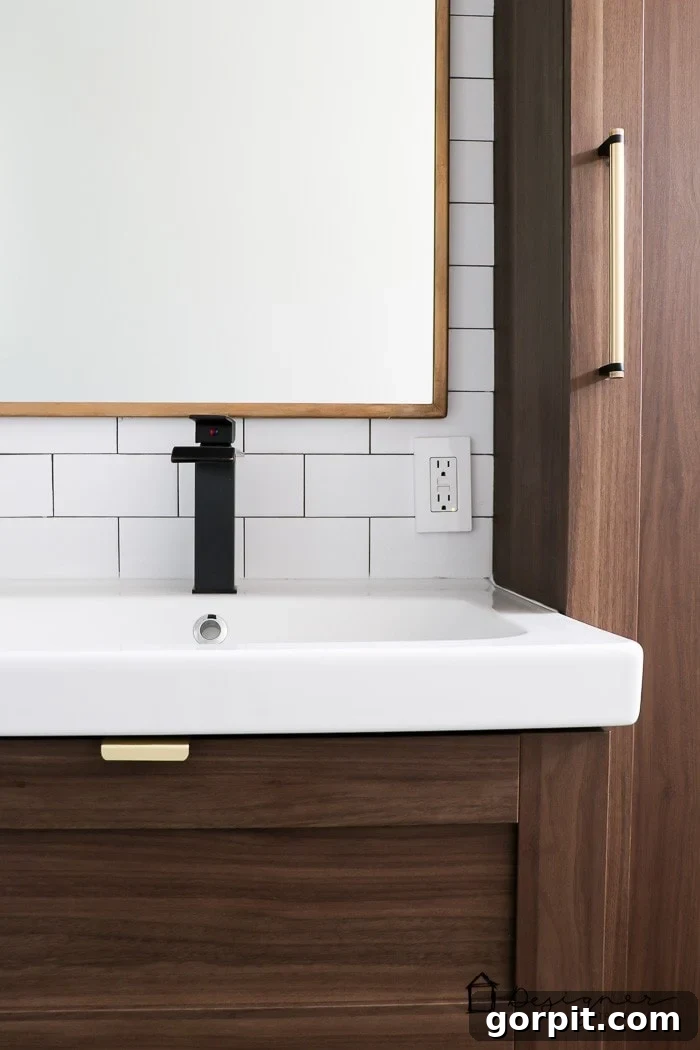
Pretty awesome, isn’t it? The ability to personalize your Ikea cabinets with the hardware of your choice truly elevates their aesthetic and makes them feel bespoke. This hack not only provides a practical solution but also adds significant value to your home by allowing for a truly customized interior. If you’re inspired by this transformation and want to see how these newly customized cabinets fit into the larger picture, feel free to check out the full details of our DIY bathroom remodel by clicking here. Discover how simple, strategic DIY projects can dramatically enhance your home and reflect your unique style!