

Transform Your Space: The Ultimate Guide to Converting Recessed Lights to Pendant Lights
Recessed lighting, often called “can lights,” serves a functional purpose, providing ambient illumination that blends seamlessly into the ceiling. However, there are times when these discreet fixtures fall short of your design vision or functional needs. Perhaps you have too many recessed lights in a single area, or they are positioned in ways that detract from your home’s aesthetic. Maybe you simply crave a different style, a statement piece, or more focused task lighting. If you’ve found yourself wishing to swap out those ubiquitous can lights for something with more character, like a stunning pendant fixture, you’re in luck! This comprehensive guide will walk you through the surprisingly simple process of converting a recessed light to a pendant light, allowing you to beautifully update your home’s lighting without extensive renovation.

We’re Heather and Dave from The Heathered Nest, and we’re excited to delve into the world of electrical upgrades with you today. Before we dive into the step-by-step instructions, a crucial safety note: working with electricity can be hazardous. Serious injury can occur from electrical shock. If you are not confident in your basic electrical wiring skills or uncomfortable at any point during this DIY project, please consult a qualified electrician. Your safety is paramount, and it’s always wise to know your limits when dealing with household electricity.
Why Convert Recessed Lighting to Pendant Lights?
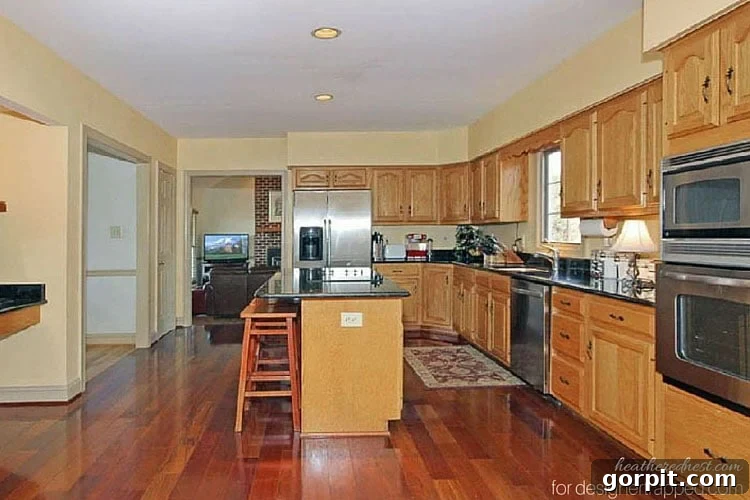
When we first moved into our current home, we encountered a common design challenge: an abundance of recessed lights throughout the house. While ample lighting is generally a good thing, can lights aren’t always the ideal choice for every space. For instance, in our kitchen, a row of recessed lights directly above the island created a sterile, almost institutional atmosphere, rather than the warm, inviting culinary hub we envisioned. The aesthetic just didn’t align with the cozy, stylish kitchen we wanted to create.
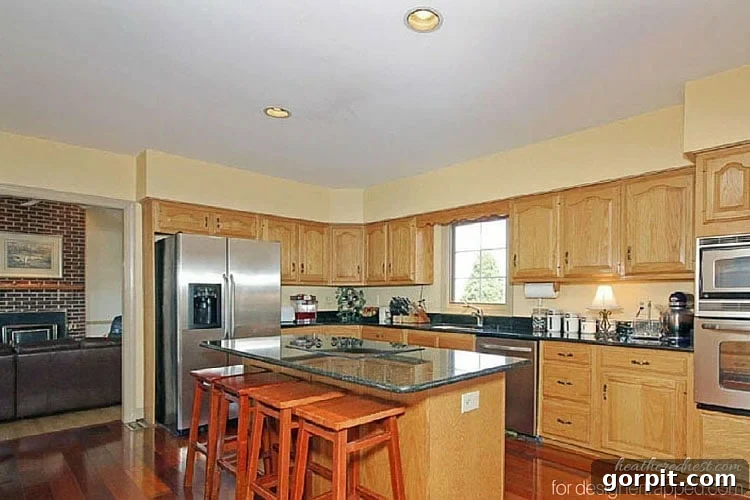
Initially, I considered a full replacement: removing the existing recessed fixtures and installing new chandeliers or traditional pendant lights. Having installed recessed lighting before, I anticipated a straightforward, albeit time-consuming, process. However, a closer inspection revealed a significant hurdle. Our can lights were “new work” recessed lighting kits, meaning they were rigidly supported by the ceiling joists. Extracting these would require cutting into the drywall, removing the fixtures, patching the holes, and then performing a new installation. The thought of extensive drywall repair and the associated mess was enough to make us reconsider this labor-intensive approach. It simply wasn’t worth the effort or the potential for damage.
This challenge led me to explore alternative solutions online, specifically “how to convert a recessed light to a pendant light.” To my delight, I discovered the existence of recessed lighting conversion kits! These ingenious kits provide a simple, elegant solution, transforming your existing recessed light housing into a standard junction box from which you can hang virtually any pendant light you desire. This discovery was a game-changer, eliminating the need for complex demolition and rewiring. With these simple pendant conversion kits, we were able to effortlessly transition our kitchen island from bland can lights to beautiful mini chandeliers, completely changing the room’s character and functionality.
This post contains some affiliate links for your convenience. Click here to read my full disclosure policy.
How to Convert a Recessed Light to a Pendant Light: A DIY Tutorial
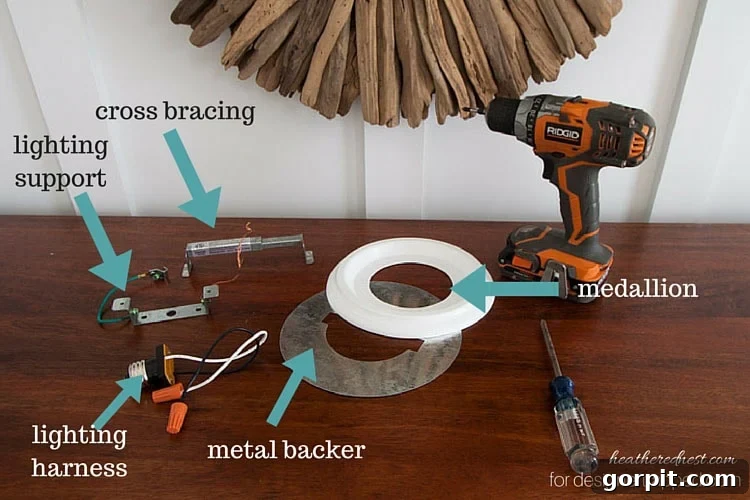
Upgrading your lighting doesn’t have to be a daunting task involving electricians and drywall repairs. With a specialized recessed light conversion kit, you can easily transform your existing can lights into stylish pendant fixtures. This DIY project is perfect for enhancing the ambiance and aesthetic appeal of your kitchen island, dining area, entryway, or any space where you desire a more decorative and focused light source. Follow these steps to achieve a professional-looking upgrade.
Essential Supplies for Your Recessed Light to Pendant Conversion:
- Recessed Light Conversion Kit: This is the core component that makes the magic happen. Ensure it’s compatible with your existing recessed light size (usually 5 or 6 inches).
- Phillips head screwdriver: For various screws in the kit and pendant light.
- Power screwdriver or drill: Speeds up the process, especially for tightening screws into the ceiling.
- Pendant Light: The fun part! Choose a fixture that complements your decor.
- The options are endless! For our project, we opted for mini-chandeliers, which added a touch of elegance. However, you could also select more traditional pendant lights, such as a sleek drum pendant light for a modern look, or an industrial pendant light for a contemporary, edgy vibe. Consider the size of your space, the desired illumination, and your personal style when making your selection.
- Voltage Tester (highly recommended for safety)
- Ladder or sturdy step stool
Step-by-Step Guide to Converting Your Recessed Light:
Before you begin any electrical work, always prioritize safety. This project is straightforward, but caution is key.
1) Prioritize Safety: Turn Off Power at the Breaker
Locate your home’s electrical service panel (breaker box). Identify the circuit breaker that controls the light fixture you’ll be working on and switch it to the “OFF” position. To confirm the power is off, flip the light switch for that fixture a few times. For an extra layer of safety, use a non-contact voltage tester to verify there is no electricity flowing to the fixture before proceeding. Never work on a live circuit.
2) Prepare the Recessed Light Housing
Carefully unscrew the light bulb from the recessed can light. Next, remove the trim kit, which is the decorative ring that frames the light. Most trim pieces are held in place by torsion springs or clips and can be gently pulled down and out. Once the bulb and trim are removed, you should be left with just the bare recessed light housing (the “can”) visible in the ceiling.
3) Install the New Lighting Harness
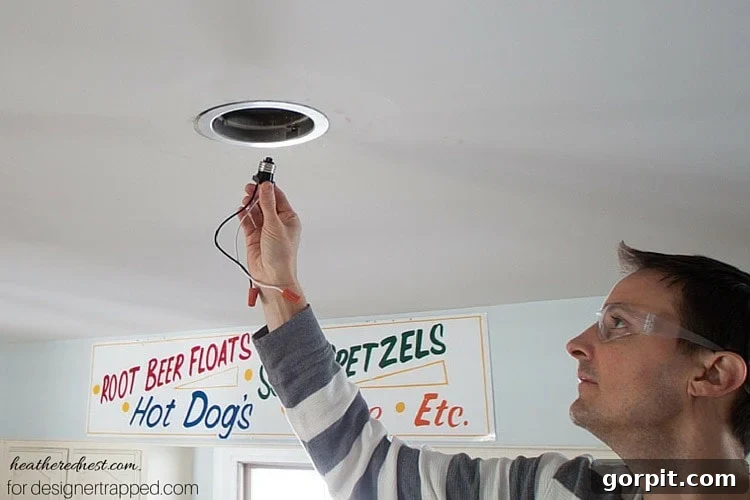
Take the new lighting harness from your conversion kit. This component typically features a standard screw-in base on one end and wiring connections on the other. Screw the base of this new harness directly into the existing socket where the recessed light bulb was previously installed. Ensure it’s snug but do not overtighten.
4) Secure the Cross Bracing Piece
Now, take the cross bracing piece from your kit. This is a crucial support element designed to fit securely within the recessed housing. It is fully adjustable to accommodate various can light sizes. Extend the bracing arms until they fit snugly inside the recessed housing, pressing firmly against the interior walls. The goal is to get it tight enough to hold itself in place without additional screws initially. This hands-free placement makes the next step considerably easier. Once positioned, tighten the central screw on the bracing to set its length and ensure it’s firmly expanded within the can.
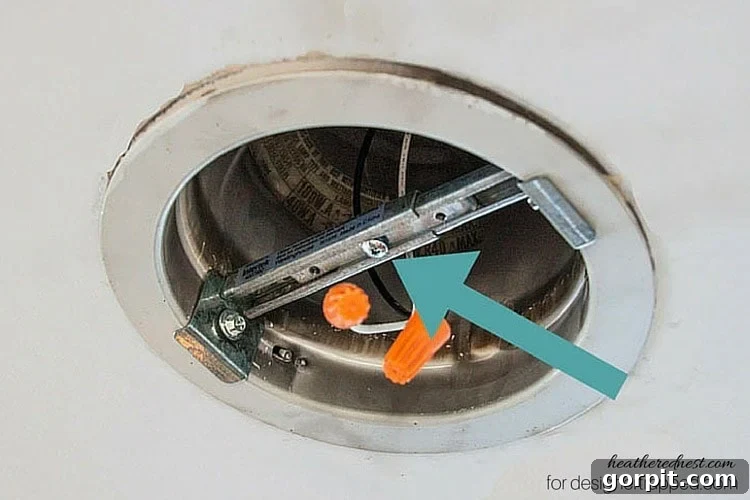
5) Fasten the Cross Brace to the Housing
With the cross brace now securely fitted, use the two screws provided in the conversion kit to permanently attach it to the sides of the recessed housing. Drive these screws firmly to create a stable and reliable mounting point for your new pendant fixture. This step ensures the entire assembly is robust and capable of supporting the weight of your chosen pendant light.
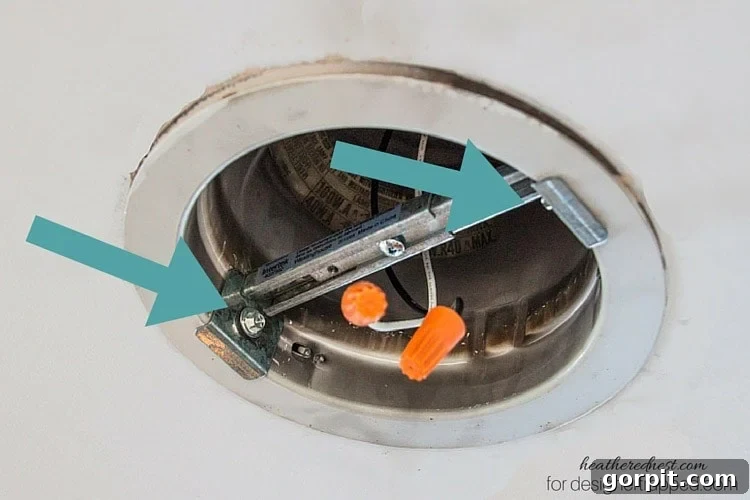
6) Attach the Lighting Support Bracket
Next, you’ll attach the lighting support bracket (sometimes called a mounting plate or canopy bracket) to the newly installed cross brace. This piece is what your new pendant light will ultimately hang from. Typically, this involves aligning holes and securing it with just two screws. Make sure it’s centered and tightly fastened. This bracket now effectively transforms your recessed light into a standard electrical junction box, ready for your new fixture.
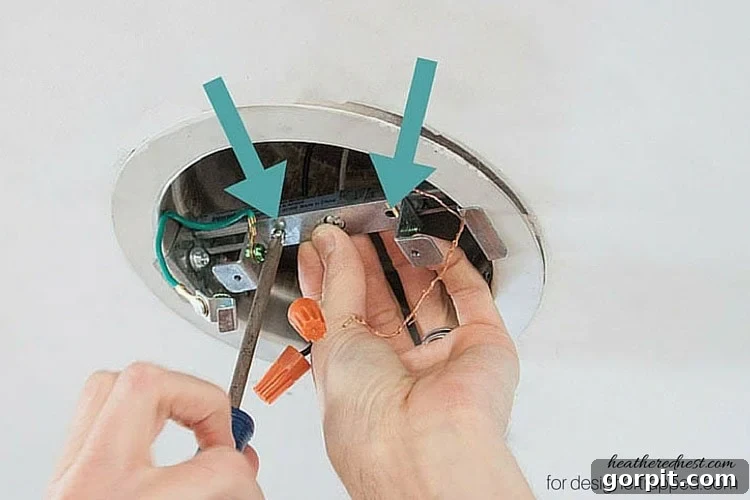
As part of the lighting support, you will notice two ground wires. The green insulated wire is designed to ground the conversion kit assembly to the existing recessed light housing, preventing electrical hazards. The bare copper wire is your primary ground wire for the new pendant light you will install in the next steps.
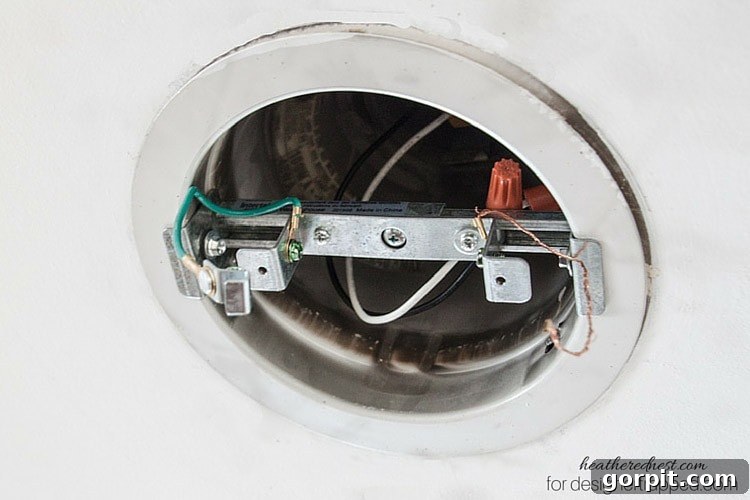
7) Connect the Ground Wire to the Housing
Connect the green ground wire from the conversion kit to the metal of the existing recessed light housing. Your kit should include a clip or a green screw for this purpose. This connection is vital for safety, ensuring the entire metallic structure of the conversion kit is properly grounded.
8) Install the Ceiling Medallion (Optional but Recommended)
Many recessed light conversion kits come with a decorative ceiling medallion to cover the larger opening of the recessed can and provide a finished look. If you choose to use it, first install the metal backer plate (if provided) onto the lighting support bracket. Then, position the medallion over the backer and secure it according to the kit’s instructions, often with small screws or by twisting it into place. This medallion helps create a seamless transition from the ceiling to your new pendant light.
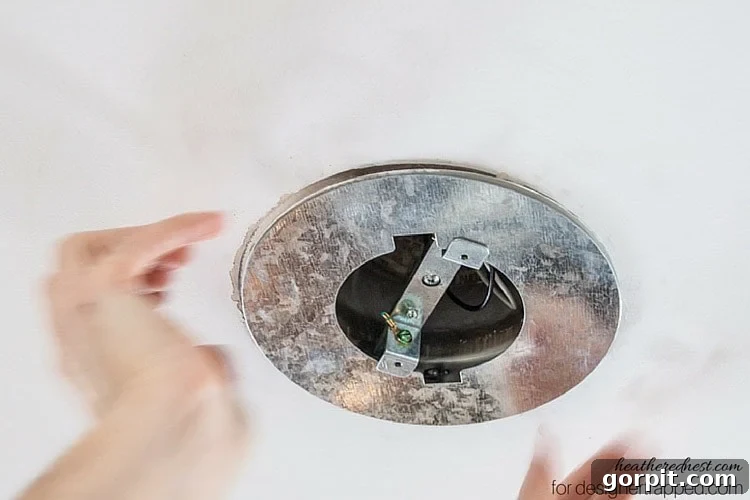
Quick Tip: If your medallion is a paintable material, it’s highly recommended to paint it the same color as your ceiling *before* you install it. This ensures clean lines and avoids having to tape off and paint around a newly installed fixture, saving you time and ensuring a professional finish.
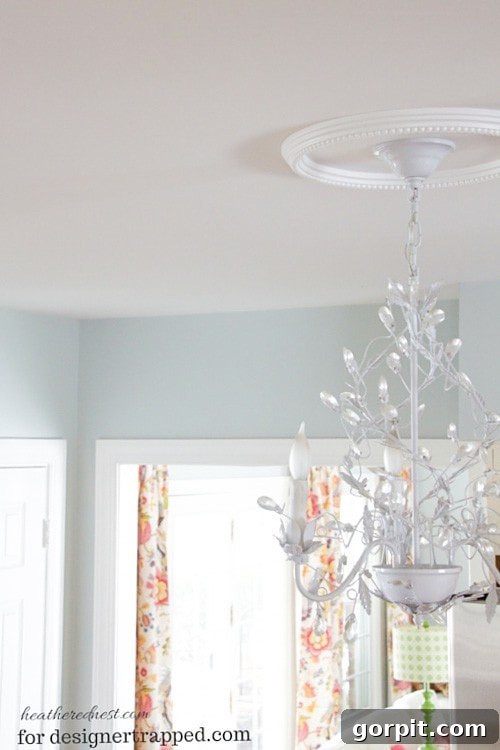
9) Wiring Your New Pendant Light
Now comes the final and most exciting part: wiring your chosen pendant light. Most pendant lights will have three wires: a black (hot), a white (neutral), and a bare copper or green (ground) wire. Match these wires to the corresponding wires coming from your conversion kit’s harness: black to black, white to white, and bare copper/green to bare copper. Secure each connection with wire nuts, ensuring they are tightly twisted and insulated. Double-check all connections before proceeding.
10) Mount Your Pendant Light
Once wired, carefully tuck the wires into the canopy of your pendant light and secure the light fixture to the lighting support bracket according to its specific installation instructions. This usually involves screwing a decorative nut or cap onto a threaded rod protruding from the bracket, holding the canopy flush against the ceiling medallion.
Flipping the Switch: Enjoy Your New Lighting!
With just a few simple steps, you’ve successfully transformed your outdated recessed light into a beautiful and functional pendant light. It’s a remarkably easy DIY project that yields stunning results, making you wonder why you didn’t tackle it sooner! The impact on a room’s aesthetic and ambiance is truly significant. If you’re inspired to tackle more easy DIY projects to enhance your home, be sure to explore some of our other creative lighting ideas:
| Our Outdoor DIY “Can”-delier! | A DIY Lampshade Makeover | 5-Minute, No-Tools “Boob” Light Hack! |
Once your new pendant light is securely installed, head back to your breaker box and switch the power back on. Return to your light switch and flip it on to admire your handiwork! The difference a new fixture can make in a room is truly remarkable, adding character, warmth, and a personal touch that recessed lights simply can’t provide. This project is a testament to how small changes can lead to big impacts in your home decor.
Don’t forget to pin this post to your favorite DIY or home decor board so you can easily refer back to it whenever you’re ready to transform your own lighting!
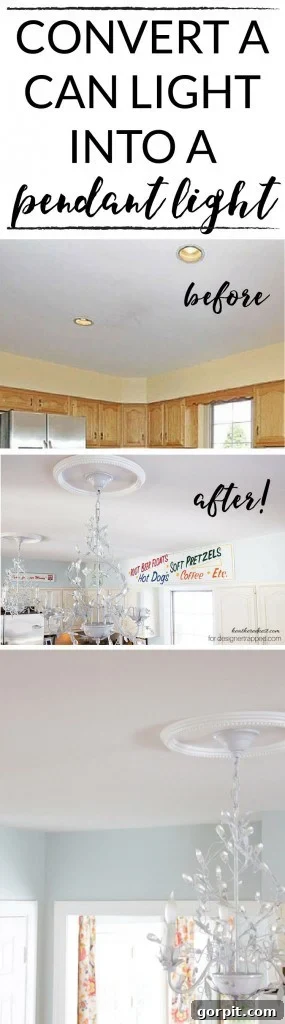
Looking for more inspiration? Check out some of our most popular DIY home improvement projects:
