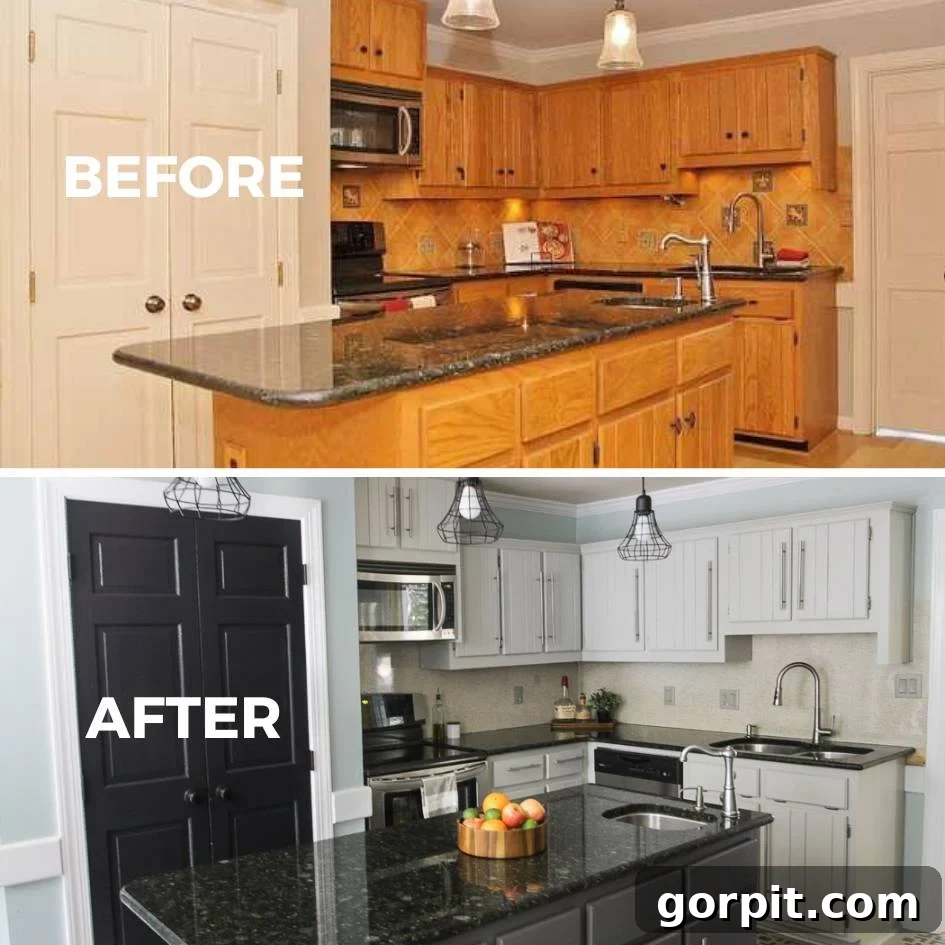
Let’s be honest—the idea of painting kitchen cabinets yourself often comes with a healthy dose of skepticism. For every breathtaking DIY kitchen transformation you admire online, there’s an undercurrent of doubt in the comments: “Looks fantastic now, but how will it hold up in the long run?” This concern is completely valid. Kitchen cabinets endure a constant barrage of daily activity, from enthusiastic cooks to playful children and pets. No one wants to invest significant time, effort, and elbow grease into a DIY project only to see it start chipping and peeling a mere six months later. It’s a common fear, and it’s precisely why I’m here to share an honest, in-depth look at how our DIY painted kitchen cabinets fared after five years of intensive daily use—and even beyond. Spoiler alert: the news is overwhelmingly positive, provided you approach it with the right methods and materials.
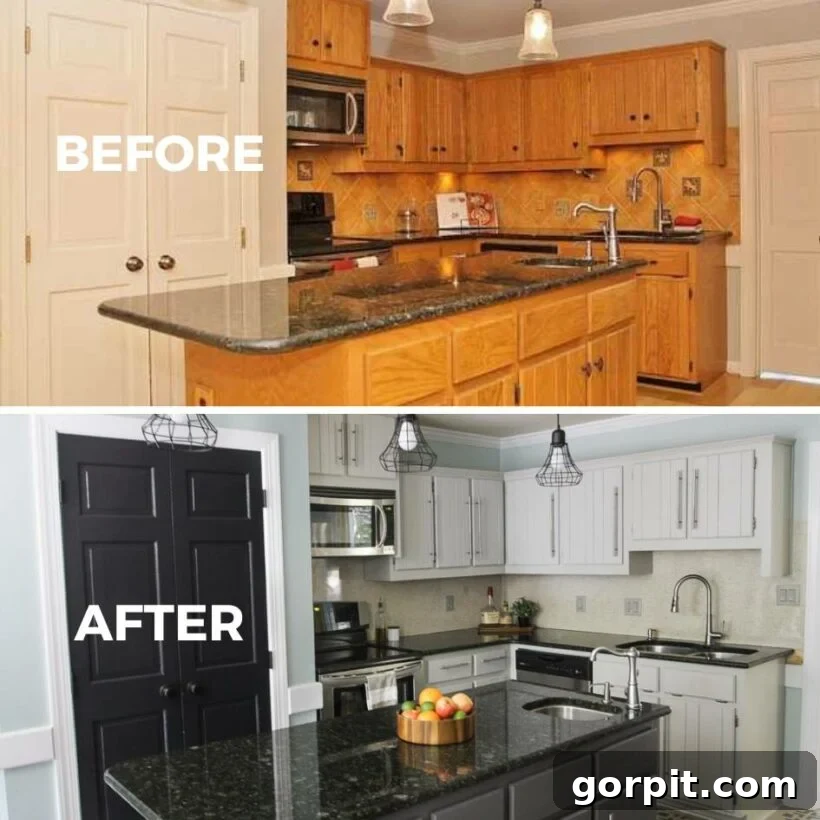
As a seasoned DIY enthusiast with over 23 years of hands-on experience, I’ve personally taken on the challenge of painting kitchen cabinets not once, but three distinct times! This extensive experience allows me to speak with genuine authority on the subject. With that practical wisdom in mind, let’s address the most common and pressing questions I consistently receive about the longevity and performance of our very own DIY painted kitchen cabinets.
When Did We Paint Our Kitchen Cabinets, and What Was The Initial Process?
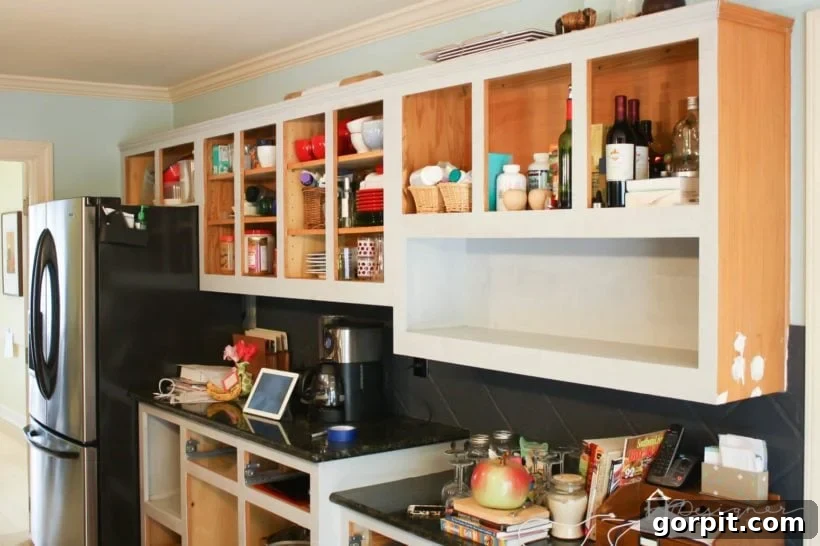
Our journey with DIY cabinet painting began in 2014 when we decided to transform the incredibly outdated, orange oak cabinets that dominated our kitchen. What might surprise many, and indeed sounded outrageous and too good to be true at the time, is that we undertook this project without a single grain of sanding or a coat of primer. Even more astonishingly, we didn’t even bother to empty the contents of our cabinets! This unconventional approach raised eyebrows, but our confidence stemmed from careful research and product selection. It’s now well into 2025, meaning over eleven years have passed since that initial cabinet transformation. Despite the passage of time, the question I’m still frequently asked remains: “How did your painted kitchen cabinets *really* hold up over all these years?” Rest assured, I promise to reveal the detailed answer, but first, it’s essential to cover some other crucial aspects of our project.
What Products and Method Did We Use for Our DIY Cabinet Painting?
The success of any DIY painting project, especially one as demanding as kitchen cabinets, hinges on the quality of the products and the meticulousness of the process. Below, you’ll find a concise overview of the specific products and the method we employed. For those seeking a comprehensive, step-by-step guide, my full tutorial on how to paint kitchen cabinets without sanding or priming is available here. This detailed guide walks you through every stage, ensuring you can replicate our durable results.
This post contains affiliate links for your convenience. Click here for my full disclosure policy.
📋
Overview of Our DIY Painted Kitchen Cabinets Project
- Time to complete: The entire transformation, from start to finish, took approximately 4 days of dedicated work.
- Durability: Remarkably, our cabinets held up absolutely perfectly after more than 5 years of extremely heavy daily use, showcasing exceptional resistance to wear and tear.
- Primary Paint Used: We chose General Finishes Milk Paint, an acrylic-based, high-quality paint known for its superb adhesion and smooth finish. This was a critical factor in achieving professional-level results without extensive prep work.
- Protective Topcoat: To seal and protect the paint, we applied General Finishes High-Performance Top Coat. This water-based topcoat is incredibly durable and crucial for long-lasting results in high-traffic areas like kitchens.
- Detailed Tutorial: For a complete, step-by-step guide on how we achieved these results, including all tips and tricks, visit my full tutorial: How to Paint Kitchen Cabinets Without Sanding or Priming.
- Key Process Steps:
- Disassembly: We carefully removed all cabinet doors and drawer fronts to ensure even coverage.
- No Emptying Required: A huge time-saver! We did *not* pack up or remove the contents of our cabinets, making the process less disruptive.
- Thorough Cleaning: This step is non-negotiable. We meticulously cleaned all cabinetry surfaces to remove grease, grime, and any buildup, ensuring optimal paint adhesion.
- No Sanding or Priming: For our wood cabinets, this critical omission significantly reduced prep time without compromising durability, thanks to the specific paint and topcoat chosen.
- Paint Application: Applied multiple thin coats of General Finishes Milk Paint, allowing adequate drying time between each.
- Topcoat Application: Applied three robust coats of the protective topcoat. This layer is vital for sealing the paint and providing maximum resistance against moisture, scratches, and daily impacts.
- Pros of Our Method: Unbelievably durable finish, no tedious sanding or priming needed for wood cabinets, exceptional coverage, and superior adhesion to the existing surface.
- Cons to Consider: While the paint performs beautifully, the color palette for General Finishes Milk Paint isn’t as vast as some other brands. Also, achieving the best, most even finish for the topcoat ideally requires cabinet doors to be laid flat during application, which can require more space.
How Long Did We Enjoy Our DIY Painted Cabinets?
We actively used our freshly painted cabinets for over five years before embarking on a complete gut and renovation of that entire kitchen in 2019. If you’re curious to see the dramatic transformation, you can explore the before and after photos of that extensive kitchen renovation. It’s crucial to understand that our kitchen was not a showpiece that saw minimal activity; quite the opposite. We are a family that rarely eats out and passionately loves to cook, meaning our kitchen was subjected to truly *heavy* daily use. At the time, our energetic twin girls were young, and we shared our home with a large, equally active dog. So, to say we were “easy” on our painted cabinets would be a considerable understatement—we absolutely put them through their paces, and they certainly earned their keep.
The Moment of Truth: How Did Our Painted Cabinets *Really* Hold Up After 5 Years?
Y’all, I can confidently tell you that they held up absolutely *beautifully*. Frankly, their performance surpassed even our own high expectations. Given the daily demands of a busy family kitchen, we were prepared for some signs of wear. While we had a strong conviction that the quality paint and topcoat we used would offer impressive durability, I genuinely anticipated at least some minor chipping or noticeable wear and tear after a couple of years of relentless use. Yet, the results were stunningly resilient.
For a real-time assessment, you can check out this video I filmed approximately 22 months after the initial painting. It offers an early glimpse into their impressive durability. The video will begin playing after a brief advertisement 🙂
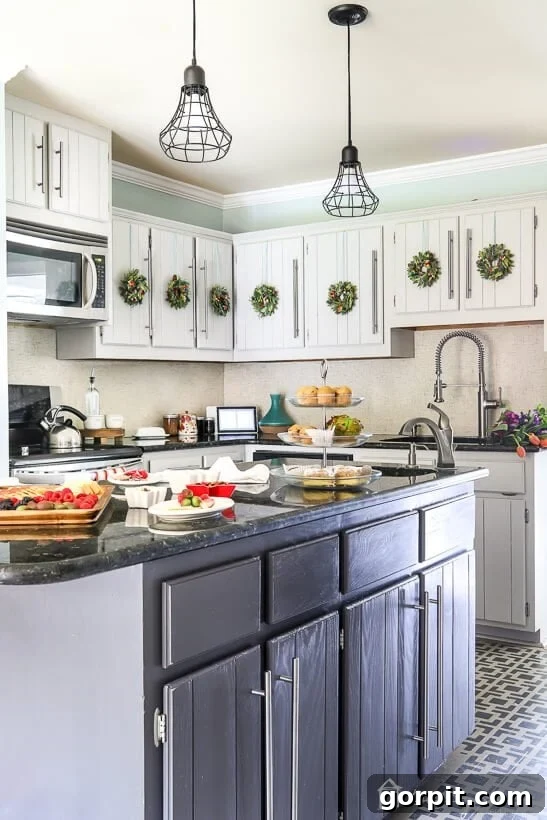
The photograph below was captured roughly two months before the cabinets were ultimately removed as part of our comprehensive kitchen renovation. As you can plainly see, they still maintained an almost flawless appearance, exhibiting only the most minor signs of wear and tear, precisely as detailed in the video above. This long-term performance is a testament to the chosen products and method.
How Much Money Did We Save by Painting Our Kitchen Cabinets Ourselves?
The financial savings associated with a DIY cabinet painting project can be truly staggering. Based on my extensive research and industry insights, hiring a professional to paint kitchen cabinets typically ranges anywhere from $3,000 to a staggering $10,000. This cost is highly dependent on various factors, including the size and complexity of your kitchen, the specific type of paint and finish desired, and, of course, your geographical location. When we tackled our project, the total expenditure for all the necessary supplies—paint, topcoat, brushes, rollers, and cleaning agents—came in at an incredibly modest sum of under $250. When you crunch the numbers, this means we effectively saved ourselves a minimum of $2,700, and potentially much, much more, by choosing the DIY route. This significant saving alone makes the effort well worth it for many homeowners looking to update their space on a budget.
Do We Have Any Regrets About Painting Our Kitchen Cabinets Ourselves?
Absolutely, unequivocally, NO REGRETS whatsoever. Over the course of the past eleven years, I’ve not only painted kitchen cabinets a single time but have successfully completed this project on THREE separate occasions, utilizing TWO distinct paint types and methods. In each instance, my priority was to select methods that demanded the absolute least amount of prep work, making the entire process as quick, easy, and approachable as possible. And I can truthfully say, I have *never* once regretted the decision. Every single time, the outcome has been nothing short of professional-looking and, perhaps most importantly, incredibly durable. The satisfaction of transforming a space with my own hands, coupled with the impressive longevity of the finish, has consistently reinforced that DIY cabinet painting is a brilliant solution for budget-conscious homeowners.
Do You Have Other Tips or Ideas for Budget-Friendly Kitchen Makeovers?
Yes, absolutely! I am a passionate advocate for budget-friendly kitchen makeovers, proving that you don’t need to break the bank to achieve a stunning transformation. As you’ve seen, our first DIY kitchen makeover was a testament to this philosophy. But my journey didn’t stop there. Years later, we helped a dear friend, Thea, completely revitalize her kitchen for an astonishingly low cost—less than $1,000! You can dive into the details of her stunning budget-friendly kitchen makeover reveal. And when we moved into a different house, you guessed it, we embarked on yet another exciting budget-friendly kitchen makeover, proving that these transformations are not just a one-off success but a consistent, achievable reality.
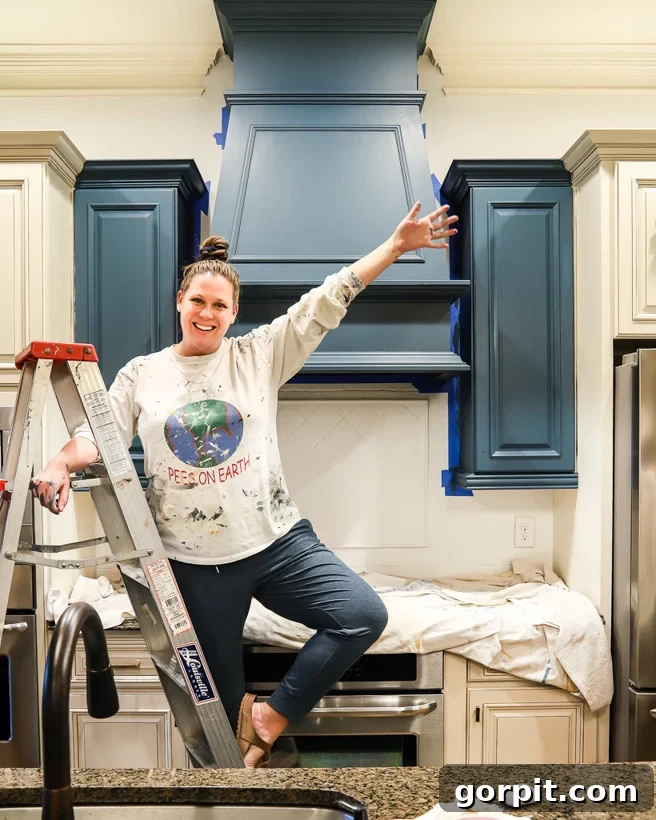
Of course, painting the kitchen cabinets was a central component of all these makeovers! But beyond that foundational change, there are numerous other inventive and affordable ways to update your kitchen without the need for a full, expensive renovation. Here are some fantastic ideas to consider for updating your kitchen on a budget:
Ingenious Kitchen Countertop Ideas
Don’t assume old countertops mean a massive replacement project. You can dramatically update your countertops by painting them to brilliantly mimic the elegant look of marble (yes, we’ve successfully done this too, achieving stunning, realistic results!). This is just *one* of many truly affordable DIY countertop ideas that can completely refresh your kitchen’s aesthetic. If you currently have butcher block countertops that have seen better days, showing significant wear and tear from years of use, there’s no need to rip them out entirely. Instead, you can easily and effectively refinish your butcher block countertops, bringing them back to their original glory or giving them a fresh, new look with minimal investment.
Creative Kitchen Backsplash Ideas on a Budget
When it comes to backsplashes, the options for budget-friendly transformations are plentiful and incredibly creative. There are tons of excellent budget-friendly DIY backsplash ideas out there, catering to various styles and skill levels. One of my personal favorite and most impactful ideas involves painting and stenciling an existing tile backsplash. And yes, you guessed it—I’ve personally tackled that project with fantastic results! You can find my comprehensive tutorial for how to paint a tile backsplash here, guiding you through the process to achieve a custom, high-end look without the high-end price. Of course, if you’re set on new tile, installing a new tile backsplash can still be surprisingly affordable, especially if you thoughtfully choose an inexpensive yet stylish tile option. Moreover, installing a backsplash isn’t nearly as daunting as it might sound—you can learn how to install a backsplash the easy way with my straightforward guide.
The Bottom Line: DIY Painted Cabinets Are a Winning Choice
So there you have it—the definitive answer gleaned from years of real-world use and multiple successful projects. Our DIY painted cabinets not only stood the test of time but excelled, demonstrating remarkable resilience with absolutely no peeling, no chipping, and not a single regret on our part. If you’ve been contemplating painting your kitchen cabinets yourself but have been hesitant or uncertain about the long-term results, I sincerely hope our extensive, real-life experience and long-term findings instill in you the confidence to embark on this rewarding project. Take it from someone who has navigated the challenges and triumphs of painting kitchen cabinets three different times, employing two distinct methods: with a blend of patience, attention to detail, and most importantly, the selection of the right, high-quality materials, you *can* achieve professional-looking, incredibly durable cabinets without the prohibitive cost of professional services. The ultimate secret to success truly lies in making informed choices about your products and ensuring they are applied correctly and meticulously.
More Kitchen IDEAS
SEE ALL kitchen POSTS
-
Budget-Friendly DIY Backsplash Ideas for Kitchens
-
How Durable are DIY Painted Kitchen Cabinets?
-
How To Refinish Butcher Block Countertops & Maintain Them
-
Designer Tips for Choosing Perfect Kitchen Rug Runners
-
How to Paint Kitchen Cabinets (From a DIYer Who Has Done it 3 Times)
-
Our Kitchen Renovation Reveal- It’s Neutral AND Colorful
Curious about how I approach transforming rooms and spaces in our home, consistently achieving professional results on a DIY budget? Be sure to check out Designer in a Binder®. It’s my proven, affordable, and straightforward system for decorating your home with confidence and style, making design accessible to everyone.
And if you’re eager for exclusive content, behind-the-scenes sneak peeks into upcoming projects, and insider tips you won’t find anywhere else, be sure to subscribe to my newsletter before you head out! Join our community of DIY enthusiasts and get inspired.
Don’t miss out on future DIY insights and inspiration! Subscribe to our newsletter for exclusive content.