Are you considering updating your bathroom but feel daunted by the idea of removing an old toilet and installing a brand new one? Many DIY enthusiasts share this apprehension, especially when faced with plumbing tasks. I completely understand that feeling! Before we tackled our first toilet installation, I felt the same way, particularly since it was the only toilet in our house – failure simply wasn’t an option!
However, I can confidently tell you that installing a toilet is a surprisingly straightforward project. As long as you have the physical strength to lift the toilet bowl (which, by the way, is often less heavy than you’d imagine) and a willingness to follow clear instructions, you can absolutely install a toilet yourself. This comprehensive, step-by-step guide is designed to empower you, regardless of your DIY skill level or prior experience. Get ready to transform your bathroom with confidence!
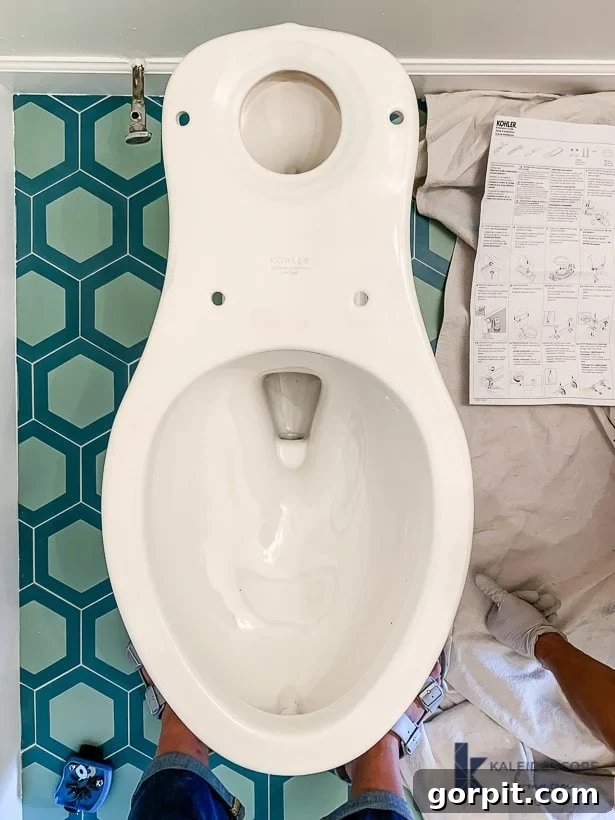
Table of Contents
We extend our gratitude to DAP for sponsoring this post. Please note that this post includes affiliate links for your convenience. You can click here to review our full disclosure policy.
Essential Tools & Supplies for Toilet Installation
Having the right tools and supplies on hand before you begin will make the toilet installation process much smoother and more efficient. Here’s everything you’ll need to successfully complete this DIY project:
- Hack Saw: Indispensable for trimming the excess length of the toilet flange bolts, ensuring a clean finish under the bolt caps.
- Wax Ring (or Waxless Seal): This critical component creates a watertight seal between the toilet bowl and the drainpipe. Consider an extra thick wax ring if your flooring, such as thick tile, raises the toilet higher than standard.
- Toilet Flange Repair Ring: If your existing toilet flange is damaged or cracked, a repair ring (available in metal or plastic) is essential to provide a secure mounting surface for your new toilet. Ensure compatibility with your current flange material.
- Adjustable Pliers and/or Wrenches: You’ll use these for various tasks, including disconnecting the old water supply line, removing tank bolts, and tightening new connections.
- Drill Driver/Hand-held Screwdrivers: Useful for securing flange repair rings or other components that may require screws.
- Putty Knife: Perfect for scraping away the old, stubborn wax ring and any residual sealant from the floor and flange area.
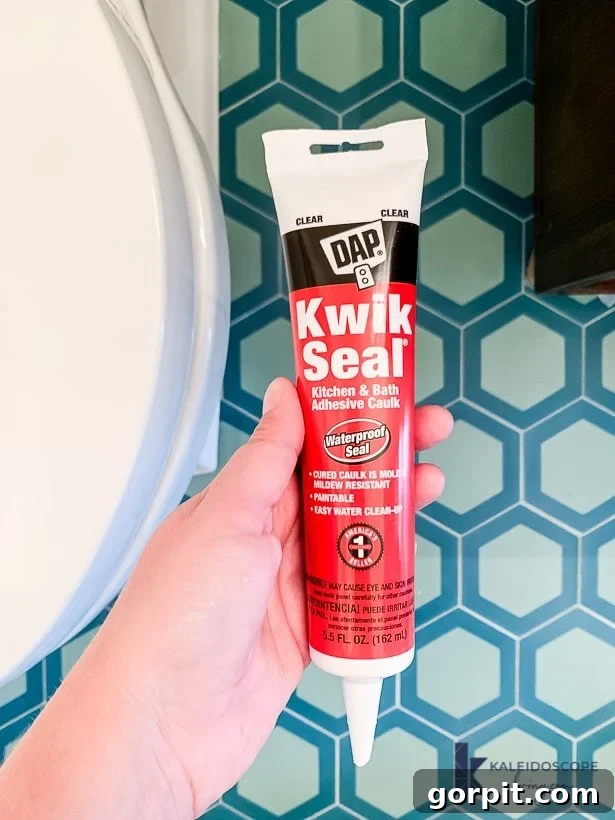
- DAP Kwik Seal Caulk (or similar waterproof caulk): Used to seal the base of the toilet to the floor, preventing water from seeping underneath and providing a finished look. Clear caulk is often preferred for a seamless appearance.
- Toilet Shims: Small plastic wedges used to stabilize the toilet if it rocks slightly after installation, ensuring a level and firm fit.
- Old Rags, Towels, and Sponges: Absolutely necessary for absorbing any residual water during toilet removal and for general cleanup.
- Toilet Plunger: An unexpected but incredibly effective tool for forcing out remaining water from the toilet bowl before removal, significantly reducing mess.
- Gloves: Essential for hygiene, especially when dealing with old wax rings and plumbing residue.
Preparing for Your Toilet Installation
Before diving into the actual installation, a little preparation can save you time and hassle. Here are a few things to consider:
- Measure Your Rough-in: Before purchasing a new toilet, measure the “rough-in,” which is the distance from the finished wall behind the toilet to the center of the drainpipe (or the bolts holding the toilet). Standard rough-ins are 10, 12, or 14 inches. Most homes have a 12-inch rough-in, but confirming this will ensure your new toilet fits perfectly.
- Choose Your New Toilet: Toilets come in various styles, heights, and flushing technologies. Consider water efficiency (e.g., WaterSense certified), comfort height, and aesthetic appeal to match your bathroom design. Ensure you understand if it’s a one-piece or two-piece toilet, as this affects assembly.
- Gather All Supplies: Double-check your list of tools and materials. It’s far better to realize you’re missing something before you start, rather than in the middle of the project.
- Clear the Area: Remove any rugs, decorations, or items from around the toilet area to give yourself ample space to work.
How to Install a Toilet: A Comprehensive Step-by-Step Guide
This guide will walk you through every critical stage of toilet installation, starting with the careful removal of your old unit and culminating in a perfectly sealed and functional new toilet. While the focus is on installation, a proper removal is the first crucial step, so we’ve included thorough instructions for that as well. Let’s get started!
Estimated Time: 2-3 hours
Follow these detailed steps to successfully remove your old toilet and install a sparkling new one, ensuring a secure and leak-free setup.
-
Step 1: Safely Remove the Old Toilet
The first order of business is to carefully remove your existing toilet. This process involves several key actions to prevent leaks and make the job easier:
- Turn Off the Water Supply: Locate the shutoff valve, typically found on the wall or floor directly behind or beside the toilet. Turn it clockwise until the water flow stops completely.
- Drain the Tank and Bowl: Flush the toilet to empty most of the water from the tank into the bowl. To remove remaining water from the bowl, use a plunger to forcefully push water down the drain. This little trick is incredibly effective at minimizing spills and can save you a lot of clean-up time! Repeat until the bowl is mostly empty. Have old towels and sponges ready for any drips.
- Disconnect the Supply Line: Use an adjustable wrench to carefully loosen and disconnect the water supply line from the fill valve at the bottom of the toilet tank. Be prepared for a small amount of residual water to drip out.
- Separate Tank from Bowl (if applicable): For two-piece toilets, you’ll need to separate the tank from the bowl. Remove the bolts located at the bottom of the tank that secure it to the bowl. Use an adjustable wrench or pliers for this. Once the bolts are off, lift the tank straight up and set it aside.
- Unfasten the Toilet Base: At the base of the toilet, you’ll find plastic caps covering the toilet bolts. Pry these caps off. Use an adjustable wrench or or pliers to loosen and remove the nuts holding the toilet base to the floor flange.
- Lift and Remove the Bowl: Now, carefully lift the toilet bowl straight up from the floor. Try your best to keep it upright as you move it to avoid spilling any leftover water. It’s a good idea to have a helper for this step, as toilets can be awkward to carry. Immediately place the old toilet in an area where any remaining water can drain without causing damage.
-
Step 2: Prevent Sewer Gas with a Temporary Plug
Once the old toilet is removed, you’ll see the open drainpipe in the floor. Immediately stuff an old rag or towel firmly into this hole. This prevents unpleasant sewer gases from entering your home and also stops any tools or debris from accidentally falling into the drain. Crucially, remember to remove this plug just before you install the new toilet!
-
Step 3: Clean Up the Old Wax Ring
The old wax ring will likely be stuck to either the toilet flange on the floor or the base of the old toilet. Using a putty knife, meticulously scrape away all traces of the old wax. This material can be quite messy and unhygienic, so wearing gloves during this step is highly recommended. A clean surface is paramount for the new wax ring to create a proper seal.
-
Step 4: Inspect the Toilet Flange for Damage
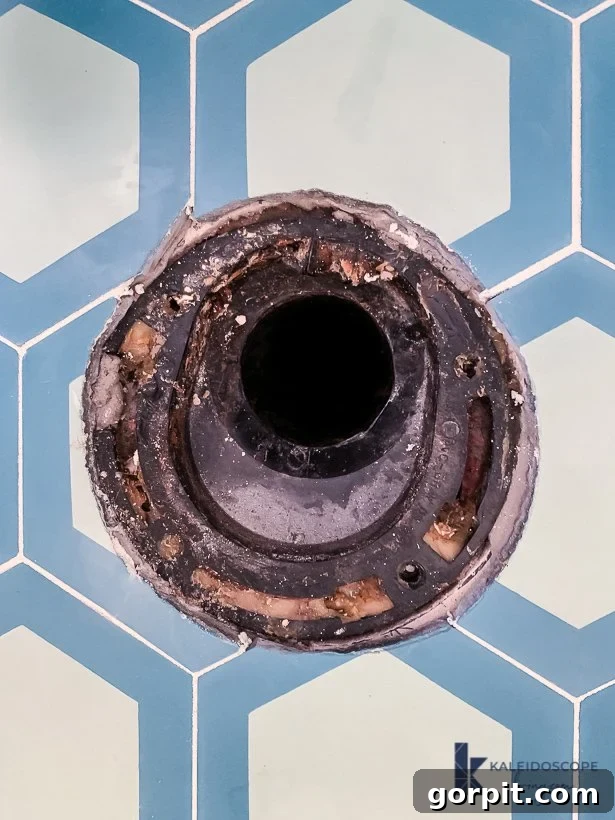
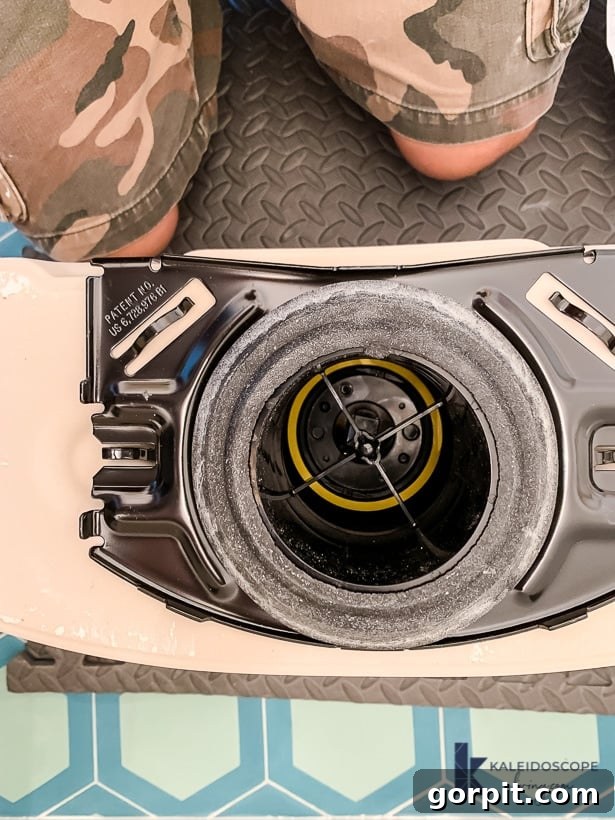
With the old wax removed, you now have a clear view of the toilet flange, which is the crucial component that secures the toilet to the floor and connects it to the drainpipe. Take a good, close look at it. Check for any cracks, breaks, corrosion, or signs of deterioration. The flange should be firmly attached to the floor and level with or slightly above the finished floor surface.
If your flange appears to be in excellent condition, you’re in good shape! Simply remove the old toilet bolts and replace them with the new bolts that typically come with your new toilet. However, if you notice any damage, a repair might be necessary. For instance, our flange had a crack, which is a common issue. Don’t panic if yours is damaged; it’s a fixable problem!
This is what our floor flange looked like once the wax ring was removed, clearly showing a crack:

-
Step 5: Repair or Replace the Flange (If Necessary)
If your toilet flange is indeed cracked or damaged, you’ll need to repair it before proceeding. The easiest solution is often a flange repair ring. When purchasing one, ensure it is compatible with your existing floor flange – some are metal, others plastic, and they come in various designs. A good tip is to take a photo of your damaged flange before heading to the hardware store. If you’re unsure which type to buy, show the photo to a plumbing specialist, who can guide you to the correct product.
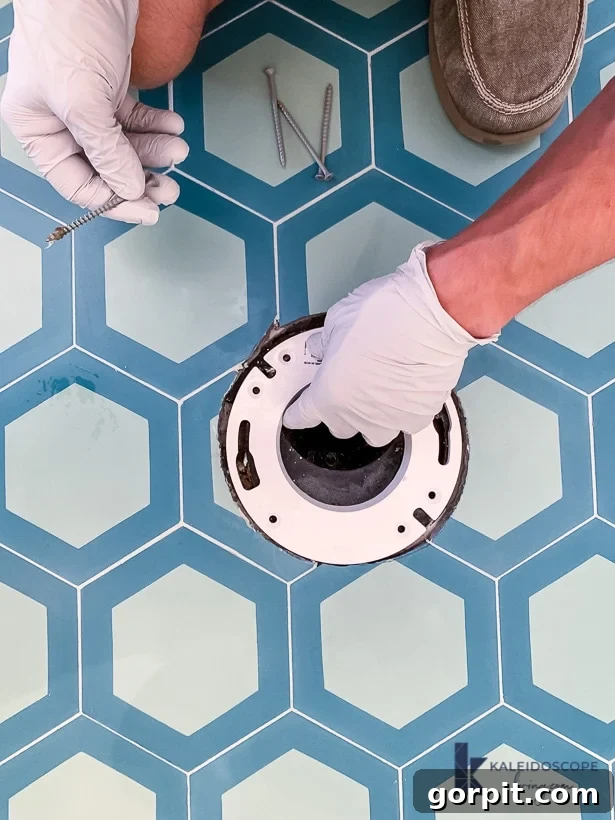
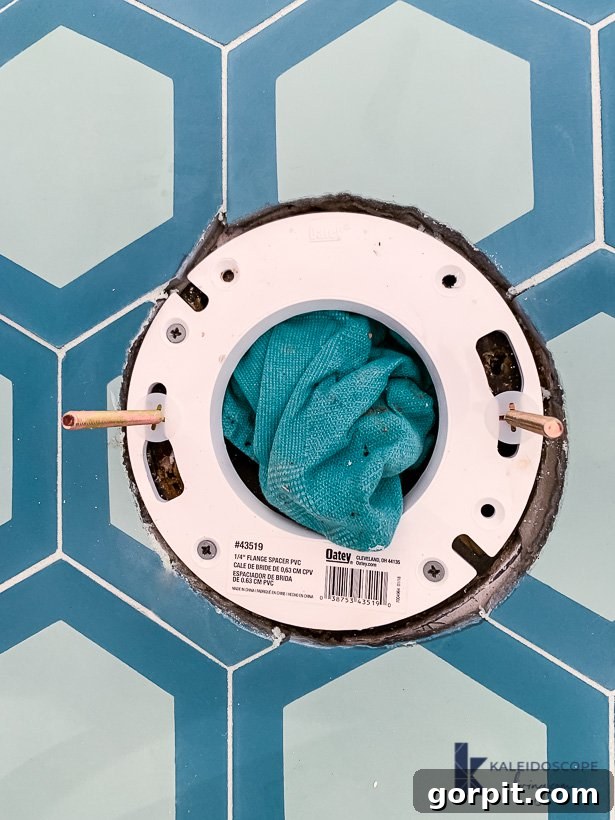
In our particular case, we simply placed the flange repair ring (visible as the white ring in the photo below) directly into the existing flange and secured it according to the manufacturer’s instructions. This creates a solid, stable surface for the new toilet.
Before moving on to the next step, make sure to properly position the new toilet bolts into the slots of your flange (or flange repair ring). These bolts will anchor your toilet firmly to the floor. Below, you can see how our new bolts were positioned within our repaired flange.
-
Step 6: Install the New Wax Ring
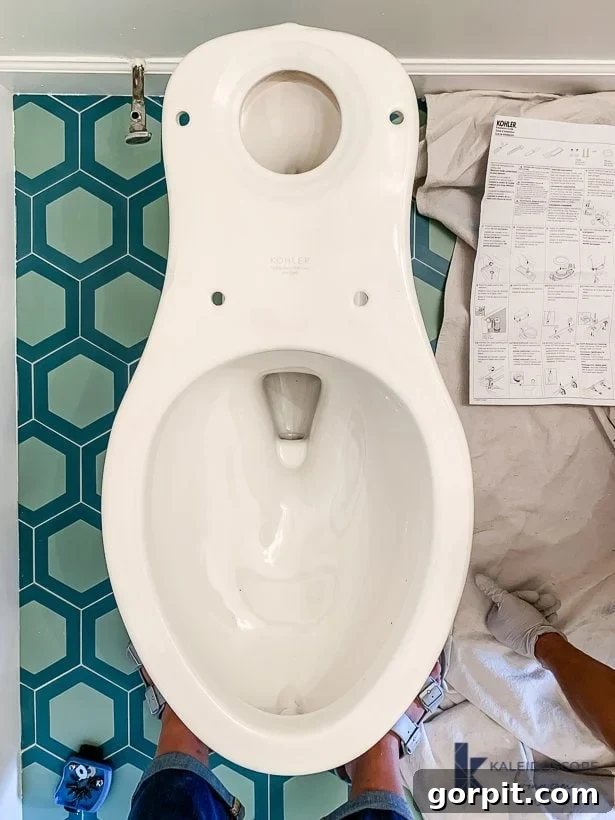
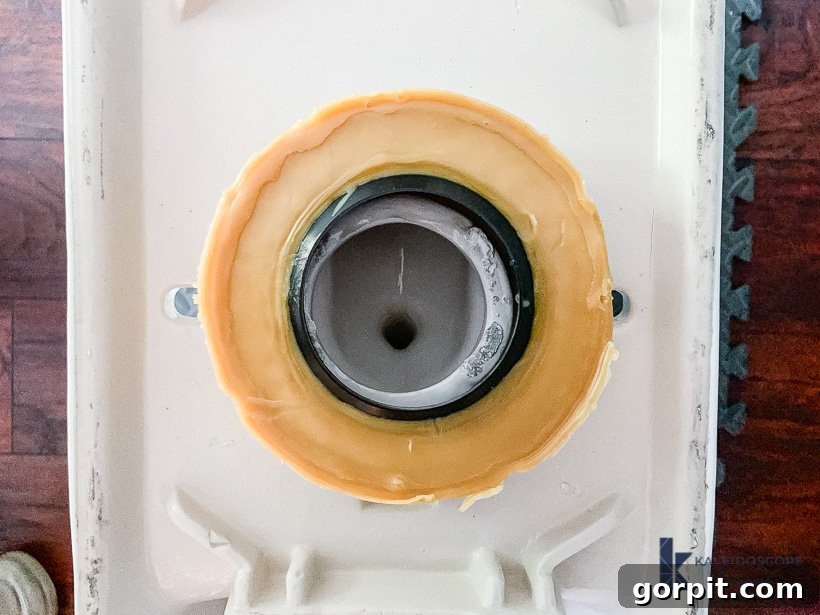
Now it’s time to install your new wax ring. This part is crucial for creating a watertight seal. There are two common methods for placing the wax ring: either directly onto the floor flange or onto the base of the toilet bowl. We strongly prefer attaching the wax ring to the bottom of the toilet bowl first. To do this, gently rest your toilet bowl upside down on a soft, protective surface like foam mats or old towels. Carefully press the wax ring onto the horn (the outlet opening) at the bottom of the bowl. This method allows you to visually confirm that the ring is perfectly centered and securely attached, minimizing the risk of a misaligned seal when you set the toilet.
For our installation, given our thick cement tile flooring, we opted for an extra-thick wax ring. This ensures a proper compression and seal even with the slightly elevated toilet base. Below you can see the wax ring properly positioned on the base of the toilet bowl.
-
Step 7: Carefully Position the New Toilet Bowl
The moment of truth has arrived! Remove the rag from the drain opening. Carefully lift the toilet bowl and align the holes in its base with the bolts protruding from the floor flange. This step requires precision, so take your time. Once the bolt holes are perfectly aligned over the bolts, gently but firmly lower the toilet bowl straight down onto the flange. Avoid any twisting or rocking motions. Once it’s in place, apply firm, even pressure downwards on the bowl to compress the wax ring and create a tight, watertight seal. It’s crucial not to move or tilt the toilet after it’s seated, as this can break the wax seal and lead to leaks. If you don’t get it right on the first try, it’s often best to lift the toilet, discard the wax ring, and start over with a fresh one to ensure a perfect seal.
-
Step 8: Securely Fasten the Toilet Bowl
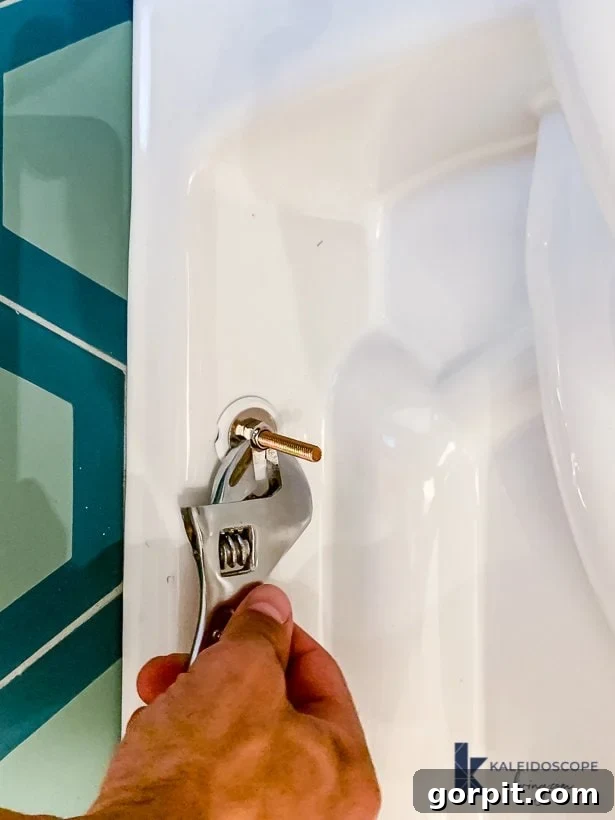
With the toilet bowl properly seated, it’s time to secure it to the floor. Place a washer, followed by a nut, onto each toilet bowl bolt. Hand-tighten them initially, then use an adjustable wrench to snug them down. It’s imperative not to over-tighten these nuts, as excessive force can crack the porcelain base of the toilet. Tighten them alternately, a little at a time on each side, until the toilet is firm and doesn’t rock, but stop before applying too much pressure.
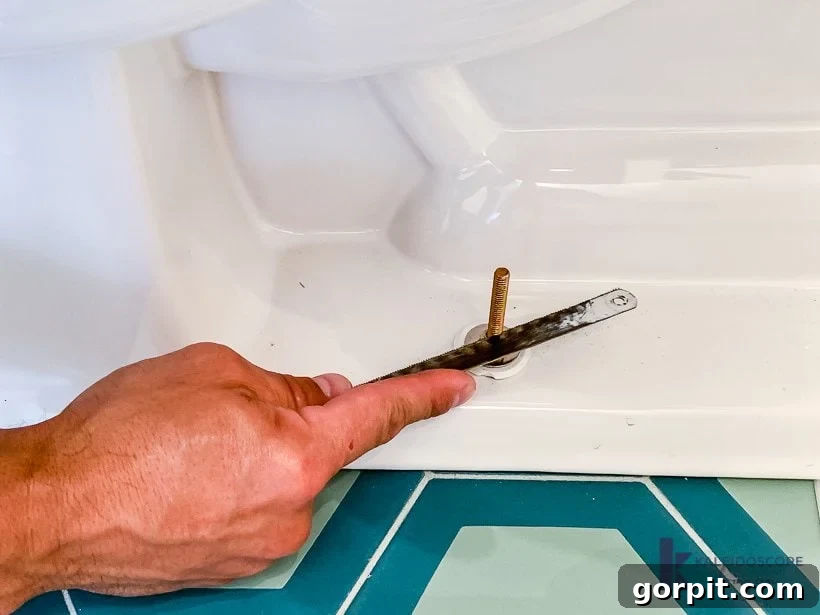
Once the nuts are tightened, you’ll likely have excess bolt length sticking up. Use a hacksaw to carefully trim these bolts down. The goal is to cut them short enough so that the decorative plastic bolt caps can snap neatly into place, providing a clean and finished appearance.
-
Step 9: Attach the Toilet Tank to the Bowl
If you’re installing a two-piece toilet (which most residential toilets are), your next step is to attach the tank to the toilet bowl. While specific models may vary slightly, the general process involves:
- Install the Tank-to-Bowl Gasket: This large rubber gasket typically sits over the flush valve opening on the underside of the tank. Ensure it’s correctly seated to prevent leaks between the tank and bowl.
- Insert Tank Bolts and Washers: From inside the tank, insert the tank bolts through the designated holes, often with rubber washers under the bolt heads to create a watertight seal inside the tank.
- Position the Tank: Carefully align the tank bolts with the corresponding holes on the back of the toilet bowl. Gently lower the tank into position, ensuring the gasket seals properly and the bolts pass through the holes.
- Secure the Tank: From underneath the bowl, place washers and nuts onto the tank bolts. Hand-tighten them first, then use an adjustable wrench to snug them down. Again, be cautious not to overtighten, as this can crack the porcelain of either the tank or the bowl. Tighten them evenly and gradually, checking for a secure, level fit.
-
Step 10: Connect the Water Supply Line & Test for Leaks
You’re almost there! It’s time to reconnect your water supply line to the fill valve on the underside of the toilet tank. Hand-tighten the connection first, then give it a quarter-turn or so with an adjustable wrench to ensure it’s snug, but again, avoid overtightening. Once the connection is secure, slowly turn the main water shutoff valve back on. You’ll hear the tank begin to fill with water. Let it fill completely.
Now for the crucial leak test: flush the toilet several times. Immediately after each flush, carefully inspect all connection points for any signs of water. Check where the supply line connects, where the tank meets the bowl, and most importantly, around the base of the toilet where it meets the floor. Look for any drips or pooling water. If you notice a small leak at a connection point, try gently tightening it further. If the wax seal appears compromised (water leaking from the base), you will need to remove the toilet, replace the wax ring, and reseat it. Patience here ensures a completely dry and functional installation.
-
Step 11: Shim and Caulk the Base for Stability and Seal
Your final steps involve ensuring stability and creating a finished, waterproof seal. If your newly installed toilet feels perfectly firm and doesn’t rock at all, congratulations – you’ve done an exceptional job! However, it’s quite common for toilets, especially on uneven flooring, to have a slight wobble. If your toilet rocks even a little, insert plastic toilet shims into the low spots around the base until the rocking motion is completely eliminated. Once stable, use a utility knife to carefully trim the shims flush with the toilet base for a clean look.
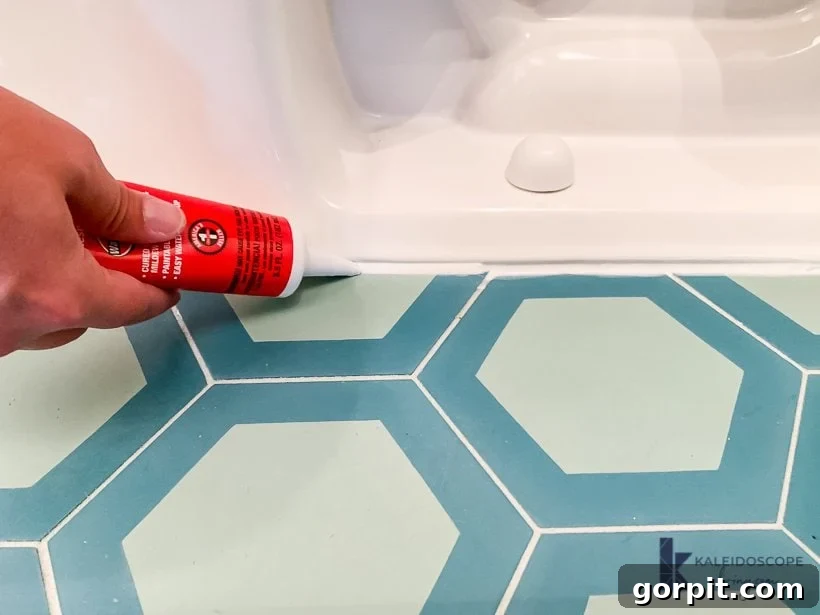
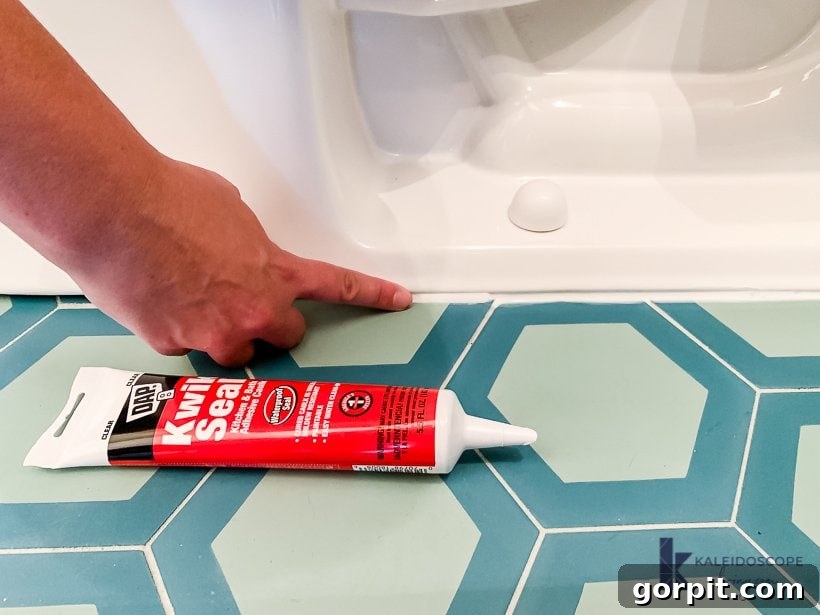
Now, let’s talk about caulking! We consistently recommend using a high-quality, waterproof caulk specifically designed for kitchens and bathrooms, like DAP Kwik Seal Caulk. Opt for a clear caulk for a discreet finish. Apply an even, continuous bead of caulk around the entire perimeter where the base of the toilet meets the floor. This creates a waterproof barrier, preventing water from seeping under the toilet and protecting your subfloor from potential damage. It also helps to further stabilize the toilet and provides a professional, finished appearance.
After applying the caulk, immediately use a wet finger or a caulking tool to smooth out the bead. This creates a clean, professional line. Don’t worry if it looks white at first; clear caulk will dry transparently within a few days, blending seamlessly with your flooring.
With the caulk smoothed, you’re officially done! You’ve successfully installed your new toilet, ensuring it’s stable, watertight, and ready for use.
And there you have it! Your stunning new toilet is now fully installed, secure, and ready for use. Wasn’t that much more manageable than you initially thought? By following these steps, you’ve not only saved money but also gained valuable DIY experience and the satisfaction of a job well done. You’ve successfully tackled a significant home improvement task!
This toilet installation was a part of a larger project. Be sure to explore the full bathroom renovation to see the complete transformation and gather more inspiration for your next home project!
Explore More Bathroom Renovation Ideas:
- SUPERAffordable Master Bathroom Makeover
- The Easy Way to Update Bathroom Tile Without Replacing It!
- DIY Vanity Makeover: Concrete Overlay
- 25 Stunning Powder Room Makeovers
- Attley’s Budget-Friendly Bathroom Renovation
- Avery’s Budget-Friendly Bathroom Makeover
- The Best Colorful Shower Curtains
Curious about my personal approach to transforming rooms and spaces throughout our home? Discover the secrets and strategies within Designer in a Binder® – your guide to affordable and simple home decorating.
For exclusive content, behind-the-scenes sneak peeks, and fresh DIY inspiration delivered straight to your inbox, be sure to subscribe to our newsletter before you leave!