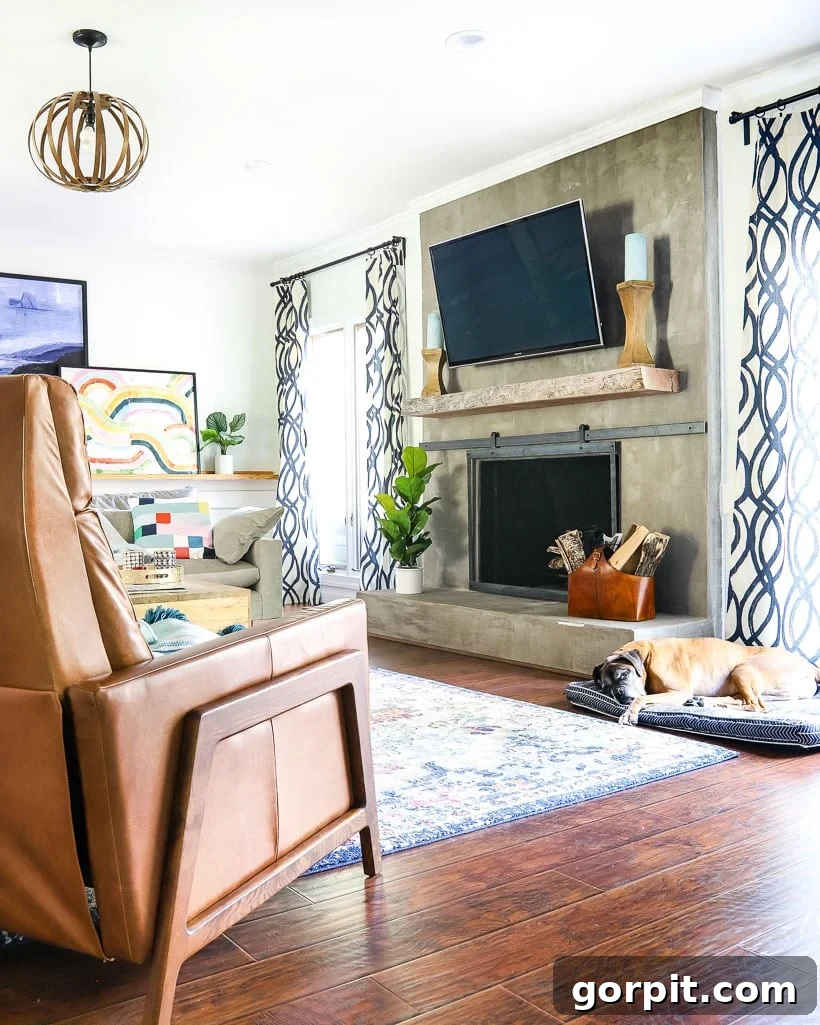
Transform Your Fireplace: A Budget-Friendly DIY Concrete Makeover Guide for Under $100
Are you tired of staring at an outdated, uninspired fireplace that drags down the aesthetic of your entire living space? Many homeowners dream of a modern, sleek fireplace but are often deterred by the perceived complexity and high cost of a professional renovation. What if we told you that a dramatic, contemporary fireplace transformation is not only achievable but also incredibly budget-friendly, costing less than $100? This comprehensive DIY guide will walk you through every step of updating your fireplace with a stunning concrete finish, delivering a breathtaking before-and-after that will completely redefine your home’s focal point.
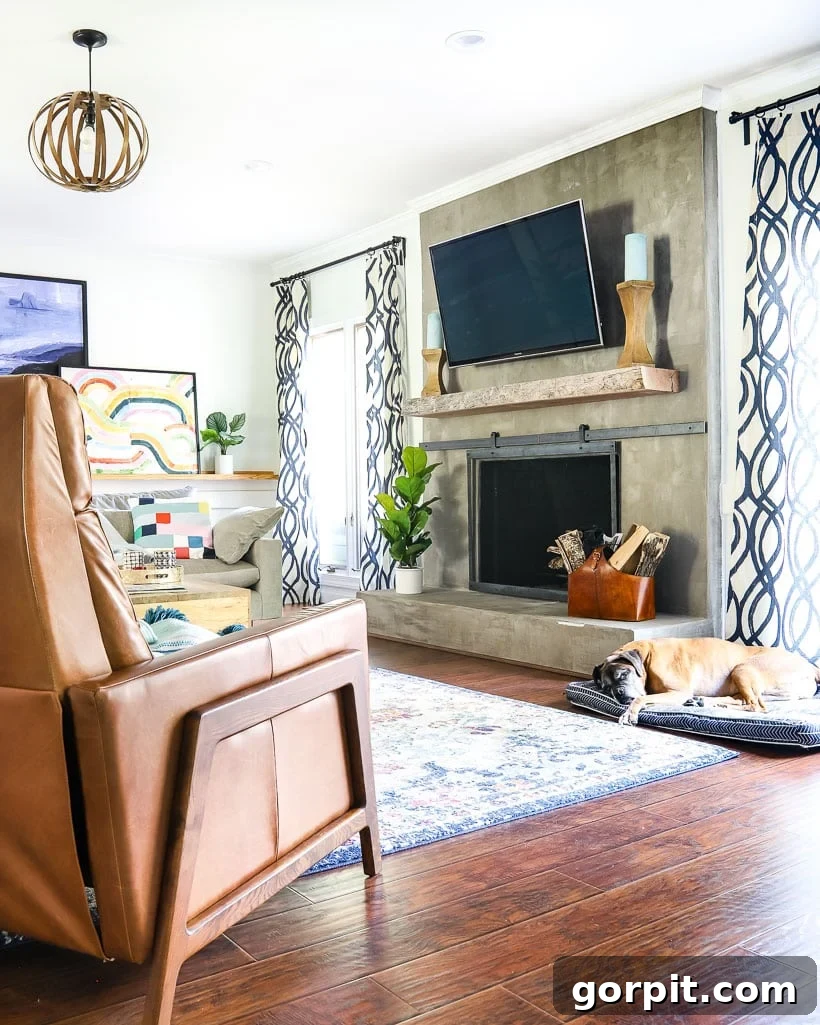
Table of Contents
This post contains some affiliate links for your convenience. Click here to read my full disclosure policy.
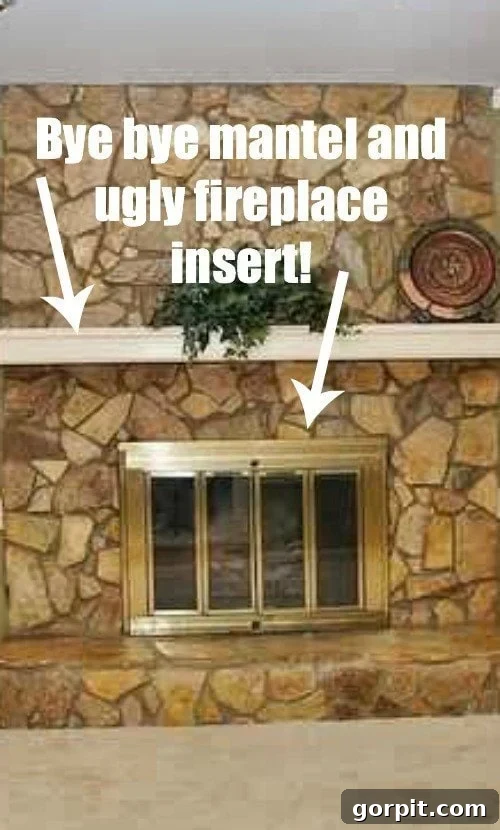
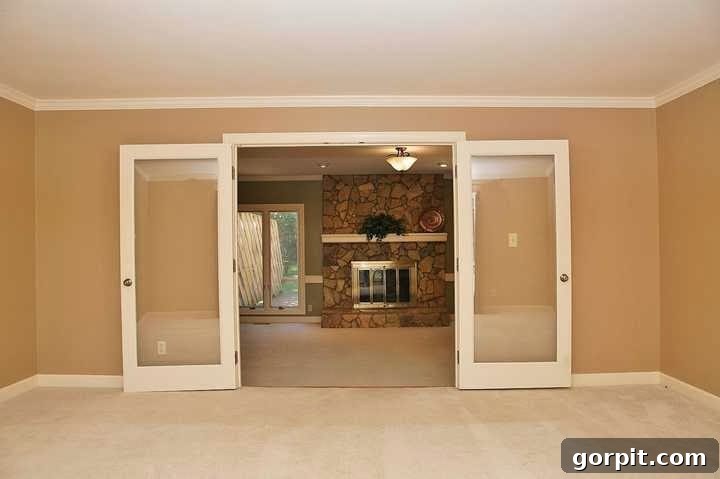
When we first purchased our home, it was clear that the existing fireplace, a relic from 1986 with its old stone veneer, simply wouldn’t align with our vision for a clean, simple, and contemporary living room. The stone was not only aesthetically dated but also improperly sealed, contributing to an overall unkempt appearance. Determined to revitalize this central feature, I embarked on an extensive search for fireplace makeover ideas, hoping to find a solution that offered both style and affordability.
My exploration quickly led me to concrete fireplaces, and I was immediately captivated. For anyone familiar with my DIY concrete vanity project, my enthusiasm for all things concrete comes as no surprise. The raw, industrial yet refined appeal of concrete perfectly matched the modern aesthetic we envisioned. This fireplace renovation, however, felt like a significantly larger undertaking, prompting me to consider hiring professionals.
Unfortunately, the quest for professional help proved challenging. Contractors either claimed the project couldn’t be done to our specifications or quoted exorbitant prices—between $2,000 and $3,000—with no guarantee of success. This uncertainty, coupled with the high cost, was a significant deterrent. Undeterred, I dove into extensive research, ultimately discovering an exceptional concrete product: Ardex Feather Finish. This product promised to deliver the exact look we desired at a fraction of the cost, making a DIY approach not just feasible, but incredibly appealing.
Our concrete fireplace has garnered considerable attention since its debut in our family room renovation post. While it’s certainly not to everyone’s taste, the overwhelming majority of feedback has been positive. If you’re among those who appreciate its unique charm and modern appeal, prepare to be inspired by the detailed instructions that follow. This project transformed our family room, and we’re excited to share how you can achieve similar results.
Why Choose a DIY Concrete Fireplace Makeover?
Opting for a concrete fireplace makeover offers a multitude of benefits, making it an increasingly popular choice for homeowners looking to modernize their spaces. Firstly, the aesthetic appeal of concrete is unparalleled in contemporary design. Its neutral tone and smooth finish provide a versatile backdrop that complements various interior styles, from minimalist and industrial to Scandinavian and modern farmhouse. Unlike traditional brick or stone, concrete offers clean lines and a seamless surface, instantly elevating the sophistication of any room.
Beyond aesthetics, concrete is renowned for its incredible durability. It’s a robust material that withstands the test of time, resisting wear and tear, and maintaining its pristine look for years with minimal maintenance. This makes it an ideal choice for a high-traffic area like a living room fireplace. Furthermore, a DIY concrete project like this offers significant cost savings compared to hiring professionals or investing in other high-end finishes. By choosing to apply a concrete overlay such as Ardex Feather Finish, you’re not just updating a surface; you’re transforming your entire space with a custom, high-impact design element that is both practical and stylish.
Planning Your Concrete Fireplace Renovation: Essential Pre-Project Considerations
Before diving into the hands-on work, it’s crucial to address some foundational considerations to ensure a successful and safe DIY concrete fireplace project. First and foremost, a significant disclaimer: this method worked perfectly for our specific fireplace structure. We took the critical step of having our chimney inspected by a professional and consulting with a contractor. This gave us the confidence that the existing stone on our fireplace was purely a facade, and its removal would not compromise the structural integrity of the chimney. It is absolutely imperative that you ascertain the nature of your fireplace structure. If you are uncertain whether your stone is decorative or load-bearing, or if removing it could cause structural damage, please seek professional advice immediately. Your safety and the stability of your home are paramount.
Our tutorial also assumes the presence of a brick structure underneath your existing facade. This brick provides a sturdy and receptive surface for the cement board and subsequent concrete overlay. If your fireplace does not have this underlying brick, or if its condition is poor, additional preparation or alternative methods may be required. Proceeding without proper assessment could lead to unexpected challenges or even hazardous outcomes. Once you’re absolutely confident in your fireplace’s structural suitability, you can move on to gathering the necessary materials and tools to bring your modern concrete vision to life.
Materials and Tools Needed for Your DIY Concrete Fireplace
To ensure a smooth and efficient renovation, gather all your materials and tools before you begin. Having everything on hand will prevent unnecessary interruptions and help maintain momentum throughout the project. Here’s what you’ll need:
- Demolition hammer: Essential for efficiently removing stubborn stone facades. We rented ours from a local hardware store like Home Depot for a day.
- Cement board: Provides a stable, moisture-resistant base for the concrete overlay.
- Mesh tape: Used to reinforce seams between cement boards, preventing cracks in the concrete finish.
- Electric drill: A powerful tool necessary for drilling into masonry and attaching cement board.
- Masonry drill bit and screws: Specifically designed for drilling into brick and securing cement board firmly.
- 14 inch Drywall tray: Ideal for holding and managing the mixed concrete for application.
- 12 inch Drywall knife: For smooth and even application of the concrete mixture.
- Ardex Feather Finish or Henry’s Feather Finish: The star of the show! A self-drying, self-bonding concrete patching compound. We used approximately two full bags for our project.
- A 5-gallon bucket for mixing the concrete: A robust container to mix your concrete efficiently.
- A drill attachment mixer: Greatly simplifies and speeds up the concrete mixing process compared to hand mixing.
- Safety glasses and dust mask: Crucial for protecting your eyes and lungs during demolition and mixing.
- Utility knife and straight edge: For precisely cutting cement board.
- Trowel or smaller putty knives: Useful for applying concrete to tighter areas and edges.
Step-by-Step Guide to Create Your DIY Concrete Fireplace
Time needed: 2 days
Follow this tutorial for step-by-step instructions to DIY your own concrete fireplace, transforming it into a modern focal point.
-
Step 1: Prepare Your Fireplace Space
The initial phase of your fireplace makeover involves clearing the canvas. If your fireplace features an existing insert, particularly an outdated or aesthetically unpleasing one like ours was, carefully remove it first. Similarly, any attached mantelpieces should also be detached. This step not only provides a clean working surface but also allows you to envision the ultimate transformation more clearly. Ensure the surrounding area is protected with drop cloths to contain dust and debris from subsequent steps.

-
Step 2: Demolish the Old Facade
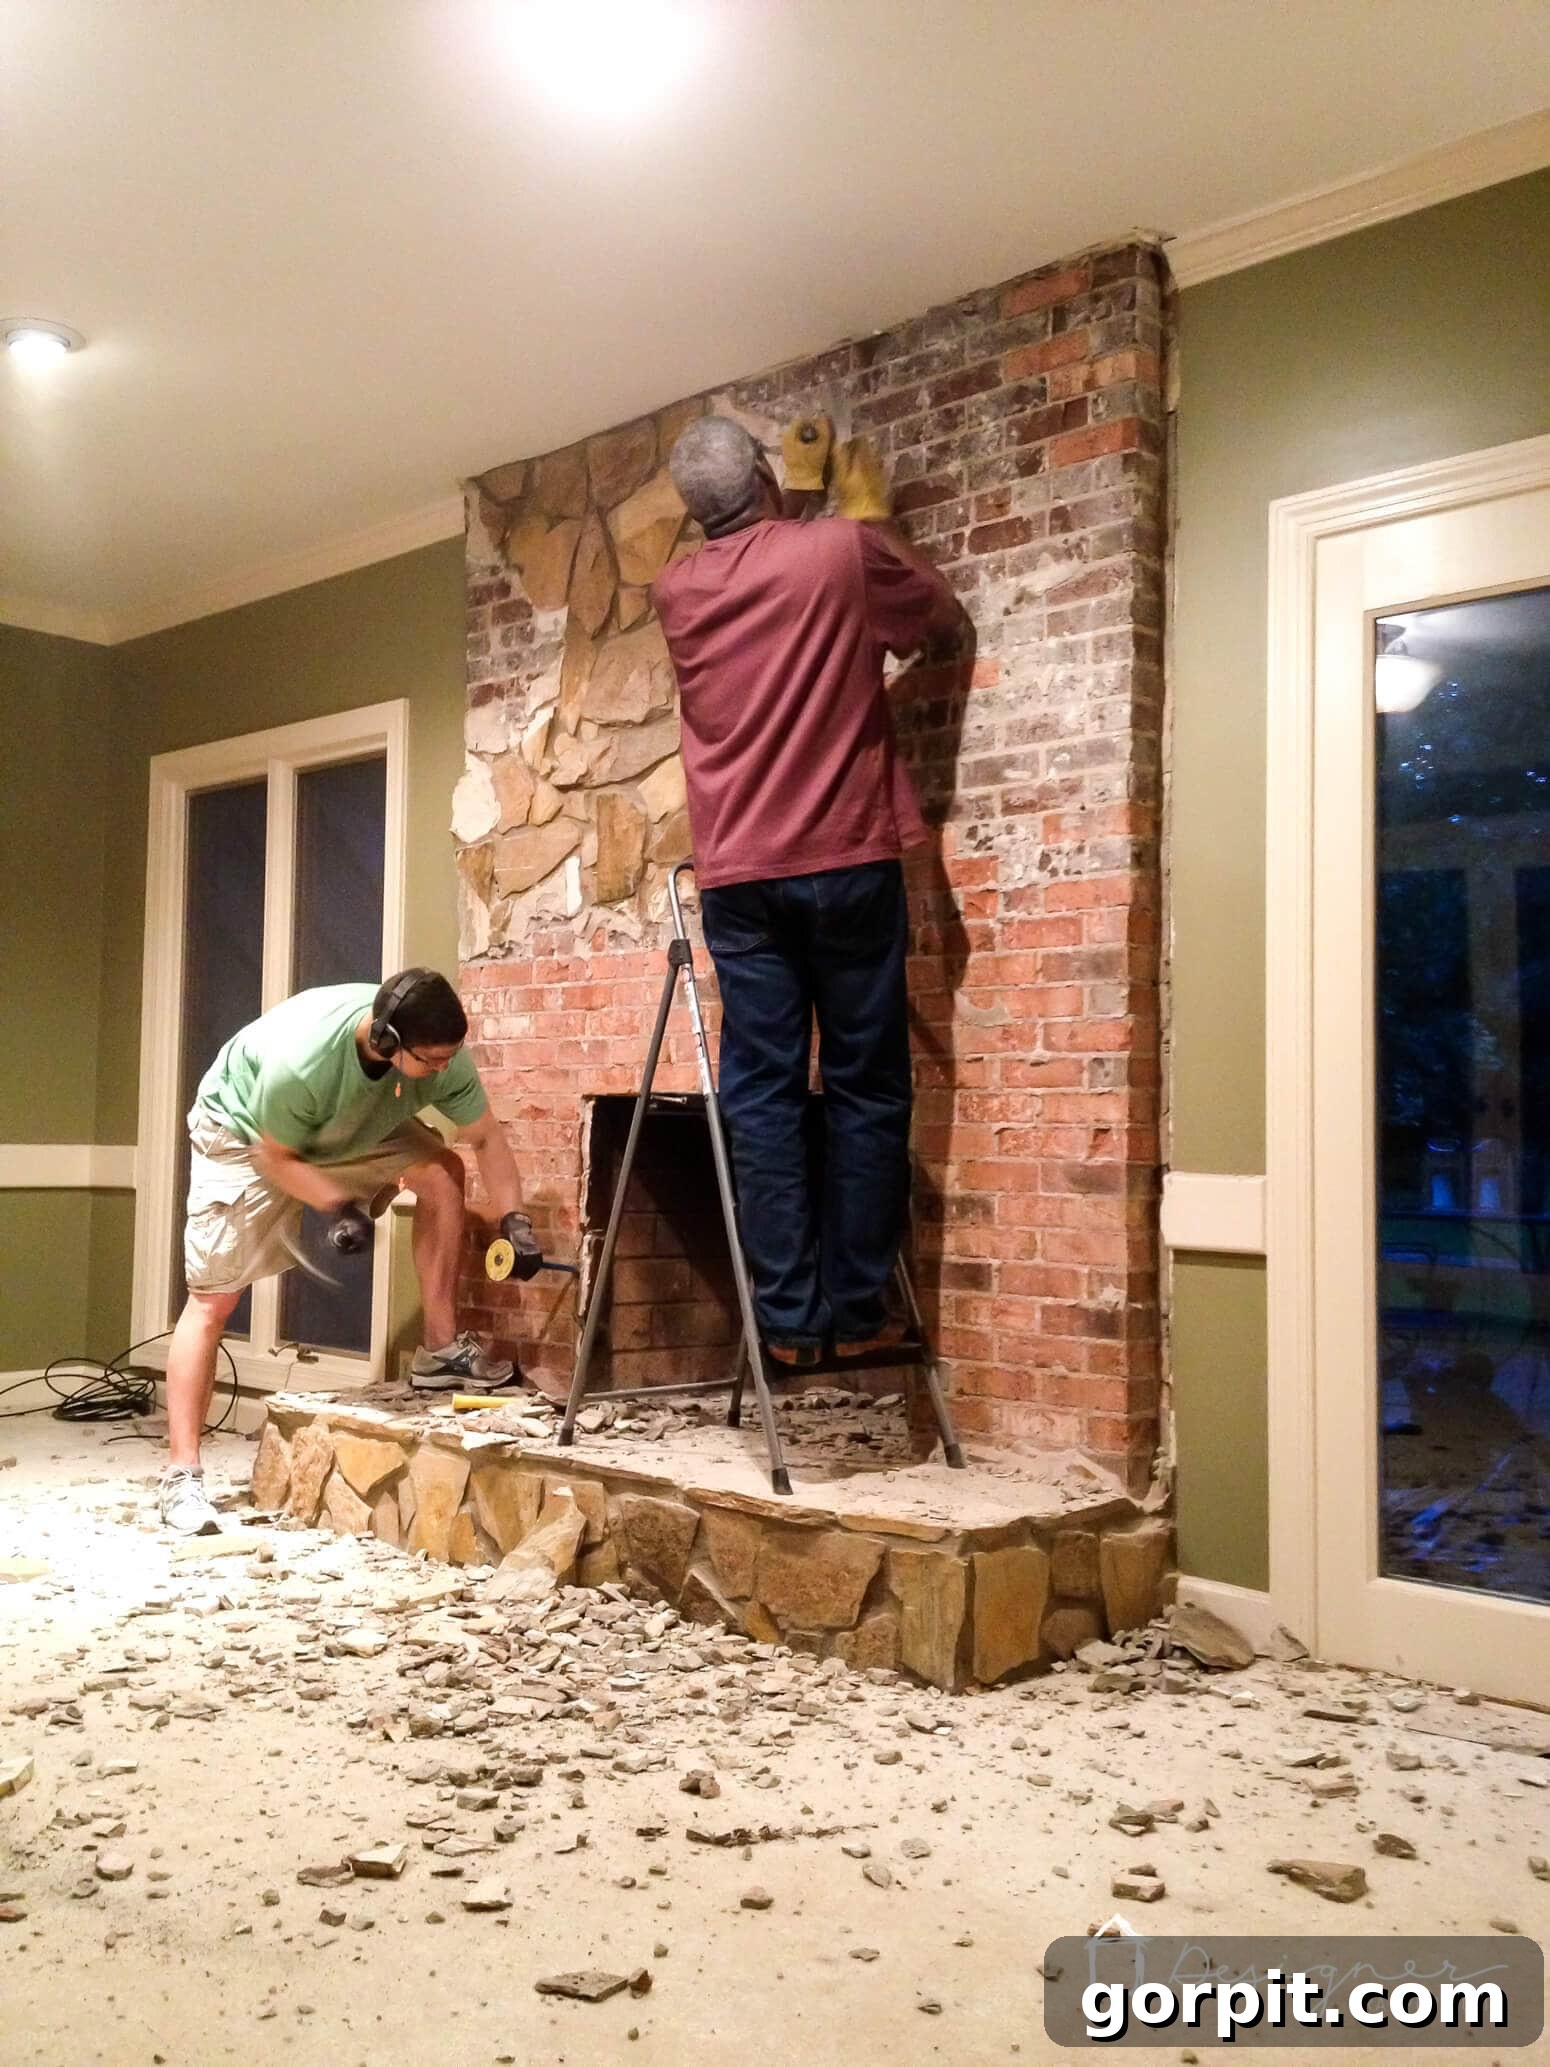
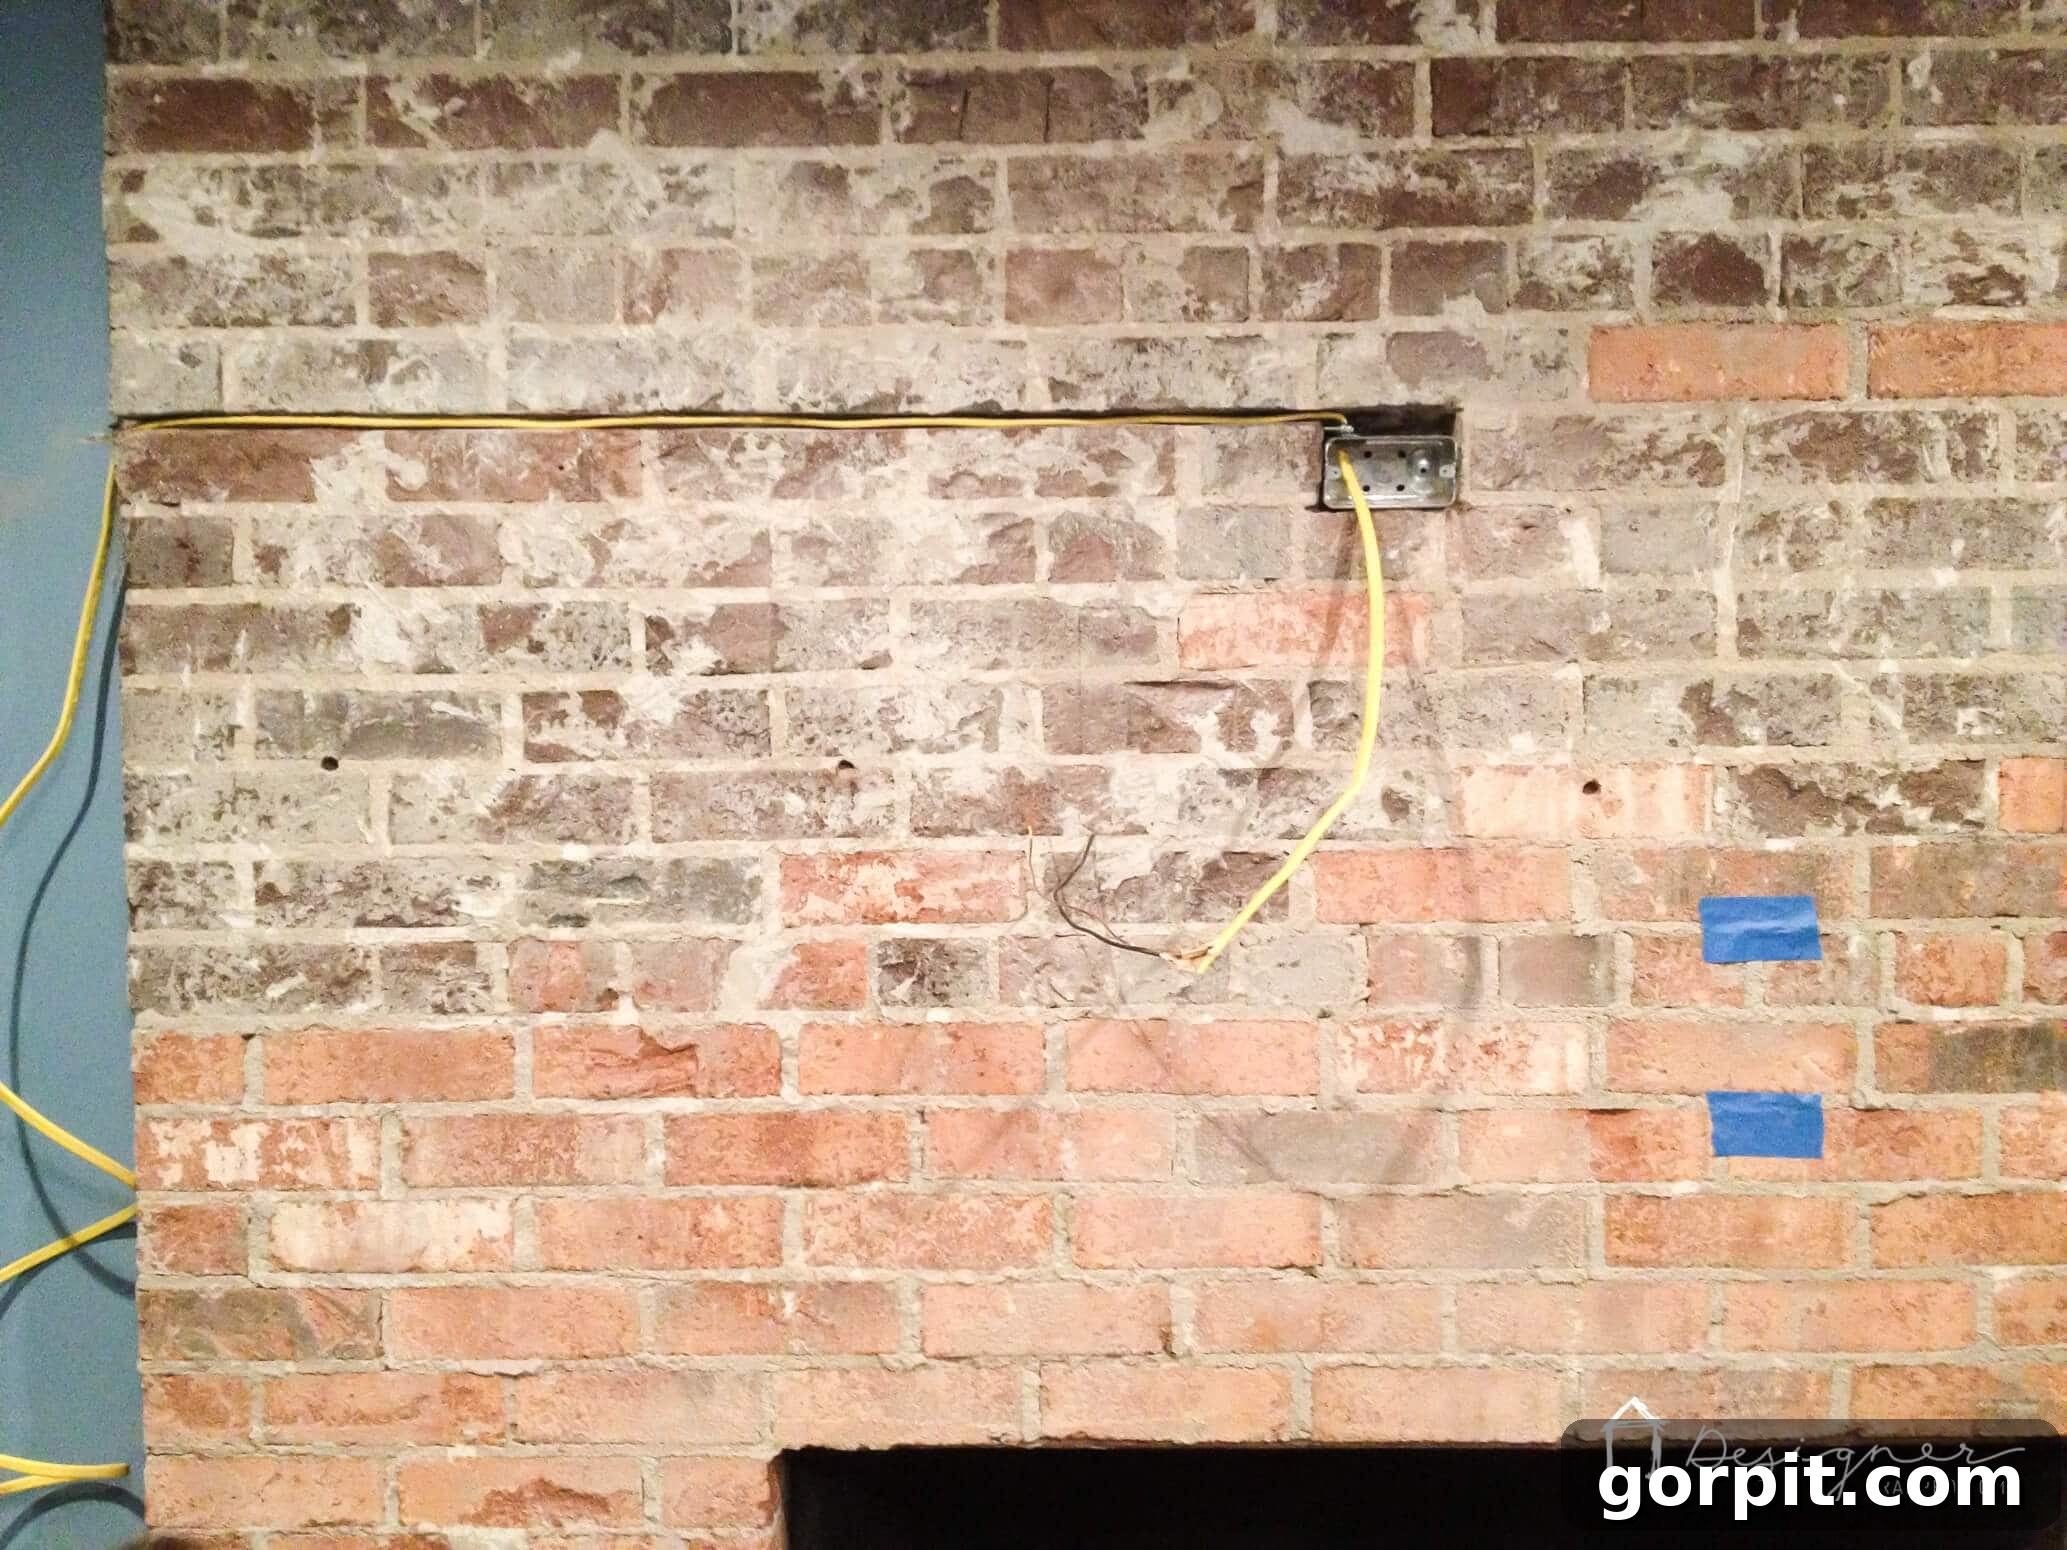
This step is for those dealing with an existing facade that needs removal. If you are fortunate enough to have a bare brick fireplace, you can happily skip directly to Step 3! However, for many, the journey begins with demolishing an old stone or tile facade. We cannot stress enough the benefit of renting a demolition hammer for this task. My husband, Joe, initially tried with a chisel and hammer, a method that quickly proved arduous and inefficient. Do yourself a massive favor and start with a demolition hammer from the outset—it will save you immense time and effort. As you chip away the old facade, the goal is to reveal the solid brick structure underneath. The transformation begins to feel real as the outdated material comes off, making way for a modern aesthetic. A huge shout-out goes to my awesome step-dad, Roger, whose assistance with this demolition phase was invaluable, as you can see him lending a hand to Joe below.
During this stage, we also opted to create a channel within the mortar joints of the brick to run electrical wiring. This allowed us to install a hidden outlet behind where our television would eventually be mounted, creating a clean, wire-free look. While this is an optional enhancement, and I must strongly advise against providing specific electrical advice (always consult with a qualified electrician for any electrical work), it highlights the potential for customization during your renovation. If a similar hidden electrical setup interests you, speaking with an electrician is the best course of action to ensure safety and compliance.
-
Step 3: Install Cement Board for a Stable Base
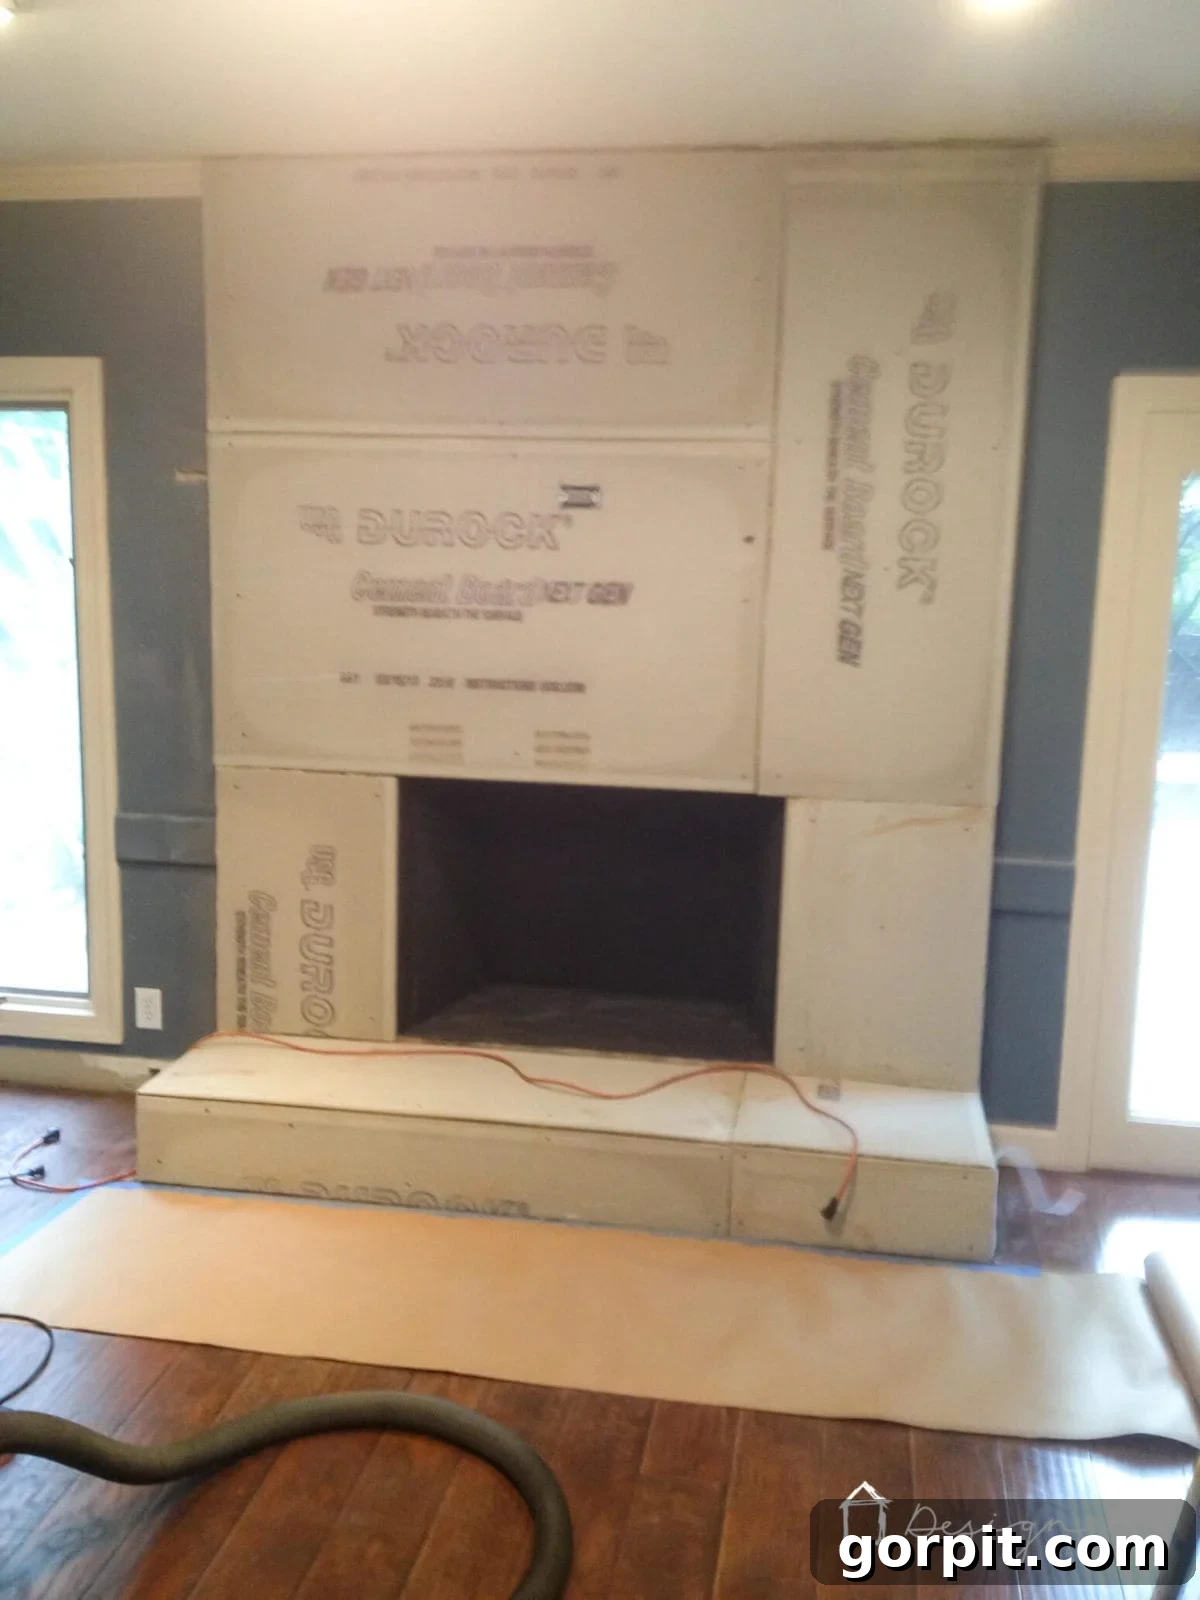
With the old facade removed and the brick exposed, the next crucial step is to create a stable and suitable substrate for your concrete finish: attaching cement board. Using an electric drill equipped with an appropriate masonry bit and masonry screws, carefully secure the cement board panels to the brick surface. It is vital to use an electric drill for this task; battery-operated drills often lack the necessary power and torque to penetrate brick effectively and efficiently. Measure and cut your cement board pieces precisely to fit each section of your fireplace, ensuring a snug fit. Once all the boards are firmly attached, proceed to tape all seams where two cement boards meet using mesh tape. This tape helps to reinforce these joints, preventing any future cracking in your concrete overlay and providing a smooth, continuous surface.
-
Step 4: The Magic of Concrete Application
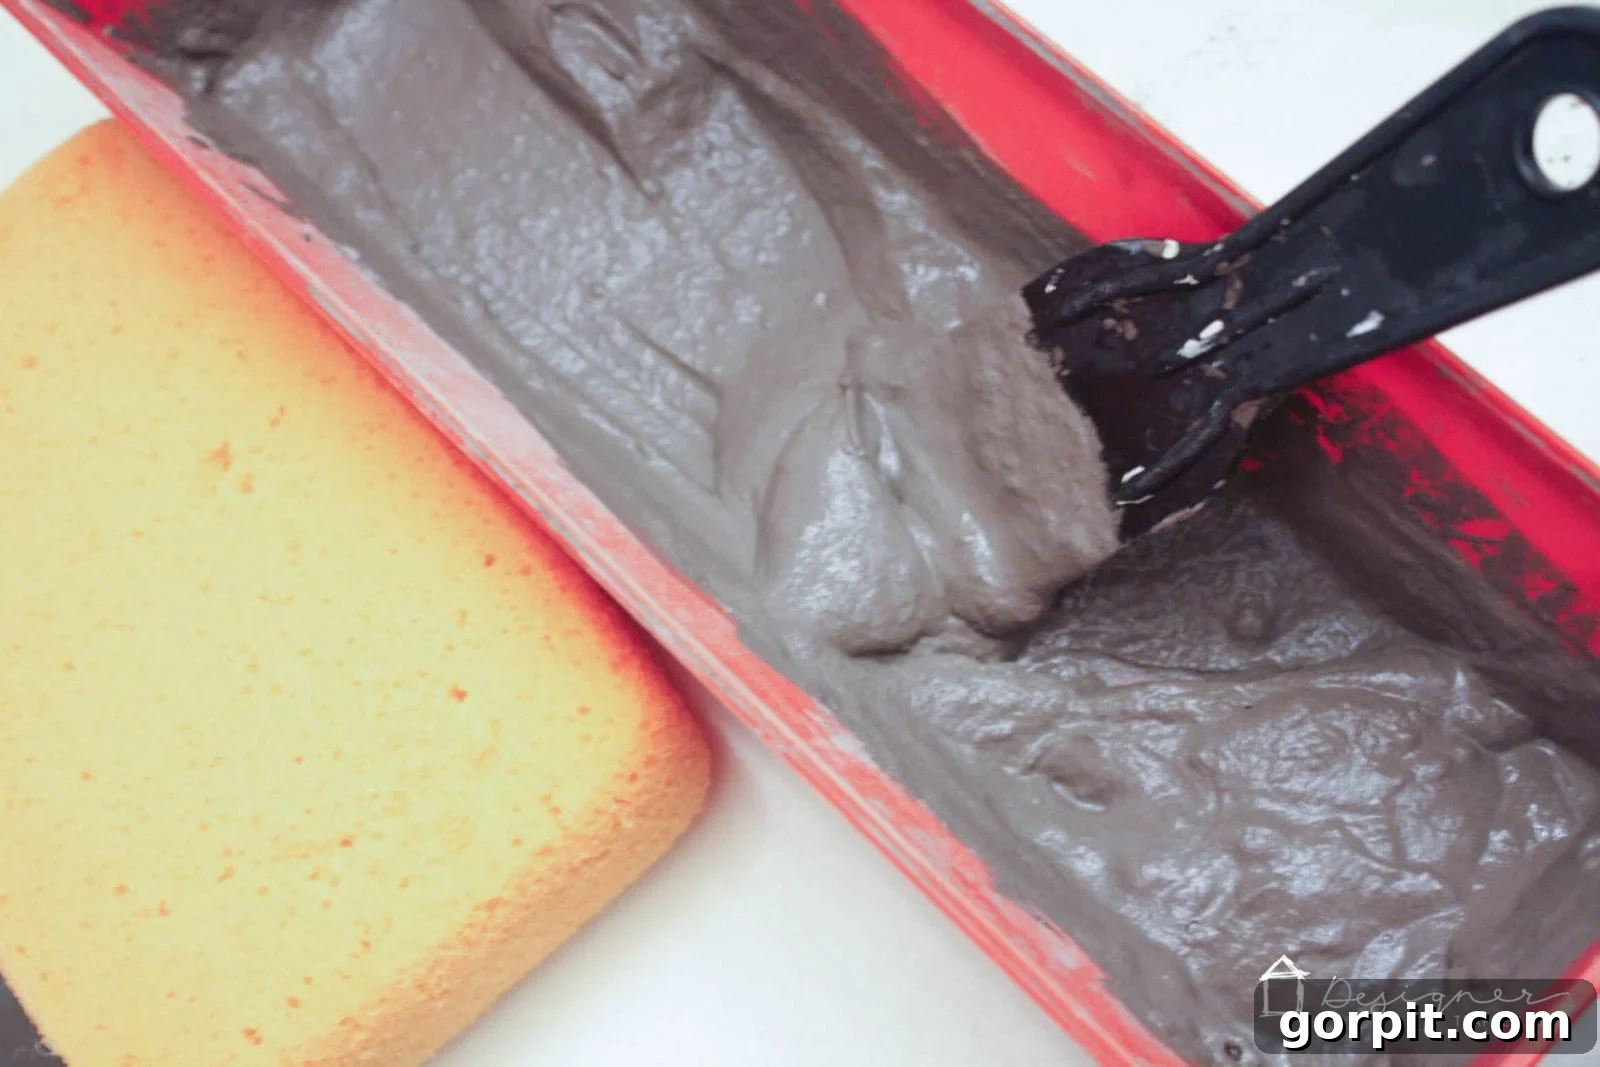
Now for the truly transformative and most enjoyable part of the project: applying the concrete finish! Begin by mixing your Ardex Feather Finish (or Henry’s Feather Finish) in a large 5-gallon bucket. Gradually add water to the dry mix, stirring continuously with a drill attachment mixer (or by hand, though it’s considerably more effort) until you achieve a consistency akin to thin pancake batter. The correct consistency is paramount for easy application and a smooth finish. Once mixed, allow the concoction to sit undisturbed for approximately 5 minutes. This “slaking” period allows the polymers to fully hydrate, enhancing the product’s workability and extending its open time. After 5 minutes, give it another thorough mix. This is what the perfectly mixed concrete will look like.
Transfer a manageable amount of the mixed concrete into your drywall tray. Using your 12-inch drywall knife, begin applying the mixture to the cement board. We recommend starting by covering the taped seams first, ensuring they are well-embedded and invisible beneath the concrete. Then, proceed to cover the remaining surfaces of the cement board. The key is to apply thin, even layers using long, sweeping strokes. For the edges and corners, we found it easiest and most effective to use our fingers, gently shaping and smoothing the concrete for a refined look. Unfortunately, as this project predated my blogging journey, I didn’t capture photos of this specific application step. However, if you’d like a visual reference for applying this product on a different surface, my DIY concrete vanity post includes some helpful images. Despite having zero prior experience with this type of application, we found it surprisingly straightforward. If you have any experience with plaster or drywall mud, you’ll likely pick this up even faster than we did!
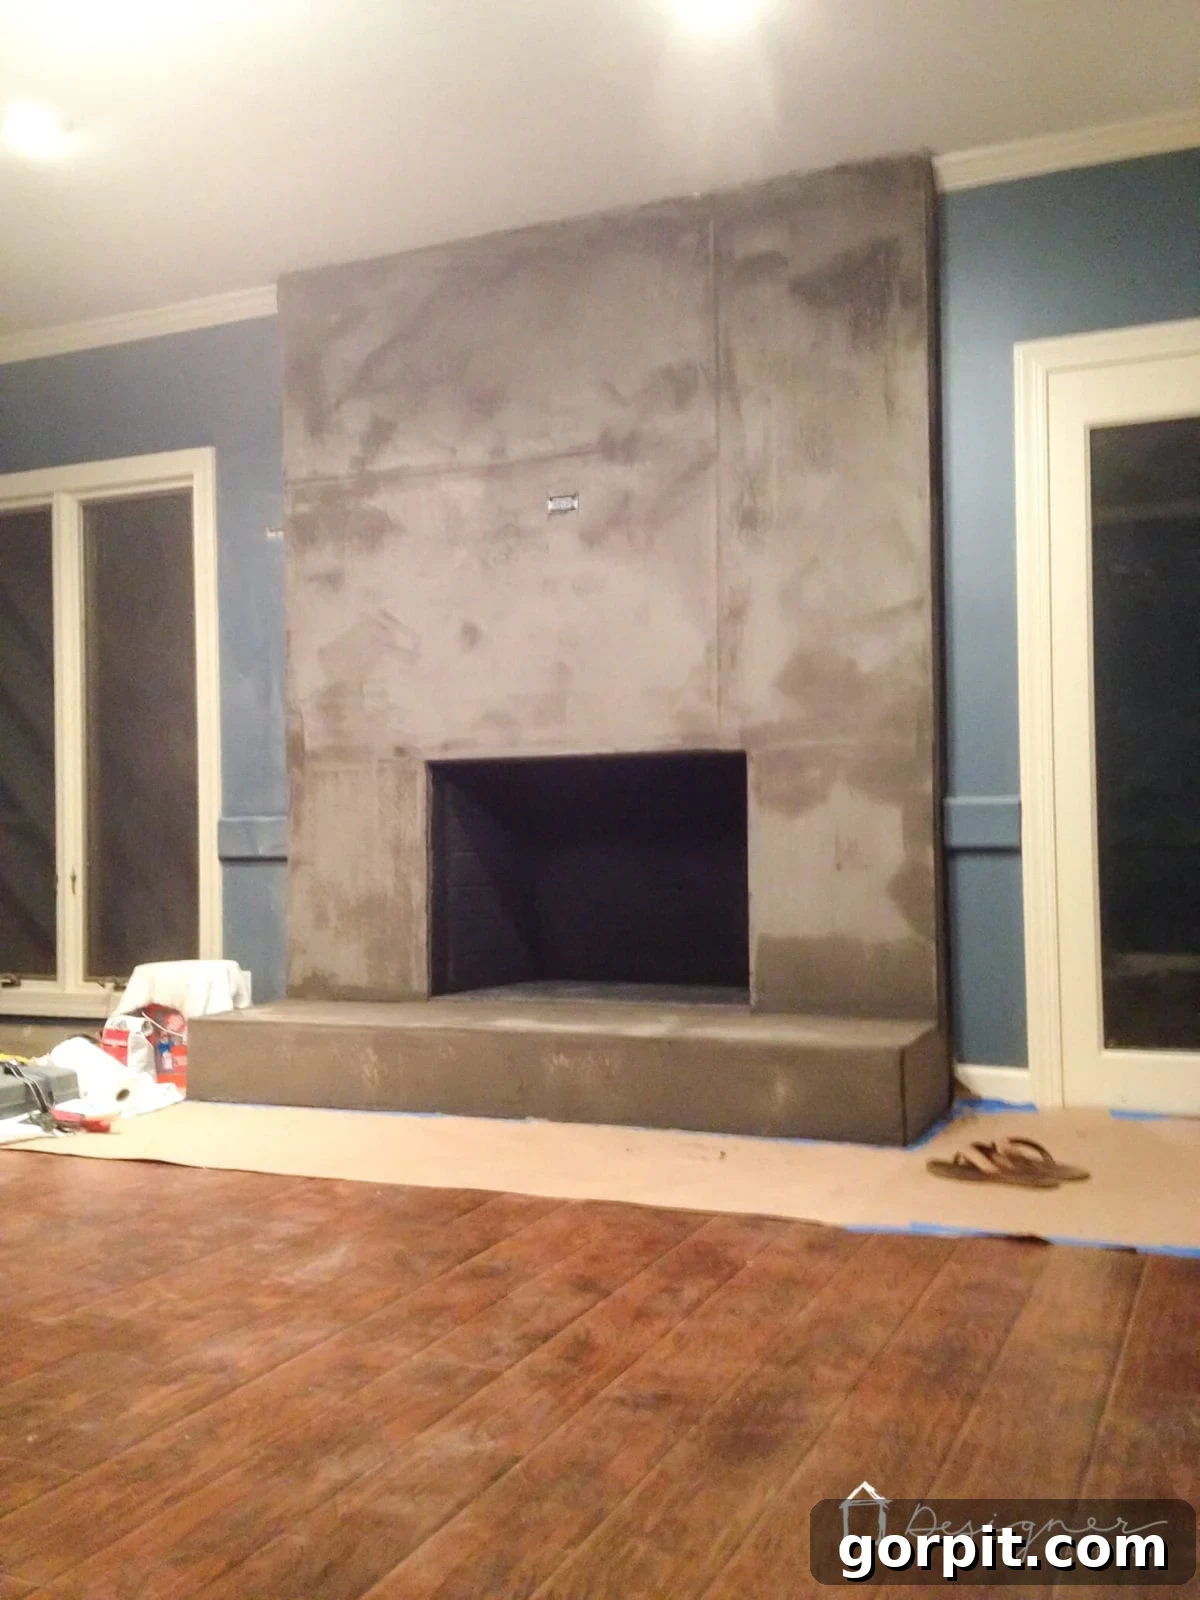
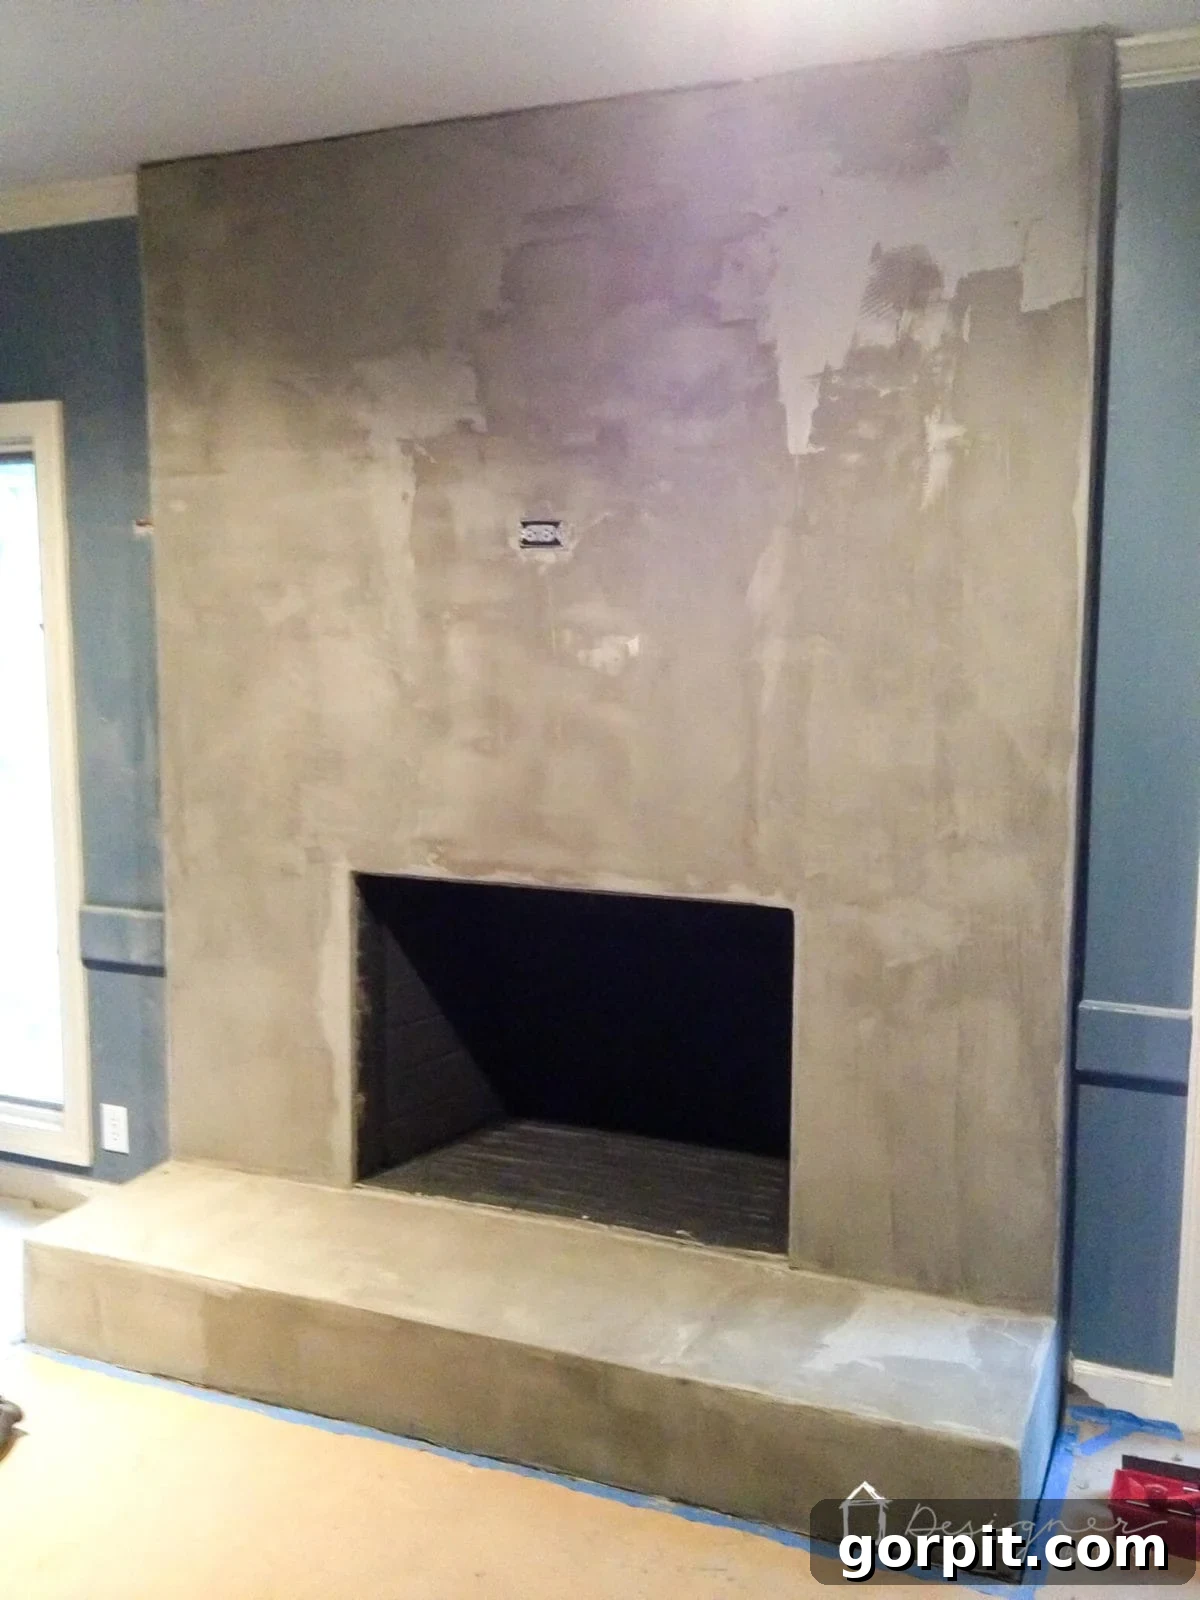
After the first coat, your DIY concrete fireplace will likely still show visible cement board seams, as ours did in this drying photo. Do not be alarmed; this is entirely normal. The purpose of the initial thin coats is to build up the surface. As you apply subsequent layers, these seams will gradually disappear, leading to a perfectly uniform and smooth finish.
Continue applying thin coats, allowing each layer to dry completely before adding the next. This typically takes a few hours, depending on humidity and ventilation. You will notice with each successive coat how the fireplace surface becomes smoother and more consistent, and how the underlying seams vanish completely. We applied between four and five coats in total, stopping when we achieved the desired level of smoothness and aesthetic appeal. The beauty of this process is that you can control the texture and depth, building it up to your personal preference.
-
Step 5: Optional – Refining and Sealing Your Concrete Finish
Once you’ve applied all your concrete coats and are satisfied with the coverage and smoothness, you might consider sanding and sealing. We did experiment with sanding between early coats, but honestly, we wish we hadn’t. It created a significant mess and, in the end, felt unnecessary. We absolutely adore the authentic, hand-troweled look of concrete, and sanding would have removed those beautiful, subtle imperfections that give it character. If you notice any particularly high spots or ridges that bother you, a light sanding with fine-grit sandpaper can address those specific areas. Otherwise, allowing each coat to dry thoroughly and then applying the next until you achieve your desired finish is often sufficient.
After our final coat, the concrete was incredibly smooth to the touch, even without additional sanding, which made us decide against it once more. We also chose not to apply a sealer. For a fireplace, the risk of spills like red wine is minimal, making a sealer less of a necessity unless you desire a slight sheen or extra protection against smudges. However, if you wish to add a protective layer and a subtle gloss, you can use the same sealer I applied to our DIY concrete vanity. The choice to sand and seal is entirely yours, depending on the exact aesthetic and level of protection you desire for your stunning new concrete fireplace.
The Stunning Reveal and Lasting Impact
And there you have it! For an astonishingly low cost of less than $100, we completely revolutionized our outdated fireplace. This DIY concrete fireplace now stands as a beautiful, contemporary focal point in our family room, defying the initial skepticism of professionals who couldn’t envision such a transformation. We are absolutely thrilled with the clean, simple lines and the modern aesthetic it brings to the space. The concrete work is flawless, precisely mirroring the vision I held from the very beginning of this project.
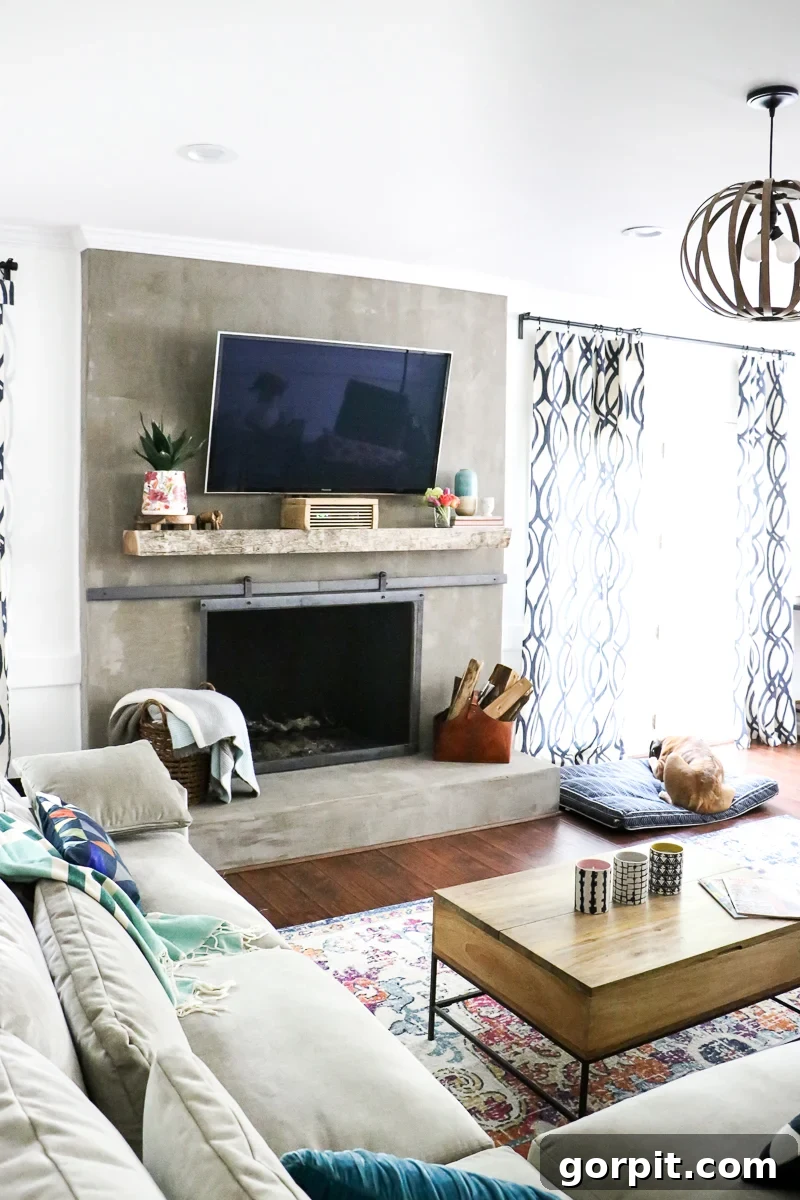

To perfectly complete this vision, we custom-built and added an incredible DIY metal sliding barn door fireplace screen. This screen not only adds a touch of rustic modernism but also provides functional elegance, perfectly complementing the concrete’s industrial charm. The entire ensemble is sheer perfection, and it fills me with immense satisfaction every time I recall the original, dreadful state of the fireplace and compare it to its current gorgeous form!

One of my absolute favorite comparisons is the view from my home office/craft room into the family room. The transformation is genuinely astounding, a testament to what can be achieved with a clear vision, a bit of elbow grease, and the right materials. The before-and-after speaks volumes.
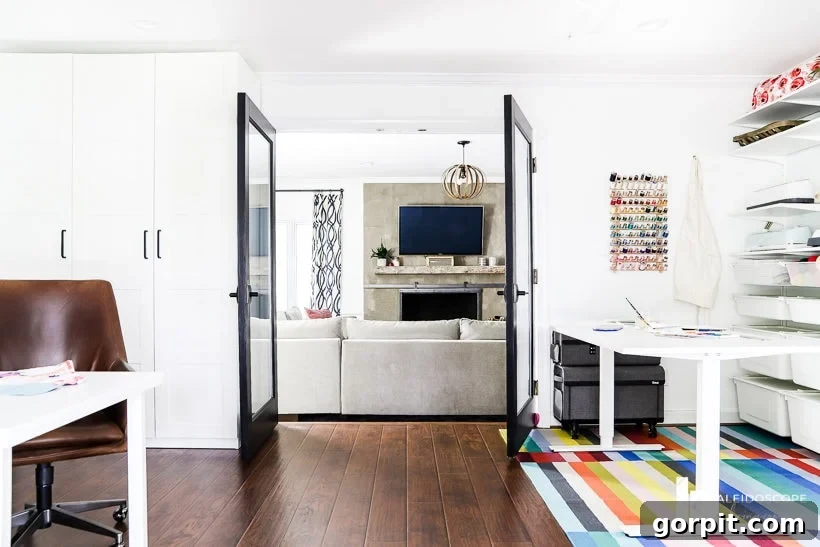
What are your thoughts on our DIY concrete fireplace? Can you believe that this dramatic, stylish transformation was accomplished for less than $100? We hope this tutorial empowers you to tackle your own fireplace renovation, proving that a high-impact home upgrade doesn’t have to come with a hefty price tag.
Other DIY home improvement ideas you may enjoy:
- DIY Concrete Vanity: A Bathroom Countertop Makeover
- DIY Tiled Fireplace Makeover Reveal: Modernizing with Tile
- The Coolest DIY Concrete Projects Out There for Your Home
- The Easy Way to Update Bathroom Tile Without Replacing It!
- DIY Staircase Makeover in 2 Days: Tutorial & Reveal
- DIY Range Hood Finish With Wood and White Concrete
- 18+ Budget Friendly DIY Backsplash Ideas to Transform Your Kitchen
Wondering how I approach transforming rooms and spaces in our home, achieving these stunning results on a budget? Check out my signature system, Designer in a Binder®, designed to simplify home decorating for everyone.
For exclusive content, behind-the-scenes sneak peeks, and more transformative DIY projects delivered straight to your inbox, be sure to subscribe to our newsletter before you go!