Thank you to DAP Products for sponsoring this post. As always, all opinions are 100% my own based on personal experience.
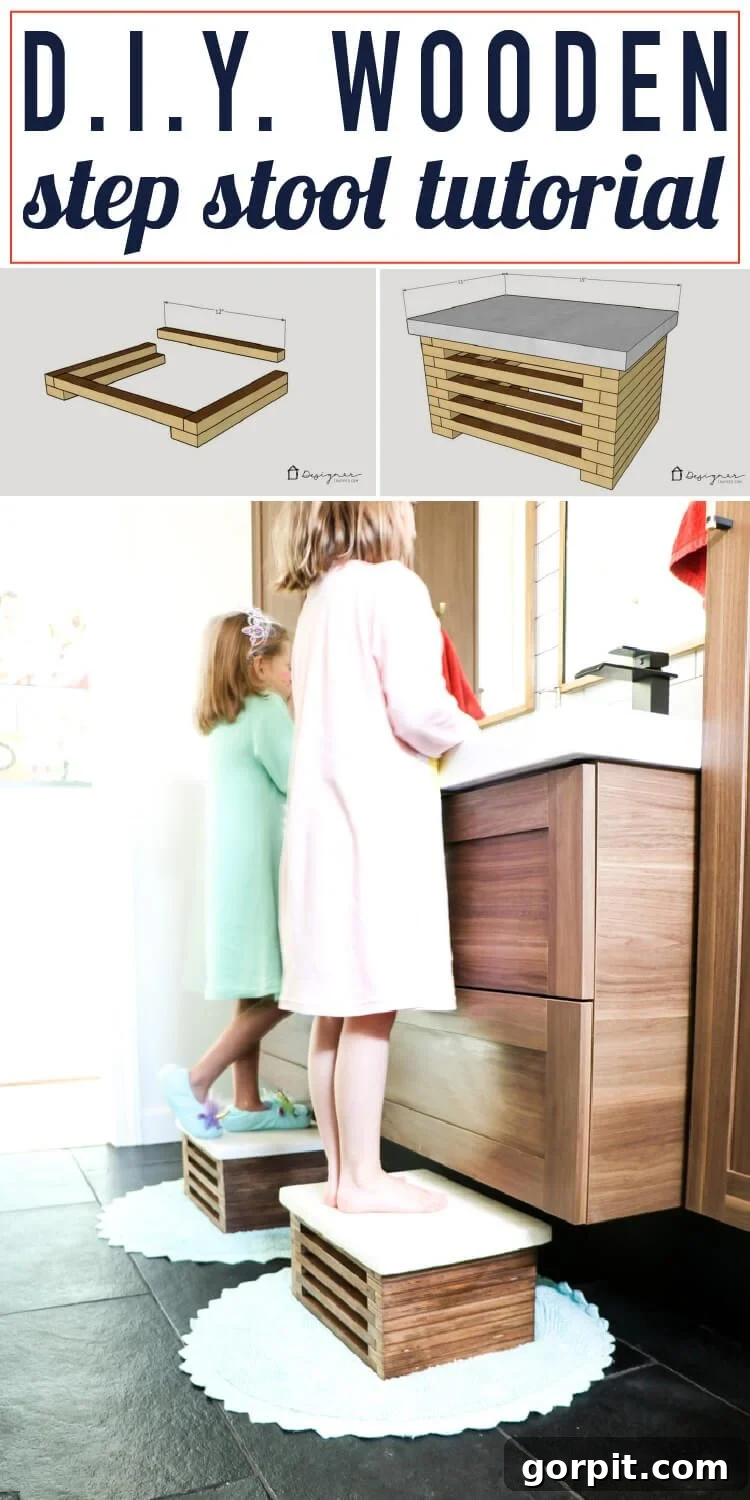
Welcome to an exciting DIY journey where functionality meets modern aesthetics! Today, we’re thrilled to unveil the comprehensive tutorial for crafting your very own stylish wooden step stool, complete with a unique faux white concrete top. We’ve been eagerly anticipating sharing this project, and while putting together a detailed, easy-to-follow guide takes time, we believe the result—and this tutorial—is well worth the wait. Don’t let the intricate appearance fool you; this project is surprisingly straightforward and incredibly rewarding, even for novice DIYers. If you’re looking for a project that combines practical utility with eye-catching design, you’ve found it.
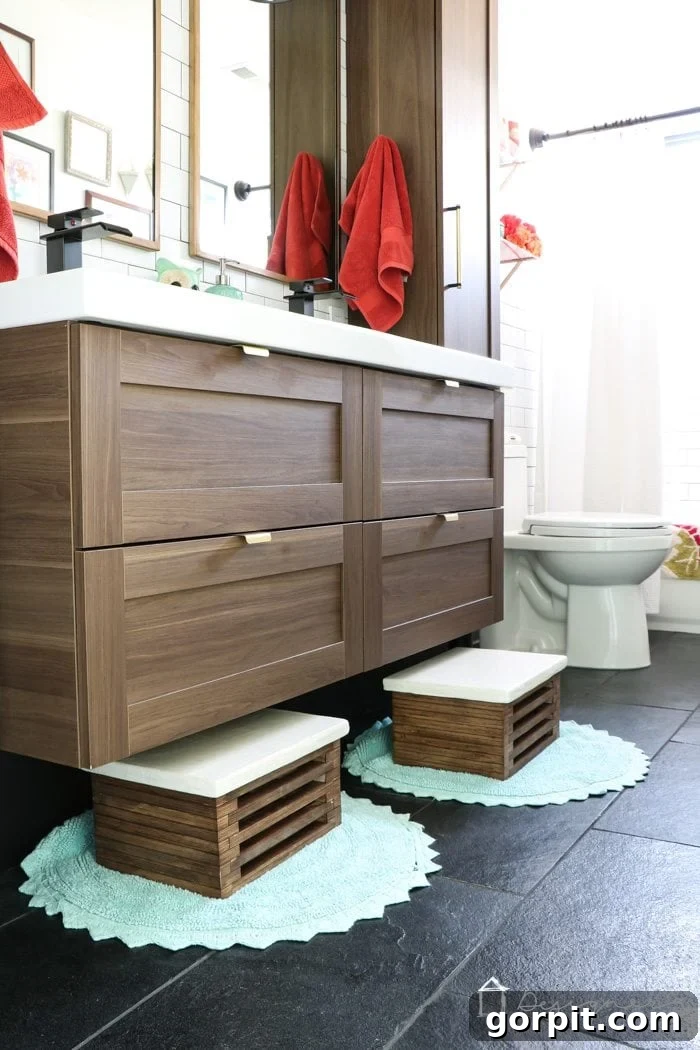
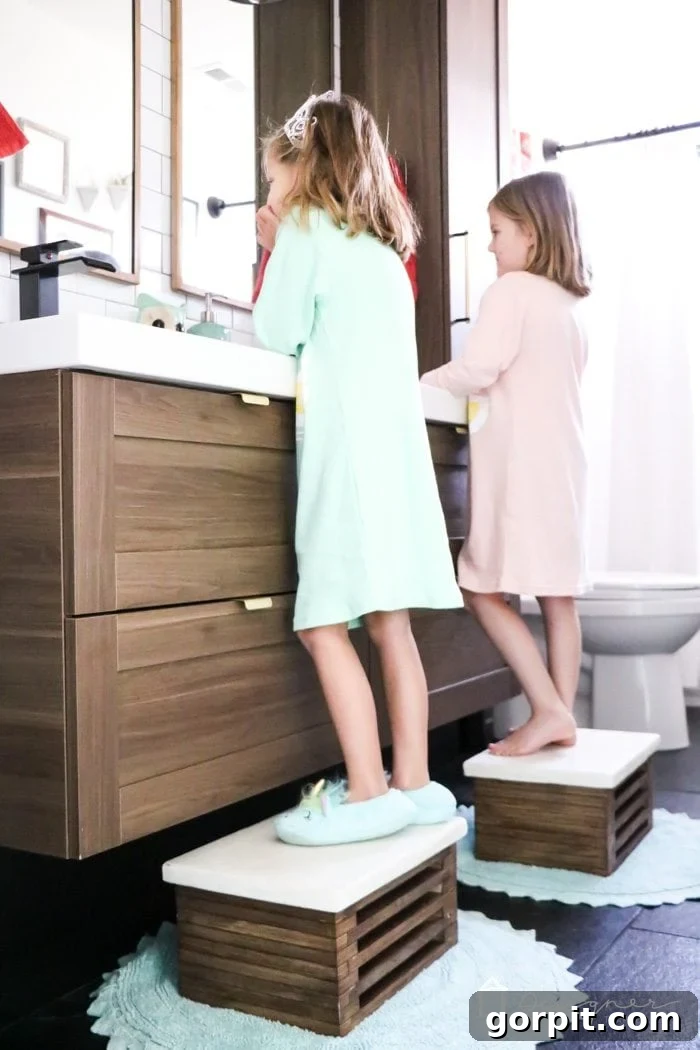
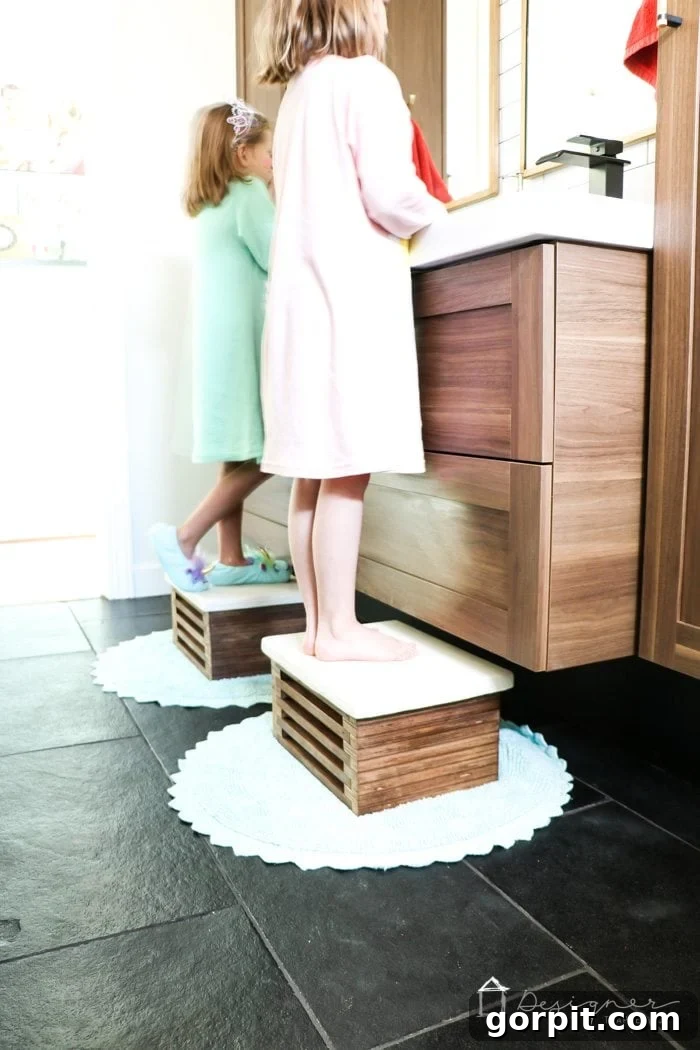
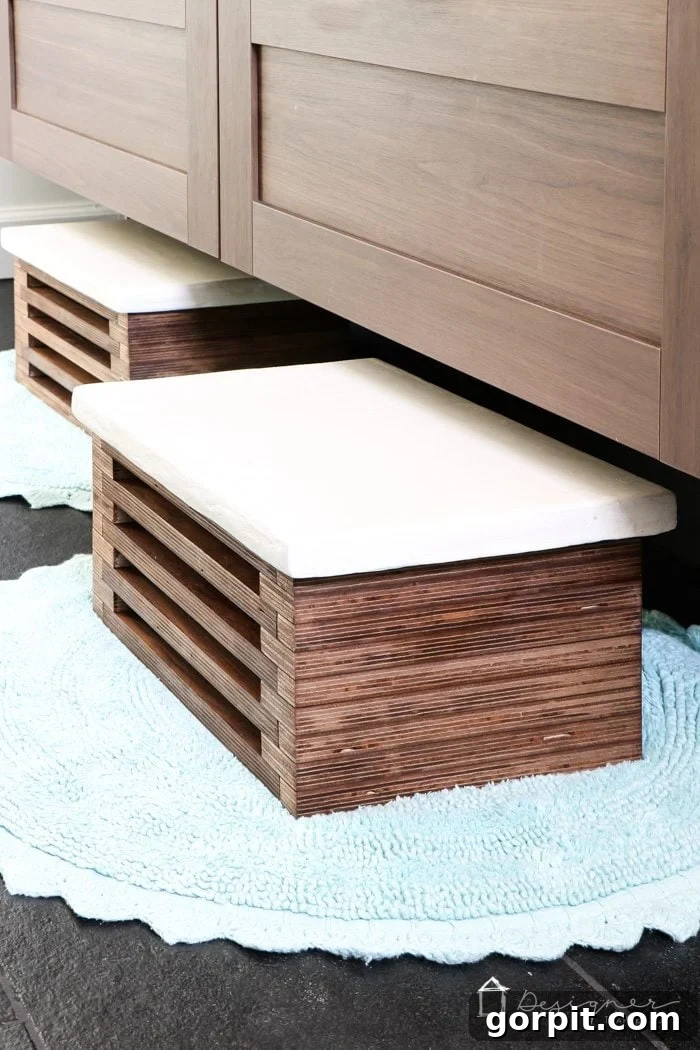
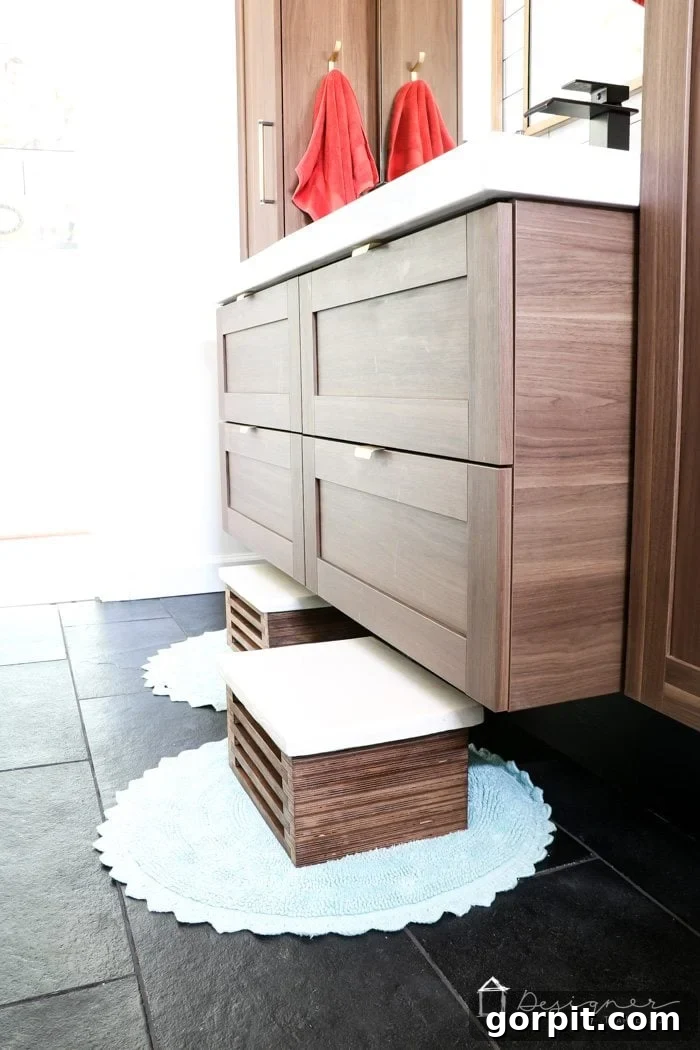
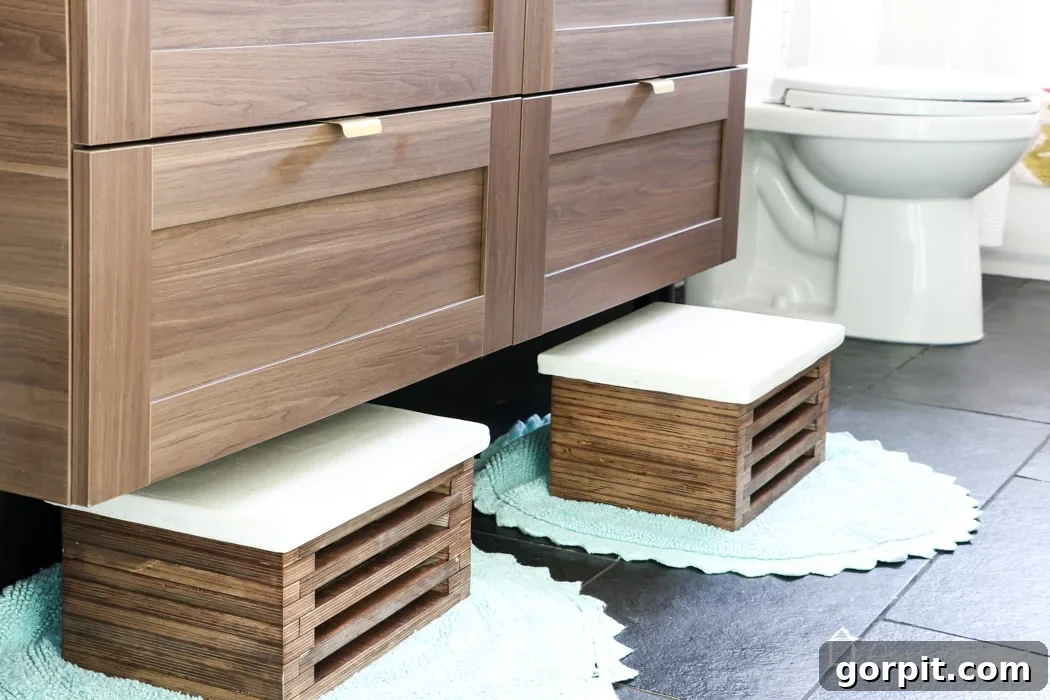
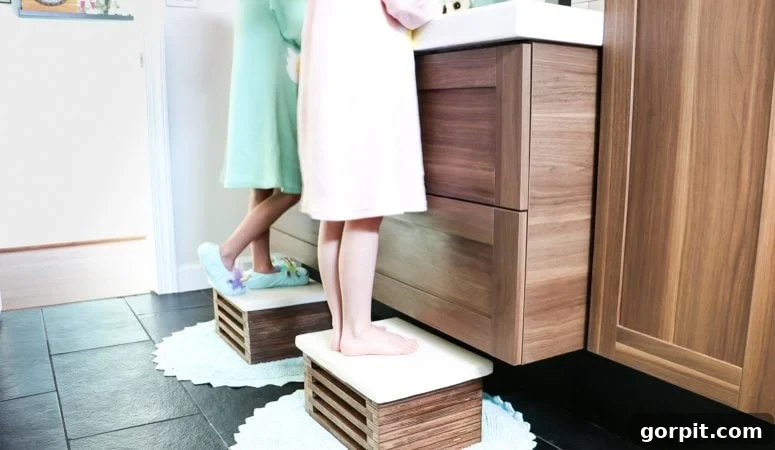
Our twin girls’ recently renovated bathroom provided the perfect inspiration and need for these custom step stools. They aren’t just pretty faces; they are indispensable tools, empowering our little ones to independently reach the sink for brushing teeth and washing hands. The design was carefully considered to be just the right height, allowing them to tuck neatly under our floating vanity, preserving valuable floor space and maintaining a clean, minimalist look. This thoughtful design ensures they are always accessible yet never in the way. The marriage of warm wood tones with a cool, modern white concrete top truly encapsulates our design philosophy—practicality wrapped in undeniable style. And for those who share our love for all things concrete, you’re in for a treat; achieving this sophisticated faux concrete finish is simpler than you might imagine, and we’ll show you exactly how. Before we dive into the hands-on process, please note that this post contains some affiliate links for your convenience. Click here to read my full disclosure policy. For a deeper dive into the stunning bathroom where these stools reside, including all the sources and design choices, be sure to visit our twin girls’ DIY bathroom remodel reveal.
Craft Your Own Modern Masterpiece: The DIY Wooden Step Stool with Faux Concrete Top
Embark on a creative woodworking adventure with our step-by-step guide to building a custom wooden step stool. This isn’t just any stool; it’s a modern statement piece designed to elevate both your home decor and your children’s independence. Perfect for a kids’ bathroom, a kitchen, or even as a chic plant stand, this DIY project is adaptable and incredibly rewarding. We’ll walk you through everything from selecting materials to applying the striking faux concrete finish, ensuring you achieve a professional-looking result that you’ll be proud to showcase.
Essential Materials & Tools for Your DIY Step Stool
Gathering the right materials and tools is the first crucial step towards a successful DIY project. We’ve carefully selected components that ensure durability, ease of use, and a beautiful finish. Investing in quality materials and having the right tools on hand will make the entire process smoother and more enjoyable. Here’s what you’ll need to create your own modern wooden step stool:
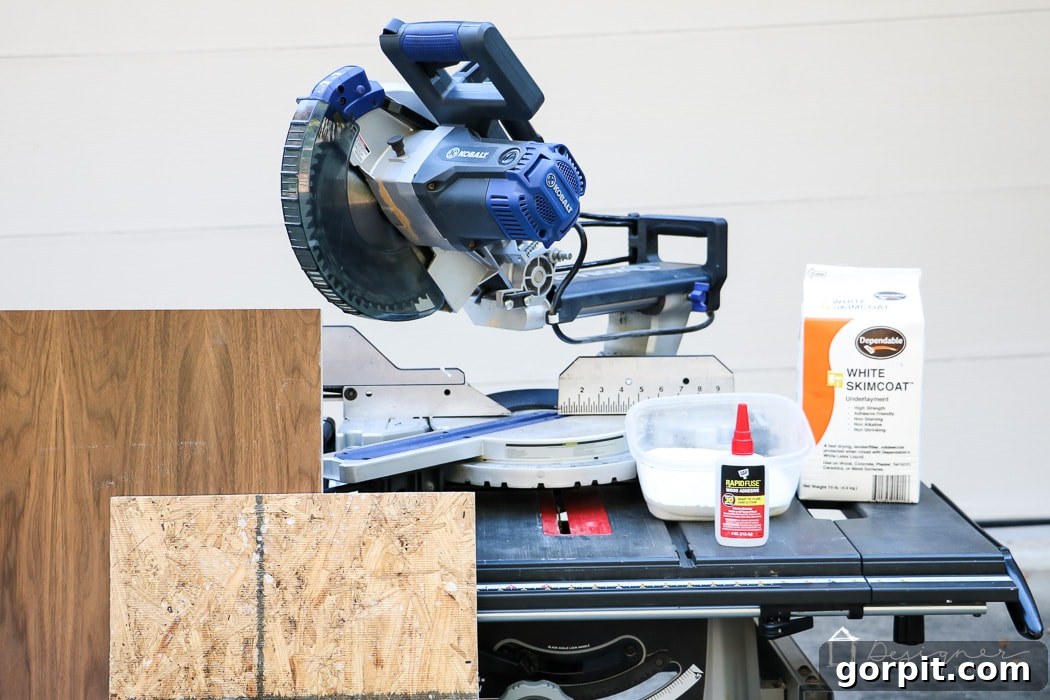
- Plywood: We opted for Purebond design edge plywood in walnut. Plywood is an excellent choice for step stool construction due to its inherent strength, stability, and resistance to warping, ensuring your stool will be robust and long-lasting. Purebond plywood is particularly noteworthy for being formaldehyde-free, making it a healthier and more environmentally friendly choice for your home. The rich walnut finish provides a warm, elegant base for your stool, but you can, of course, choose any wood species or finish that best complements your home’s existing aesthetic.
- 1 sheet of OSB (Oriented Strand Board): This material serves as the perfect, cost-effective substrate for our faux concrete top. OSB provides a stable and slightly textured surface that allows the skimcoat to adhere exceptionally well, creating a durable and realistic concrete appearance. It’s an ideal choice for adding structural integrity to the top without significant expense.
- Dap Rapid Fuse Wood Adhesive: A true game-changer for woodworking projects, this adhesive offers a remarkably fast and strong bond, significantly reducing clamping time compared to traditional wood glues. One bottle is more than sufficient for this project, making assembly quick and secure. Its superior bonding strength ensures your step stool will withstand daily use and remain structurally sound for years.
- White Skimcoat: This is the secret to our stunning faux concrete top. Skimcoat is a thin layer of plaster-like material that can be applied over various surfaces to create a smooth, durable finish. Choosing a white skimcoat provides that clean, minimalist, and modern concrete aesthetic we adore. It’s surprisingly easy to work with, dries relatively quickly, and yields impressively realistic results that can fool even a close observer.
- Orbital Sander: Essential for achieving a smooth, professional finish on both your raw wood components and, later, for perfecting the skimcoat surface. An orbital sander makes quick work of preparing surfaces by removing splinters, smoothing edges, and ensuring proper adhesion for the skimcoat and any subsequent wood finishes.
- Table Saw: For precise and straight cuts on your plywood and OSB. A table saw is invaluable for ensuring all your pieces fit together perfectly, which is critical not only for the structural integrity of the step stool but also for its overall aesthetic appeal. Accuracy in cutting will make the assembly process much easier.
- Miter Saw (optional): While a table saw can handle most cuts required for this project, a miter saw offers additional precision for crosscuts and angles, potentially simplifying some steps and allowing for faster, more accurate repetitive cuts. If you have one, it can be a convenient addition to your toolset, but it’s not strictly necessary if you’re comfortable with a table saw.
- Drywall Mud Pan: A simple yet incredibly effective tool for mixing and holding your skimcoat material. Its design makes it easy to scoop the mixture and ensures you have a consistent supply ready for application. It also facilitates easy cleanup.
- 8 to 10 inch Drywall Taping Knife: This tool is perfect for spreading the skimcoat smoothly and evenly across the OSB surface. Its wide blade allows you to achieve that flawless faux concrete finish with ease, minimizing streaks and providing a professional-looking surface.
With your materials and tools at the ready, you’re well-prepared to tackle this rewarding DIY project. Let’s move on to the planning and construction phases, where your vision truly comes to life, piece by precise piece.
Precision Planning: Wooden Step Stool Diagrams & Dimensions
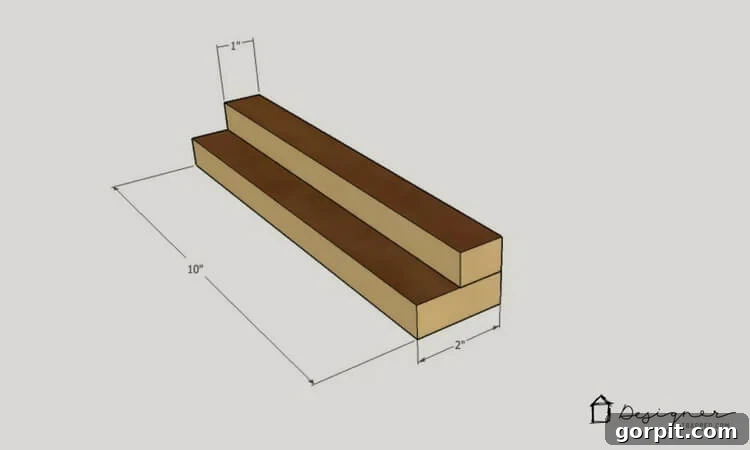
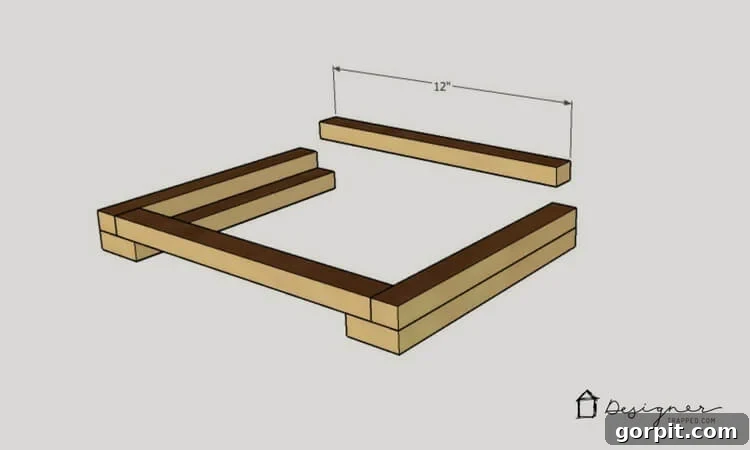
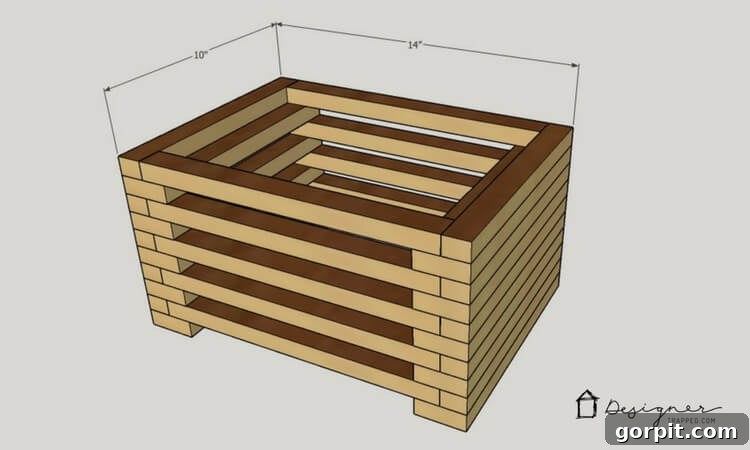
Before you make your first cut, a thorough understanding of the step stool’s dimensions and assembly is paramount. The success of any woodworking project begins with accurate measurements and a clear plan. We’ve created detailed diagrams to guide you through every measurement, ensuring accuracy and a perfect fit for all your components. We highly recommend reviewing these drawings carefully before watching the video tutorial or picking up your saw. Visualizing the structure and understanding each component’s role will significantly streamline your building process, helping you avoid mistakes and optimize material usage. Pay close attention to the cut list and how each piece fits together.
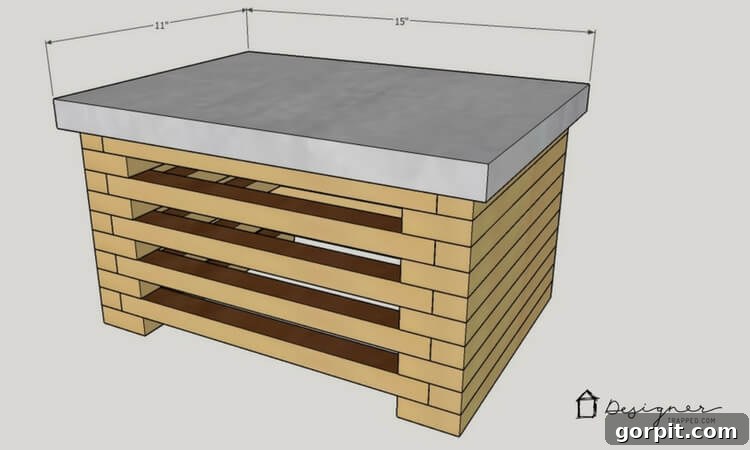
Step-by-Step Construction: Bringing Your Wooden Step Stool to Life
Now that you have your materials and diagrams, it’s time to assemble your modern step stool. This section will guide you through the key stages of construction, from precise cutting to the application of the unique faux concrete top. Remember to prioritize safety throughout the entire process by wearing appropriate eye and hearing protection.
1. Cutting Your Wood Pieces
Refer diligently to the provided diagrams for all dimensions of your plywood and OSB pieces. Using your table saw (and miter saw if preferred for crosscuts), carefully cut all the plywood pieces that will form the main structural components of the step stool. Precision here is vital for a sturdy and professional-looking final product. Make sure your cuts are straight and clean. Once the plywood is cut and inspected for accuracy, proceed to cut the OSB piece that will form the top surface where your faux concrete will be applied. Double-check all measurements before making your cuts, as the adage “measure twice, cut once” is truly invaluable in woodworking.
2. Assembling the Wooden Base
With all your pieces cut, it’s time for assembly. Apply a generous bead of Dap Rapid Fuse Wood Adhesive along the edges where the plywood pieces will join. This adhesive is incredibly strong and fast-acting, making the assembly process efficient. Press the pieces firmly together, ensuring they are square and flush at every joint. Rapid Fuse lives up to its name, providing a strong bond quickly, but it’s always good practice to use clamps to hold the pieces securely in place while the adhesive fully cures. This ensures maximum contact and bond strength. Allow ample drying time as recommended by the adhesive manufacturer to ensure maximum strength and stability before moving on.
3. Preparing for the Faux Concrete Top
Once your wooden base is fully assembled and the adhesive has completely cured, take your orbital sander and lightly sand all surfaces of the wooden frame, paying particular attention to the top edges where the OSB will sit. This ensures a smooth transition and optimal adhesion for the OSB and subsequently the skimcoat. Then, securely attach the cut OSB piece to the top of the wooden frame. You can use wood adhesive and small screws if desired for extra reinforcement, ensuring the screws are countersunk so they don’t interfere with the skimcoat application. Ensure the OSB is centered and flush with the edges of the plywood base. This creates the perfect, stable, and ready-to-finish foundation for your faux concrete top.
4. Creating the Faux White Concrete Top with Skimcoat
This is where the magic happens and your step stool truly begins to take on its signature modern look! Prepare your white skimcoat according to the manufacturer’s instructions. Consistency is key here; you want a smooth, lump-free, and workable mixture, similar to thick pancake batter. Using your drywall mud pan for holding and your drywall taping knife for application, apply a thin, even layer of skimcoat over the entire OSB surface. Work in smooth, deliberate strokes to minimize lines and achieve an even texture. Don’t worry if the first coat isn’t perfect; it’s a base. Allow the first coat to dry completely, which may take several hours depending on humidity. Once dry, lightly sand any imperfections with fine-grit sandpaper (around 220 grit) to create a smooth surface for the next layer, then wipe away dust. Apply a second thin coat, aiming for greater perfection. Depending on the desired finish and depth, you might apply a third coat. The goal is a smooth, continuous surface that convincingly mimics the look and feel of real concrete. After the final coat is dry, very lightly sand the entire surface with an ultra-fine-grit sandpaper (e.g., 320 or 400 grit) to achieve an ultra-smooth, polished finish.
5. Sealing for Durability and Longevity
To protect your beautiful faux concrete top from moisture, stains, and daily wear and tear, sealing is a crucial final step, especially for an item used in a bathroom. Apply a high-quality concrete sealer (ensure it’s compatible with skimcoat applications) following the product’s instructions carefully. This will create a protective barrier, enhance its durability, make it significantly easier to clean, and ensure your step stool remains pristine and gorgeous for years to come, even in a high-moisture environment like a bathroom. Allow adequate time for the sealer to fully cure before heavy use. For the wooden base, you might consider applying a clear coat or wood sealant for added protection and a finished look.
Visual Guidance: Watch Our Wooden Step Stool Video Tutorial
Sometimes, seeing is believing, and a video tutorial can clarify steps that text alone might not fully convey. This comprehensive video guide will walk you through each stage of building these DIY wooden step stools, offering valuable visual insights, practical tips, and demonstrations of the techniques described above. We encourage you to watch the video at least once before starting your project. The video will play after a brief ad.
And there you have it – the finished product! We are absolutely thrilled with how these modern wooden step stools turned out. Their seamless integration into our girls’ bathroom, combined with their striking aesthetic, makes them a truly beloved and indispensable addition. They exemplify our belief that practical household items can, and should, be beautiful. The faux concrete tops add a sophisticated, designer touch that elevates the entire space. Don’t forget, you can delve deeper into the full transformation of our twin girls’ DIY bathroom remodel reveal for more inspiration and all the sources for everything you see in the room. We hope this comprehensive tutorial empowers you to create your own functional and fabulous piece that adds both style and practicality to your home!