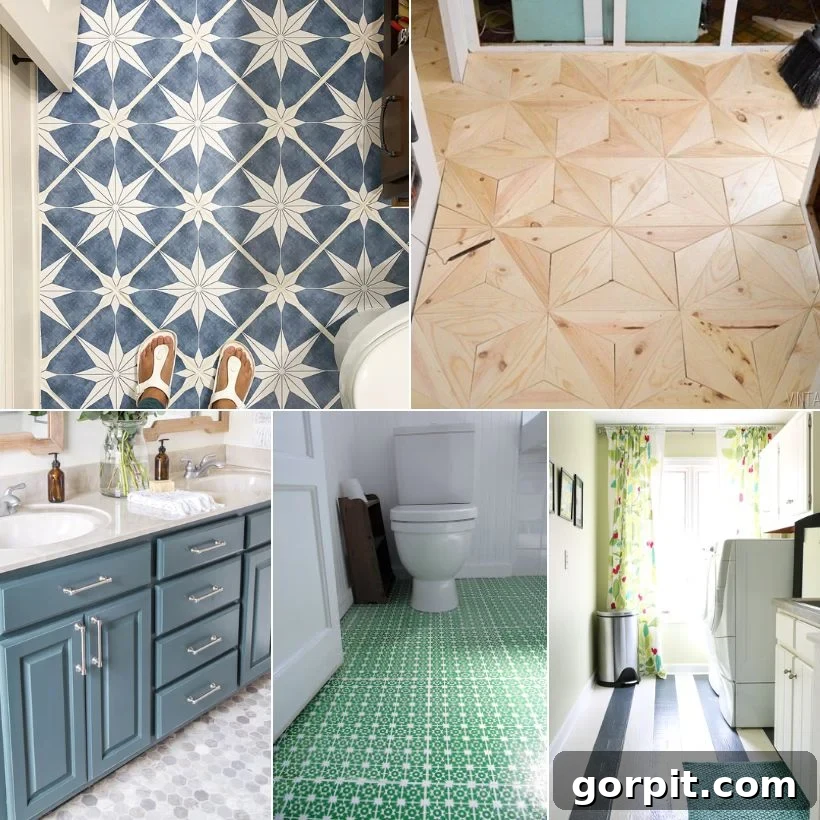
Ugly, outdated, or damaged flooring can significantly detract from your home’s overall appeal. While traditional solutions like refinishing hardwood floors, replacing old carpets, or installing new tile can be incredibly expensive, often requiring professional installers and a hefty price tag, there are numerous budget-friendly and DIY-friendly ways to update your floors. These affordable flooring ideas can transform your space beautifully without breaking the bank. As an experienced DIYer, I’ve personally tackled many of these cost-effective flooring projects, so I can speak to their feasibility and impressive results.
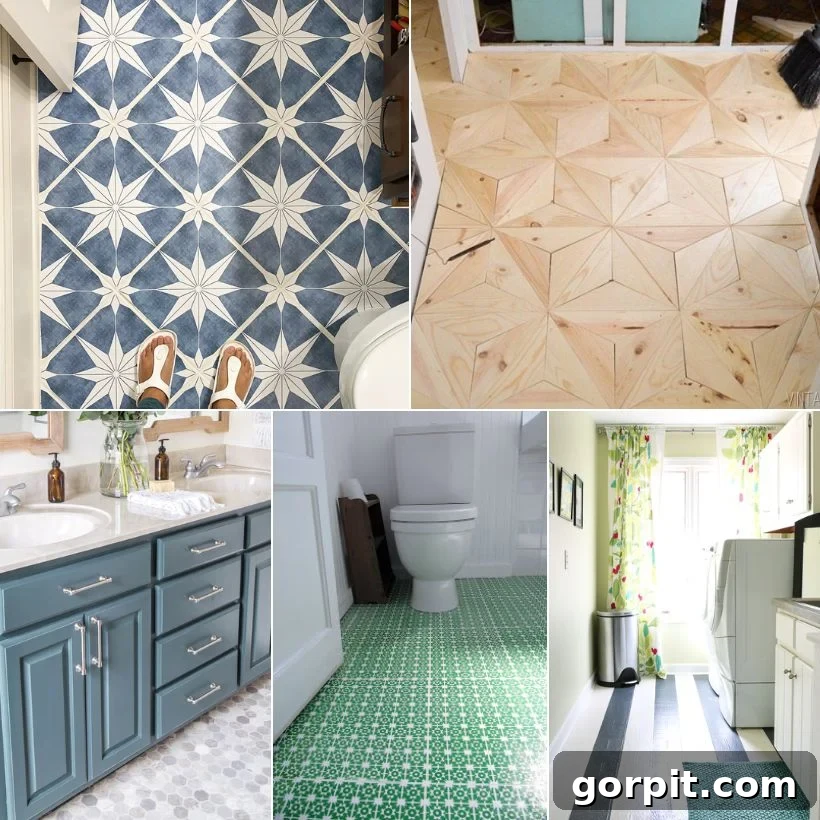
Table of Contents
My husband and I are currently renovating our fifth home, a testament to our passion for DIY projects. Over the past 22 years of tackling renovations, we’ve frequently faced the challenge of updating a room without the budget for expensive new flooring. This led us to explore creative and affordable flooring ideas that are also DIY-friendly, allowing us to save significantly on installation costs.
In this comprehensive guide, I’m sharing the most effective low-cost flooring methods we’ve successfully implemented, alongside a wealth of brilliant ideas from other talented DIYers. This extensive list covers everything from painted floors and tile stickers to vinyl plank floors, peel-and-stick options, and even DIY wood floors crafted from plywood. Please note that all these flooring options are designed for interior rooms. If you’re looking for solutions for your garage, I have a separate post dedicated to garage flooring options.
This post contains some affiliate links for your convenience. Click here to read my full disclosure policy.
20 Cheap Flooring Options That Are DIY-Friendly
1. Paint Your Vinyl or Linoleum Floors for a Fresh Look
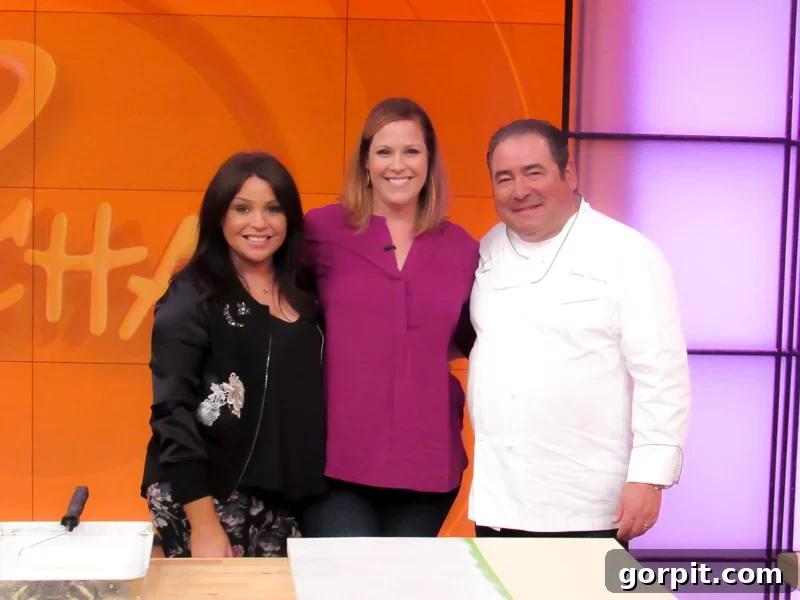
In 2013, I undertook a complete laundry room makeover for a mere $71. The existing floor was old, brown, and desperately outdated vinyl. Since replacing it wasn’t within our budget, I decided to paint our vinyl floor. The paint itself cost only $30, and the transformation was remarkable. Simple stripes breathed new life into the space, and we loved the fresh, modern aesthetic. The key to its durability, which lasted for over 7 years, was using a high-quality porch and floor paint. This specialized paint ensures a resilient finish without the need for an additional topcoat. This project was so successful that I was even invited to appear on the Rachael Ray show to demonstrate the process!
Painting vinyl or linoleum floors is an excellent budget-friendly solution for any room with these materials. It’s particularly effective in areas like laundry rooms, bathrooms, or entryways where a quick, cost-effective update is desired. The process typically involves thorough cleaning, light sanding for adhesion, and then applying multiple coats of the appropriate porch and floor paint. This method allows for endless creative possibilities, from solid colors to intricate stencil designs, making it a truly versatile DIY flooring option.
2. Install a Luxury Vinyl Tile Floor Over Outdated or Damaged Surfaces
If painting isn’t your preference, or if your existing floors are too severely damaged for a paint job, a luxury vinyl tile (LVT) floating floor offers an excellent, durable, and attractive alternative. The beauty of a floating floor is that it can be installed directly over existing outdated or damaged surfaces, eliminating the need for messy and time-consuming demolition. This method is considerably quicker and easier than traditional glue-down or nail-down installations.
We successfully installed a vinyl tile floating floor in our laundry room, and the results are stunning. LVT is renowned for its incredible durability, ease of maintenance, and realistic appearance, often mimicking natural stone or wood. It’s also remarkably waterproof or highly water-resistant, making it ideal for moisture-prone areas like bathrooms, kitchens, and laundry rooms. Our chosen faux marble tile cost us just $4 a square foot, proving that elegance doesn’t have to come with a premium price. The click-lock installation system makes it a very approachable DIY flooring project.
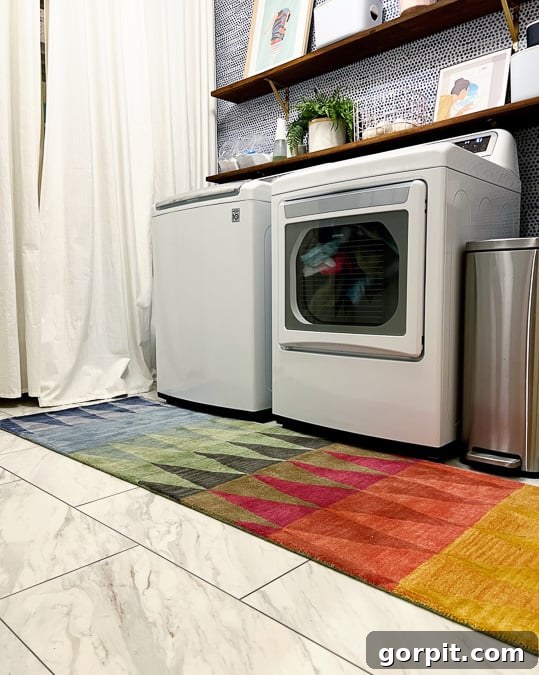
You can see how easy it was to install in the short video below.
[Video Placeholder: How to Install a Floating Tile Floor]
3. Update Tile Flooring With Stylish Tile Stickers
For those who wish to refresh outdated tile floors without the mess, expense, and effort of demolition, tile stickers are a game-changer. These innovative vinyl stickers are completely waterproof and designed to adhere directly over existing tiles, offering an instant visual upgrade. Considering that the average cost for installing new tile flooring ranges between $15 and $20 per square foot, vinyl tile stickers provide a remarkably cost-effective alternative at around $6.00 a square foot.
We’ve successfully installed tile stickers three times, consistently achieving quick and easy transformations. You can learn everything you need to know about tile stickers here, including a video detailing their performance after 16+ months of use. These stickers work beautifully on smooth surfaces like ceramic and porcelain tiles. However, I would not recommend them for textured natural stone tiles such as travertine or slate, as a smooth surface is crucial for proper adhesion. While they may not be ideal for very high-traffic areas, tile stickers are absolutely perfect for refreshing bathrooms, powder rooms, or accent walls.
You can watch an overview of installing tile stickers below.
[Video Placeholder: Update Outdated Tile With Tile Stickers]
In our current home, I’ve used tile stickers to enhance Avery’s bathroom makeover. The specific tile stickers we chose for Avery’s bathroom created a chic, updated look that perfectly complemented the room’s new aesthetic.
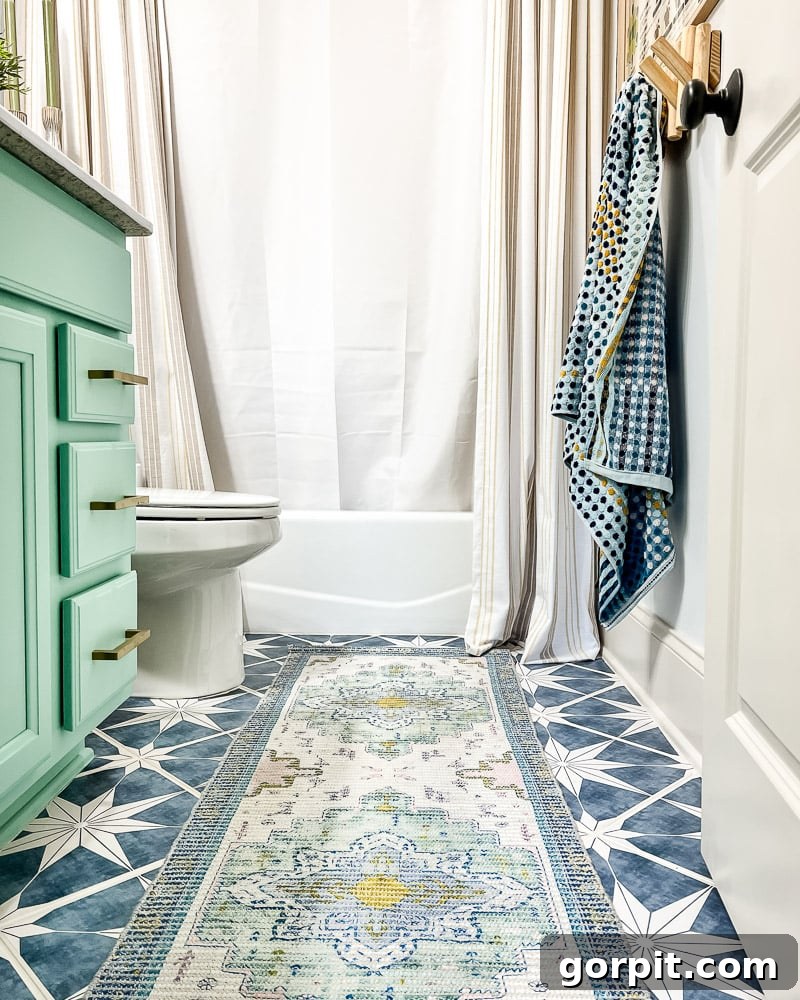
Similarly, we applied tile stickers to update the floor in Attley’s budget-friendly bathroom makeover. The transformation was just as impressive, proving the versatility and effectiveness of this inexpensive flooring solution. These tile stickers used in Attley’s bathroom brought a vibrant, fresh feel to the space.
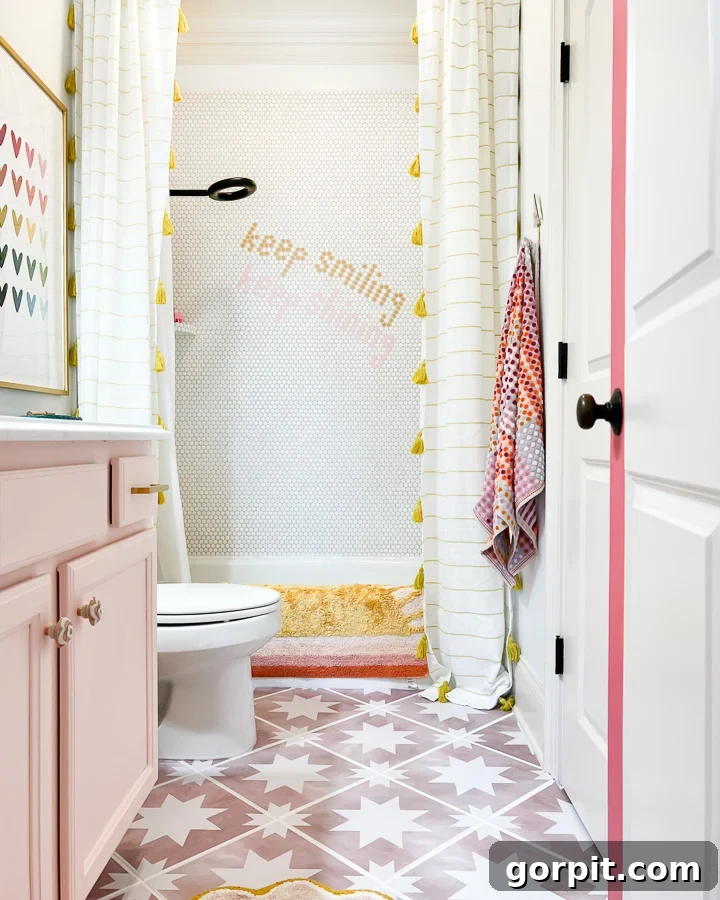
Below are some of the other beautiful tile stickers that I love.
Scroll and click on any image for full product details.
4. Install Vinyl Sheet Flooring Over Outdated Tile
Another fantastic option for updating an existing tile floor without demolition is to install vinyl sheet flooring directly over it. My friend Lauren from Bless’er House successfully used this method, proving its effectiveness and aesthetic appeal. Sheet vinyl has long been recognized as an inexpensive flooring choice, and today’s market offers a wide array of modern and trendy designs that can dramatically elevate a space.
The primary advantage of sheet vinyl is its cost-efficiency, generally ranging between only $1.00 and $2.00 per square foot, making it one of the cheapest flooring options available. Its large, seamless format means fewer seams and often easier installation than individual tiles or planks, especially for larger areas. Sheet vinyl is also highly water-resistant, making it a practical choice for bathrooms, kitchens, and basements. With proper preparation, including ensuring the existing tile surface is clean and level, installing sheet vinyl can be a straightforward DIY project that delivers a fresh, updated floor in a fraction of the time and cost of traditional methods.
5. Install Laminate Flooring that Looks Like Wood
Laminate flooring has undergone a significant transformation in the past 15 years, evolving into a sophisticated and highly durable option. In my opinion, modern hand-scraped laminate floors are often as aesthetically pleasing as many genuine hardwood floors, and in our experience, they frequently surpass hardwoods in terms of durability. This makes laminate an excellent choice for those seeking affordable wood flooring alternatives.
In our previous home, we chose to install laminate floors throughout because the cost of installing hardwoods was prohibitive, typically ranging from $7 to $25 per square foot. We found thick, hand-scraped laminate for only $1.76 per square foot, with even cheaper options available for under $1.00 a square foot. The installation was a simple click-lock method, and with an attached underlayment, the floors felt solid and didn’t produce a hollow sound when walked upon. We saved a significant amount of money by installing them ourselves, room by room, and we absolutely adored them.
While every flooring type has its pros and cons, our current home features real hardwoods that, despite their beauty, show scratches from our dogs’ toenails—an issue we never encountered with our old laminate floors. Believe it or not, I sometimes miss the practical resilience of our laminate floors!
6. Paint and Stencil an Outdated Tile Floor
Breathing new life into an old tile floor through painting and stenciling remains a highly creative and budget-friendly option. The key to a long-lasting and beautiful result lies in using the correct products and meticulous surface preparation. When done properly, with high-quality porch and floor paint, your painted tile floor can last for many years without peeling or chipping. Contrary to common belief, a separate topcoat is generally not required when using durable porch and floor paint, designed specifically for high-traffic surfaces.
This DIY flooring method allows for immense customization. You can mimic the appearance of expensive cement tiles, create bold geometric patterns, or opt for subtle, sophisticated designs. The transformation can be truly stunning, completely altering the character of a room from drab to fab. Imagine a worn-out bathroom or kitchen floor becoming a focal point with a personalized stencil pattern. Just look at the beautiful painted tile floors below for inspiration!
7. Paint Your Damaged Hardwood Floors to Cover Imperfections
If your hardwood floors are significantly damaged, deeply scratched, stained, or simply not to your taste, but a full replacement or costly refinishing project isn’t an option, painting them offers an incredibly effective and stylish solution. Whether your decor preference leans towards vibrant colors or serene neutrals, painted hardwoods can provide a completely renewed look for a fraction of the cost.
I have personally painted and stenciled hardwood floors, and I can confirm that with the right preparation and the use of a specialized porch and floor paint, you absolutely do not need to worry about the paint peeling or chipping. And yes, you truly don’t need a topcoat if you select the correct type of paint. This is the kind of paint you MUST use for durable painted hardwood floors. Painting is a fantastic way to conceal persistent stains, even out discoloration, and cover general wear and tear, effectively transforming worn-out wood floors into beautiful, personalized statements. Painted wood floors can complement any interior style, from rustic farmhouse to modern chic.
Liz Marie, for instance, painted the hardwoods in her farmhouse a perfect creamy white/cream color, which looks absolutely stunning and seamlessly integrates with her neutral decor palette, adding warmth and brightness to the space.
For those who love a bold statement, these painted green floors by White Dog Vintage are truly inspiring. They inject significant depth and character, turning the floor into a vibrant design element. This demonstrates how a simple paint job can profoundly influence the ambiance of a room.
And I particularly admire how Teri Moore embraced contrast by painting her historic hardwoods a crisp white in an otherwise colorful and eclectic space. This choice allowed her vibrant furnishings and art to pop, while still maintaining the charm of the original wood beneath. Painted hardwoods are a truly versatile and affordable flooring solution for any home.
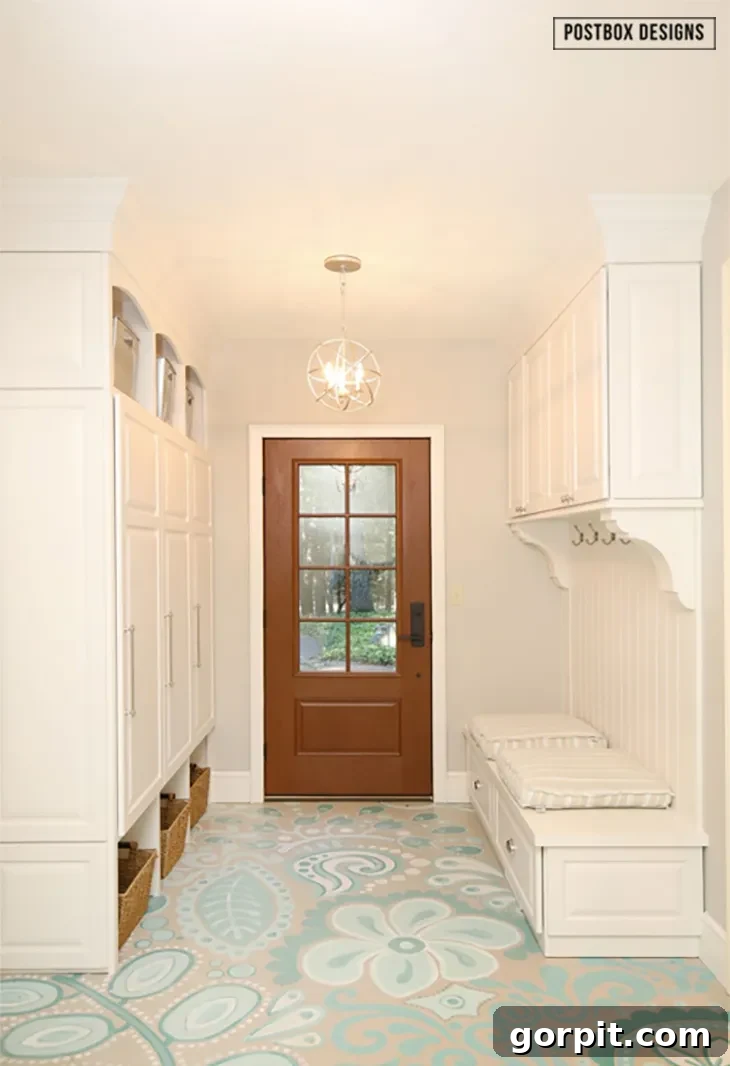
8. Paint Your Concrete Floor to Add Warmth and Style
Concrete floors, while incredibly durable and functional, can sometimes feel too cold, industrial, or modern for certain aesthetics. If you find your concrete floor lacking warmth or character and desire a more inviting atmosphere, painting it is an excellent and budget-friendly solution to completely transform its look. This is precisely what Postbox Designs achieved in her mudroom, and the entire project cost her a remarkable $80.
Painting concrete floors allows you to introduce color, pattern, and personality into what might otherwise be a stark space. It’s a particularly great option for basements, laundry rooms, mudrooms, or even sunrooms where concrete is often the existing subfloor. The process typically involves thorough cleaning, etching (if necessary for adhesion), priming, and then applying a suitable concrete floor paint or epoxy coating. You can choose a solid, welcoming color, create faux rug patterns with stencils, or even mimic more expensive tile designs. This DIY approach not only enhances the aesthetic appeal but also provides a protective layer, making your concrete floor more visually appealing and an integral part of your home’s design.
9. Install Vinyl Tile Planks in a Herringbone Pattern
Luxury vinyl planks (LVP), much like LVT, are a popular and affordable flooring option that skillfully mimics the look of natural hardwood. What truly elevates LVP is the ability to install it in sophisticated patterns, such as the classic herringbone. My friend Lauren, once again from Bless’er House, demonstrated this beautifully by installing her LVP flooring in a herringbone pattern directly over her outdated tile floor, resulting in a truly gorgeous and high-end aesthetic.
The herringbone pattern, typically associated with expensive parquet wood floors, instantly adds a layer of elegance and visual interest to any room. Using LVP planks for this pattern offers several advantages: it’s more budget-friendly than real wood, easier to install for DIYers (especially the click-lock varieties), and provides superior durability and water resistance. This makes it an ideal choice for creating a luxurious look in areas where real wood might be impractical or too costly, like kitchens, bathrooms, or high-traffic entryways. The transformation from old tile to a stylish herringbone LVP floor is a testament to the versatility and impact of modern affordable flooring solutions.
10. Paint a Plywood Subfloor for a Stylish Foundation
It might seem unconventional to consider a plywood subfloor—the foundational material typically hidden beneath finished flooring—as a decorative element. However, Carrie from Lovely Etc. brilliantly transformed her plywood subfloor into a stylish and incredibly cheap flooring option. This approach truly embodies the spirit of budget-friendly upgrades, proving that beauty doesn’t always require expensive materials.
Painting a plywood subfloor is an excellent DIY solution for areas where you want a unique look without the high cost of traditional flooring. The process involves ensuring the plywood is clean, smooth, and free of any protruding nails or screws. Then, like other painted floor methods, you’ll apply a durable porch and floor paint. This method allows for a wide range of creative finishes: you can paint it a solid color, stencil intricate patterns, or even create a faux rug effect. The result is a personalized, durable, and highly cost-effective floor that adds charm and character to a space. It’s an especially clever idea for studios, craft rooms, or spare bedrooms where a distinctive, low-cost surface is desired.
11. Install Peel & Stick Vinyl Tiles Over Any Flat Floor
For the ultimate in easy and affordable flooring, peel and stick vinyl tiles are hard to beat. While luxury vinyl tiles can appear expensive, you can actually find a vast selection of high-quality peel & stick options for under $2.00 a square foot, making them an incredibly accessible budget flooring choice. Their installation is remarkably quick and straightforward, making them perfect for DIYers of all skill levels.
We successfully installed peel & stick luxury vinyl tiles as part of our colorful laundry room makeover, and the entire installation took us approximately an hour, yielding beautiful results. This versatile flooring solution can be applied over almost any flat, clean surface, including existing vinyl sheet floors, linoleum floors, hardwood, and even bare subfloors. If you’re looking to install them over grouted tile, a crucial step would be to first fill in and level the grout lines to ensure a smooth, even surface for proper adhesion. Peel & stick tiles come in a huge variety of patterns, colors, and textures, allowing you to achieve a custom look—from faux wood to geometric designs—without complex tools or extensive labor, making it an ideal option for renters or anyone seeking a quick, impactful update.
12. Wallpaper Your Floor for a Creative Touch
For a truly unexpected and visually striking flooring idea, consider wallpapering your floor! Medina from Grillo Designs achieved a phenomenal transformation by using wallpaper to update the scratched laminate flooring in the entryway of her rental property. This innovative approach demonstrates an incredible level of creativity and resourcefulness, turning a common decorative material into a unique floor covering.
Wallpapering a floor is a particularly appealing option for renters who cannot make permanent changes, or for anyone seeking a temporary but impactful design statement. It’s best suited for low-traffic areas, such as a closet, a small powder room, or a dedicated creative space, where wear and tear will be minimal. The process generally involves applying a strong adhesive or primer to the existing floor, carefully laying down the wallpaper, and then sealing it with multiple coats of a durable, clear topcoat (like a polycrylic or epoxy resin) to protect it from moisture and abrasion. This DIY flooring method offers endless pattern and color possibilities, allowing for a highly personalized and artistic expression that will undoubtedly be a conversation starter.
13. Stain Your Plywood Subfloor for a Faux Hardwood Look
If your heart is set on the warmth and classic beauty of hardwood floors but your budget simply won’t allow for it, consider staining your plywood subfloor. Ana White’s incredible stained plywood subfloor project serves as powerful inspiration, demonstrating how this inexpensive material can be transformed to mimic the rich, natural appearance of wood planks. This DIY flooring idea provides an authentic wood look without the enormous price tag typically associated with genuine hardwood installation.
The process involves thoroughly preparing the plywood surface, which might include sanding to achieve a smooth finish and cleaning to remove any dust or debris. Then, the plywood can be stained in your desired wood tone, from light oak to dark walnut. For an even more convincing effect, some DIYers opt to cut the plywood into plank-like strips before staining and installation, or simply score lines into the surface to simulate individual boards. After staining, multiple coats of a durable polyurethane or floor-grade sealant are essential to protect the surface from wear, moisture, and stains, ensuring longevity. This method yields a custom, rustic, and incredibly affordable flooring solution that adds genuine character to any room.
14. Create the Look of Hardwood Planks With Plywood
Beyond simply staining a plywood subfloor, you can take this DIY flooring concept a step further by actually creating your own custom plywood plank floors. This method involves cutting large sheets of plywood into individual planks, which can then be installed and finished to closely resemble traditional hardwood flooring. This approach offers significant cost savings compared to purchasing pre-fabricated wood planks and allows for a truly personalized touch in terms of plank size, layout, and finish.
Once cut, these plywood planks can be stained to achieve a variety of wood tones or painted for a more contemporary or customized look. The beauty of this method lies in its versatility; you can mimic wide-plank farmhouse floors, create a staggered pattern, or even lay them in a herringbone design. Proper sealing with a durable topcoat is crucial to protect the plywood from moisture, scratches, and daily wear, ensuring the longevity of your handmade floors. This project is a fantastic option for skilled DIYers looking for a deeply satisfying and affordable way to achieve the coveted aesthetic of genuine hardwood, making your space feel custom and elevated without the designer price tag.
15. Make Your Own Geometric Wood Floors
For the truly adventurous and patient DIYer, creating your own geometric wood floors can result in a breathtaking and unique design statement that will be the envy of all your guests. Mandi from Vintage Revivals masterfully executed this project, and the results are utterly mesmerizing. These floors are an absolute dream, and I can envision myself tackling such a project in my own home someday!
This advanced DIY flooring technique typically involves cutting numerous small pieces of wood (often plywood or reclaimed wood) into specific geometric shapes—triangles, hexagons, or various polygons. These pieces are then meticulously laid out and adhered to the subfloor to form an intricate, repeating pattern. The beauty of geometric wood floors lies in their artistic potential; you can combine different wood species, stains, or even painted elements to create striking contrasts and depth. While it demands precision, patience, and a keen eye for detail, the reward is a custom, high-impact floor that transcends typical design, offering a permanent work of art beneath your feet. It’s an unparalleled way to infuse personality and bespoke luxury into a space on a DIY budget.
16. Cover Your Floor With Unusual Materials for Unexpected Flair
When it comes to truly creative and affordable flooring ideas, thinking outside the box can lead to astonishing results. Some DIYers have ingeniously used unusual materials to cover their floors, creating incredibly unique and personalized spaces that stand out. This category is for those who dare to be different and aren’t afraid to put in some artistic effort.
Take, for instance, the incredible scrabble tile floor by Mullo Designs. This concept is utterly brilliant and unlike anything I’ve ever encountered! Imagine a bathroom floor adorned with thousands of tiny wooden scrabble tiles, spelling out words, quotes, or simply creating a fascinating texture. This level of detail and personalization turns a simple floor into a captivating piece of art. While highly labor-intensive, the material cost itself can be surprisingly low if you source tiles creatively, making it a truly cheap flooring option with immense character.
Another striking example is the gorgeous green art paper floors by Lazy Cozy. This idea is so innovative and adds such a vibrant, whimsical touch to a room. Using colorful art paper to cover a floor and then sealing it with a protective finish creates a surface that is both visually stunning and highly customized. This method requires careful application of the paper and multiple coats of a clear, durable sealant to ensure it withstands foot traffic and moisture. It’s a perfect solution for a creative studio, a child’s bedroom, or a powder room where you want to infuse a burst of color and unique texture. These unconventional flooring ideas prove that with imagination, almost any material can be repurposed to create a beautiful and affordable floor.
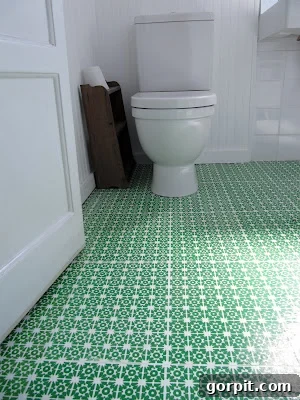
I am genuinely impressed with the ingenuity and beauty of all these affordable flooring ideas! They provide fantastic opportunities to update your home without exceeding your renovation budget. Which one is your favorite? I’m absolutely smitten with those green-painted floors, and the scrabble tile floor is undeniably clever and fun. I hope these diverse and budget-friendly flooring options have inspired you to embark on your own home improvement journey, proving that a stunning floor makeover is well within reach for any DIY enthusiast!
More Flooring Inspiration
SEE ALL flooring POSTS
-
20 Stylish But Cheap Flooring Ideas (With Lots of Photos)
-
How to Install a Stair Runner: A Step-by-Step Tutorial
-
The Best Garage Flooring Options For A Fresh Update
-
Everything You Need to Know About Tile Stickers
-
How to Paint Vinyl Floors for Long-Lasting Results
-
The Easy Way to Update Bathroom Tile Without Replacing It!
Wondering how I approach transforming rooms and spaces in our home? Check out Designer in a Binder®, my comprehensive guide to decorating your home with confidence and ease. It’s packed with strategies to help you plan, budget, and execute your design visions, ensuring beautiful results every time.
And if you want exclusive content, behind-the-scenes sneak peeks, and more DIY inspiration delivered straight to your inbox, be sure to subscribe to my newsletter before you head out! Join our community of fellow DIY enthusiasts and never miss out on new, budget-friendly home transformation ideas.