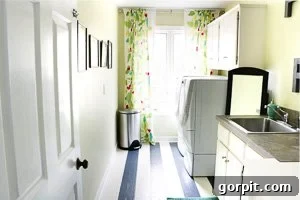
Do you look at your old, worn-out vinyl floors and dream of a fresh, modern look but feel held back by a tight budget? You’re not alone, and the good news is, you absolutely can transform them without breaking the bank! Dive into this comprehensive guide to learn exactly how to paint vinyl floors and achieve stunning, long-lasting results. Forget expensive replacements; painting offers an incredibly durable and affordable option when you use the right materials and techniques. My own painted vinyl floors defied expectations, looking impeccable even after seven years of daily use!
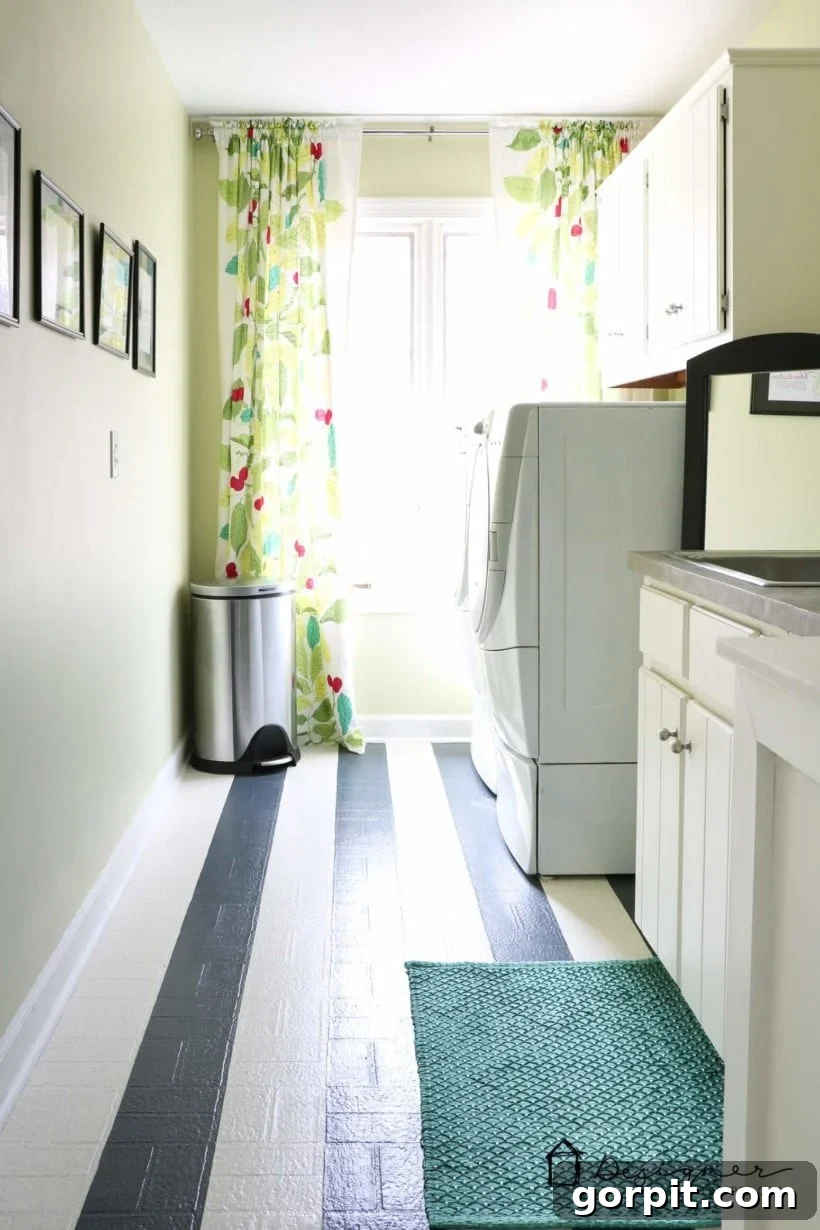
Table of Contents
Many of you might remember my budget-friendly $71.00 laundry room DIY renovation, a project that proved just how much impact a small investment can make. A standout feature from that transformation, and indeed one of my proudest DIY achievements, is the beautifully painted vinyl floor. While I initially referred to it as “linoleum,” I later learned the technical distinction—my floors are, in fact, vinyl. It’s an easy mistake to make, as even some flooring retailers use the terms interchangeably! Regardless of the nomenclature, the outcome has been nothing short of spectacular. These painted VINYL floors have not only transformed the look of my laundry room but have also incredibly held up perfectly for over seven years, showing absolutely no signs of chipping or peeling. That’s DIY durability you can truly trust!
This post was originally published in November 2013 and has been fully updated in February 2023 to provide the most current and comprehensive information.
To fully appreciate the transformation, let’s take a moment to recall the “before” state of the floor. Picture this: an outdated, rather unappealing brick pattern, typical of many older vinyl installations. It was certainly not my preferred aesthetic, and replacing it was out of the question due to budget constraints. However, I had seen inspiring examples of painted vinyl floors online, and their success stories gave me the confidence to embark on this project. It was time to give my laundry room floor a second chance!
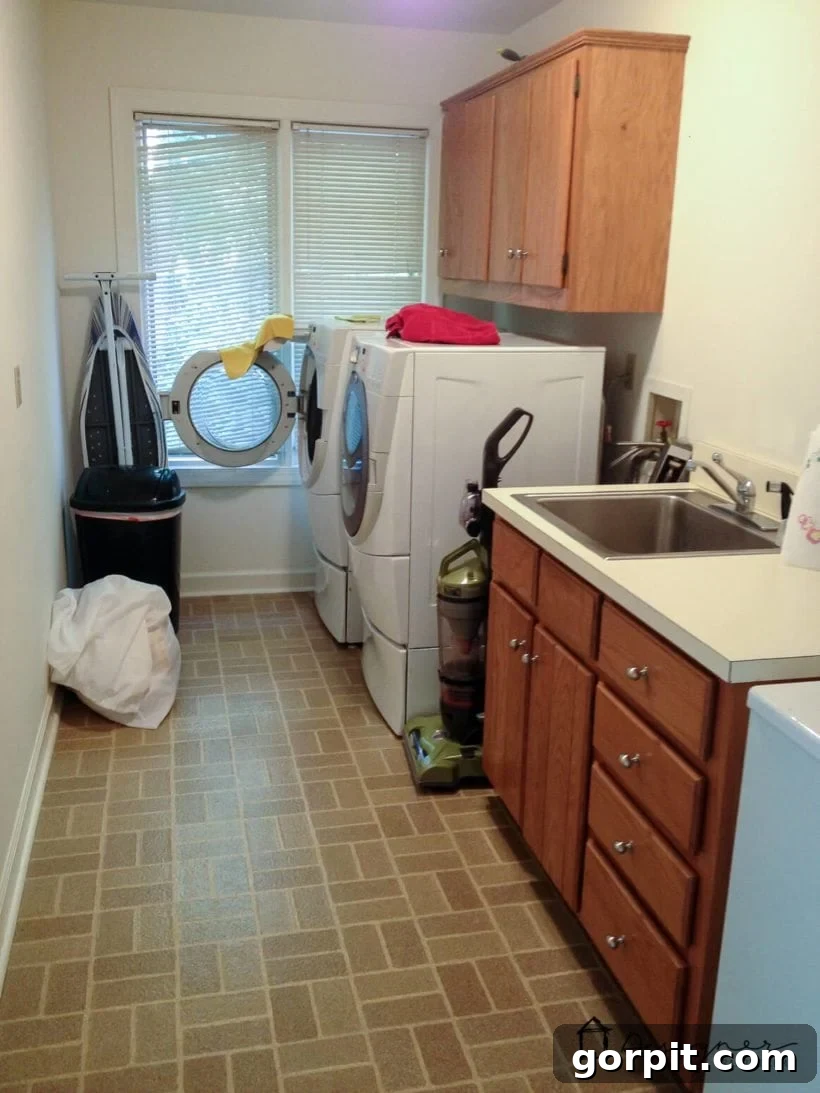
This outdated look was precisely why I decided to take matters into my own hands. Why settle for something you don’t love when a simple, cost-effective solution exists? Painting vinyl floors isn’t just about saving money; it’s about unleashing your creativity and achieving a custom look that truly reflects your style.
This post contains some affiliate links for your convenience. Click here to read my full disclosure policy.
How to Paint Vinyl Floors: A Step-by-Step Tutorial for Durable Results
Ready to transform your floors? This detailed tutorial will walk you through every step, ensuring a beautiful, long-lasting finish. From selecting the right paint to mastering application techniques, you’ll gain the confidence to tackle this DIY project with ease.
Essential Materials for Painting Vinyl Floors
Having the right tools and materials is paramount for a successful painted vinyl floor project. Don’t cut corners here; investing in quality products will ensure your floor stands the test of time and looks fantastic.
- Porch and Floor Latex Satin Enamel Paint: This is your secret weapon for durability. Unlike standard wall paint, porch and floor enamel is specifically formulated to withstand heavy foot traffic, abrasions, and moisture, making it ideal for floors. I personally used dark gray and creamy white to achieve a sophisticated, striped pattern, but you can choose any custom color that complements your space. Visit your local hardware store like Lowe’s to have colors custom mixed to your preference.
- KILZ General Purpose Interior Primer: A high-quality primer is non-negotiable for ensuring proper adhesion of your paint to the vinyl surface. KILZ is a trusted brand that creates an excellent bonding surface, preventing chipping and peeling down the line. One quart is often sufficient for a small-to-medium sized room.
- Paint Rollers: Opt for a good quality roller with a medium nap (3/8-inch or 1/2-inch) for even coverage on vinyl floors. Having several on hand ensures you can switch them out as needed or use different rollers for different colors.
- Angled Paint Brushes: Essential for cutting in along baseboards, edges, and for precise touch-ups. An angled brush allows for cleaner lines and better control than a flat brush.
- Paint Tray: A sturdy paint tray makes it easy to load your roller evenly and minimizes spills.
- Painter’s Tape: High-quality blue painter’s tape is critical for creating crisp lines, especially if you’re planning a striped or patterned design. The width of the tape will directly correspond to the width of the stripes you want to create, so plan accordingly.
- Floor Cleaning Solution: Thorough cleaning is the foundation of good paint adhesion. I highly recommend TSP (Trisodium Phosphate) for its heavy-duty cleaning power, which effectively removes grease, grime, and residue. If TSP isn’t readily available, a strong, mild household cleaner designed for floors can work, but ensure it leaves no residue.
- Vacuum and Broom: For initial debris removal.
- Sponge or Clean Cloths: For wiping down floors after cleaning.
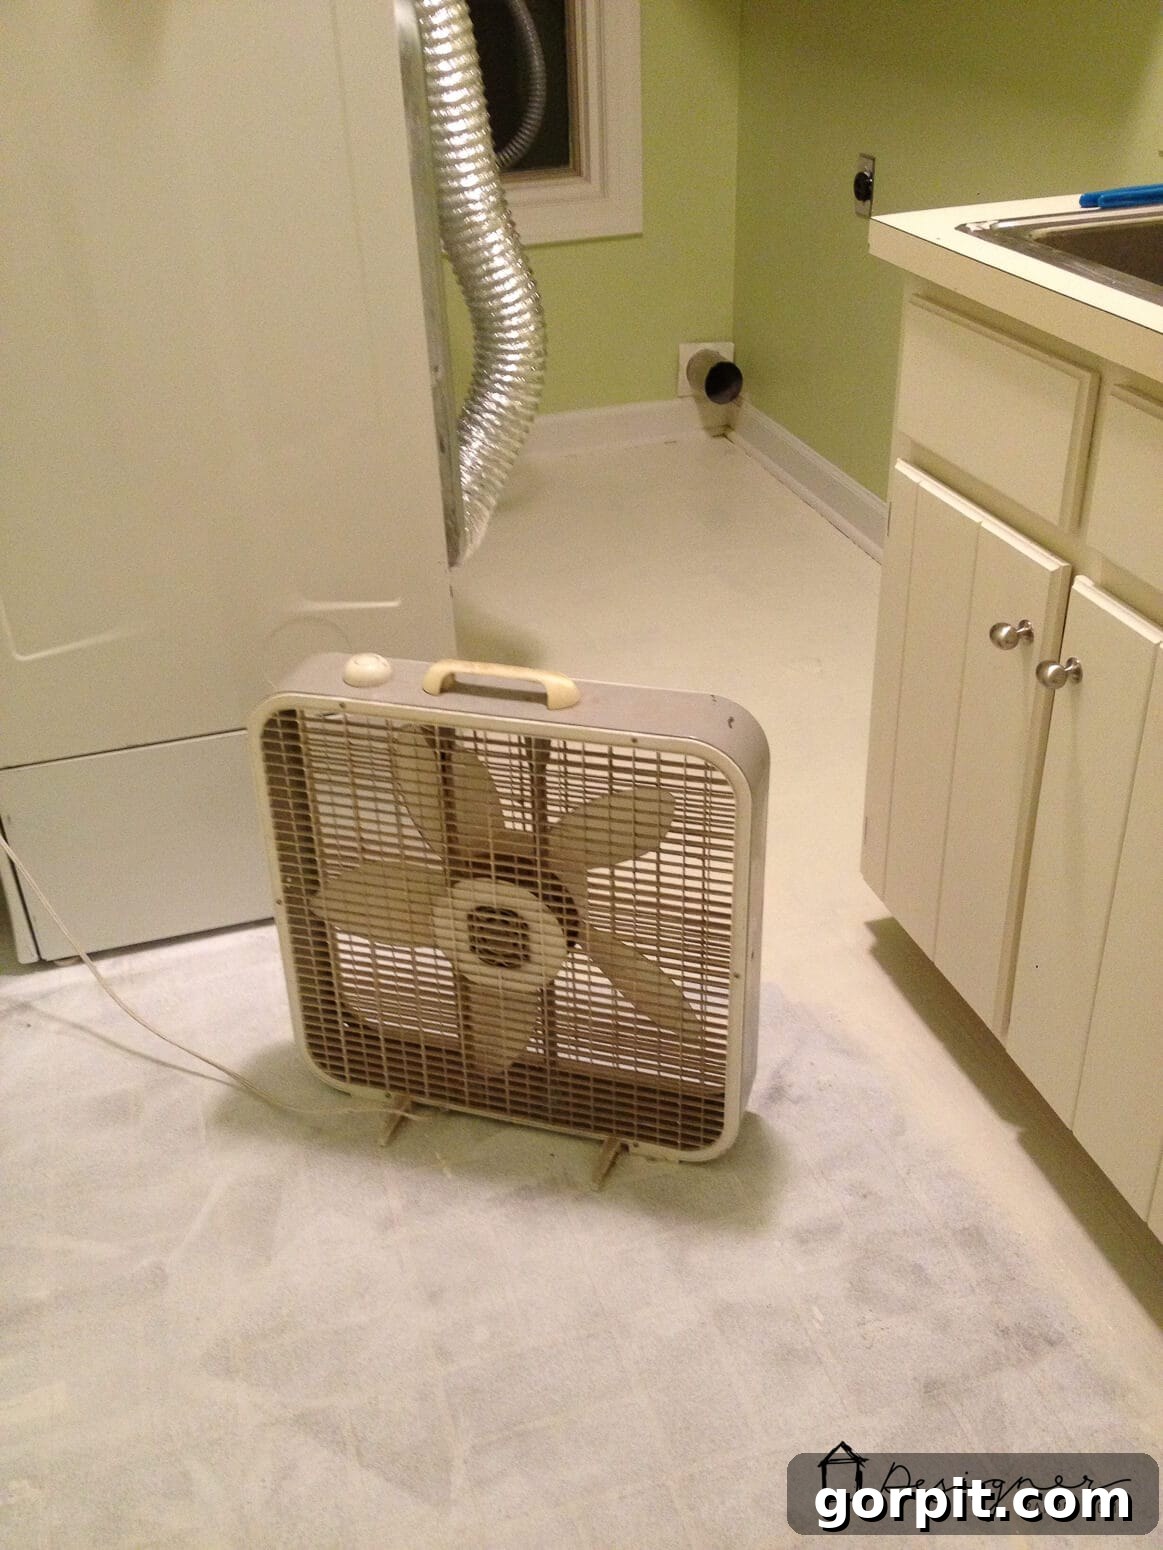
- Large Box Fan (Optional but Recommended): Speeds up drying time between coats, especially in humid environments, allowing you to complete the project more efficiently.
Step-by-Step Guide to Painting Your Vinyl Floors
Transforming your vinyl floor into a stylish statement piece is a rewarding DIY project. While it involves several steps, each one is straightforward and contributes to the overall durability and beauty of your new floor. Let’s get started!
Time needed: 2 days (including drying time)
This comprehensive guide walks you through painting your vinyl floors, from prep to finishing touches, ensuring a durable and beautiful result that lasts for years. Expect to dedicate about 2-3 hours of active work spread over two days, allowing ample time for paint to dry thoroughly between coats.
- Select Your Desired Pattern and Colors.
The first and most exciting step is deciding on the aesthetic you want to achieve. I chose a classic striped pattern for my vinyl floors, opting for a softer, more inviting look by selecting an antique white and a charcoal gray instead of stark black and white. These colors were custom-mixed at Lowe’s in Valspar’s Porch and Floor Latex Satin Enamel. This specific type of paint is crucial because it’s engineered for high foot traffic and exceptional durability. Do not be tempted to use regular interior wall paint; it will not withstand the wear and tear of a floor. Consider the overall decor of your room and pick colors that harmonize or offer a striking contrast. For patterns, popular choices include stripes, checkerboards, or even stenciled designs for a more intricate tile effect. Always purchase porch and floor paint to ensure your efforts result in a long-lasting finish.
- Thoroughly Clear and Clean the Floor Area.
Preparation is key to a successful paint job. Begin by removing all furniture, appliances, and movable items from the room. If you’re working in a laundry room like mine, you might be able to temporarily slide your washer and dryer around. However, for best results and complete access, consider moving larger appliances out of the room entirely for a few days. Once cleared, meticulously clean the floor. Start by vacuuming and sweeping to remove all dust, dirt, and loose debris. This mechanical cleaning prevents grit from embedding into your paint layers. Next, a deep clean is essential. While some experts highly recommend TSP (Trisodium Phosphate) for its ability to strip away grease and grime, I successfully used my normal floor cleaner (Mrs. Meyer’s All Purpose Cleaner) when TSP wasn’t on hand. The goal is a perfectly clean, residue-free surface for optimal primer adhesion.
- Prime the Floor for Optimal Adhesion.
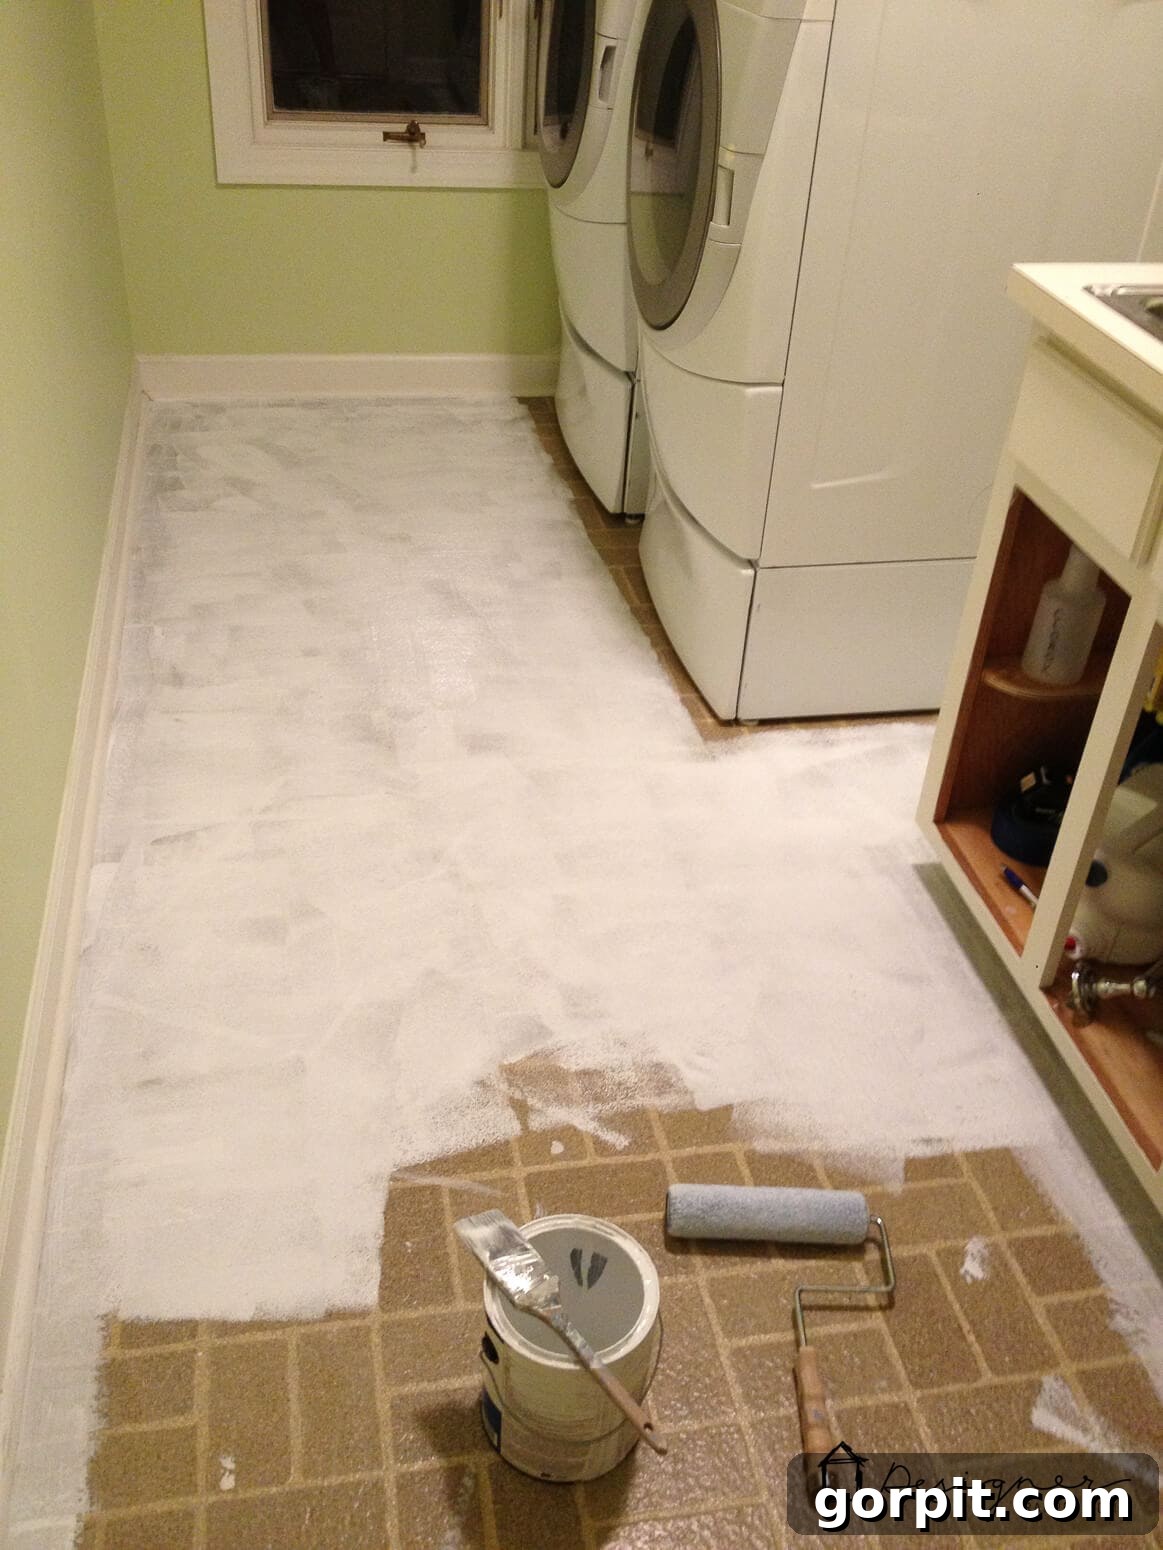
After your floor is immaculately clean and completely dry, it’s time to prime. I used KILZ General Purpose Interior Primer, which creates an ideal bonding surface for the paint. Pour the primer directly onto the floor in manageable sections and use a small paint roller to spread it evenly. Work your way out of the room, ensuring you don’t paint yourself into a corner! One uniform coat of primer is usually sufficient to provide excellent adhesion. I applied my primer around 9 PM one evening and allowed it to dry thoroughly overnight, which is crucial for proper curing and adhesion. Resist the urge to rush this step; the primer is the foundation of your durable painted floor.

- Apply the Base Coat of Paint.
Once the primer has fully dried overnight, it’s time for the first color! I painted the entire floor with my chosen base color, antique white, applying two coats for full, opaque coverage. Fortunately, porch and floor paint typically dries quite quickly, but using a large box fan can significantly accelerate the process, especially in areas with higher humidity. I was able to apply both coats of the base color within a single day. Allow the first coat to dry completely to the touch before applying the second. After the second coat, let the base color dry thoroughly overnight. Be prepared for a bit of a messy project—painting floors often leads to some paint on your feet, so plan for a good scrub afterward!
- Create and Paint Your Stripes (or Pattern).
On the third day (after the base coat has dried completely), it’s time to define your pattern. For stripes, carefully tape off your design using painter’s tape. If your floor has an existing pattern, like my brick vinyl, you can use those lines as a guide, saving you from tedious measuring. A pro tip for textured surfaces, or if you want absolutely perfect, bleed-free lines: after applying your painter’s tape, paint a very thin coat of your *base color* (in my case, antique white) directly over the edges of the tape. This trick seals the tape edges, preventing the secondary color from bleeding underneath. Trust me, it makes a huge difference! Once that “seal coat” is dry, proceed to paint your stripes with your secondary color, charcoal dark grey. Just like the base coat, apply two thin coats for optimal coverage and durability. I allowed the first stripe coat to dry overnight and applied the second coat the following evening, ensuring each layer had ample time to set.
Applying the secondary color requires patience. Work in sections and use a roller for broad areas, switching to an angled brush for edges and detailed areas. Two coats are ideal for achieving rich color and enhancing the paint’s protective qualities. Always allow sufficient drying time between coats, and use a fan to aid ventilation and speed up drying if needed. The goal is a uniform, vibrant finish that makes your pattern pop. - Remove Painter’s Tape and Perform Any Necessary Touch-Ups.
Once your final coat of paint has completely dried (usually after another overnight dry), it’s time for the big reveal! Carefully and slowly remove the painter’s tape. If you applied the base coat over the tape edges as described in the previous step, you should have wonderfully crisp lines. Even with the best precautions, minor bleeding can sometimes occur, especially on textured vinyl. Don’t panic! This is easily remedied. Grab a small, angled paint brush and use a steady hand to “cut in” along the lines with your base color, sharpening any imperfect edges. This meticulous touch-up process might sound tedious, but it typically takes less than 15 minutes to perfect the lines across an entire room, making a huge difference in the professional appearance of your finished floor.
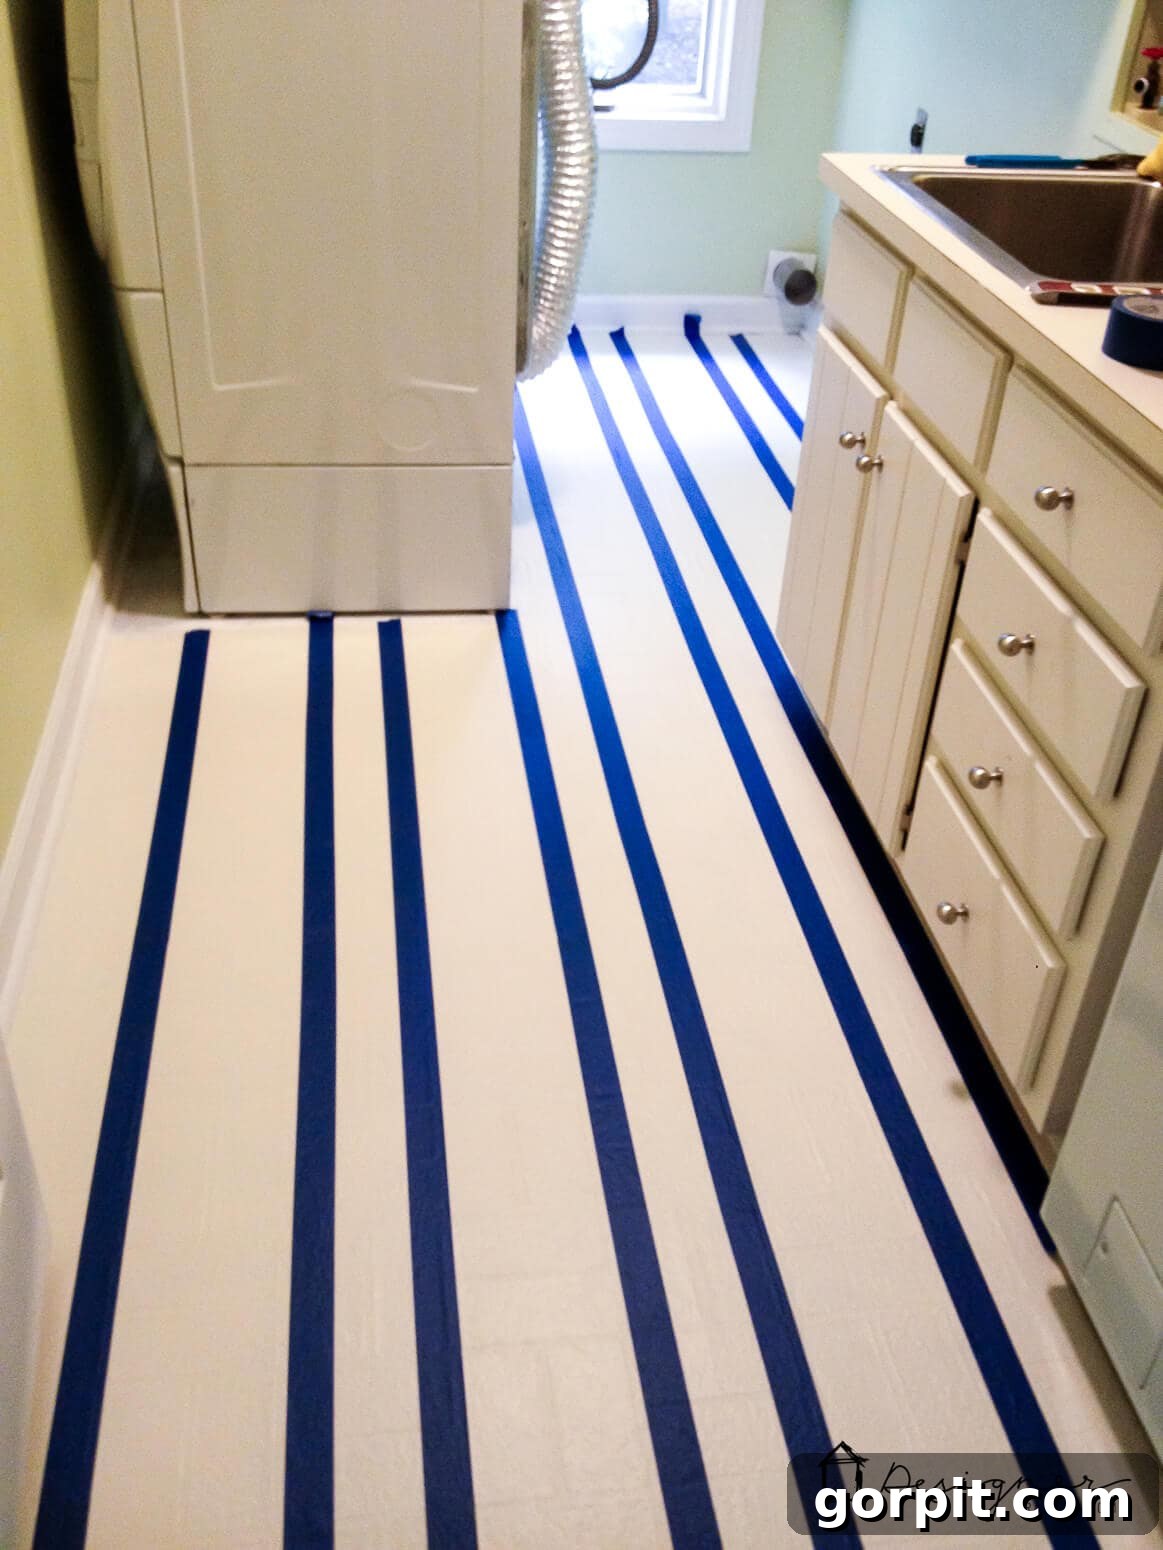
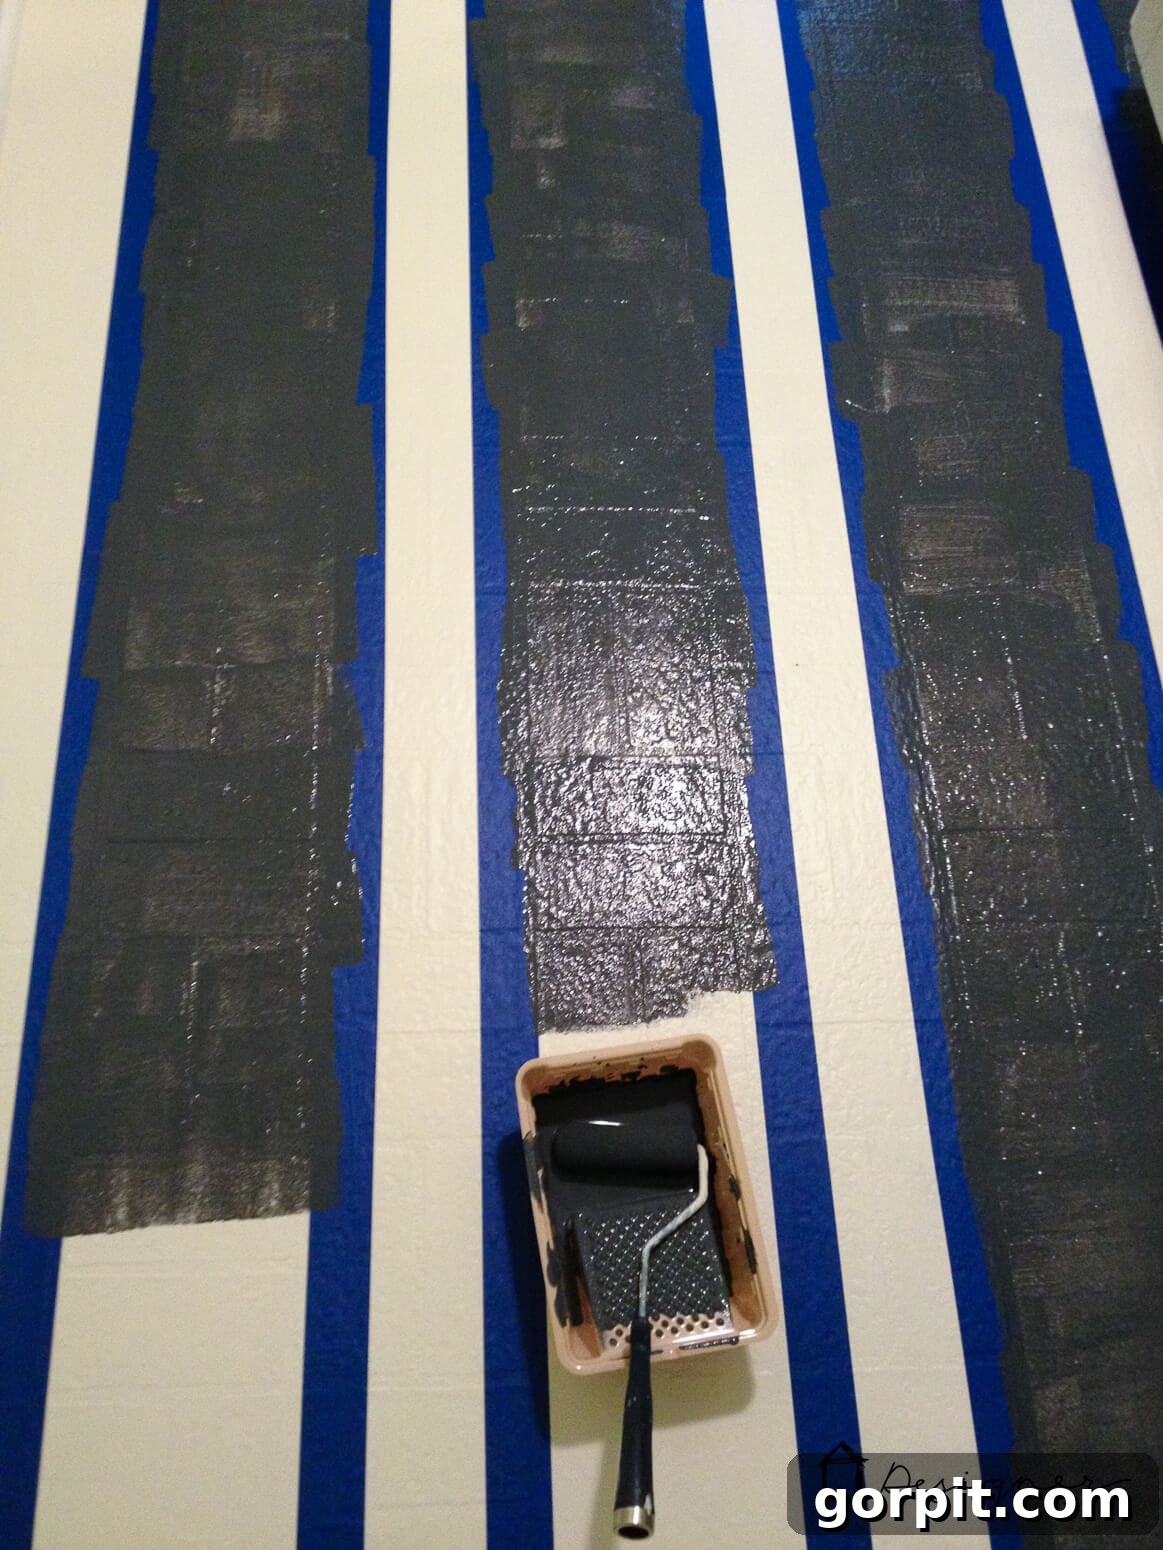
And just like that, you’ve learned how to paint vinyl (or linoleum) floors with impressive, long-lasting results! While the steps may seem numerous, the actual hands-on painting time for each stage is remarkably short—often no more than 10 to 20 minutes. I found that painting my floor progressed far more quickly than traditional wall painting projects. All the active painting and preparation steps, excluding the essential drying times, combined to less than two hours of actual work. This makes it an ideal DIY project to tackle in the evenings after work without feeling overly exhausted the next day. The minimal active time, coupled with maximum impact, makes this one of the most rewarding DIY projects you can undertake!
The end result truly is GORGEOUS! For me, painting our vinyl floors was unequivocally the MOST WORTHWHILE two hours of my DIY life. I absolutely love, love, love this floor, and I’m confident you will too.
Frequently Asked Questions About Painted Vinyl Floors
It’s natural to have questions when embarking on a significant DIY project like painting your floors. Here are some of the most common inquiries about painted vinyl floors, providing you with peace of mind and essential insights:
Absolutely! This is perhaps the most crucial question, and I can confidently say yes. I painted this floor in October 2013, and it held up absolutely perfectly for over seven years. We only covered it up with peel-and-stick marble tile as part of a laundry room refresh when we prepared our house for sale. Throughout those seven years, we did not “baby” the floor at all. It endured normal household traffic, laundry baskets were scooted across it regularly, and it saw all the usual wear and tear of a functional room. There was no damage or scratching whatsoever from daily use. We did have one incident where the water heater needed replacing, and during its removal, the old unit scraped the floor in one small area. However, this was entirely understandable given the circumstances and was very easy to touch up, proving the repairability of painted floors.
Cleaning a painted vinyl floor is incredibly simple and requires no special products. We primarily used everyday Swiffer wet pads for quick clean-ups. For deeper cleaning, you can simply mop it like any other hard surface floor with warm water and your preferred mild dish soap or all-purpose floor cleaner. Avoid harsh abrasive cleaners or scrubbers, which could potentially dull the finish or damage the paint over time. Gentle, regular cleaning is all that’s needed to maintain its pristine appearance.
No, you do not need to sand your vinyl floor before painting! This is a common misconception and one of the reasons many DIYers hesitate to tackle floor painting. When you use the right primer, like KILZ, it creates an excellent adhesive surface for the paint without the need for additional grit from sanding. The primer effectively bonds to the clean vinyl, providing the perfect foundation for your porch and floor enamel. Simply ensure your floor is thoroughly cleaned and free of any dust, dirt, or grease before applying the primer.
This is a resounding NO! I cannot emphasize this enough: do NOT apply a top coat or sealer over porch and floor enamel paint. This type of paint is specifically formulated with all the necessary durability and protective properties built into its composition. Adding an additional top coat, especially a clear one, is very likely to cause yellowing over time, which will detract from the fresh, clean look you worked hard to achieve. Furthermore, it can sometimes even compromise the paint’s inherent flexibility and adhesion. We’ve used this same “no top coat” approach on other projects, such as our painted and stenciled wood kitchen floors. Those floors endured significantly more foot traffic and abuse than the laundry room floor and held up beautifully without any top coat. Trust the product’s engineering; porch and floor paint is designed to be a standalone, incredibly durable solution.
If you’re eager to tackle this project yourself, why not make it even easier by having the instructions readily available? Just fill out the form below to grab your free printable instructions and keep them handy throughout your painting journey!
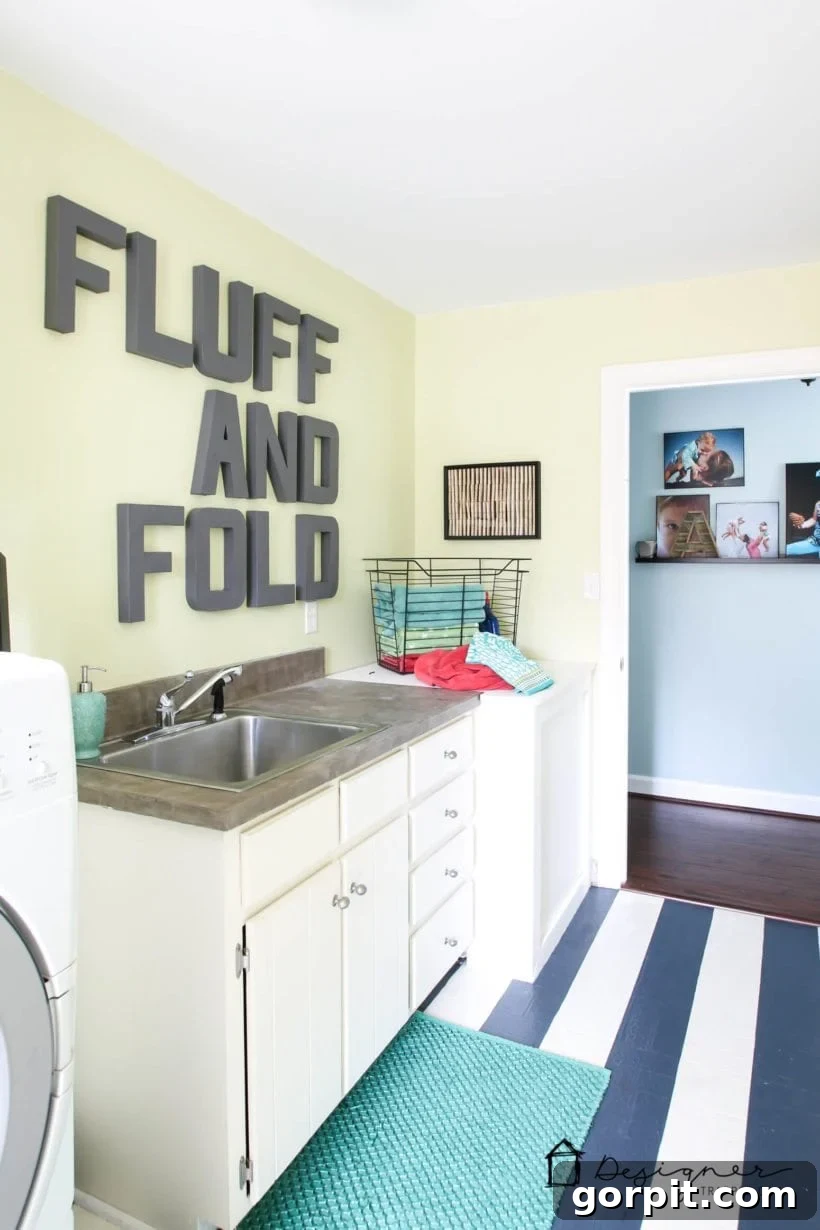
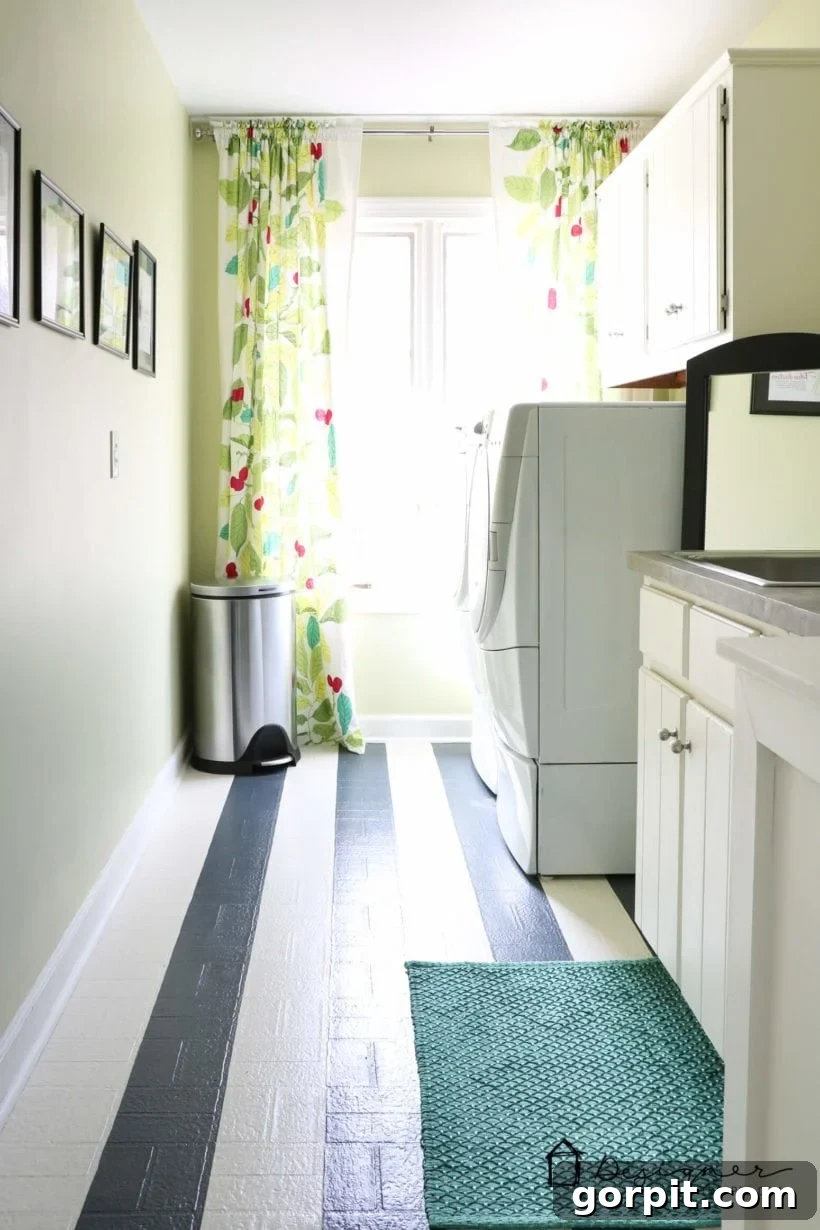
What do you think? Are you now tempted to paint those old vinyl floors and give your home a fresh, custom update? This versatile DIY technique isn’t limited to laundry rooms; it would also work wonderfully in bathrooms, mudrooms, or even basements. You can easily incorporate a faux tile look with stencils, creating intricate patterns that mimic more expensive flooring options. While alternative solutions like updating an outdated floor with tile stickers exist, painting remains one of the most cost-effective ways to achieve a dramatic transformation. Don’t be afraid of this DIY project now that you’ve seen how easy it truly is to completely revamp your outdated vinyl or linoleum flooring!
Explore More Paint Projects and Guides
SEE ALL PAINT POSTS
-
9 Life-Changing Painting Hacks Everyone Should Know
-
How Durable are DIY Painted Kitchen Cabinets?
-
How to Paint Kitchen Cabinets (From a DIYer Who Has Done it 3 Times)
-
How Have Our Painted Countertops Held Up?
-
How to Paint IKEA Furniture and Mistakes to Avoid
-
How Much Paint Do I Need for My Room?
Other flooring posts you may enjoy:
- Gorgeous But Cheap Flooring Ideas
- How to Install a Floating Tile Floor
- The Pros & Cons of Flooring Types & How to Choose
Wondering how I approach transforming rooms and spaces in our home, from initial concept to stunning completion? Check out Designer in a Binder®, my proven system for affordable and stylish home decorating.
And if you want exclusive content, behind-the-scenes sneak peeks into my latest DIY adventures, and valuable decorating tips delivered straight to your inbox, be sure to subscribe before you head out!