
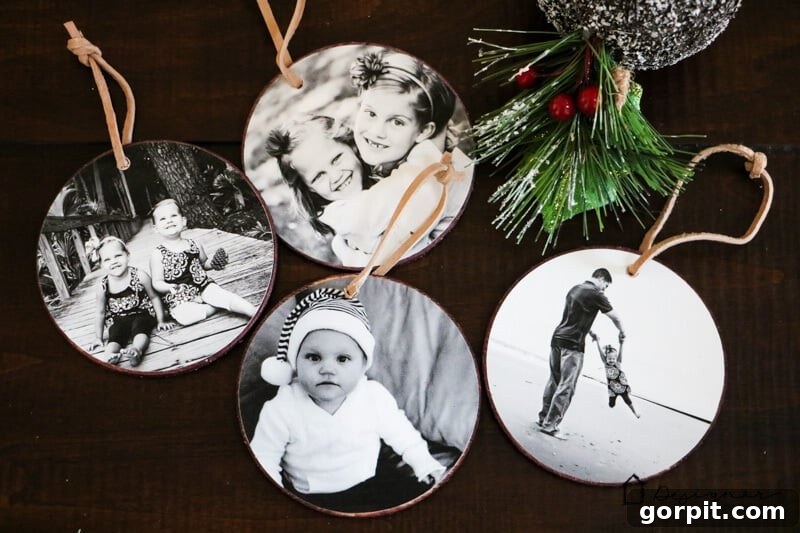
DIY Photo Christmas Ornaments: A Heartfelt Way to Preserve Cherished Family Memories
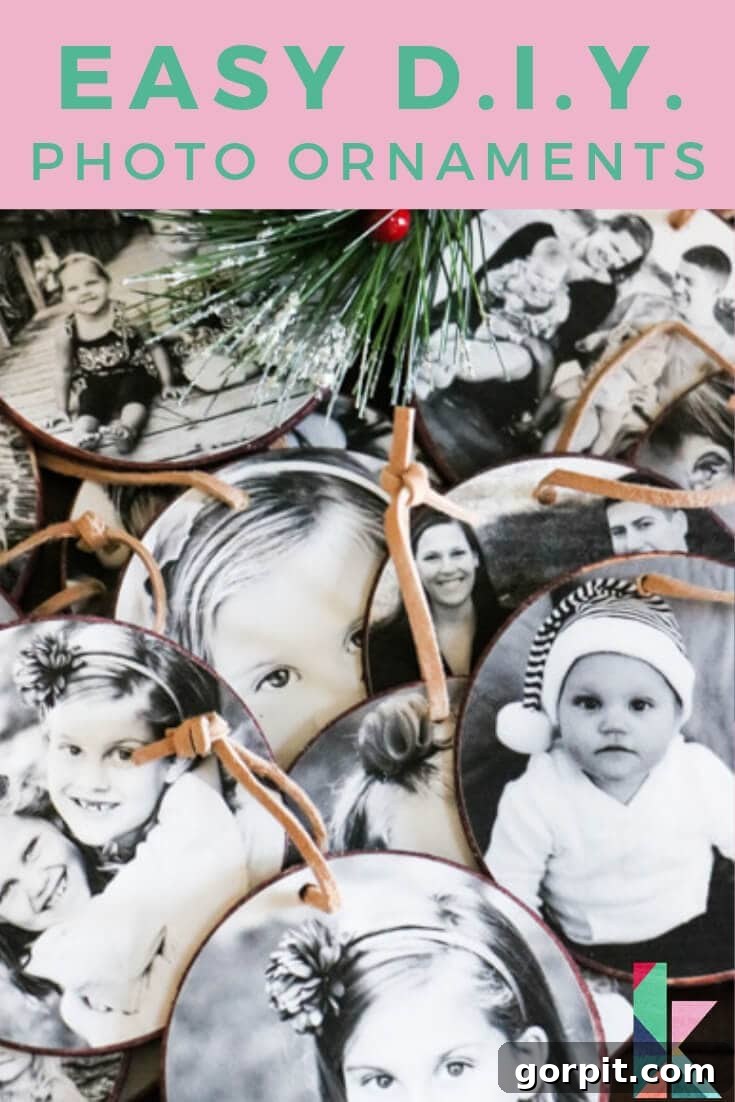
This post is proudly sponsored by DAP.
The holiday season is a magical time for creating new memories, but it’s also a wonderful opportunity to reflect on cherished moments from the past. What better way to do that than by adorning your Christmas tree with beautiful, personalized photo ornaments? These DIY photo Christmas ornaments are incredibly easy to make and offer a unique, sentimental touch to your holiday decor, transforming your tree into a gallery of your most beloved family memories.
Last year, I embarked on an exciting project: making every single ornament for our grand new 9-foot artificial tree that graces our foyer. It was an ambitious endeavor, but one filled with immense joy and creativity. Among all the delightful crafts, these DIY photo Christmas ornaments quickly became my absolute favorite. There was something truly special about delving into old photo albums and digital archives, rediscovering forgotten smiles, silly moments, and significant milestones. Each year, I look forward to adding a few more, watching our tree evolve into a heartwarming display of our family’s journey. Now, I’m thrilled to share with you how you can create these enchanting ornaments for your own home, making your Christmas tree a deeply personal and meaningful centerpiece.
Beyond personalizing your own holiday setup, these custom photo ornaments also make incredibly thoughtful and unique gifts. Imagine the delight on a grandparent’s face as they unwrap an ornament featuring their grandchildren, or a friend receiving a keepsake from a memorable shared adventure. This tutorial will guide you through each step, ensuring a smooth and enjoyable crafting experience, whether you’re a seasoned DIYer or just starting out. Get ready to add a touch of heartfelt nostalgia to your festive celebrations!
This post contains some affiliate links for your convenience (which means if you make a purchase after clicking a link I will earn a small commission which helps keep my blog up and running but it won’t cost you a penny more)! Click here to read my full disclosure policy.
Craft Your Own Keepsakes: The Ultimate DIY Photo Christmas Ornaments Tutorial
Ready to transform your favorite snapshots into festive keepsakes? Let’s gather our supplies. The key to any successful DIY project lies in having the right tools and materials at hand. Here’s what you’ll need to create your own collection of beautiful photo Christmas ornaments:
Materials Needed:
- Inkjet Printer: A good quality inkjet printer is essential for vibrant photo prints that truly capture the essence of your memories. I personally use this printer, and I’m utterly obsessed with its ability to print large sizes up to 13 x 19 inches, which offers fantastic versatility for various projects beyond just ornaments. Ensure your printer has fresh ink for the best results, as faded prints won’t do your precious memories justice.
- Matte Photo Paper: For these ornaments, matte photo paper is preferred over glossy. It significantly reduces glare, prevents unsightly fingerprints, and gives your finished ornaments a beautiful, soft, professional finish that enhances the nostalgic feel. This is the paper I used, and it provides excellent print quality and durability, ensuring your ornaments last for many Christmases to come.
- Round Wood Discs: These form the rustic and charming base of your ornaments. Their natural texture beautifully complements the printed photos, adding warmth and character. I opted for these exact wood discs, which were 3 inches in diameter, offering a perfect size for displaying a single photo prominently without being too heavy or overwhelming. You can experiment with different sizes or even shapes like squares or ovals if you prefer a different aesthetic.
- DAP Weldwood Multipurpose Spray Adhesive: A reliable adhesive is crucial for ensuring your photos stay securely and smoothly attached to the wood discs. DAP Weldwood Multipurpose Spray Adhesive is my go-to for this project due to its strong, long-lasting bond and remarkably easy, mess-free application. It provides excellent, even coverage without the excessive residue or stickiness often associated with other craft adhesives.
- Wood Stain: To enhance the natural beauty of the wood and add a touch of warmth or color to the back of your ornaments, wood stain is a fantastic choice. I used this stain in the “Blood Red” color to give the back of my ornaments a rich, festive hue that truly popped. You could also opt for a clear sealant to highlight the natural wood grain, use acrylic paint for a more opaque and vibrant finish, or simply leave the wood natural for a minimalist look.
- Paper Towels: An essential for any staining project, paper towels are indispensable for applying and wiping off excess wood stain, as well as for quick cleanup of any spills or drips. Have a generous supply ready to ensure a tidy workspace.
- Cricut Cutting Machine or Scissors and a Round Template: For perfectly cut circular photos, a Cricut cutting machine is a game-changer, especially if you’re planning to make a large batch of ornaments. It ensures unparalleled precision and saves a significant amount of time. If you don’t have a Cricut, sharp craft scissors and a round template (like a coin, bottle cap, or a circle drawn with a compass) will work perfectly fine with a little patience.
- If you’re considering investing in a cutting machine, you can read my detailed review of Cricut vs. Silhouette machines here to help you decide which is best for your crafting needs. For a closer look at a specific model, check out my comprehensive review of the Cricut Maker here.
- Suede Cord: This provides a sturdy, attractive, and tactile hanger for your ornaments. Suede cord adds a lovely textural element, but you could also use twine for a rustic feel, thin satin ribbon for elegance, or decorative string to match your decor.
- Drill with Small Drill Bit: You’ll need this to create a clean, precise hole in the wood disc for the hanger. A small drill bit, appropriate for the thickness of your suede cord, will be necessary. While a drill press offers maximum stability and precision, a handheld drill works just as well with a steady hand.
- Optional: Self-healing mat, craft knife, ruler (if hand-cutting for precision), small weights (to hold photos down while adhesive dries), masking tape (to protect areas from overspray).
Step-by-Step Guide to Creating Your Photo Ornaments
Now that we have all our materials neatly organized, let’s dive into the exciting creation process. Follow these detailed steps carefully to craft beautiful, lasting photo ornaments that you’ll cherish for many years to come.
Step 1: Select, Prepare, and Print Your Photos
This is arguably the most enjoyable and nostalgic part of the project! Begin by carefully selecting the photos you wish to immortalize on your Christmas tree. Think about family milestones, candid shots, beloved pets, or even scenic landscapes from memorable vacations. Once selected, you’ll need to prepare them perfectly for printing.
- Sizing Your Photos for a Perfect Fit: It’s crucial that your printed photos are just slightly smaller than your wood discs. For instance, if your wood discs are 3 inches in diameter, aim to print your circular photos at approximately 2.9 inches in diameter. This small difference is vital; it ensures the photo fits perfectly within the disc’s face without overhanging the edges, giving it a clean, professional, and finished look.
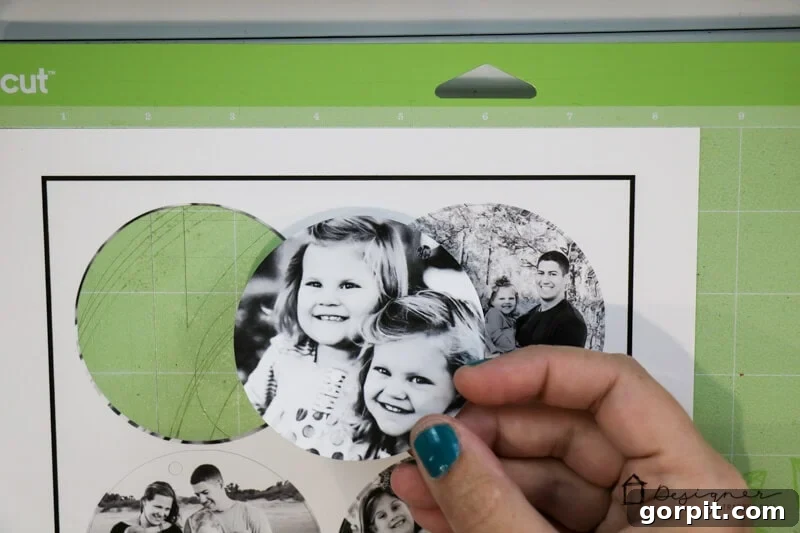
- Shaping Your Photos (Cricut Method): If you’re using a Cricut cutting machine, you’ll utilize its incredible ‘Print Then Cut’ feature. For optimal efficiency and to streamline your workflow, I highly recommend pre-cropping your images into a circular shape using an external photo editor (like PicMonkey or Canva) before importing them into Cricut Design Space. This saves you the additional step of slicing each image individually within Design Space. You can easily do this by following the steps in this tutorial for PicMonkey. However, the video below also clearly demonstrates how to create circular images directly within Design Space, so don’t worry if you prefer that method!
- Printing with Quality in Mind: Load your chosen matte photo paper into your inkjet printer. Before printing, double-check that your printer settings are optimized for photo quality and the correct paper type. This ensures you achieve the most vibrant colors and sharp details, making your memories truly pop.
- Cutting Your Photos (Cricut Method): Follow the intuitive instructions within Cricut Design Space to send your prepared circular images to your printer first (for the ‘Print’ part), and then to your Cricut machine for the ‘Cut’ part. The unparalleled precision of the Cricut will yield perfectly uniform circles every time, saving you significant time and guaranteeing a flawless, professional finish.
- Cutting Your Photos (Manual Method): If you’re cutting by hand, print your photos at the desired slightly smaller size. Then, use a reliable round template (a craft punch, a traced circle from a coin, or a template drawn with a compass) to carefully draw circles on the back of your prints. Use sharp craft scissors to meticulously cut along these lines. For best results and uniformity, ensure your template is consistently slightly smaller than your wood discs.
As showcased in the video and image above, this is the impressive result you’ll achieve after your Cricut expertly cuts your photos: perfectly uniform circles, ready for assembly!
Step 2: Stain the Back of Your Wood Discs for a Polished Look
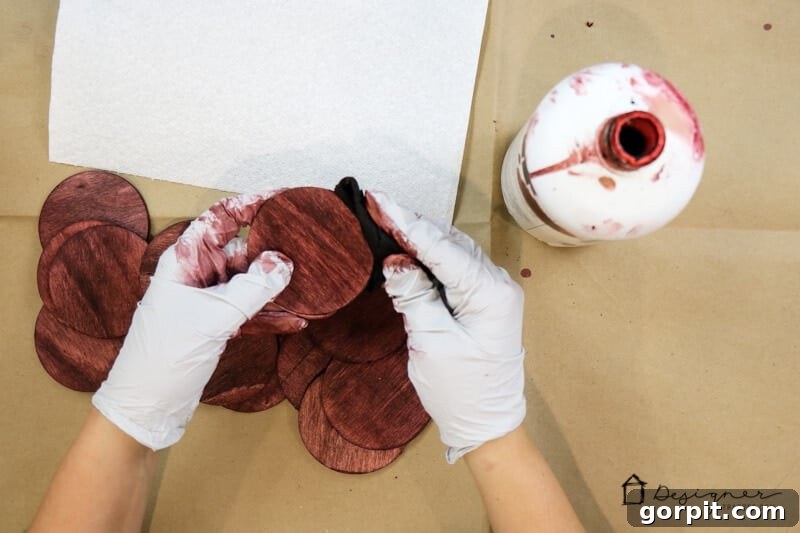
While your cutting machine (or you!) is diligently working on the photos, you can prepare the wood discs. This step is crucial for adding a beautiful, finished look to the back of your ornaments and allows you to complement your chosen photos or overall holiday decor theme.
- Application Technique: Using a clean paper towel or a soft, lint-free rag, apply a thin, even coat of your chosen wood stain to the back of each wood disc. Always work in the direction of the wood grain for the smoothest, most professional-looking finish. Avoid over-saturating the wood.
- Creative Color Choice: I used a “Blood Red” stain, which infused my ornaments with a rich, festive depth, perfectly matching my holiday theme. You have complete creative freedom here! Experiment with different stain colors such as light oak for a natural feel, dark walnut for a classic look, or cherry for warmth. Alternatively, you can use acrylic craft paint for a more opaque and vibrant color, or simply apply a clear sealant to protect and highlight the natural beauty of the wood grain.
- Crucial Drying Time: Allow the stain to dry completely according to the manufacturer’s instructions. This usually takes several hours, or even overnight, to ensure it’s absolutely dry and not tacky before you proceed. Proper drying is essential to prevent smudging and to ensure the adhesive adheres correctly and securely in the next step.
- Safety First: Always prioritize safety when working with wood stains. Work in a well-ventilated area, preferably outdoors, and consider wearing protective gloves to shield your hands from chemicals.
Step 3: Apply the Spray Adhesive for a Strong Bond
Once your stain is thoroughly dry, it’s time to bond the photos to the wood discs. Spray adhesive is an incredibly effective tool for this, as it creates a strong, even bond without leaving visible brush strokes or excess glue, which can compromise the appearance of your ornaments.
- Work Outdoors or in a Well-Ventilated Area: Spray adhesives produce fumes, so it’s absolutely best to work outdoors in the fresh air or in a very well-ventilated space, such as a garage with the door open. Always protect your work surface with newspaper, cardboard, or a drop cloth to prevent unintended stickiness.
- Optimal Spraying Technique: Hold the can of DAP Weldwood Multipurpose Spray Adhesive about 6-8 inches away from the unstained side of the wood disc. Apply a thin, even coat across the entire surface where the photo will be placed. Remember, a little goes a long way with this adhesive; you do not need to saturate the wood. Having used many craft adhesives over the years, I can confidently say this spray adhesive is hands-down my favorite for its clean application and robust, long-lasting hold.
- Ensure Complete Coverage: Make certain the adhesive covers the entire area where the photo will sit. Take care to avoid overspraying onto the edges of the disc or the beautifully stained back, as this can leave a sticky residue.
- Pro Tip for Clean Edges: If you’re concerned about overspray, you can create a simple makeshift shield. Cut a hole in a piece of cardboard that is slightly smaller than your wood disc. Place this shield over the disc, then spray through the hole. This will help contain the adhesive to only the desired area.
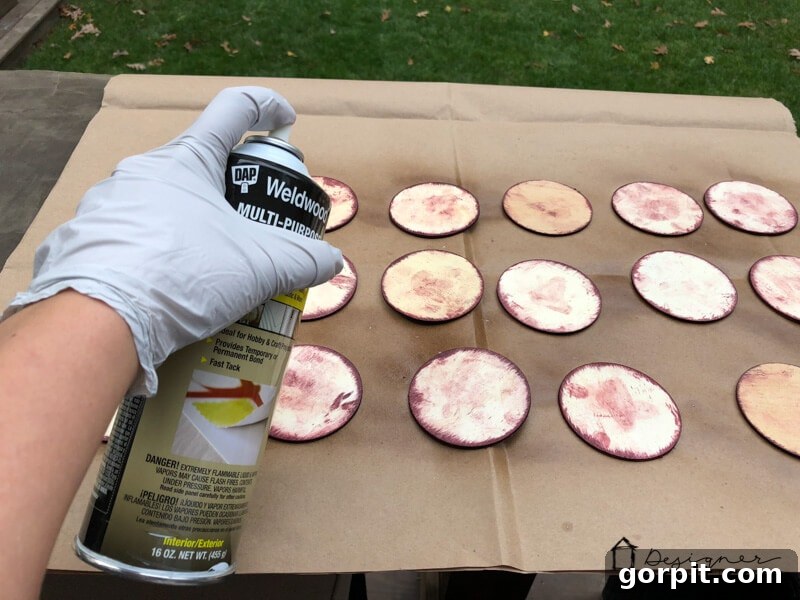
Step 4: Attach Photos to Wood Discs with Precision
This step requires a steady hand and a keen eye to ensure your precious photos are perfectly centered and flawlessly smooth on their wood bases.
- Careful and Quick Placement: Immediately after applying the adhesive (as spray adhesives often set quickly), carefully pick up one of your pre-cut circular photos. Align it precisely over the unstained, adhesive-coated side of a wood disc. The key is to get it right on the first try, as repositioning can be challenging once the spray adhesive takes hold firmly.
- Smoothing Out Air Bubbles: Once the photo is in its desired place, gently but firmly press it down from the center outwards, using your fingers or a clean, soft cloth. This crucial step helps to eliminate any trapped air bubbles and ensures full, even contact between the photo and the wood disc. Work your way thoroughly to the edges, applying consistent and firm pressure across the entire surface.
- Adequate Drying Time: Allow the adhesive to dry completely. It’s important that the edges of your ornaments no longer feel tacky before you proceed to the next step. This typically takes a few hours, but always refer to the specific adhesive product instructions for the most accurate drying times. Patience here ensures a lasting bond.
- Pro Tip for Enhanced Adhesion: To ensure a super strong bond and prevent any lifting at the edges, consider placing a heavy book or a small, even weight on top of the finished ornaments for a few hours while the adhesive fully cures.
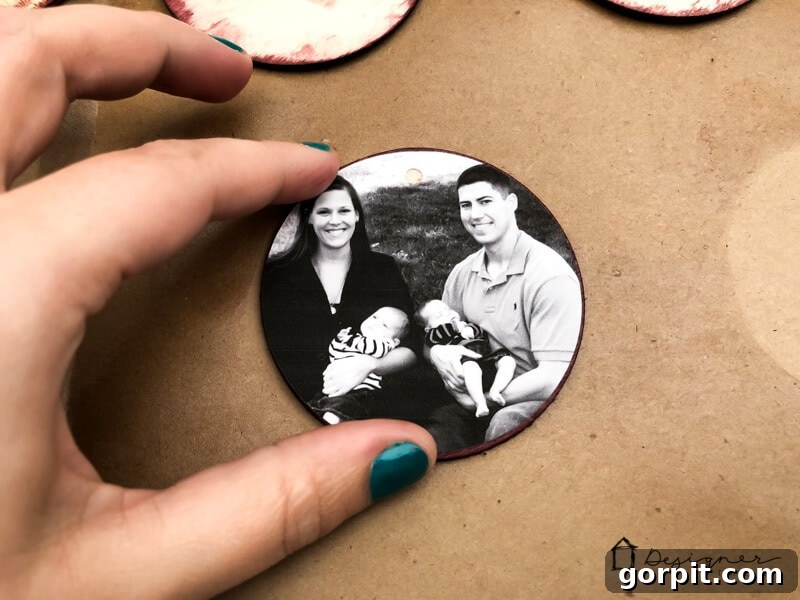
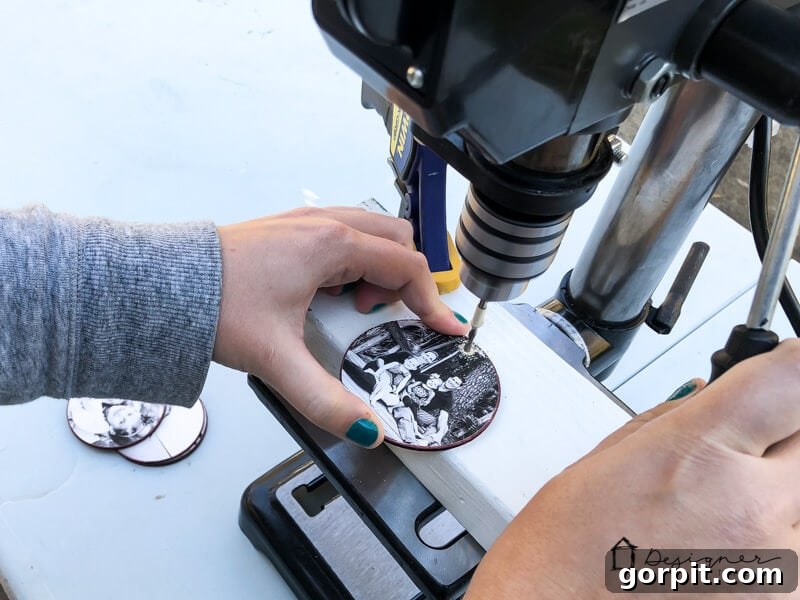
Step 5: Drill Holes for the Hangers
Once the adhesive is fully cured and your ornaments are no longer tacky to the touch, it’s time to add the hanging mechanism. This involves carefully drilling a small, neat hole through the top of each ornament.
- Choosing the Right Drill Bit: Select a drill bit that is slightly larger than the thickness of your chosen suede cord (or whatever hanging material you’ve opted for). You want the cord to pass through easily without having to force it, but you also want to avoid creating an excessively large or unsightly hole.
- Precise Hole Alignment: Use the top edge of your circular photo as a precise guide for where to drill. Aim for the dead center top of the ornament for a balanced hang. If your hand-cut photos already had a hole punched in them during Step 1, you can simply use that as your pilot hole, drilling directly through it. If not, carefully mark the spot with a pencil.
- Optimal Drilling Technique: If you’re fortunate enough to have a drill press, it offers fantastic stability and precision, making this step almost effortless. However, a handheld drill works perfectly well too! The key is to secure the ornament firmly – a small clamp or vise can be incredibly helpful in preventing it from spinning or shifting. Drill slowly and steadily through both the photo and the wood disc. Apply consistent, gentle pressure and avoid forcing the drill, which can splinter the wood or tear the paper.
- Safety First and Always: Always wear appropriate eye protection when drilling to shield your eyes from flying debris. If using a handheld drill, ensure the ornament is absolutely stable to prevent it from slipping, which could cause injury or damage to your beautiful creation.
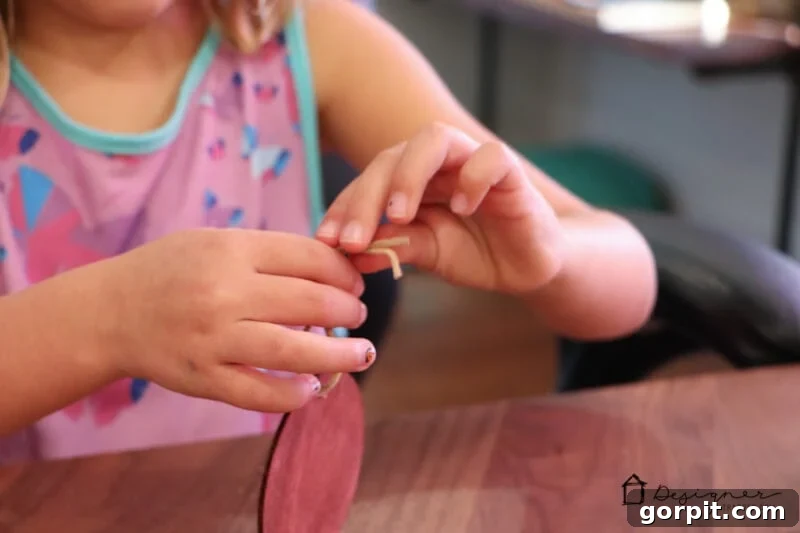
Step 6: Thread the Suede Cord and Finish Your Ornaments
The final step brings your personalized ornaments to life, transforming them into hangable treasures ready to adorn your Christmas tree!
- Prepare Your Cord Lengths: Cut individual lengths of suede cord, approximately 6-8 inches long. This length provides enough material to comfortably thread through the hole and tie a secure knot, creating a perfectly sized loop for hanging.
- Gracefully Thread the Cord: Gently thread one end of a suede cord through the drilled hole from the front of the ornament (the photo side) to the back. Then, bring that same end back through the hole from the back to the front. You should now have a loop of cord emerging from the top of the ornament, with both loose ends facing you.
- Secure the Knot: Bring the two loose ends of the cord together, ensuring they are even, and tie them into a secure knot. A simple overhand knot followed by a second knot (a double knot) works wonderfully to prevent slipping. Trim any excess cord with sharp scissors, leaving a neat and functional loop for hanging. This is a fantastic and simple step to involve “little helpers” – children often enjoy the fine motor skill practice and the immense satisfaction of contributing to the family’s holiday decorations!
- Explore Variety in Hangers: While suede cord adds a lovely rustic and tactile touch, feel free to experiment with different hanger materials to match your personal style or tree theme. Twine provides a more natural, farmhouse feel, satin ribbon adds an elegant sheen, and even thin metallic thread can provide a subtle sparkle and sophistication.
Your Beautiful Personalized Ornaments Are Complete!
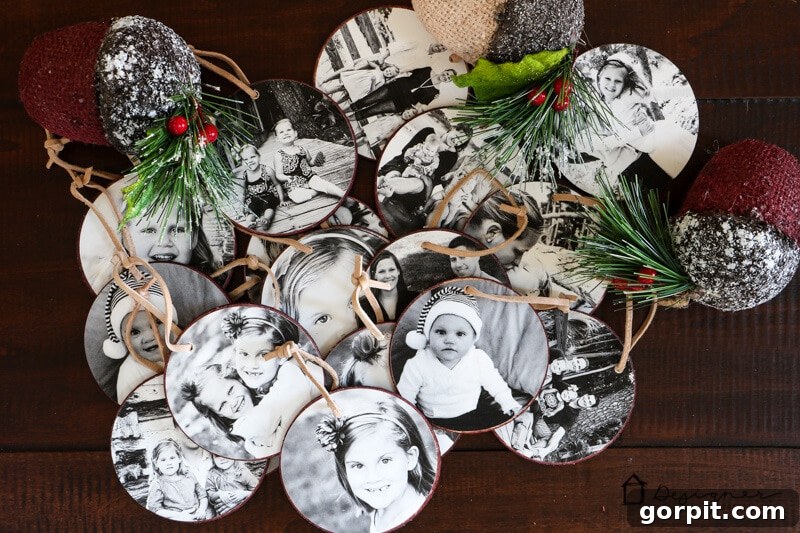
And just like that, you’ve created a collection of absolutely stunning, personalized photo Christmas ornaments! I am genuinely 100% in love with how mine turned out, and I’m confident you’ll feel the same way about yours. There’s an unparalleled sense of satisfaction that comes from crafting something so meaningful and unique with your own hands. Each ornament isn’t just a decoration; it’s a tiny window to a cherished memory, a conversation starter, and a heartfelt reminder of your family’s journey. Take a peek at the final result:
Tips for Displaying and Gifting Your Photo Ornaments:
- On Your Christmas Tree: Mix your photo ornaments with traditional baubles, twinkling lights, and festive garlands for a truly unique and personal Christmas tree display. Distribute them evenly to ensure that your precious memories are visible from all angles and become focal points of your holiday decor.
- As Thoughtful Gifts: These personalized ornaments make incredible, heartfelt holiday gifts! Package them elegantly in small decorative boxes lined with tissue paper, or attach them as a special, custom tag to a larger present. Grandparents, in particular, adore receiving ornaments featuring their beloved grandchildren, making these gifts that will be treasured for years.
- Year-Round Decor: Don’t feel obligated to limit these beautiful keepsakes to just Christmas! Hang them on a decorative branch displayed on a mantelpiece, from a wall hook in a nursery, or even use them as unique and memorable party favors for birthdays, anniversaries, or family reunions.
- Care Instructions for Longevity: To ensure your personalized ornaments look their best and last for many years to come, store them carefully in a cool, dry place when not in use. Avoid exposing them to extreme temperatures or direct sunlight for prolonged periods, as this can cause the photos to fade over time.
Join Our Crafting Community and Get More Inspiration!
If you loved this DIY idea and are eager for more creative inspiration and engaging projects, be sure to save this tutorial to your favorite Pinterest board! Pinning it is a fantastic way to keep track of projects you want to try later and helps others in the crafting community discover the joy of handmade holidays. Don’t forget to share your creations on Facebook too – we’d love to see them!
Before you go, don’t miss out on my popular and absolutely FREE Christmas printables! They’re perfect for adding extra festive cheer and effortless style to your home decor this holiday season. Just click the image below and let me know what email address I should send them to – consider it a little gift from me to you!

Explore More Cricut Projects and DIY Ideas:
If you enjoyed crafting with your Cricut machine or are simply looking for more creative ways to personalize your home and create unique gifts, explore some of our other popular tutorials:
- Easy Personalized Vinyl Decals for Home Decor
- Custom T-Shirt Design with Cricut Iron-On Vinyl: A Step-by-Step Guide
- DIY Wall Art: Creating Stencils and Painting with Your Cricut Machine
- Crafting Unique Gifts: Exploring Engraving and Debossing with Cricut Maker
- Festive Holiday Banners and Cards: Quick Projects with Your Cutting Machine