
Hello and welcome! For those new to our corner of the internet, allow me to introduce myself. My name is Courtney, and alongside my husband Brent, I blog over at Gray House Studio. There, we meticulously document our ongoing home renovation journey, sharing a wealth of DIY projects, practical tutorials, and detailed plans to inspire fellow homeowners and DIY enthusiasts.

Brent and I share an unwavering passion for dreaming big when it comes to reinventing spaces within our home. Our latest endeavor, transforming our spare bedroom into a functional and stylish home gym, proved to be no exception to this rule. We’ve long harbored a desire for a distinctive brick accent wall somewhere in our living space. When we envisioned our new home gym with a distinct industrial loft aesthetic, we immediately recognized it as the perfect canvas for bringing this vision to life. The character and texture of an authentic brick wall were essential to achieving the desired ambiance.
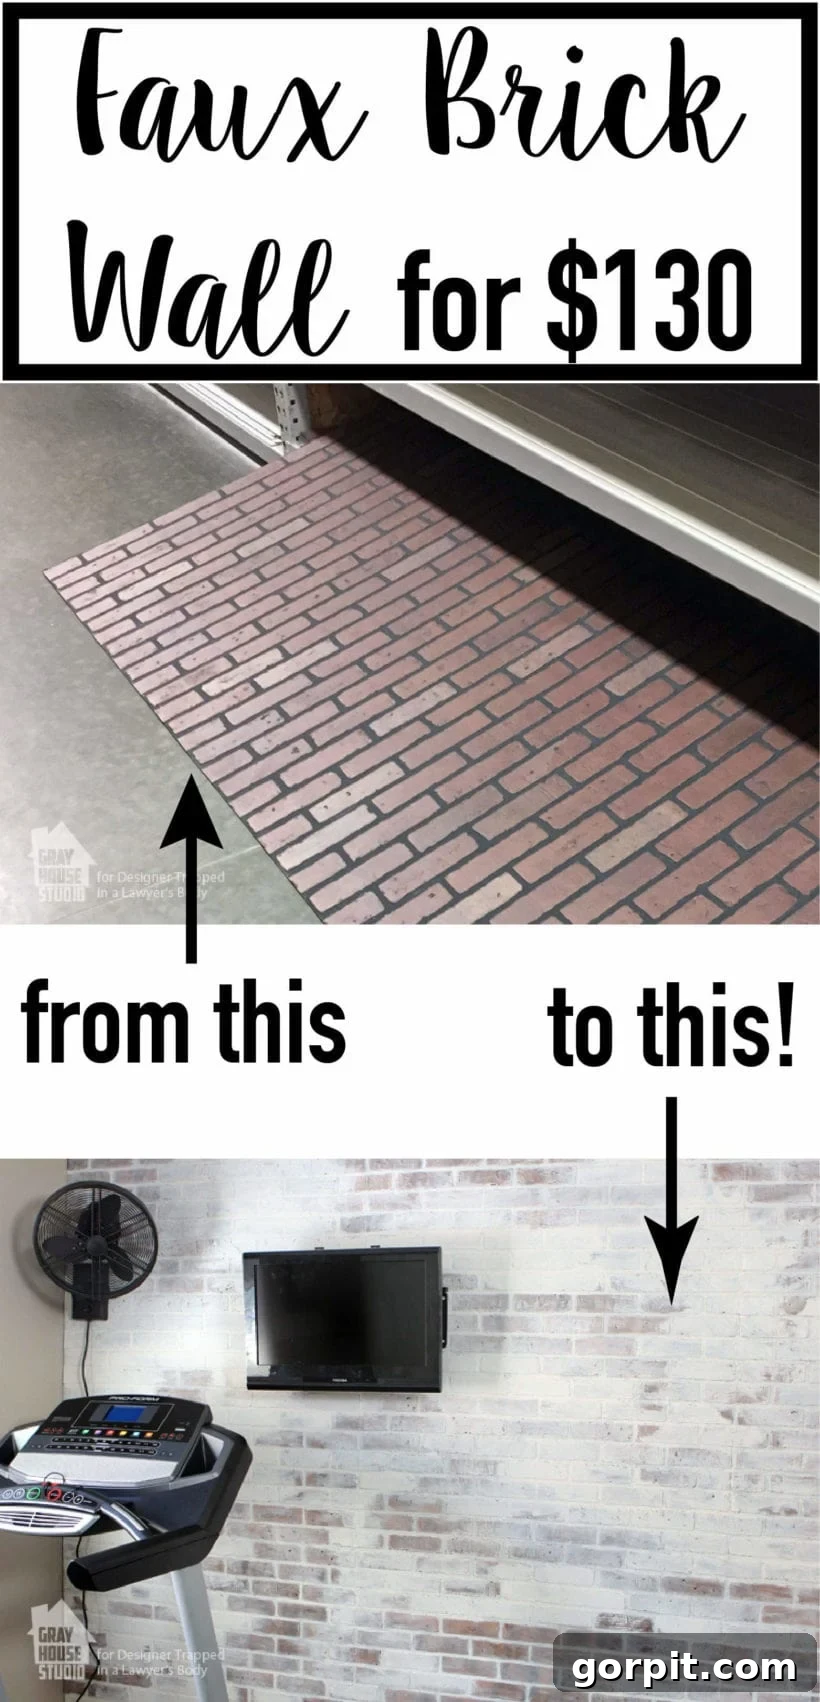
After extensively researching various methods for creating a brick wall, we quickly realized that the cost of genuine brick veneers far exceeded our allocated budget. This forced us to explore more economical yet equally impactful alternatives. Our only viable option, within our desired spending limit, was to acquire three large sheets of embossed hardboard wall paneling designed to mimic the look of brick. These panels offered a promising foundation for our DIY project, presenting an affordable path to our dream industrial brick wall. 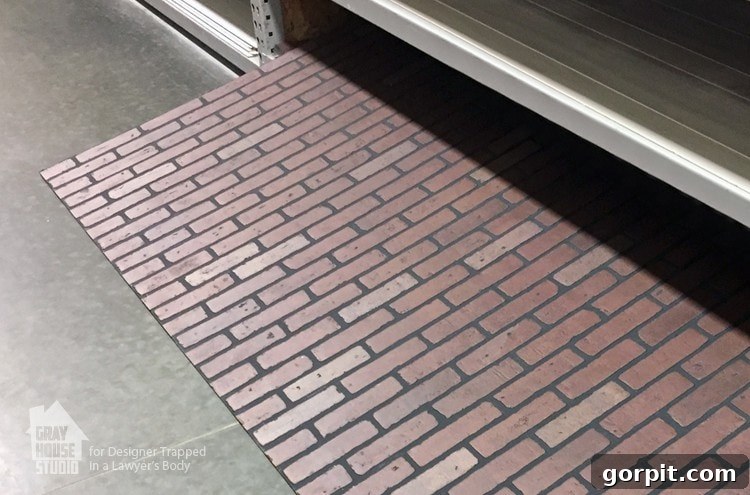 The initial challenge, however, arose from the fact that the only readily available paneling came in an undesirable combination of bright red brick with stark black mortar. This certainly wasn’t the aged, sophisticated industrial look we had in mind. We knew we had a significant task ahead of us to customize it to our preferred style. Yet, we were confident that by strategically painting the wall with a sophisticated new color palette, rather than simply covering it with a single coat of white, we could dramatically transform the paneling and the entire space into the exact industrial masterpiece we had envisioned.
How to Paint a Realistic Faux Brick Wall for an Industrial Loft Look
Are you ready to learn how we meticulously transformed basic embossed hardboard paneling into a remarkably realistic brick accent wall? For a visual step-by-step guide, be sure to check out our detailed video tutorial. Afterwards, follow along below as we elaborate on the precise techniques demonstrated in the video to paint the faux brick wall we installed in our home gym, breathing new life into it with a custom color palette. This guide will walk you through creating an authentic-looking brick wall on a budget. Please note that this post contains some affiliate links for your convenience. Click here to read my full disclosure policy.
Essential Materials for Your DIY Faux Brick Project
Gathering the right tools and materials is the first crucial step towards achieving a professional-looking faux brick wall. Here’s what you’ll need:
- Faux Brick Embossed Hardboard Paneling: These panels are the foundation of your brick wall. (We required 3 sheets to adequately cover our accent wall.)
- Foam Paint Rollers: Essential for applying paint smoothly and creating an authentic texture without brush marks.
- Large Piece of Cardboard: This will serve as your mixing palette, allowing you to blend multiple paint colors naturally.
- Paintbrush: Crucial for precise detailing, especially for the mortar lines and touch-ups.
- Various Sample Paint Colors: You’ll need a range of hues to create depth and realism. (Our specific selections are detailed further below to guide your choices.)
Projected Cost Breakdown for Your Affordable Faux Brick Wall
One of the most appealing aspects of this DIY faux brick wall project is its incredible affordability, especially when compared to installing real brick or even brick veneers. Here’s an estimated cost breakdown:
- Embossed Panels: 3 panels x approximately $25 each = $75
- Sample Size Paints: 8 sample pots x approximately $7 each = $56
- Total Estimated Cost: Around $130 (This figure can vary slightly depending on whether you already own basic painting supplies like brushes and rollers.)
This budget-friendly approach demonstrates that a stunning, realistic brick wall is entirely achievable without breaking the bank.
A highly effective starting point for conceptualizing and painting your faux brick wall is to actively seek out inspiration. Find photographs of real brick walls that embody your desired style, texture, and especially, the color palette you wish to replicate.
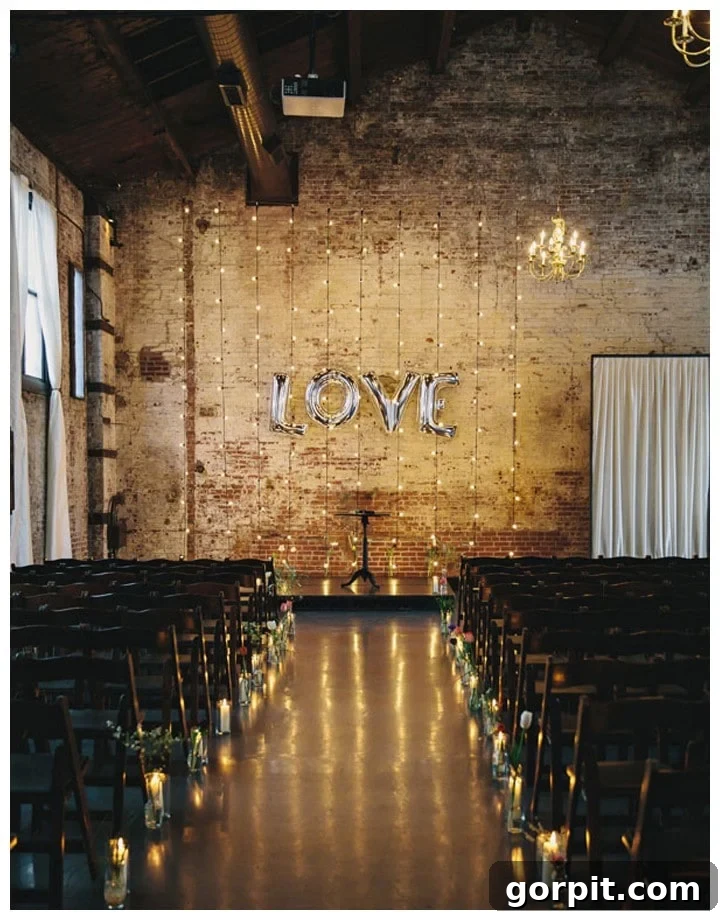 Source: Ruffled
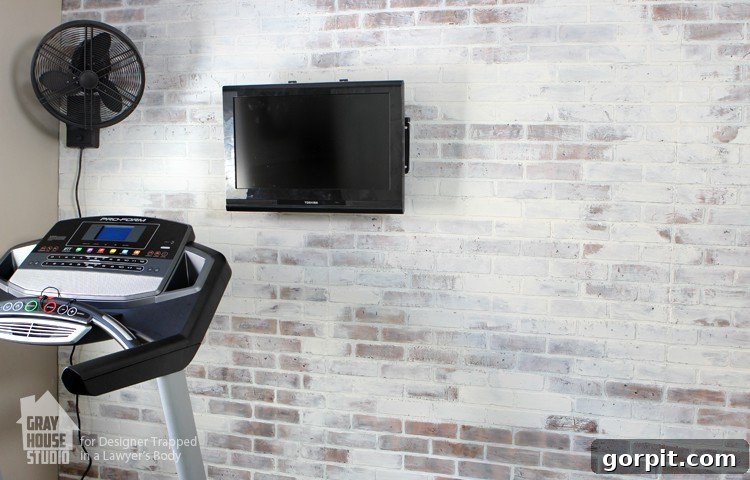
For our specific project, we were particularly drawn to the authentic industrial loft aesthetic. Our aim was to meticulously replicate the appearance of aged brick, subtly covered in worn, distressed white paint, mimicking years of character and history.
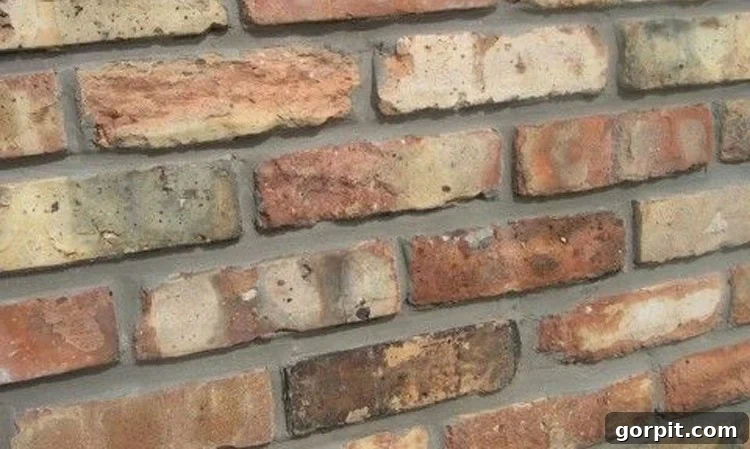 Source: Brick Salvage
When selecting the primary brick colors, our preference leaned towards a lighter, more neutral scheme. This was a deliberate choice to ensure the faux brick wall would harmoniously blend with the existing beige tones of the other walls in our home gym, creating a cohesive and inviting atmosphere. 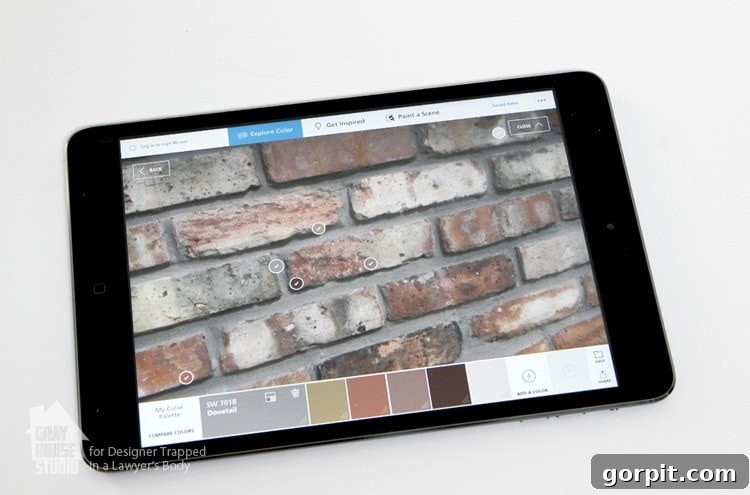 Once you have a clear vision of your desired wall aesthetic, the next crucial step is to meticulously determine the exact paint colors that will comprise your new, customized color palette. To streamline this process and ensure accuracy, we utilized the incredibly helpful ColorSnap app. This innovative tool allowed us to extract colors directly from our inspiration photos and instantly translate them into specific, purchasable paint colors that we could use for our brick wall transformation.
  When analyzing your chosen inspiration photos to determine the necessary colors, focus on identifying two distinct midtone colors, two prominent highlight colors, and two to three versatile accent colors. While using this many colors might seem daunting at first, and some choices may appear unconventional individually, their magic lies in their collective blend. Once applied, they seamlessly integrate to give the wall a remarkably realistic appearance, imbued with exceptional depth and captivating dimension. Additionally, remember to carefully select a specific color for the mortar lines, as this detail significantly contributes to the overall authenticity. For our project, we conveniently purchased all of our selected paints from Sherwin Williams, ensuring consistent quality and availability.
Our Curated Faux Brick Color Palette
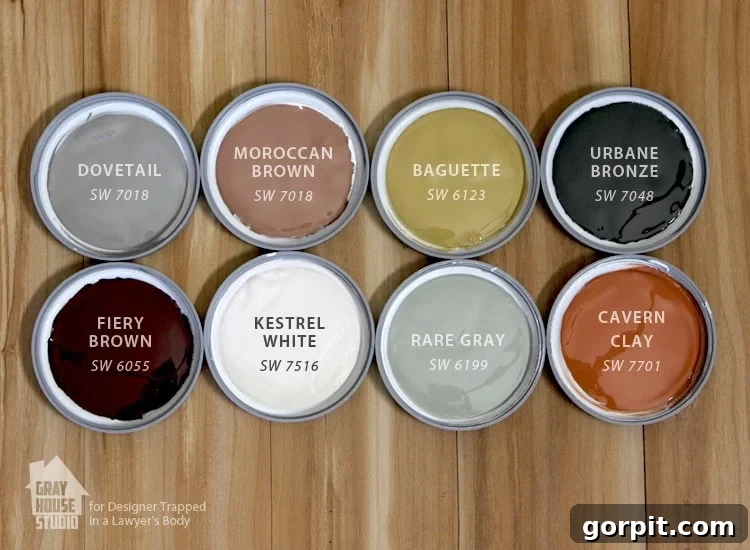
To give you a clearer idea, here are the specific Sherwin Williams paint colors we chose, each playing a vital role in creating our desired industrial loft look:
- Cavern Clay SW 7701 (Primary Midtone): A warm, earthy base for the bricks.
- Moroccan Brown SW 6060 (Secondary Midtone): Adds depth and variation to the brick base.
- Fiery Brown SW 6055 (Accent Color): Provides rich, darker spots for character.
- Baguette SW 6123 (Accent Color): A lighter, almost golden accent to mimic natural brick variations.
- Urbane Bronze SW 7048 (Accent Color): A deep, sophisticated gray-brown, ideal for adding shadows and an aged feel.
- Rare Gray SW 6199 (Highlight Color): Essential for creating dimension and catching light on the brick surfaces.
- Dovetail SW 7017 (Mortar Color): A perfect neutral gray to clean up and define the mortar lines.
- Kestrel White SW 7516 (Whitewash Color): The key to achieving that beautifully worn and distressed look.
PRO TIP: You only need to purchase sample sizes of each paint color. This small quantity is surprisingly ample, even for a large accent wall, as you’ll be applying only a modest amount of each hue in a layered fashion to build up the authentic brick effect. 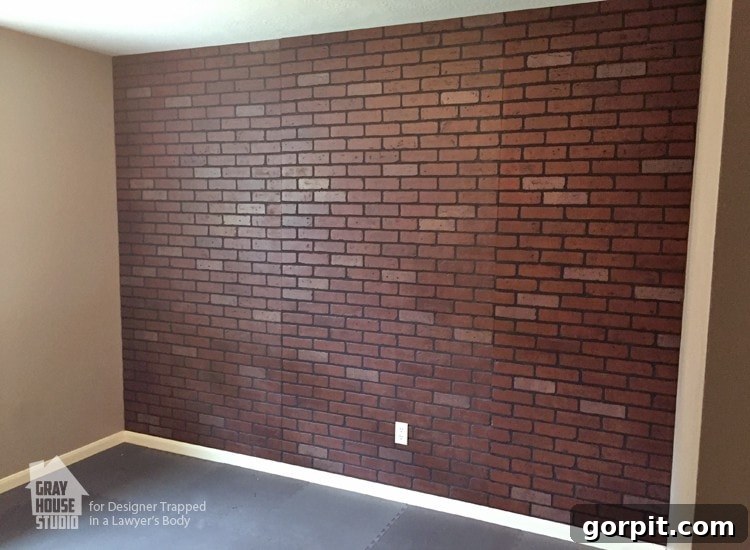 We strongly recommend installing all of your faux brick wall panels first before you even open a paint can. This crucial step ensures that the final painted surface will appear much more cohesive and seamless, as you won’t have to worry about matching paint across panel seams later. If you happen to have a leftover piece of the hardboard paneling, it’s an excellent idea to use it as a test swatch. Practice your painting technique and color blending on this smaller piece before committing to the main wall.
 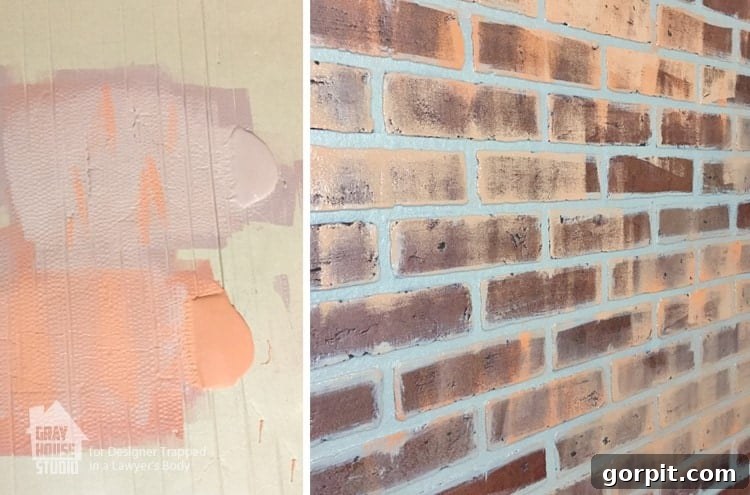 Once your panels are securely installed and you’re mentally prepared to begin painting, start by preparing your two chosen midtone colors from your carefully curated palette. For our project, these were Cavern Clay and Moroccan Brown. Pour these two paint colors out onto a large, flat piece of cardboard. The spacious surface of the cardboard is vital, as it provides ample room to roll your foam paint roller, allowing the colors to naturally mix and blend together as you pick them up. We absolutely adore the authentic, slightly mottled texture that the foam roller imparts as it glides across the embossed surface, perfectly mimicking the unevenness of real brick.
 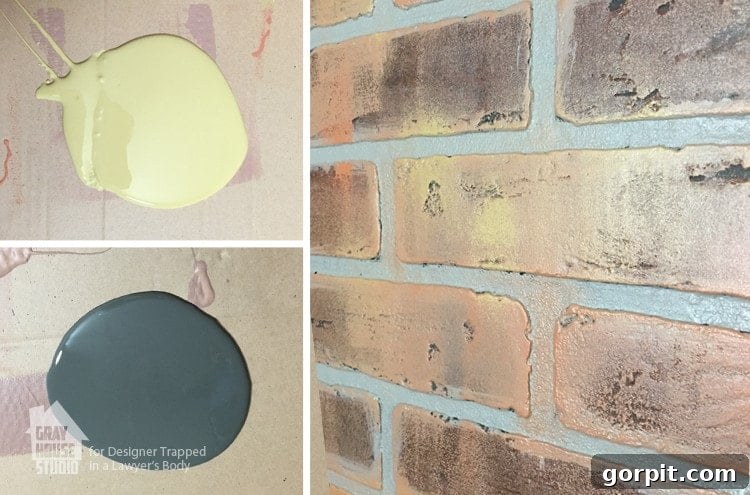 Once the entire wall surface is adequately covered with the base layers of your two midtone colors, it’s time to introduce the accent colors. These are the hues that truly begin to make the color palette pop and add distinctive character to your faux brick. For our accent colors, we used a vibrant yellow (Baguette), a rich dark brown (Fiery Brown), and a deep dark gray (Urbane Bronze). With these particular colors, the technique is different: you do not want to cover the entire wall uniformly. Instead, strategically concentrate them in specific, irregular areas, applying them more sparingly to create natural variations and interest. Finally, proceed to liberally apply the highlight colors. For this step, we utilized Rare Gray. The highlights should be scattered across the wall to create dimension and mimic how light catches real brick. If at any point the highlights become too overwhelming or appear unnatural, don’t fret! You can easily go back and lightly reapply some of your midtone colors or even previous highlight shades to tone it down and re-establish balance.
 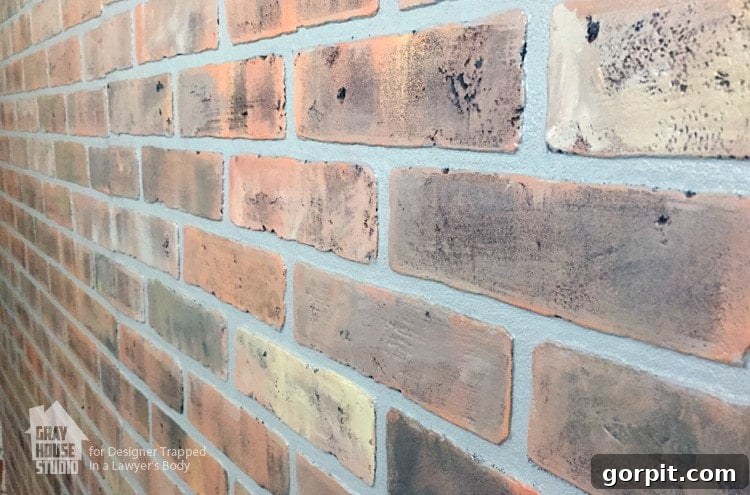 An important lesson we learned during our project: when we initially began painting our wall, we actually started by applying the mortar color first. However, we quickly realized that using a paint roller inevitably leads to paint inadvertently getting into the mortar grooves. Therefore, we strongly recommend painting the mortar lines last. This revised approach allows you to take a fine paintbrush and meticulously apply a lighter, contrasting color—in our case, Dovetail—to precisely paint over the pre-existing black mortar and elegantly conceal any stray paint that might have gotten into these areas during the previous layering steps. Carefully touching up the mortar lines at this stage genuinely refines and cleans up the entire appearance of the brick, making it look incredibly crisp and professional. If your desired outcome is a more traditional brick aesthetic, then this final mortar detailing step marks the completion of your project.
 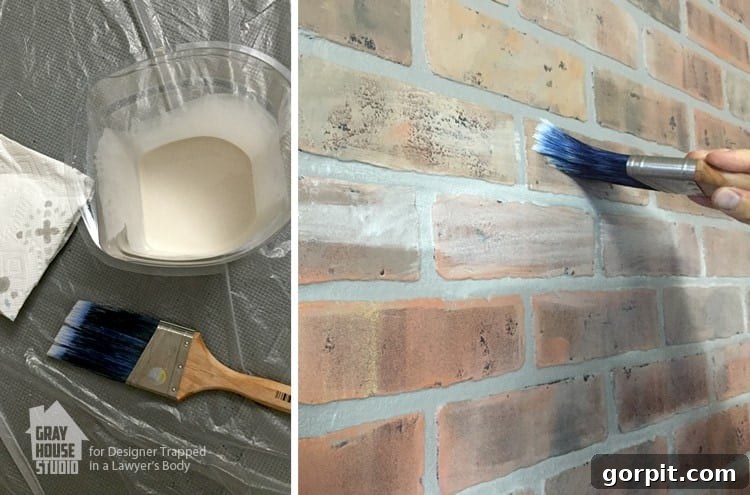 For our specific industrial loft vision, we aimed for a more aged, weathered appearance—the kind you might discover in an authentic old loft conversion. To achieve this charmingly distressed look, we applied a strategic whitewash to select portions of the wall. Our goal was to create the illusion that the wall was once painted a solid white, but over time, the paint had gracefully worn away, revealing the underlying brick in certain areas. To successfully replicate this worn aesthetic, you’ll need to paint the wall using various shades of white paint, or varying degrees of dilution. Begin by significantly watering down your chosen white paint (we opted for Kestrel White). With this highly diluted mixture, lightly brush the paint onto the wall in your desired pattern using a paintbrush. We deliberately chose to leave specific areas untouched, allowing them to serve as our “worn” and “exposed” brick sections, adding to the authenticity.
 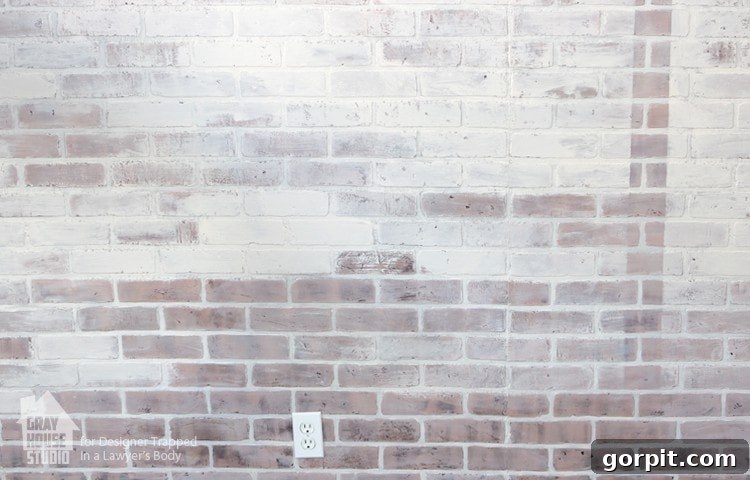 Subsequently, return to the wall with a less diluted white paint mixture. Use this slightly thicker paint to cover additional areas of the wall where you desire less of the underlying brick to show through, creating a gradient of transparency and further enhancing the aged, layered effect. This two-stage whitewashing process is key to achieving truly convincing depth and character.
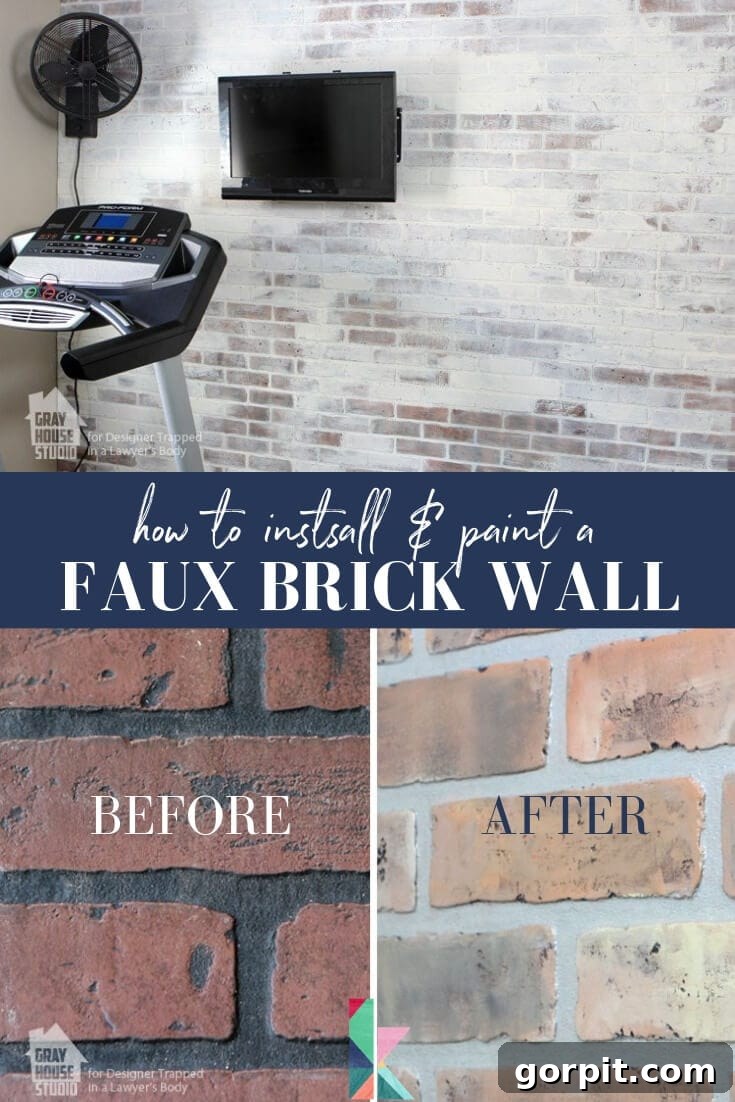
 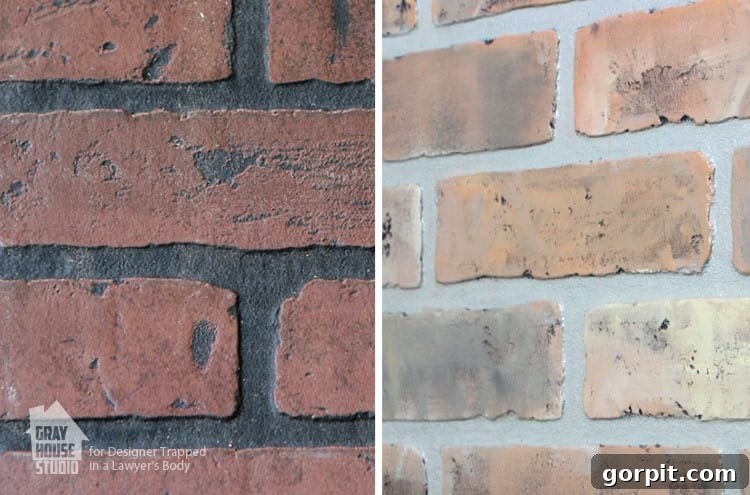 Just look at the remarkable difference from where we started to what it looked like after applying our new custom colors – truly a monumental transformation, wouldn’t you agree?
 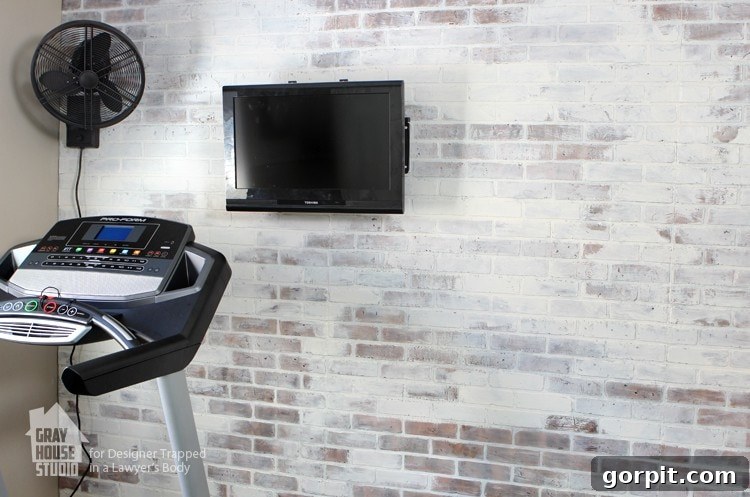 Above, you can admire our meticulously finished wall after we applied the strategic whitewash to specific areas. The wall, now adorned with our thoughtfully chosen new color palette, is undeniably much more aesthetically pleasing and perfectly complements the overall style of the room, a vast improvement over the original harsh red brick and black mortar. When you step into the room, the effect is so convincing that it effortlessly passes for genuine brick. Our project vividly illustrates that you don’t need to spend a fortune to achieve an authentic, high-end brick look. All it truly requires is a modest investment of time, diligent effort, and a dash of creative ingenuity. Remember, you are by no means confined to the original, often limited, colors of the hardboard paneling. You possess the power to dramatically alter and enhance its appearance simply by reimagining and applying a fresh, custom color palette. The possibilities are truly limitless when it comes to what you can create with a little imagination and these techniques. We sincerely hope that this comprehensive tutorial inspires you to unleash your creativity and embark on painting your very own realistic faux brick wall. I am genuinely delighted that I had the opportunity to stop by and share our latest inspiring project with you today.
Stay connected and follow our ongoing home renovation and DIY adventures! You can keep in touch with us across various social media platforms, including Facebook, Pinterest, Twitter, Instagram, and YouTube. If you thoroughly enjoyed this project and are eager for more DIY inspiration, we would be absolutely thrilled for you to explore a few of our other popular projects linked below.
Crafting a Cozy Reading Nook with a Custom Wood Plank Wall
Building Your Own Functional and Stylish DIY Coffee Bar
Transform your home with creative and budget-friendly DIY projects!